Page 152 of 446

481
Features of your vehicle
Windshield wipers
Operates as follows when the igni-
tion switch is turned ON.
MIST : For a single wiping cycle,
move the lever upward and
release it. The wipers will
operate continuously if the
lever is held in this position.
OFF : Wiper is not in operation
INT : Wiper operates intermittently at the same wiping intervals. Use
this mode in a light rain or mist.
To vary the speed setting, turn
the speed control knob.
LO : Normal wiper speed
HI : Fast wiper speed
If there is heavy accumulation of
snow or ice on the windshield,
defrost the windshield for about 10
minutes, or until the snow and/or ice
is removed before using the wind-
shield wipers to ensure proper oper-
ation.
AUTO (Automatic) control (if equipped)
The rain sensor located on the upper
end of the windshield glass senses
the amount of rainfall and controls
the wiping cycle for the proper inter-
val. The more it rains, the faster the
wiper operates. When the rain stops,
the wiper stops. To vary the speed setting, turn the
speed control knob (1).
If the wiper switch is set in AUTO
mode when the ignition switch is ON,
the wiper will operate once to per-
form a self-check of the system. Set
the wiper to off position when the
wiper is not in use.
Always remove all snow and ice and
defrost the windshield properly prior
to operating the windshield wipers.
✽ ✽
NOTICE - Sensor cover
Do not remove the sensor cover
located on the upper end of the pas-
senger side windshield glass as this
may damage the sensor system.
✽ ✽
NOTICE - Winter driving
Always set the auto wiper switch to
the off position in the winter to avoid
auto activation during icy conditions
which may damage the windshield
wipers.
OXM049123
Rain sensor
Page 157 of 446

Features of your vehicle
86
4
If you want to defrost and defog the
front windshield, refer to “Windshield
Defrosting and Defogging” in this
section.
Rear window defroster
The defroster heats the window to
remove frost, fog and thin ice from
the interior and exterior of the rear
window, while the engine is running. To activate the rear window
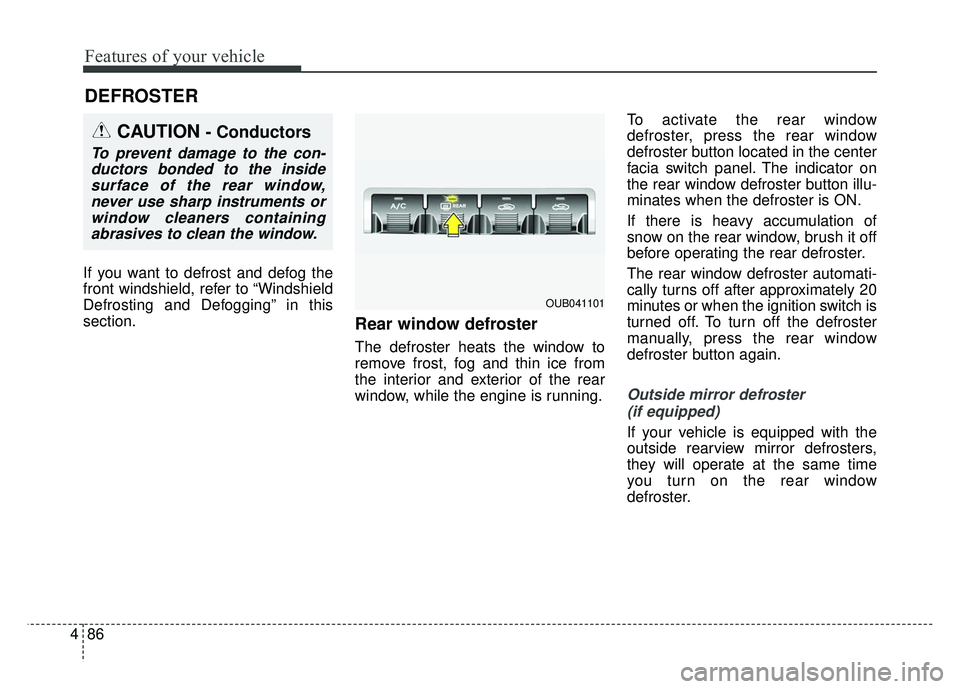
defroster, press the rear window
defroster button located in the center
facia switch panel. The indicator on
the rear window defroster button illu-
minates when the defroster is ON.
If there is heavy accumulation of
snow on the rear window, brush it off
before operating the rear defroster.
The rear window defroster automati-
cally turns off after approximately 20
minutes or when the ignition switch is
turned off. To turn off the defroster
manually, press the rear window
defroster button again.
Outside mirror defroster
(if equipped)
If your vehicle is equipped with the
outside rearview mirror defrosters,
they will operate at the same time
you turn on the rear window
defroster.
DEFROSTER
CAUTION- Conductors
To prevent damage to the con-ductors bonded to the insidesurface of the rear window,never use sharp instruments orwindow cleaners containingabrasives to clean the window.
OUB041101
Page 163 of 446
Features of your vehicle
92
4
Fan speed control
The ignition switch must be in the ON
position for fan operation.
The fan speed control knob allows
you to control the fan speed of the air
flowing from the ventilation system.
To change the fan speed, turn the
knob to the right for higher speed or
left for lower speed.
Setting the fan speed control knob to
the “0” position turns off the fan.
To turn off the blowers
To turn off the blowers, turn the fan
speed control knob to the “0” posi-
tion.
WARNING - Reduced
visibility
Continuous use of the climate
control system in the recirculat-
ed air position may allow
humidity to increase inside the
vehicle which may fog the glass
and obscure visibility.
OUB041110OUB043208
Page 168 of 446

497
Features of your vehicle
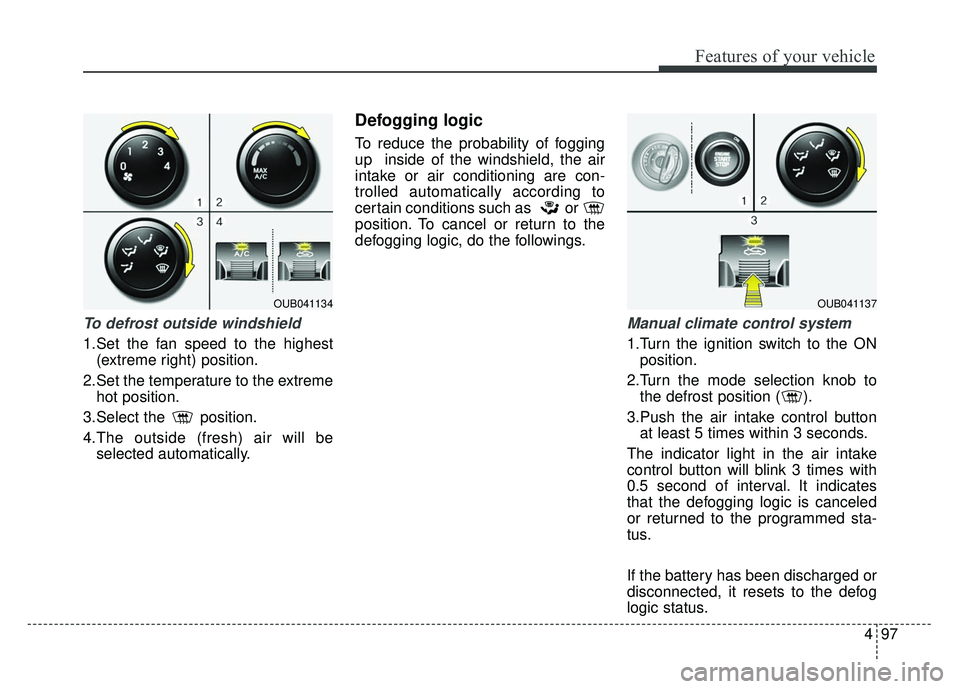
To defrost outside windshield
1.Set the fan speed to the highest(extreme right) position.
2.Set the temperature to the extreme hot position.
3.Select the position.
4.The outside (fresh) air will be selected automatically.
Defogging logic
To reduce the probability of fogging
up inside of the windshield, the air
intake or air conditioning are con-
trolled automatically according to
certain conditions such as or
position. To cancel or return to the
defogging logic, do the followings.
Manual climate control system
1.Turn the ignition switch to the ONposition.
2.Turn the mode selection knob to the defrost position ( ).
3.Push the air intake control button at least 5 times within 3 seconds.
The indicator light in the air intake
control button will blink 3 times with
0.5 second of interval. It indicates
that the defogging logic is canceled
or returned to the programmed sta-
tus.
If the battery has been discharged or
disconnected, it resets to the defog
logic status.
OUB041134OUB041137
Page 173 of 446
Features of your vehicle
102
4
Cigarette lighter (if equipped)
For the cigarette lighter to work, the
ignition switch must be in the ACC or
ON position.
To use the cigarette lighter, push it all
the way into its socket. When the ele-
ment is heated, the lighter will pop
out to the “ready” position.
If it is necessary to replace the ciga-
rette lighter, use only a genuine Kia
replacement or its approved equiva-
lent. Do not hold the lighter in after it is
already heated because it will
overheat.
If the lighter does not pop out with- in 30 seconds, remove it to prevent
overheating.
Ashtray (if equipped)
To use the ashtray, open the cover.
To clean or empty the ashtray, pull it
out.
INTERIOR FEATURES
OUB041153OUB041152
CAUTION - Cigarettelighter
Do not insert accessories into
the cigarette lighter socket.Doing so can damage toe lightersocket
WARNING - Ashtray use
Putting lit cigarettes or matches
in an ashtray with other com-
bustible materials may cause a
fire.
Page 177 of 446
Features of your vehicle
106
4
Digital clock and calendar
(if equipped)
Whenever the battery terminals or
related fuses are disconnected, you
must reset the clock and the calen-
dar.
When the ignition switch is in the
ACC or ON position, the clock but-
tons operate as follows:
Setup the clock and calender
With audio off
1.Press the [SETUP] or [Clock] but-
ton (1) until the clock of the display
blinks.
2.Set the clock by turning the knob (2) and press it. With audio on
1.Press the [SETUP] or [Clock] but-
ton (1) until the clock adjust mode
displayed.
2.Set the clock by turning the knob (2) and press it.
OUB041161N
WARNING - Clock setting
Do not adjust the clock while
driving. You may lose your
steering control.
Page 215 of 446

Features of your vehicle
144
4
When connecting aBluetooth®
Phone
with the mobile phone, check to
see that the mobile phone sup-
ports
Bluetooth®features.
Bluetooth®, the phone will not be
found during device searches if
the phone has been set to hidden
state or the
Bluetooth®power is
turned off. Disable the hidden
state or turn on the
Bluetooth®
power prior to searching/connect-
ing with the Head unit.
connected when the ignition on.
nection with your
Bluetooth®
device, turn off the Bluetooth®
feature within your mobile phone.
quality may differ depending on
the mobile phone.
the head unit with the mobile
phone.
Bluetooth®connection may
become intermittently discon-
nected in some mobile phones.
Follow these steps to try again.
1. Within the mobile phone, turn the
Bluetooth®function off/on
and try again.
2. Turn the mobile phone power Off/On and try again.
3. Completely remove the mobile phone battery, reboot, and then
again.
4. Reboot the
AudioSystem and
try again.
5. Delete all paired devices, pair and try again.
Handsfree call quality and volume may differ depending on the
model of your mobile phone.
Page 241 of 446

Before entering vehicle
• Be sure that all windows, outsidemirror(s), and outside lights are
clean.
Check the condition of the tires.
Check under the vehicle for any sign of leaks.
Be sure there are no obstacles behind you if you intend to back up.
Necessary inspections
Fluid levels, such as engine oil,
engine coolant, brake fluid, and
washer fluid should be checked on a
regular basis, with the exact interval
depending on the fluid. Further
details are provided in Section 7,
“Maintenance”.
Before starting
Close and lock all doors.
Position the seat so that all con-trols are easily reached.
Buckle your seat belt.
Adjust the inside and outside rearview mirrors.
Be sure that all lights work.
Check all gauges.
Check the operation of warning lights when the ignition switch is
turned to the ON position.
Release the parking brake and make sure the brake warning light
goes out.
For safe operation, be sure you are
familiar with your vehicle and its
equipment.
BEFORE DRIVING
53
Driving your vehicle
WARNING - Distracted driving
Focus on the road while driving.
The driver's primary responsi-
bility is in the safe and legal
operation of the vehicle. Use of
any handled devices, other
equipment or vehicle systems
that distract the drive should
not be used during vehicle
operation.
WARNING
- Check surrounding
Always check the surrounding
areas near your vehicle for peo-
ple, especially children, before
putting a vehicle into D (Drive)
or R (Reverse).