Page 113 of 446

Features of your vehicle
42
4
Inside rearview mirror
Adjust the rearview mirror so that the
center view through the rear window
is seen. Make this adjustment before
you start driving.
Do not place objects in the rear seat
which would interfere with your vision
through the rear window.
Day/night rearview mirror
(if equipped)
Make this adjustment before you
start driving and while the day/night
lever is in the day position.
Pull the day/night lever toward you to
reduce the glare from the headlights
of the vehicles behind you during
night driving.
Remember that you lose somerearview clarity in the night position.
Outside rearview mirror
Be sure to adjust the mirror angles
before driving.
Your vehicle is equipped with both
left-hand and right-hand outside
rearview mirrors. The mirrors can be
adjusted remotely with the remote
switch (if equipped). The mirror
heads can be folded to prevent dam-
age during an automatic car wash or
when passing through a narrow
street.
MIRRORS
WARNING - Mirror adjustment
Do not adjust the rearview mir-
ror while the vehicle is moving.
This could result in loss of con-
trol.
OAM049023
Day Night
Page 116 of 446
445
Features of your vehicle
INSTRUMENT CLUSTER
1. Tachometer
2. Turn signal indicators
3. Speedometer
4. Fuel gauge
5. Engine coolant temperature gauge
6. Warning and indicator lights
7. Shift position indicator (A/T) or Manual transaxle shift indicator (M/T)
8. Odometer/Trip computer
❈ The actual cluster in the vehicle may differ
from the illustration.
For more details refer to the "Gauges" in
the next pages.
OUB044036N/OUB042037N
■
■Type A
■
■Type B
Page 117 of 446

Features of your vehicle
46
4
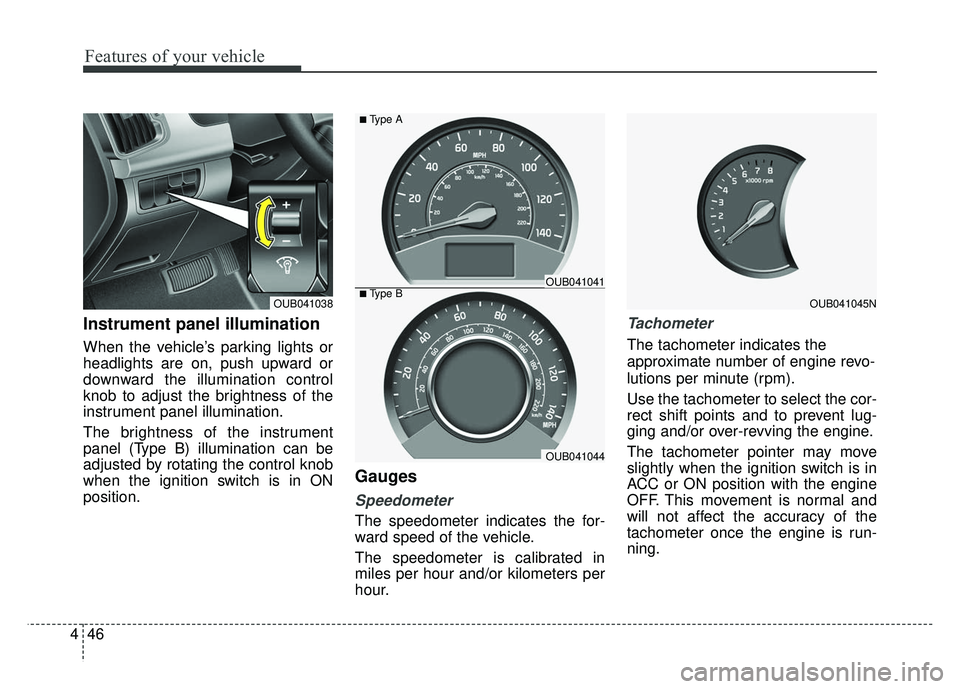
Instrument panel illumination
When the vehicle’s parking lights or
headlights are on, push upward or
downward the illumination control
knob to adjust the brightness of the
instrument panel illumination.
The brightness of the instrument
panel (Type B) illumination can be
adjusted by rotating the control knob
when the ignition switch is in ON
position.
Gauges
Speedometer
The speedometer indicates the for-
ward speed of the vehicle.
The speedometer is calibrated in
miles per hour and/or kilometers per
hour.
Tachometer
The tachometer indicates the
approximate number of engine revo-
lutions per minute (rpm).
Use the tachometer to select the cor-
rect shift points and to prevent lug-
ging and/or over-revving the engine.
The tachometer pointer may move
slightly when the ignition switch is in
ACC or ON position with the engine
OFF. This movement is normal and
will not affect the accuracy of the
tachometer once the engine is run-
ning.
OUB041045NOUB041038■Type BOUB041041
OUB041044
■Type A
Page 129 of 446

Features of your vehicle
58
4
Warnings and indicators
All warning lights are checked by
turning the ignition switch ON (do not
start the engine). Any light that does
not illuminate should be checked by
an authorized Kia dealer.
After starting the engine, check to
make sure that all warning lights are
off. If any warning lights are still on,
this indicates a situation that needs
attention. When releasing the park-
ing brake, the brake system warning
light should go off. The fuel warning
light will stay on if the fuel level is low.
Air bag warning light
This warning light will illuminate for
approximately 6 seconds each time
you turn the ignition switch to the ON
position.
This light also comes on when the
Supplement Restraint System (SRS)
is not working properly. If the air bag
warning light does not come on, or
continuously remains on after oper-
ating for about 6 seconds when you
turned the ignition switch to the ON
position or started the engine, or if it
comes on while driving, have the
SRS inspected by an authorized Kia
dealer.
Anti-lock brake system
(ABS) warning light (if equipped)
This warning light illuminates if the
ignition switch is turned ON and goes
off in approximately 3 seconds if the
system is operating normally.
If the ABS warning light remains on,
comes on while driving, or does not
come on when the ignition switch is
turned to the ON position, this indi-
cates that the ABS may have mal-
functioned.
If this occurs, have your vehicle
checked by an authorized Kia dealer
as soon as possible. The normal
braking system will still be opera-
tional, but without the assistance of
the anti-lock brake system.
Page 130 of 446

459
Features of your vehicle
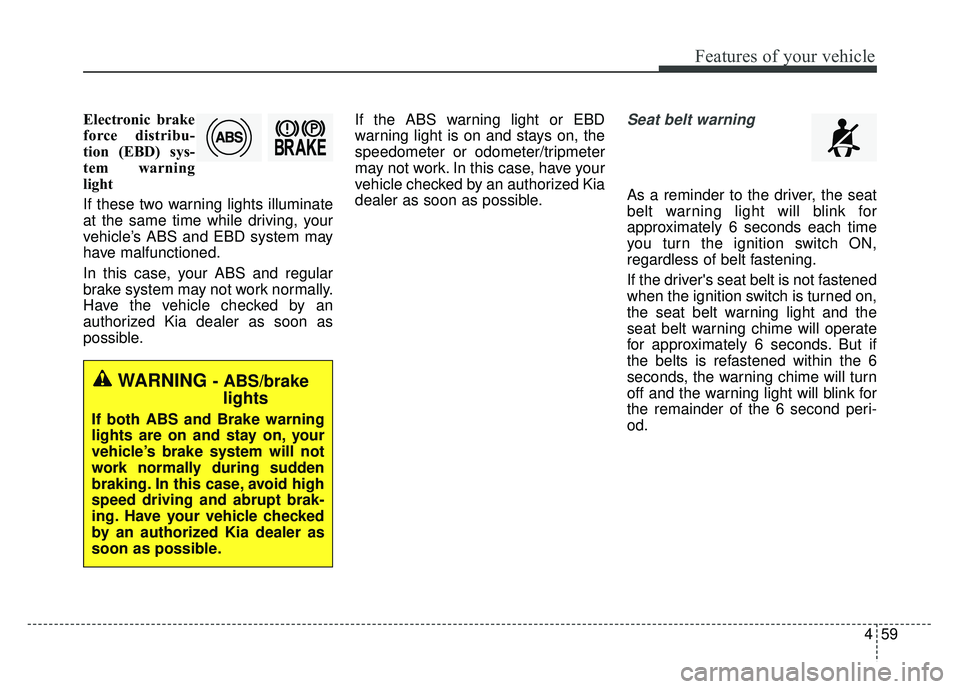
Electronic brake
force distribu-
tion (EBD) sys-
tem warning
light
If these two warning lights illuminate
at the same time while driving, your
vehicle’s ABS and EBD system may
have malfunctioned.
In this case, your ABS and regular
brake system may not work normally.
Have the vehicle checked by an
authorized Kia dealer as soon as
possible.If the ABS warning light or EBD
warning light is on and stays on, the
speedometer or odometer/tripmeter
may not work. In this case, have your
vehicle checked by an authorized Kia
dealer as soon as possible.Seat belt warning
As a reminder to the driver, the seat
belt warning light will blink for
approximately 6 seconds each time
you turn the ignition switch ON,
regardless of belt fastening.
If the driver's seat belt is not fastened
when the ignition switch is turned on,
the seat belt warning light and the
seat belt warning chime will operate
for approximately 6 seconds. But if
the belts is refastened within the 6
seconds, the warning chime will turn
off and the warning light will blink for
the remainder of the 6 second peri-
od.
WARNING - ABS/brake
lights
If both ABS and Brake warning
lights are on and stay on, your
vehicle’s brake system will not
work normally during sudden
braking. In this case, avoid high
speed driving and abrupt brak-
ing. Have your vehicle checked
by an authorized Kia dealer as
soon as possible.
Page 131 of 446

Features of your vehicle
60
4
If the driver's seat belt is disconnect-
ed after the ignition switch is turned
to the ON position, the seat belt
warning light will blink for approxi-
mately 6 seconds. But if it is fastened
within the 6 seconds the warning
light will turn off immediately. If the
driver's seat belt is not fastened
when the vehicle speed exceeds 6
mph (10 km/h), the seat belt warning
light and chime will operate approxi-
mately 11 times with a pattern of 6
seconds on and 24 seconds off until
the belt is fastened or the vehicle
speed decreases below 3 mph (5
km/h).Turn signal indicator
The blinking green arrows on the
instrument panel show the direction
indicated by the turn signals. If the
arrow comes on but does not blink,
blinks more rapidly than normal, or
does not illuminate at all, it indicates
a malfunction in the turn signal sys-
tem. You should consult your dealer
for repairs.
This indicator also blinks when the
hazard warning switch is turned on.
High beam indicator
This indicator illuminates when the
headlights are on and in the high
beam position or when the turn sig-
nal lever is pulled into the Flash-to-
Pass position.
Front fog light indicator
(if equipped)
The indicator illuminates when the
front fog lights ON.
Tail light indicator
This indicator illuminates when the
tail lights are on.
Page 139 of 446
Features of your vehicle
68
4
Auto stop indicator
(if equipped)
This indicator will illuminate when the
engine enters the Idle Stop mode of
the ISG (Idle Stop and Go) system.
When the automatic starting occurs,
the auto stop indicator on the cluster
will blink for 5 seconds.
For more details, refer to the ISG
(Idle Stop and Go) system in chapter
5.
✽ ✽
NOTICE
When the engine automatically
starts by the ISG system, some
warning lights (ABS, ESC, ESC
OFF, ESC or Parking brake warn-
ing light) may turn on for a few sec-
onds.
This happens because of the low bat-
tery voltage. It does not mean the
system is malfunctioning.
Page 147 of 446

Features of your vehicle
76
4
The hazard warning flasher should
be used whenever you find it neces-
sary to stop the car in a hazardous
location. When you must make such
an emergency stop, always pull off
the road as far as possible.
The hazard warning lights are turned
on by pushing in the hazard switch.
Both turn signal lights will blink. The
hazard warning lights will operate
even though the key is not in the igni-
tion switch.
To turn the hazard warning lights off,
push the switch again.
Battery saver function
The purpose of this feature is to
prevent the battery from being dis-
charged. The system automatically
turns off the parking lights when
the driver removes the ignition key
and opens the driver- side door.
With this feature, the parking lights will turn off automatically if the
driver parks on the side of the road
at night.
If necessary, to keep the lights on
when the ignition key is removed,
perform the following :
1) Open the driver-side door.
2) Turn the parking lights OFF and ON again using the light switch
on the steering column.
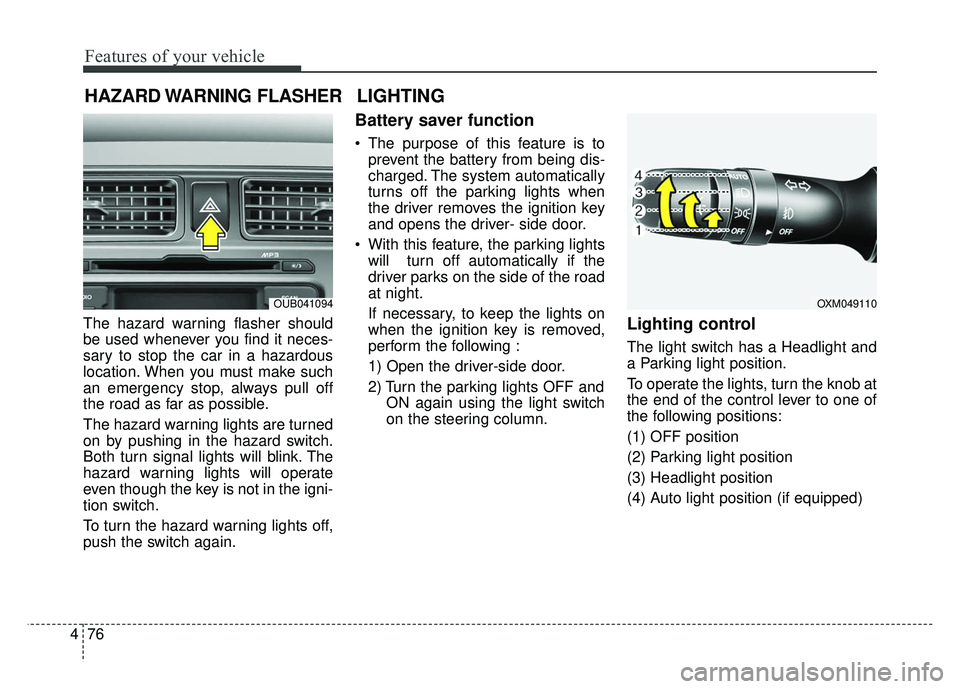
Lighting control
The light switch has a Headlight and
a Parking light position.
To operate the lights, turn the knob at
the end of the control lever to one of
the following positions:
(1) OFF position
(2) Parking light position
(3) Headlight position
(4) Auto light position (if equipped)
HAZARD WARNING FLASHER
OXM049110
LIGHTING
OUB041094