2014 KIA MOHAVE parking brake
[x] Cancel search: parking brakePage 12 of 417

Introduction
6
1
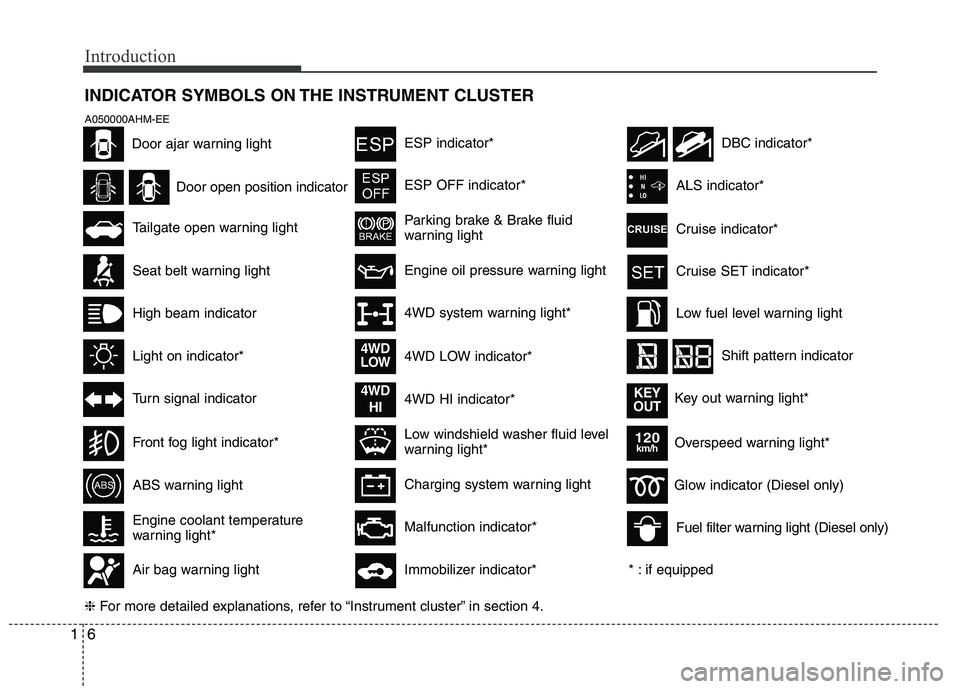
INDICATOR SYMBOLS ON THE INSTRUMENT CLUSTER
Seat belt warning light
Door open position indicator
Tailgate open warning light
High beam indicator
Light on indicator*
Turn signal indicator
Front fog light indicator*
ABS warning light
Parking brake & Brake fluid
warning light
Engine oil pressure warning light
4WD system warning light*
4WD LOW indicator* 4WD HI indicator*
Malfunction indicator*
Air bag warning light
Cruise SET indicator*
ALS indicator*
Immobilizer indicator*
Low fuel level warning light
Shift pattern indicator
DBC indicator*
❈ For more detailed explanations, refer to “Instrument cluster” in section 4.
Charging system warning light
Low windshield washer fluid level
warning light*
Engine coolant temperature
warning light*
A050000AHM-EE
Door ajar warning light
Overspeed warning light*
120km/h
Key out warning light*KEY
OUT
4WD
LOW
4WD
HI
* : if equipped
Glow indicator (Diesel only)
Fuel filter warning light (Diesel only)
ESP OFF indicator*
ESP indicator*
Cruise indicator*
Page 15 of 417

23
Your vehicle at a glance
INSTRUMENT PANEL OVERVIEW
1. Instrument cluster.............................4-47
2. Steering wheel audio controls* ......4-125
3. Light control / Turn signals ...............4-71
4. Horn .................................................4-39
5. Auto cruise controls* ........................5-44
6. Wiper/Washer switch ........................4-77
7. Driver’s front air bag .........................3-48
8. Ignition switch* orENGINE START/STOP button* ...5-4, 5-6
9. Hazard warning flasher ......................6-2
10. Audio* ...........................................4-131
11. Digital clock ..................................4-119
12. Climate control system* .................4-86
13. Power outlet* ................................4-118
14. Cigar lighter and ashtray ..............4-116
15. Shift lever .......................................5-12
16. AUX, USB and iPod port*.............4-128
17. Seat warmer switch* ........................3-9
18. Climate control seat button* ...........3-10
19. Rear parking assist system OFF switch* ....................................4-67
20. Rear fog light switch* .....................4-75
21. Parking brake pedal .......................5-29
22. Brake pedal ....................................5-28
23. Accelerator pedal .............................5-8
24. Passenger’s front air bag* ..............3-48
25. Glove box .....................................4-113
* : if equipped OHM018002L
B020000CHM-EE
Page 37 of 417

Safety features of your vehicle
20
3
CAUTION - Rear seat belts
When returning the rear (2nd and/or
3rd row) seatbacks to the upright
position, remember to return the rearshoulder belts to their proper posi-tion. Routing the seat belt webbing through the rear seat belt guides will
help keep the belts from beingtrapped behind or under the seats.
WARNING - Cargo loading
Make sure the engine is off, the automatic transmission is in P
(Park) and the parking brake is
securely applied whenever loading
or unloading cargo. Failure to take
these steps may allow the vehicle
to move if the shift lever is inadver-
tently moved to another position.
WARNING - Cargo
Cargo should always be secured to
prevent it from being thrown about
the vehicle in a collision and caus-
ing injury to the vehicle occupants.Do not place objects in the rear
(2nd and/or 3rd row) seats, since
they cannot be properly secured
and may hit the front seat occu-pants in a collision.
Page 91 of 417

Features of your vehicle
14
4
D050100BHM
Operating door locks from out-
side the vehicle
Turn the key toward the rear of the
vehicle to unlock and toward the front
of the vehicle to lock.
If you lock/unlock the driver’s door with a key, all vehicle doors will lock/unlock
automatically.
Doors can also be locked and unlocked with the transmitter (or smart
key). (if equipped)
Once the doors are unlocked, they may be opened by pulling the door handle.
When closing the door, push the door by hand. Make sure the doors are
closed securely.
✽✽ NOTICE
In cold and wet climates, door lock and door mechanisms may not work
properly due to freezing conditions.
If the door is locked/unlocked multi-
ple times in rapid succession with
either the vehicle key or door lock
switch, the system may stop operating
temporarily in order to protect the
circuit and prevent damage to system
components.
To lock a door without the key, push theinside door lock button (1) or central
door lock switch (2 ) to the “Lock” posi-
tion and close the door (3).
If you lock the door with the central door lock switch (2), all vehicle doors
will lock automatically.
✽✽ NOTICE
Always remove the ignition key, engage
the parking brake, close all windows
and lock all doors when leaving your
vehicle unattended.
DOOR LOCKS
OHM048002L
LockUnlock
OHM048007WARNING
If you do not close the door securely, the door may open again.
Be careful that someone's body and hands are not trapped when
closing the door.
Page 93 of 417

Features of your vehicle
16
4
When pressing the front portion (1) of
the switch, all vehicle doors will lock.
When pressing the rear portion (2) of the switch, all vehicle doors will unlock.
If the key is in the ignition switch (or if the smart key is in the vehicle) and any front door is opened, the doors will not
lock even though the front portion (1)
of the central door lock switch ispressed.
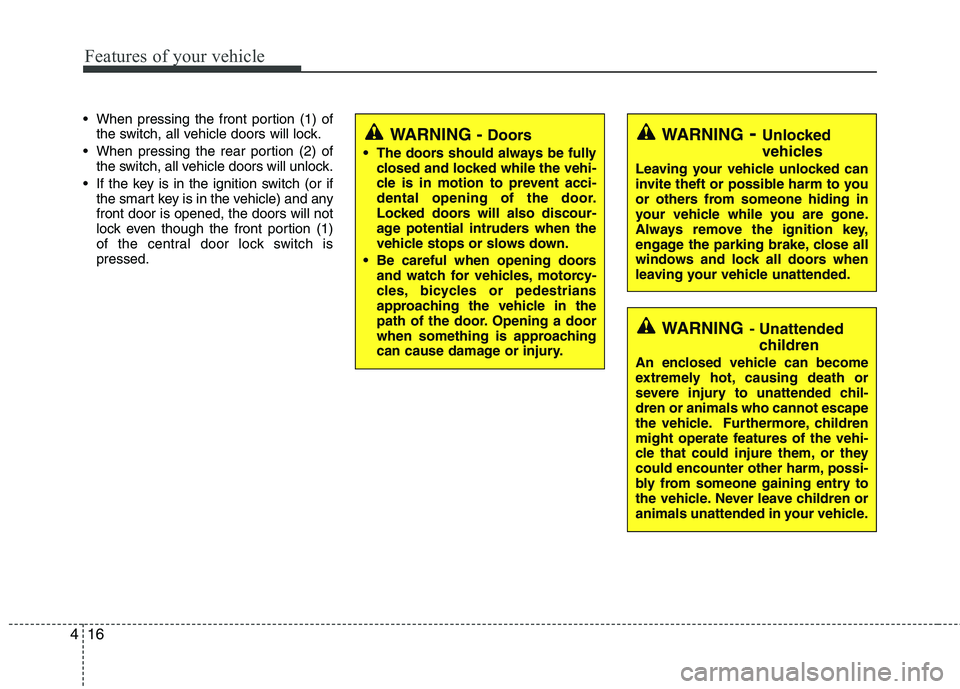
WARNING - Unlocked
vehicles
Leaving your vehicle unlocked can
invite theft or possible harm to you
or others from someone hiding in
your vehicle while you are gone.
Always remove the ignition key,
engage the parking brake, close all
windows and lock all doors when
leaving your vehicle unattended.
WARNING - Unattended
children
An enclosed vehicle can become
extremely hot, causing death or
severe injury to unattended chil-dren or animals who cannot escape
the vehicle. Furthermore, children
might operate features of the vehi-
cle that could injure them, or they
could encounter other harm, possi-
bly from someone gaining entry to
the vehicle. Never leave children or
animals unattended in your vehicle.
WARNING - Doors
The doors should always be fully closed and locked while the vehi-
cle is in motion to prevent acci-
dental opening of the door.
Locked doors will also discour-
age potential intruders when the
vehicle stops or slows down.
Be careful when opening doors and watch for vehicles, motorcy-
cles, bicycles or pedestrians
approaching the vehicle in the
path of the door. Opening a door
when something is approaching
can cause damage or injury.
Page 101 of 417

Features of your vehicle
24
4
D090100BHM Opening the hood
1. Pull the release lever to unlatch the
hood. The hood should pop open
slightly. 2. Go to the front of the vehicle, raise the
hood slightly, pull up the secondarylatch (1) inside of the hood center andlift the hood (2).
3. Raise the hood. It will completely raise by itself after it has been raised about
halfway. D090200AHM Closing the hood
1. Before closing the hood, check the fol-
lowing:
ment must be correctly installed.
bustible material must be removed
from the engine compartment.
2. Lower the hood halfway and push down to securely lock in place.
HOOD
OHM048019OHM048020
WARNING
Open the hood after turning off the
engine on a flat surface, shifting
the shift lever to the P(Park) posi-
tion for automatic transmission,
and setting the parking brake.
Page 113 of 417

Features of your vehicle
36
4
D310000AHM-EE
You may adjust the position of the accel-
erator and brake pedals by pressing the
switch. The position of the pedals can be adjust-
ed in any position of the ignition switch.
But the transmission shift lever must be
in the P (Park) position when the ignition
switch is in the ON position.
If you press the portion of the
switch, the pedals will move toward the
driver.
If you press the portion of the switch, the pedals will move away from
the driver. D310100AHM
Setting the adjustable pedal posi- tion
1. Be sure the parking brake is engaged.
2. Move the accelerator and brake ped-
als to the front most position by press-
ing the portion of the switch.
3. Adjust the seat position and the steer- ing wheel angle properly.
4. Move the pedals toward you until you can fully depress the brake pedal by
pushing the portion of the switch.
5. Depress the pedals a few times to get used to the pedals after the adjust-ment.
POWER ADJUSTABLE PEDALS (IF EQUIPPED)
OHM048033N
WARNING
Adjust the pedals after parking the vehicle on level ground.
Never attempt to adjust the ped-
als while the vehicle is moving.
Never adjust the pedals with your foot on the accelerator pedal as
this may result in increasing theengine speed and acceleration.
Make sure that you can fully depress the brake pedal before
driving. Otherwise, you may not
be able to hold down the brake
pedal firmly in an emergencystop.
Page 132 of 417

455
Features of your vehicle
✽✽NOTICE
If the vehicle is not on level ground or the battery power has been interrupt-
ed, the “Distance to empty” function
may not operate correctly.
The trip computer may not register
additional fuel if less than 6 liters (1.6
gallons) of fuel are added to the vehicle.
The fuel consumption and distance to empty values may vary significantly
based on driving conditions, driving
habits, and condition of the vehicle.
The distance to empty value is an esti- mate of the available driving distance.
This value may differ from the actual
driving distance available.D150300APB
Warnings and indicators
All warning lights are checked by turning
the ignition switch ON (do not start the
engine). Any light that does not illuminate
should be checked by an authorized Kia
dealer.
After starting the engine, check to make
sure that all warning lights are off. If any
warning lights are still on, this indicates a
situation that needs attention. When
releasing the parking brake, the brake
system warning light should go off. The
fuel warning light will stay on if the fuel
level is low. D150302AUN
Air bag warning light
This warning light will illuminate for
approximately 6 seconds each time you
turn the ignition switch to the ON posi-tion. This light also comes on when the
Supplemental Restraint System (SRS) is
not working properly. If the AIR BAG
warning light does not come on, or con-
tinuously remains on after operating for
about 6 seconds when you turned the
ignition switch to the ON position or start-
ed the engine, or if it comes on while
driving, have the SRS inspected by an
authorized Kia dealer.