Page 1038 of 1206

69
What to do in an emergency
IF YOU HAVE A FLAT TYRE (WITH SPARE TYRE, IF EQUIPPED)
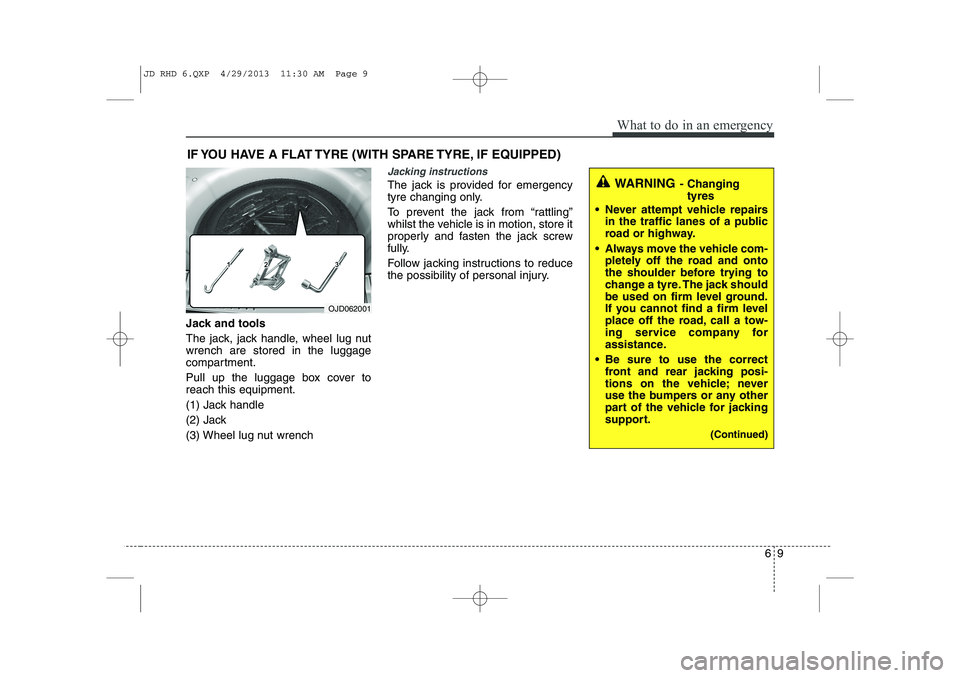
Jack and tools
The jack, jack handle, wheel lug nut wrench are stored in the luggage
compartment.
Pull up the luggage box cover to reach this equipment.
(1) Jack handle
(2) Jack
(3) Wheel lug nut wrench
Jacking instructions
The jack is provided for emergency
tyre changing only.
To prevent the jack from “rattling”
whilst the vehicle is in motion, store it
properly and fasten the jack screw
fully.
Follow jacking instructions to reduce
the possibility of personal injury.
OJD062001
WARNING - Changing
tyres
Never attempt vehicle repairs in the traffic lanes of a public
road or highway.
Always move the vehicle com- pletely off the road and onto
the shoulder before trying to
change a tyre. The jack should
be used on firm level ground.
If you cannot find a firm level
place off the road, call a tow-
ing service company for
assistance.
Be sure to use the correct front and rear jacking posi-
tions on the vehicle; never
use the bumpers or any other
part of the vehicle for jacking
support.
(Continued)
JD RHD 6.QXP 4/29/2013 11:30 AM Page 9
Page 1040 of 1206
611
What to do in an emergency
4. Remove the wheel lug nut wrench,jack, jack handle, and spare tyre
from the vehicle.
5. Block both the front and rear of the wheel that is diagonally opposite
the jack position. 6. Loosen the wheel lug nuts coun-
terclockwise one turn each, but do
not remove any nut until the tyre
has been raised off the ground.
WARNING - Changing a tyre
To prevent vehicle movement
whilst changing a tyre, always
set the parking brake fully,
and always block the wheel
diagonally opposite the wheel
being changed.
We recommend that the wheels of the vehicle be
chocked, and that no person
remain in a vehicle that is
being jacked.
OJD062003OJD062004
JD RHD 6.QXP 4/29/2013 11:30 AM Page 11
Page 1043 of 1206

What to do in an emergency
14
6
Wheel nut tightening torque:
Steel wheel & aluminium alloy wheel:
9~11 kg.m (65~79 lb.ft)
If you have a tyre gauge, remove the
valve cap and check the air pressure.
If the pressure is lower than recom-
mended, drive slowly to the nearest
service station and inflate to the cor-
rect pressure. If it is too high, adjust
it until it is correct. Always reinstall
the valve cap after checking or
adjusting tyre pressure. If the cap is
not replaced, air may leak from the
tyre. If you lose a valve cap, buyanother and install it as soon as pos-
sible.
After you have changed wheels,
always secure the flat tyre in its place
and return the jack and tools to their
proper storage locations. To prevent the jack, jack handle,
wheel lug nut wrench and spare tyre
from rattling whilst the vehicle is in
motion, store them properly.CAUTION
Your vehicle has metric threads
on the wheel studs and nuts.Make certain during wheel removal that the same nuts thatwere removed are reinstalled -or, if replaced, that nuts with metric threads and the samechamfer configuration are used.Installation of a non-metric thread nut on a metric stud orvice-versa will not secure thewheel to the hub properly andwill damage the stud so that it must be replaced.
Note that most lug nuts do nothave metric threads. Be sure touse extreme care in checking for thread style before installingaftermarket lug nuts or wheels.If in doubt, we recommend thatyou consult an authorised Kia dealer.
WARNING - Wheel studs
If the studs are damaged, they
may lose their ability to retain
the wheel. This could lead to theloss of the wheel and a collisionresulting in serious injuries.
WARNING - Inadequate
spare tyre pressure
Check the inflation pressures as
soon as possible after installing
the spare tyre. Adjust it to the
specified pressure, if necessary.
Refer to “Tyres and wheels” insection 8.
JD RHD 6.QXP 4/29/2013 11:31 AM Page 14
Page 1069 of 1206

Maintenance
8
7
OWNER MAINTENANCE
We recommend that the following lists
are vehicle checks and inspections that
should be performed by the owner or an
authorised Kia dealer at the frequencies
indicated to help ensure safe, depend-
able operation of your vehicle.
If you have any question, we recommend
that you consult an authorised Kia deal-
er.
These Owner Maintenance Checks are
generally not covered by warranties and
you may be charged for labour, parts and
lubricants used. Owner maintenance schedule
When you stop for fuel:
Check the engine oil level.
Check coolant level in coolant reser-
voir.
Check the windscreen washer fluid level.
Look for low or under-inflated tyres.
Check the radiator and condenser. Check if the front of the radiator and
condenser are clean and not blocked
with leaves, dirt or insects etc.
If any of the above parts are extremely
dirty or you are not sure of their condi-
tion, we recommend that you contact
an authorised Kia dealer.
Whilst operating your vehicle:
Note any changes in the sound of theexhaust or any smell of exhaust fumes
in the vehicle.
Check for vibrations in the steering wheel. Notice any increased steering
effort or looseness in the steering
wheel, or change in its straight-aheadposition.
Notice if your vehicle constantly turns slightly or “pulls” to one side when trav-
elling on smooth, level road.
When stopping, listen and check for unusual sounds, pulling to one side,
increased brake pedal travel or “hard-
to-push” brake pedal.
If any slipping or changes in the oper- ation of your transaxle occurs, check
the transaxle fluid level.
Check manual transaxle operation, including clutch operation.
Check automatic transaxle/double clutch transmission P (Park) function.
Check parking brake.
Check for fluid leaks under your vehicle (water dripping from the air conditioning
system during or after use is normal).
WARNING
Be careful when checking your
engine coolant level when the
engine is hot. Scalding hot coolant
and steam may blow out under
pressure. This could cause burns
or other serious injury.
JD RHD 7.QXP 4/29/2013 11:32 AM Page 8