Page 44 of 148
HARD TOP AND FREEDOM TOP®
Freedom Top® Removal
Follow these simple steps to remove the front panels.
1. Fold down the sun visor, and move it to the side.
2. Turn the rear fasteners (knobs) (located on the overhead speaker bar assembly)counterclockwise until they can be removed.
3. Turn the center L-shaped locks (two) from the center of the roof panel.
Step 2
Step 3
OPERATING YOUR VEHICLE
42
Page 50 of 148
Uconnect® 130
NOTE:
• Your radio has many features that add to the comfort and convenience for you andyour passengers.
• Some of these radio features should not be used when driving because they take your eyes from the road or your attention from driving.
Clock Setting
1. Press and hold the TIME button until the hours blink.
2. Turn the TUNE/SCROLL control knob to set the hours.
3. Press the TUNE/SCROLL control knob until the minutes begin to blink.
4. Turn the TUNE/SCROLL control knob to set the minutes.
5. Press the TUNE/SCROLL control knob to save the changes.
6. Press any button/knob or wait five seconds to exit.
Equalizer, Balance And Fade
1. Press the TUNE/SCROLL control knob and “BASS” will display.
2. Rotate the TUNE/SCROLL control knob to select the desired setting.
3. Continue pressing the TUNE/SCROLL control knob to display and set “MID RANGE,” “TREBLE,” “BALANCE” and “FADE.”
ELECTRONICS
48
Page 52 of 148

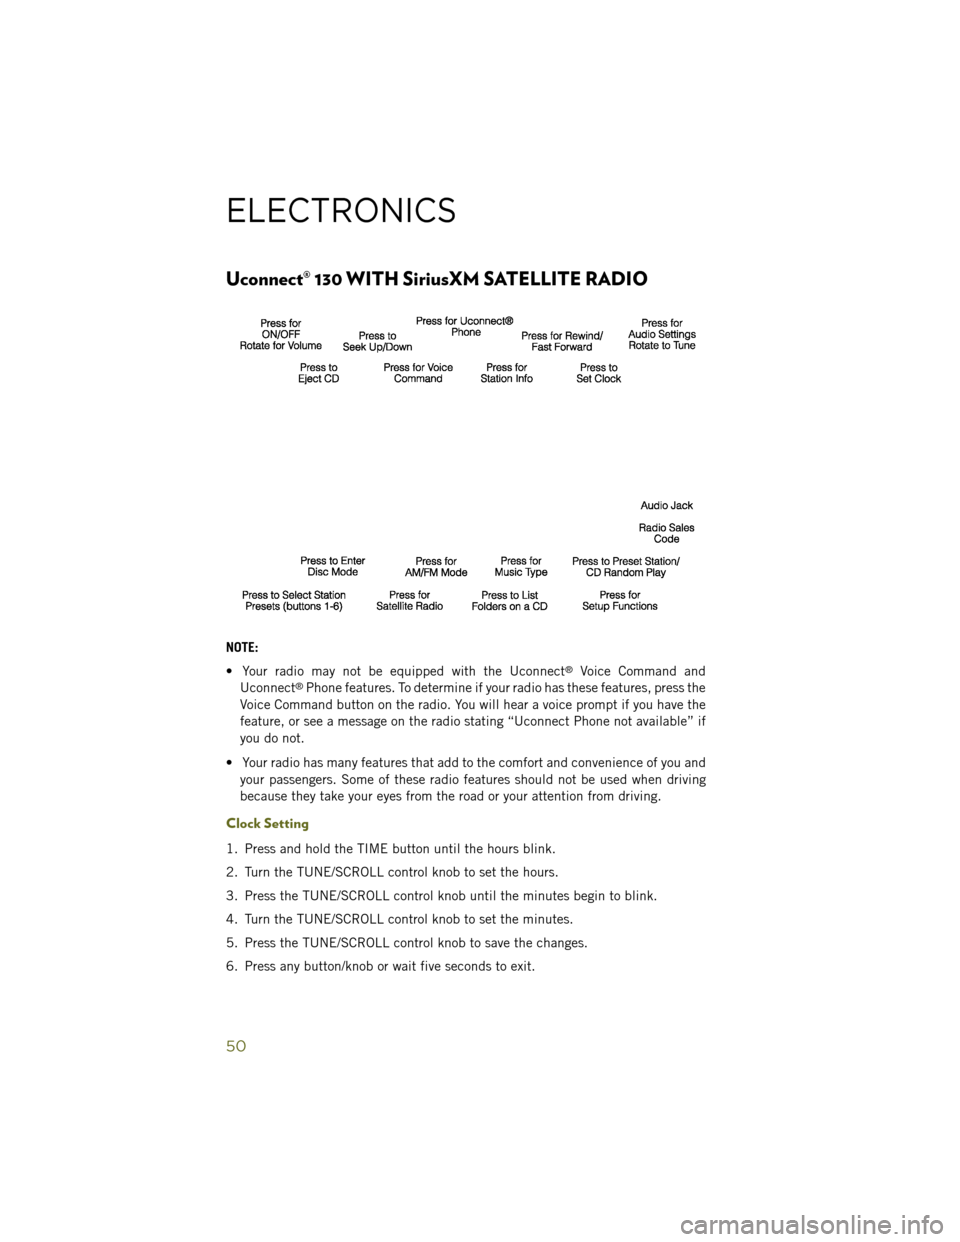
Uconnect® 130 WITH SiriusXM SATELLITE RADIO
NOTE:
• Your radio may not be equipped with the Uconnect
®Voice Command and
Uconnect®Phone features. To determine if your radio has these features, press the
Voice Command button on the radio. You will hear a voice prompt if you have the
feature, or see a message on the radio stating “Uconnect Phone not available” if
you do not.
• Your radio has many features that add to the comfort and convenience of you and your passengers. Some of these radio features should not be used when driving
because they take your eyes from the road or your attention from driving.
Clock Setting
1. Press and hold the TIME button until the hours blink.
2. Turn the TUNE/SCROLL control knob to set the hours.
3. Press the TUNE/SCROLL control knob until the minutes begin to blink.
4. Turn the TUNE/SCROLL control knob to set the minutes.
5. Press the TUNE/SCROLL control knob to save the changes.
6. Press any button/knob or wait five seconds to exit.
ELECTRONICS
50
Page 55 of 148
Uconnect® 230
NOTE:
• Your radio may not be equipped with the Uconnect
®Voice Command and
Uconnect®Phone features. To determine if your radio has these features, press the
Voice Command button on the radio. You will hear a voice prompt if you have the
feature, or see a message on the radio stating “Uconnect Phone not available” if
you do not.
• Your radio has many features that add to the comfort and convenience of you and your passengers. Some of these radio features should not be used when driving
because they take your eyes from the road or your attention from driving.
Clock Setting
1. Press and hold the TIME button until the hours blink.
2. Turn the TUNE/SCROLL control knob to set the hours.
3. Press the TUNE/SCROLL control knob until the minutes begin to blink.
4. Turn the TUNE/SCROLL control knob to set the minutes.
5. Press the TUNE/SCROLL control knob to save the changes.
6. Press any button/knob or wait five seconds to exit.
ELECTRONICS
53
Page 58 of 148

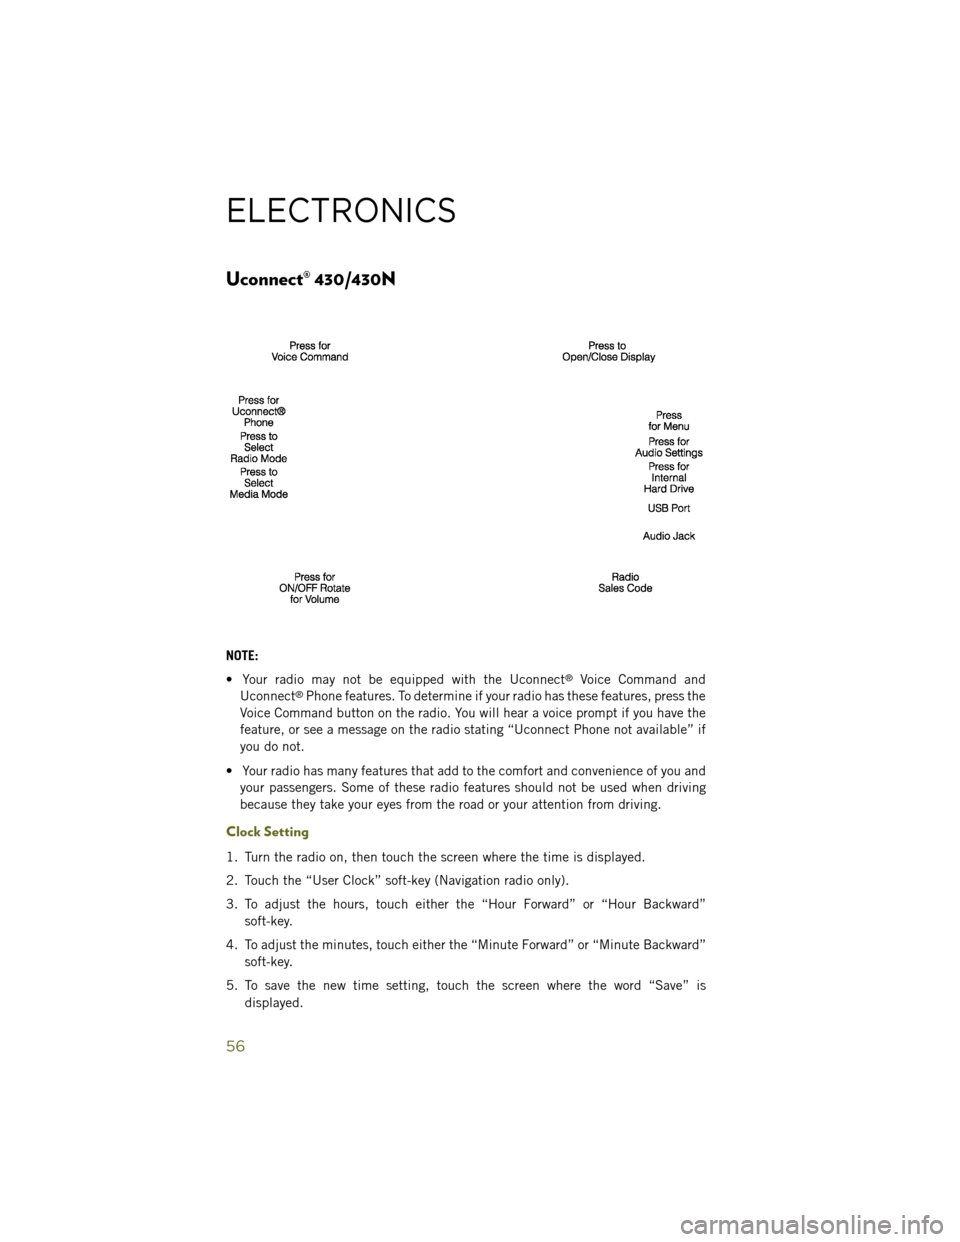
Uconnect® 430/430N
NOTE:
• Your radio may not be equipped with the Uconnect
®Voice Command and
Uconnect®Phone features. To determine if your radio has these features, press the
Voice Command button on the radio. You will hear a voice prompt if you have the
feature, or see a message on the radio stating “Uconnect Phone not available” if
you do not.
• Your radio has many features that add to the comfort and convenience of you and your passengers. Some of these radio features should not be used when driving
because they take your eyes from the road or your attention from driving.
Clock Setting
1. Turn the radio on, then touch the screen where the time is displayed.
2. Touch the “User Clock” soft-key (Navigation radio only).
3. To adjust the hours, touch either the “Hour Forward” or “Hour Backward”
soft-key.
4. To adjust the minutes, touch either the “Minute Forward” or “Minute Backward” soft-key.
5. To save the new time setting, touch the screen where the word “Save” is displayed.
ELECTRONICS
56
Page 69 of 148

Clock Setting
1. Turn the radio on, then touch the screen where the time is displayed.
2. Touch the “User Clock” soft-key.
3. To adjust the hours, touch either the “Hour Forward” or “Hour Backward”soft-key.
4. To adjust the minutes, touch either the “Minute Forward” or “Minute Backward” soft-key.
5. To save the new time setting, touch the screen where the word “Save” is displayed.
Menu
• Press the MENU hard-key to access the System Setup menu and the My Filesmenu.
• Press the MENU hard-key in an active mode (SAT, CD, AUX, etc.) to change mode specific settings.
Equalizer, Balance And Fade
Audio Control Menu
• Press the MENU hard-key on the rightside of the radio. Then press the “Au-
dio Control” soft-key to get to the audio
control menu.
• Use either the arrow soft-keys or the cross-hair on the screen to change Bal-
ance and Fade. The “Center” soft-key
resets the settings.
• Touch the “Equalizer” soft-key and use either the arrow soft-keys or the sliders on the screen to adjust BASS, MID, and/or TREBLE.
Display Settings
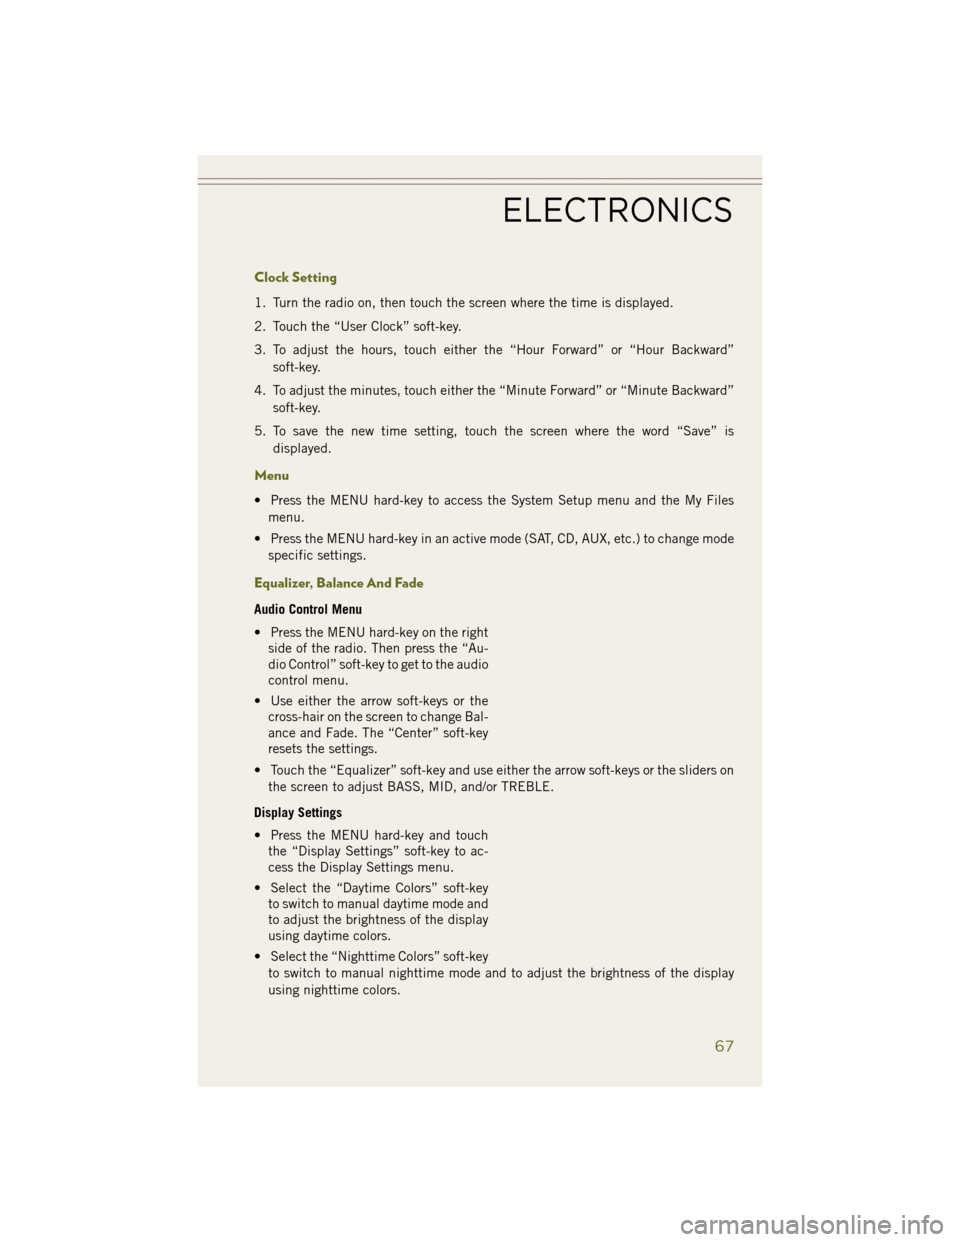
• Press the MENU hard-key and touch the “Display Settings” soft-key to ac-
cess the Display Settings menu.
• Select the “Daytime Colors” soft-key to switch to manual daytime mode and
to adjust the brightness of the display
using daytime colors.
• Select the “Nighttime Colors” soft-key to switch to manual nighttime mode and to adjust the brightness of the display
using nighttime colors.
ELECTRONICS
67
Page 108 of 148
JACKING AND TIRE CHANGING
Jack Location
• The jack and lug wrench are located in the rear storage compartment.
NOTE:
Turn the black plastic wing nut counter clockwise to loosen the jack from the storage
bin.
Spare Tire Stowage
•To remove the spare tire from the car-
rier, remove the tire cover, if equipped,
and remove the lug nuts with the lug
wrench turning them counterclockwise.
NOTE:
If you have added aftermarket accesso-
ries to the spare tire mounted carrier, it
cannot exceed a gross weight of 85 lbs
(38.5 kg) including the weight of the
spare tire.
WHAT TO DO IN EMERGENCIES
106
Page 110 of 148

4. Operate the jack from the front or the rear of the vehicle. Place the jack under theaxle tube, as shown. Do not raise the vehicle until you are sure the jack is fully
engaged.
5.
Raise the vehicle by turning the jack
screw to the right. Raise the vehicle
only until the tire just clears the surface
and enough clearance is obtained to
install the spare tire. Minimum tire lift
provides maximum stability.
6. Remove the lug nuts and wheel.
7. Position the spare wheel/tire on the vehicle and install the lug nuts with
the cone-shaped end toward the
wheel. Lightly tighten the lug nuts
clockwise.
8. Lower the vehicle by turning the jack screw to the left, and remove the jack.
9. Finish tightening the lug nuts. Push down on the wrench while tightening
for increased leverage. Alternate nuts
until each nut has been tightened
twice. The correct wheel nut tightness
is 100 ft lbs (135 N·m). If in doubt
about the correct tightness, have
them checked with a torque wrench
by your authorized dealer or at a ser-
vice station.
10. Remove the jack assembly and wheel blocks.
11. Secure the tire, jack, and tools in their proper locations.
12. Remove blocks from wheels.
WHAT TO DO IN EMERGENCIES
108