Page 161 of 674
WARNING!(Continued)
in a seat that has been overheated could cause
serious burns due to the increased surface tempera-
ture of the seat.
Head Restraints
Head restraints are designed to reduce the risk of injury
by restricting head movement in the event of a rear
impact. Head restraints should be adjusted so that the top
of the head restraint is located above the top of your ear.
Page 179 of 674
WARNING!(Continued)
windshield with defroster before and during wind-
shield washer use.
Mist Feature
Push down on the wiper lever to activate a single wipe to
clear off road mist or spray from a passing vehicle. As
long as the lever is held down, the wipers will continue
to operate.
NOTE:The mist feature does not activate the washer
pump; therefore, no washer fluid will be sprayed on the
windshield. The wash function must be used in order to
spray the windshield with washer fluid.
TILT STEERING COLUMN
This feature allows you to tilt the steering column
upward or downward. The tilt lever is located on the
steering column, below the turn signal lever.
Page 182 of 674

WARNING!
Leaving the Electronic Speed Control system on
when not in use is dangerous. You could accidentally
set the system or cause it to go faster than you want.
You could lose control and have an accident. Always
leave the system OFF when you are not using it.
To Set A Desired Speed
Turn the Electronic Speed Control ON. When the vehicle
has reached the desired speed, press the SET (-) button
and release. Release the accelerator and the vehicle will
operate at the selected speed.
NOTE:The vehicle should be traveling at a steady speed
and on level ground before pressing the SET (-) button.
To Deactivate
A soft tap on the brake pedal, pushing the CANCEL
button, or normal brake pressure while slowing the
vehicle will deactivate the Electronic Speed Control with-
out erasing the set speed from memory.
Pressing the ON/OFF button or turning the ignition
switch OFF erases the set speed from memory.
To Resume Speed
To resume a previously set speed, push the RES (+)
button and release. Resume can be used at any speed
above 20 mph (32 km/h).
To Vary The Speed Setting
To Increase Speed
When the Electronic Speed Control is set, you can in-
crease speed by pushing the RES (+) button.
180 UNDERSTANDING THE FEATURES OF YOUR VEHICLE
Page 187 of 674
WARNING!
To avoid serious injury or death:
•Only devices designed for use in this type of outlet
should be inserted into any 12 Volt outlet.
• Do not touch with wet hands.
• Close the lid when not in use and while driving the
vehicle.
• If this outlet is mishandled, it may cause an electric
shock and failure.
Page 218 of 674
WARNING!
Use both hands to remove the door frames. The door
frames will fold and could cause injury if both hands
are not used.
2. Place one hand on the upper rear and one hand on the front of the door frame.
3. Pull the frame toward you with your rearward hand to remove the frame from the vehicle.
4. Screw the knobs back into the door frame and fold forstorage. Store in a secure location.
Page 219 of 674
WARNING!
•Do not drive your vehicle on public roads with the
door frame(s) removed as you will lose the protec-
tion that they can provide. This procedure is fur-
nished for use during off-road operation only.
(Continued)
3
UNDERSTANDING THE FEATURES OF YOUR VEHICLE 217
Page 293 of 674
WARNING!(Continued)
•If you remove the doors, store them outside the
vehicle. In the event of an accident, a loose door
may cause personal injury.
Lowering The Windshield And Removing Side
Bars
1. Lower the fabric top or remove the hard top following
the instructions in this manual.
NOTE: To assist in properly reinstalling side bars, mark
the original locations prior to removing.
2. Remove the two top hex bolts (13 mm), and the one side hex bolt (13 mm) visible through the trim (Do not
remove plastic corner trim, sun visor bolts, or sport
bar covering). 3. Remove the sun visor.
4. Remove the A-pillar cap.
5. Disconnect microphone (if equipped with Uconnect®
phone).
6. Open the sport bar Velcro covering.
3
UNDERSTANDING THE FEATURES OF YOUR VEHICLE 291
Page 295 of 674

WARNING!
You or others could be injured if you carry the side
bars loose in your vehicle. Remove the side bars from
the vehicle or securely store them as described or
they may cause personal injury if an accident occurs.
See your authorized dealer for the cinch straps.
10. Remove the windshield wiper arms by first pulling the wiper away from the windshield and out to the
“lock” position. Unsnap the wiper arm nut caps, and
remove the retaining nuts. Lift the wiper arms off and
store them in the center console or securely behind
the rear seat.
NOTE: It may be necessary to use a battery terminal
puller tool in order to separate the wiper arms from the
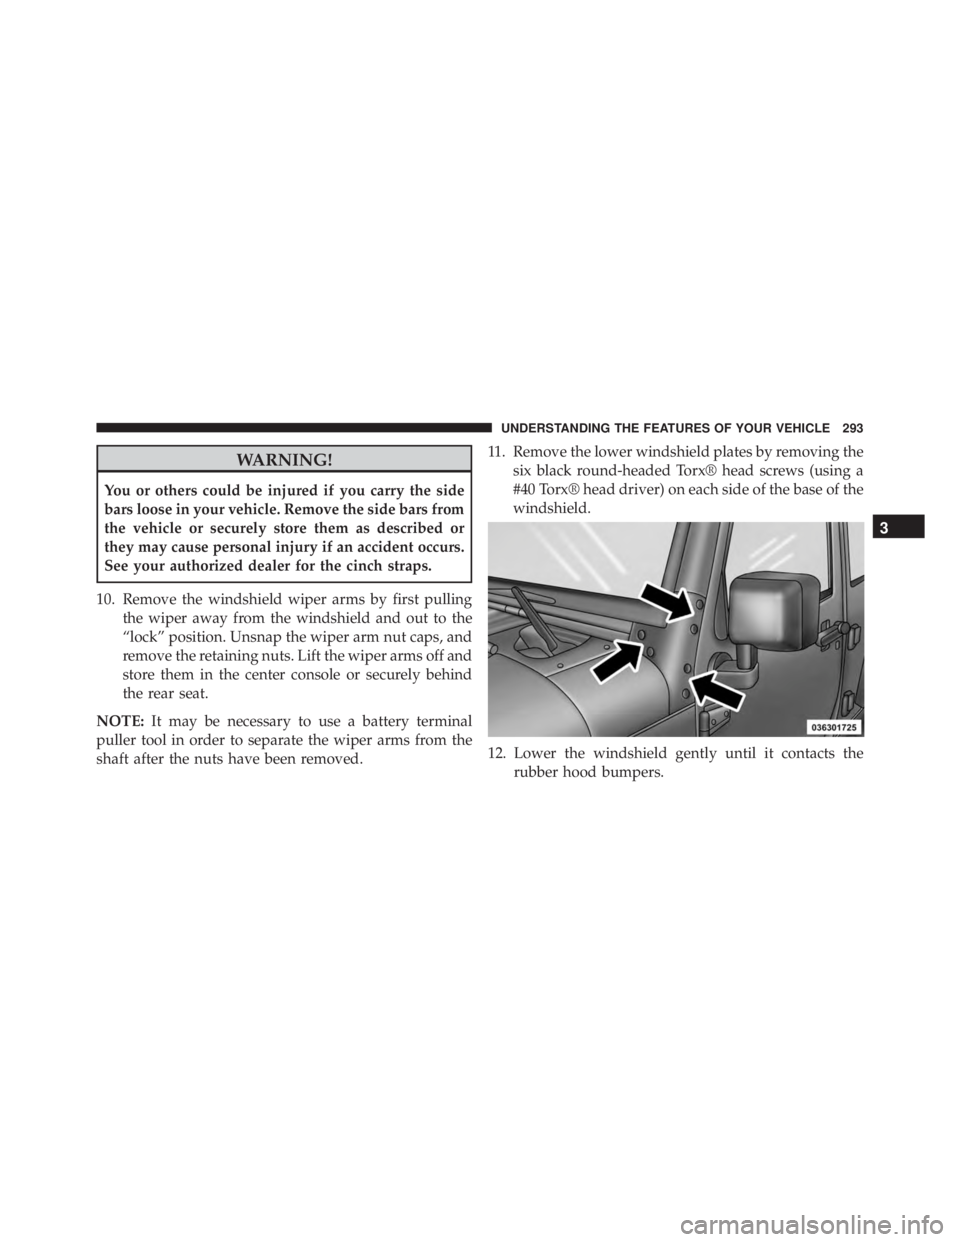
shaft after the nuts have been removed. 11. Remove the lower windshield plates by removing the
six black round-headed Torx® head screws (using a
#40 Torx® head driver) on each side of the base of the
windshield.
12. Lower the windshield gently until it contacts the rubber hood bumpers.
3
UNDERSTANDING THE FEATURES OF YOUR VEHICLE 293