2014 JEEP PATRIOT phone
[x] Cancel search: phonePage 46 of 126
NOTE:
• Your radio may not be equipped with the Uconnect
®Voice Command and
Uconnect®Phone features. To determine if your radio has these features, push the
Voice Command button on the radio. You will hear a voice prompt if you have the
feature, or see a message on the radio stating “Uconnect Phone not available” if
you do not.
• Your radio has many features that add to the comfort and convenience of you and your passengers. Some of these radio features should not be used when driving
because they take your eyes from the road or your attention from driving.
Clock Setting
1. Press and hold the TIME button until the hours blink.
2. Turn the TUNE/SCROLL control knob to set the hours.
3. Press the TUNE/SCROLL control knob until the minutes begin to blink.
4. Turn the TUNE/SCROLL control knob to set the minutes.
5. Press the TUNE/SCROLL control knob to save the changes.
6. Press any button/knob or wait five seconds to exit.
Equalizer, Balance And Fade
1. Press the TUNE/SCROLL control knob and “BASS” will display.
2. Rotate the TUNE/SCROLL control knob to select the desired setting.
3. Continue pressing the TUNE/SCROLL control knob to display and set “MID
RANGE,” “TREBLE,” “BALANCE” and “FADE.”
Radio Operation
Seek Up/Down Buttons
• Press to seek through radio stations in AM, FM, or SAT bands.
• Hold either button to bypass stations without stopping.
Store Radio Presets
• Press the SET button once and SET 1 will show in the display. Then select button(1–6).
• A second station may be added to each push button. Press the SET button twice and SET 2 will show in the display. Then select button (1–6).
ELECTRONICS
44
Page 49 of 126

Uconnect® 430/430N
NOTE:
•
Your radio may not be equipped with the Uconnect®Voice Command and Uconnect®
Phone features. To determine if your radio has these features, push the Voice
Command button on the radio. You will hear a voice prompt if you have the feature, or
see a message on the radio stating “Uconnect Phone not available” if you do not.
• Your radio has many features that add to the comfort and convenience of you andyour passengers. Some of these radio features should not be used when driving
because they take your eyes from the road or your attention from driving.
Uconnect® 430/430N
1 — Voice Command Button
2 — Open/Close Display
3 — Menu Button
4 — Audio Settings Button
5 — Internal Hard Drive Button
6 — USB Port7 — Audio Jack
8 — Radio Sales Code
9 — ON/OFF/Rotate For Volume
10 — Select Media Mode Button
11 — Radio Mode Button
12 — Uconnect
®Phone Button
ELECTRONICS
47
Page 64 of 126
iPod®/USB/MP3 CONTROL
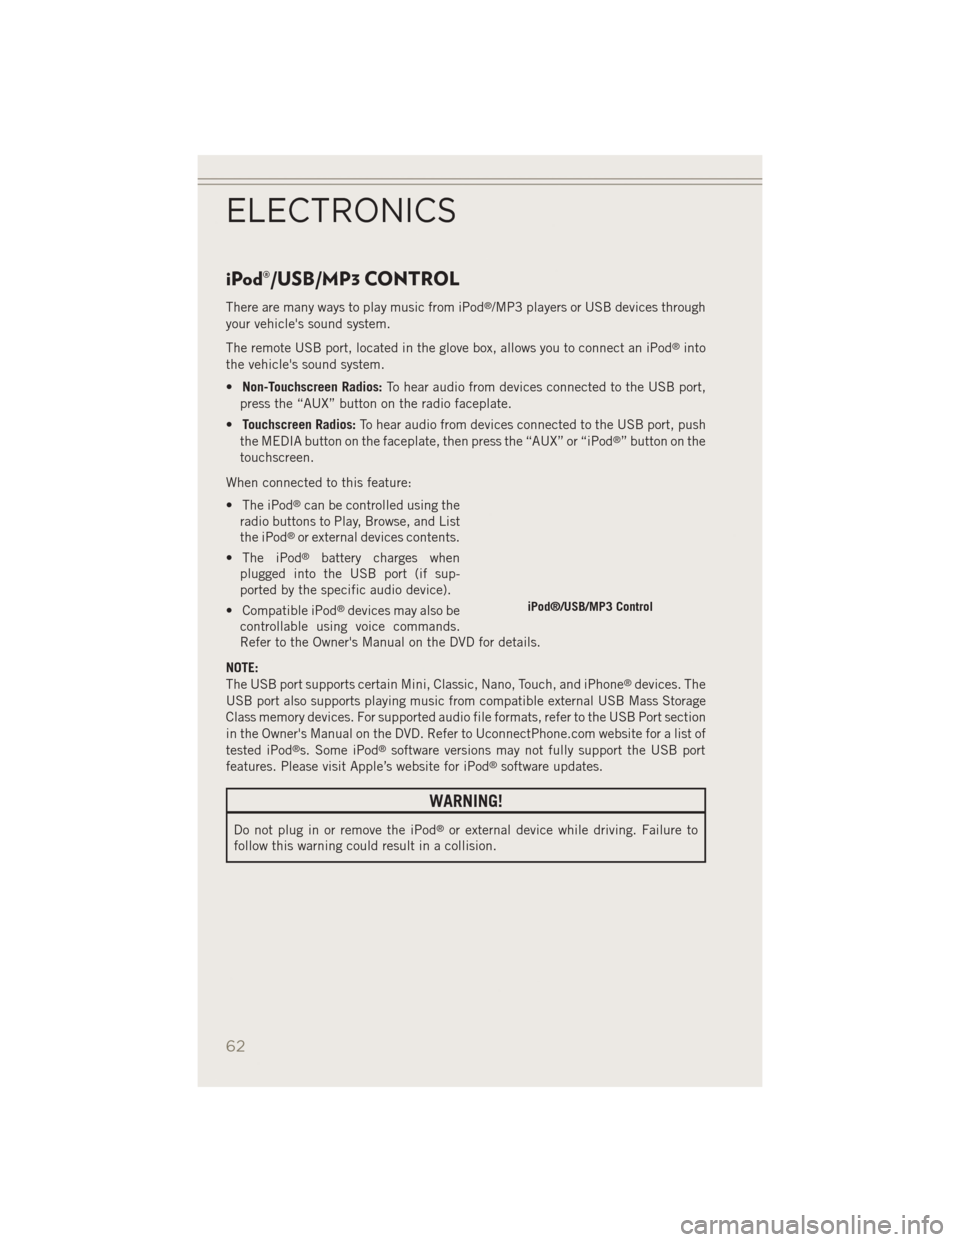
There are many ways to play music from iPod®/MP3 players or USB devices through
your vehicle's sound system.
The remote USB port, located in the glove box, allows you to connect an iPod
®into
the vehicle's sound system.
• Non-Touchscreen Radios: To hear audio from devices connected to the USB port,
press the “AUX” button on the radio faceplate.
• Touchscreen Radios: To hear audio from devices connected to the USB port, push
the MEDIA button on the faceplate, then press the “AUX” or “iPod
®” button on the
touchscreen.
When connected to this feature:
• The iPod
®can be controlled using the
radio buttons to Play, Browse, and List
the iPod
®or external devices contents.
• The iPod
®battery charges when
plugged into the USB port (if sup-
ported by the specific audio device).
• Compatible iPod
®devices may also be
controllable using voice commands.
Refer to the Owner's Manual on the DVD for details.
NOTE:
The USB port supports certain Mini, Classic, Nano, Touch, and iPhone
®devices. The
USB port also supports playing music from compatible external USB Mass Storage
Class memory devices. For supported audio file formats, refer to the USB Port section
in the Owner's Manual on the DVD. Refer to UconnectPhone.com website for a list of
tested iPod
®s. Some iPod®software versions may not fully support the USB port
features. Please visit Apple’s website for iPod®software updates.
WARNING!
Do not plug in or remove the iPod®or external device while driving. Failure to
follow this warning could result in a collision.
iPod®/USB/MP3 Control
ELECTRONICS
62
Page 65 of 126
Uconnect® PHONE
• To determine if your vehicle is equipped with Uconnect®Phone, press the
Uconnect®Phone buttonlocated on the radio faceplate. If your vehicle has
this feature, you will hear a voice prompt. If not, you will see a message on the
radio stating “Uconnect phone not available.”
• The Uconnect
®Phone is a voice-activated, hands-free, in-vehicle communica-
tions system with Voice Command Capability (see Voice Command section).
NOTE:
To access the tutorial, press the Uconnect
®Phone buttonand after the BEEP,
say “tutorial.” Press any hard-key/button or touch the display (Touchscreen radio) to
cancel the “tutorial.”
• The Uconnect
®Phone allows you to dial a phone number with your mobile phone
using simple voice commands.
• Refer to your vehicle Owner's Manual on the DVD for further details.
NOTE:
The Uconnect
®Phone requires a mobile phone equipped with the Bluetooth®
Hands-Free Profile Version 1.0 or higher. For Uconnect®Customer Support: U.S.
residents - visit www.UconnectPhone.com or call 1–877–855–8400. Canadian
Residents - call, 1-800-465–2001 (English) or 1-800-387-9983 (French). This site
will provide specific instructions based on the type of mobile phone being paired.
Phone Pairing
NOTE:
Pairing is a one-time initial setup before using the phone. Prior to starting the pairing
procedure ensure all additional phones within the vehicle have their Bluetooth®disabled.
• Activate Bluetooth®on the phone you are pairing.
• Push the “Phone”
button to begin.
• Wait for the “ready” prompt and BEEP.
• After the BEEP, say ”setup” or “Uconnect device setup.”
• After the BEEP, say “device pairing.”
• After the BEEP, say “pair a device.”
• Follow the audible prompts.
• You will be asked to say a four-digit Personal Identification Number (PIN),
which you will later need to enter into
your mobile phone. You can say any
four-digit PIN. You will not need to
remember this PIN after the initial
pairing process.
Phone Pairing
ELECTRONICS
63
Page 66 of 126
• You will then be prompted to give the phone pairing a name (each phone pairedshould have a unique name).
• Next you will be asked to give this new pairing a priority of 1 through 7 (up to seven phones may be paired); 1 is the highest and 7 is the lowest priority. The system will
only connect to the highest priority phone that exists within the proximity of the
vehicle.
• You will then need to start the pairing procedure on your cell phone. Follow the Bluetooth
®instructions in your cell phone Owner's Manual to complete the phone
pairing setup.
Phonebook
Phonebook Download — Automatic Phonebook Transfer From Mobile Phone
• If equipped and specifically supported by your phone, Uconnect
®Phone auto-
matically downloads names (text names) and number entries from your mobile
phone’s phonebook. Specific Bluetooth
®Phones with Phone Book Access Profile
may support this feature. Automatic Transfer is indicated by a green arrow at the
bottom of the screen. See www.UconnectPhone.com for supported phones.
• Automatic download and update, if supported, begins as soon as the Bluetooth
®
wireless phone connection is made to the Uconnect®Phone. For example, after
you start the vehicle.
NOTE:
The mobile phone may require authorization prior to download.
• A maximum of 1000 entries per phone will be downloaded and updated every time a phone is connected to the Uconnect
®Phone.
• Depending on the maximum number of entries downloaded, there may be a short delay before the latest downloaded names can be used. Until then, if available, the
previously downloaded phonebook is available for use.
• Only the phonebook of the currently connected mobile phone is accessible.
• Only the mobile phone’s phonebook is downloaded. The SIM card phonebook is not part of the Mobile phonebook.
• This downloaded phonebook cannot be edited or deleted on the Uconnect
®
Phone. These can only be edited on the mobile phone. The changes are transferred
and updated to Uconnect®Phone on the next phone connection.
Making A Phone Call
• Push the “Phone” button.
• After the BEEP, say “dial” (or “call” a name).
• After the BEEP, say number (or name).
ELECTRONICS
64
Page 67 of 126
Receiving A Call — Accept (And End)
• When an incoming call rings/is announced on Uconnect®, press the “Phone”
button
.
• To end a call, press the “Phone” button
.
Mute (Or Unmute) Microphone During Call
• During a call, press the “Voice Command” button.
• After the BEEP, say “mute” (or “mute off”).
Transfer Ongoing Call Between Handset And Vehicle
• During a call, press the “Voice Command” button.
• After the BEEP, say “transfer call.”
Changing The Volume
• Start a dialogue by pressing the “Phone” button, then adjust the volume
during a normal call.
• Use the radio ON/OFF VOLUME rotary knob to adjust the volume to a comfortable level while the Uconnect
®system is speaking. Please note the volume setting for
Uconnect®is different than the audio system.
WARNING!
• Any voice commanded system should be used only in safe driving conditions following applicable laws regarding phone use. Your attention should be
focused on safely operating the vehicle. Failure to do so may result in a
collision causing you and others to be severely injured or killed.
• In an emergency, to use Uconnect
®Phone, your mobile phone must be:
• turned on,
• paired to Uconnect
®Phone,
• and have network coverage.
Uconnect® VOICE COMMAND
Voice Command Operation
• The Uconnect®Voice Command system allows you to control your AM, FM radio,
satellite radio, disc player, HDD, Uconnect®Phone, a memo recorder, and
supported portable media devices.
• When you press the “Voice Command” button
located on the radio
faceplate or steering wheel, you will hear a beep. The beep is your signal to give a
command. If you do not say a command within a few seconds, the system will
present you with a list of options. If you ever want to interrupt the system while it
lists options, press the “Voice Command” button
, listen for the BEEP, and
say your command.
ELECTRONICS
65
Page 69 of 126
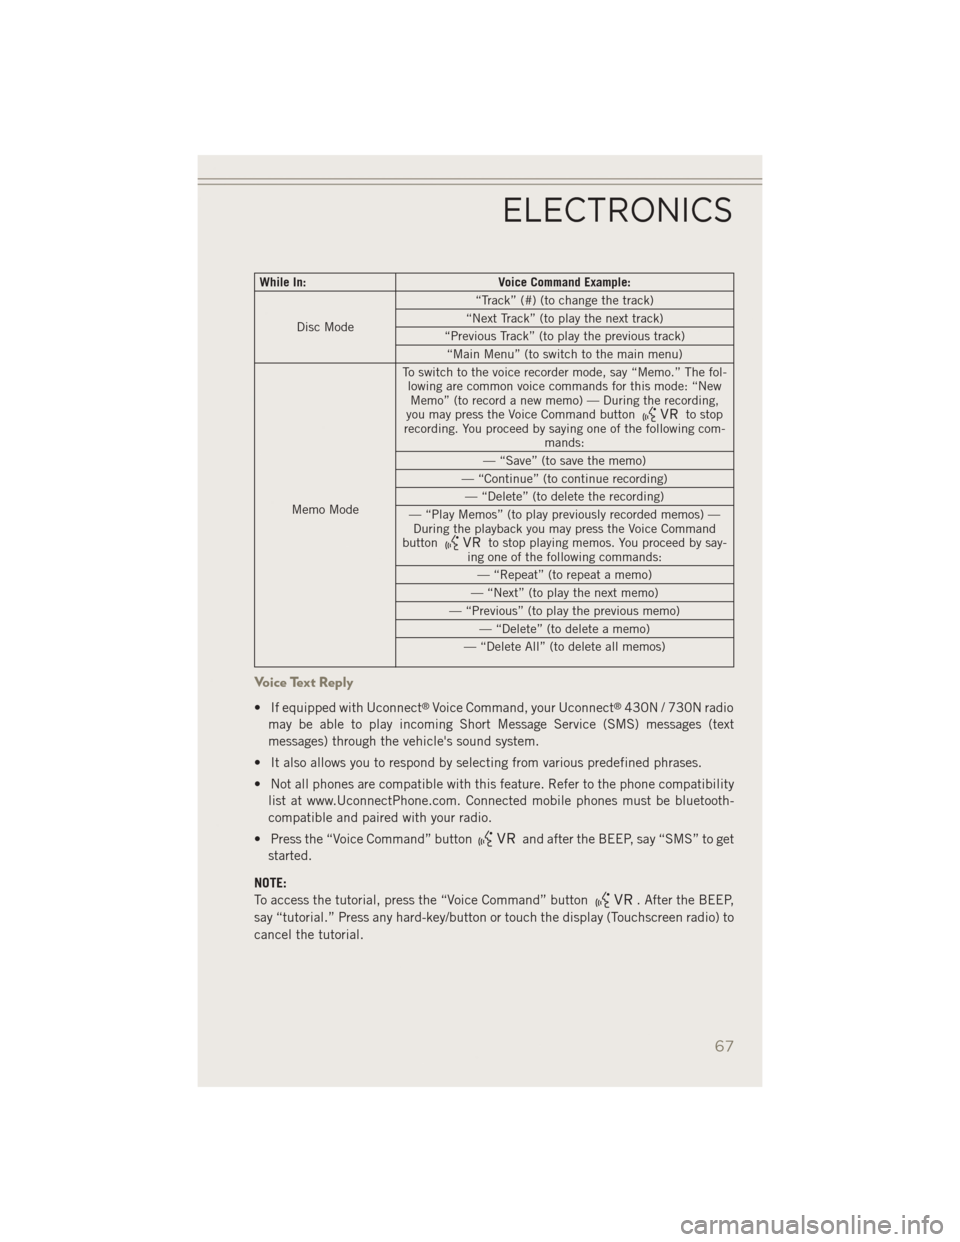
While In:Voice Command Example:
Disc Mode “Track” (#) (to change the track)
“Next Track” (to play the next track)
“Previous Track” (to play the previous track) “Main Menu” (to switch to the main menu)
Memo Mode To switch to the voice recorder mode, say “Memo.” The fol-
lowing are common voice commands for this mode: “NewMemo” (to record a new memo) — During the recording,
you may press the Voice Command button
to stop
recording. You proceed by saying one of the following com- mands:
— “Save” (to save the memo)
— “Continue” (to continue recording) — “Delete” (to delete the recording)
— “Play Memos” (to play previously recorded memos) — During the playback you may press the Voice Command
button
to stop playing memos. You proceed by say-
ing one of the following commands:
— “Repeat” (to repeat a memo)
— “Next” (to play the next memo)
— “Previous” (to play the previous memo) — “Delete” (to delete a memo)
— “Delete All” (to delete all memos)
Voice Text Reply
• If equipped with Uconnect®Voice Command, your Uconnect®430N / 730N radio
may be able to play incoming Short Message Service (SMS) messages (text
messages) through the vehicle's sound system.
• It also allows you to respond by selecting from various predefined phrases.
• Not all phones are compatible with this feature. Refer to the phone compatibility list at www.UconnectPhone.com. Connected mobile phones must be bluetooth-
compatible and paired with your radio.
• Press the “Voice Command” button
and after the BEEP, say “SMS” to get
started.
NOTE:
To access the tutorial, press the “Voice Command” button
. After the BEEP,
say “tutorial.” Press any hard-key/button or touch the display (Touchscreen radio) to
cancel the tutorial.
ELECTRONICS
67
Page 70 of 126
WARNING!
Any voice commanded system should be used only in safe driving conditions
following applicable laws regarding phone use. Your attention should be focused
on safely operating the vehicle. Failure to do so may result in a collision causing
you and others to be severely injured or killed.
Bluetooth® STREAMING AUDIO
If equipped with Uconnect®Voice Command, your Bluetooth®-equipped iPod®
devices, cell phones or other media players, may also be able to stream music to your
vehicle's speakers. Your connected device must be Bluetooth®-compatible, and
paired with your radio (see Uconnect®Phone for pairing instructions).
• Non-Touchscreen Radios: Press the
“AUX” button on the radio faceplate
until “BT” or “Audio Streaming” is
displayed on the radio screen.
• Touchscreen-Radios: Press the RADIO/
MEDIA or MEDIA hard-key and then
touch the “AUX” soft-key tab.
ELECTRONIC VEHICLE INFORMATION CENTER (EVIC)
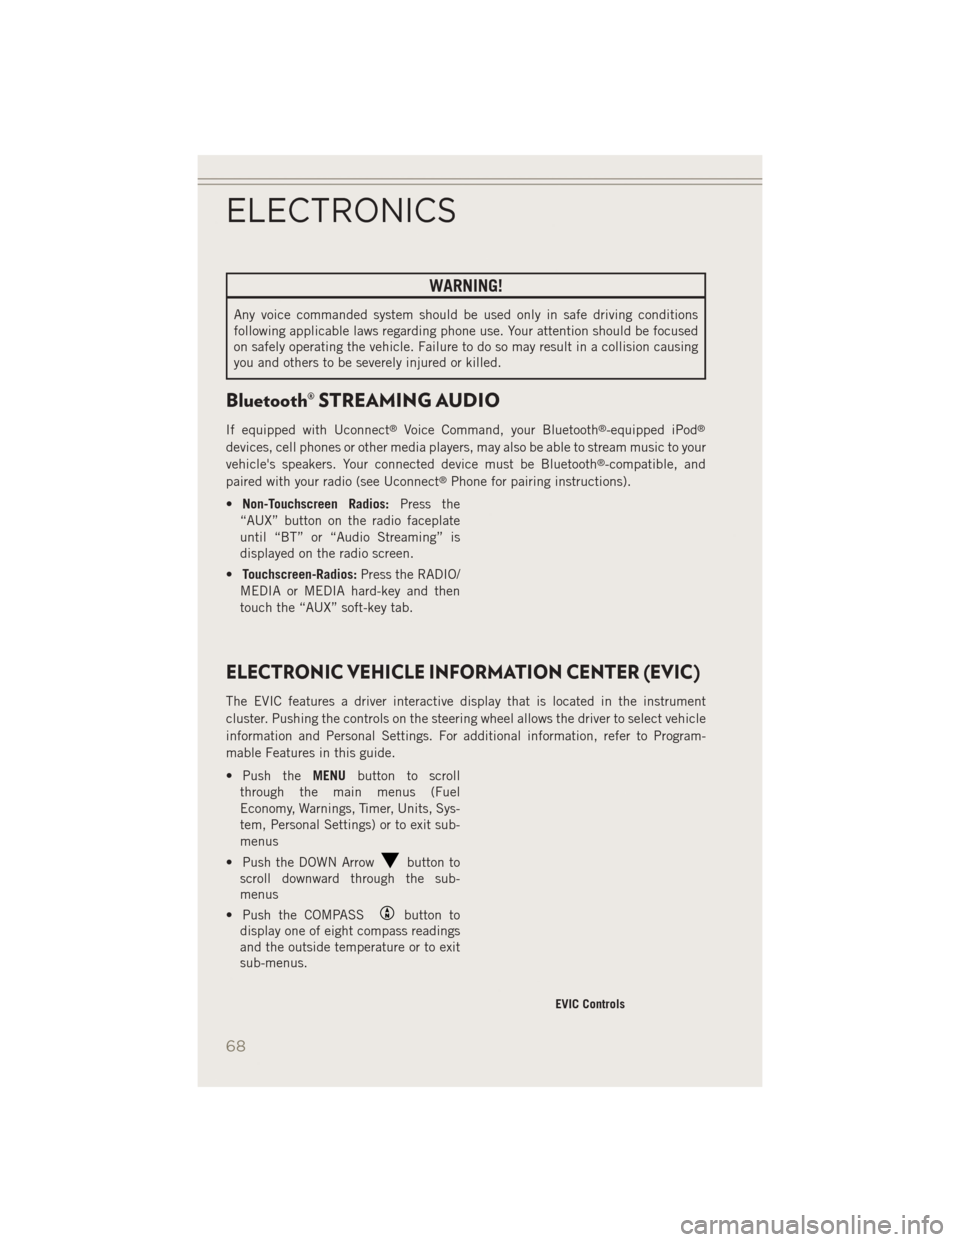
The EVIC features a driver interactive display that is located in the instrument
cluster. Pushing the controls on the steering wheel allows the driver to select vehicle
information and Personal Settings. For additional information, refer to Program-
mable Features in this guide.
• Push the MENUbutton to scroll
through the main menus (Fuel
Economy, Warnings, Timer, Units, Sys-
tem, Personal Settings) or to exit sub-
menus
• Push the DOWN Arrow
button to
scroll downward through the sub-
menus
• Push the COMPASS
button to
display one of eight compass readings
and the outside temperature or to exit
sub-menus.
EVIC Controls
ELECTRONICS
68