2014 INFINITI QX80 language
[x] Cancel search: languagePage 123 of 578

2-30Instruments and controls
The outside temperature sensor is located
in front of the radiator. The sensor may be
affected by road or engine heat, wind
directions and other driving conditions.
The display may differ from the actual
outside temperature or the temperature
displayed on various signs or billboards.
6. Setting
Setting cannot be made while driving. A
message“Setting can only be operated
when stopped” is also displayed on the
dot matrix liquid crystal display.
The
switch*Aandswitch*Bare
used in the setting mode to select and
decide a menu.
SKIP:
Push the
switch*Ato move to the
warning check mode.
Push the
switch*Bto select other
menus.
ALERT:
There are 3 submenus under the alert
menu.
. BACK
Select this submenu to return to the top
page of the setting mode. .
TIMER
Select this submenu to specify when
the “TIMER” indicator activates.
. ICY
Select this submenu to display the low
outside temperature warning.
MAINTENANCE: There are 5 submenus under the main-
tenance menu.
. BACK
Select this submenu to return to the top
page of the setting mode.
. OIL
Select this submenu to set or reset the
distance for changing the engine oil.
. FILTER
Select this submenu to set or reset the
distance for replacing the oil filter.
. TIRE
Select this submenu to set or reset the
distance for replacing tires.
. OTHER
Select this submenu and set or reset
the distance for replacing items other
than the engine oil, oil filter and tires. OPTIONS:
There are 4 submenus under the display
menu.
. BACK
Select this submenu to return to the top
page of the setting mode.
. LANGUAGE
Select this submenu to choose English,
French or Spanish for display.
. UNIT
Select this submenu to choose the unit.
. EFFECTS
Select this submenu to turn on and off
the needle sweep function when start-
ing the engine.
7. Warning check
SKIP:
Push the
switch*Ato move to the
warning check mode.
Push the
switch*Bto select other
menus.
DETAIL:
This item is available only when a warning
is displayed.
Select this menu to see the details of
warnings.
Page 216 of 578

.“Back-up Collision Intervention (BCI)
system” in the“5. Starting and driving”
section.
SAA3008
Others settings
The Others settings display will appear
when pushing the SETTING button and
selecting the “Others”key.
The following items are available:
. Display
. Comfort
. Clock
. Language & Units
. Voice Recognition
. Infiniti Connection (if so equipped)
. Camera .
Image Viewer
Monitor, climate, audio, phone and voice recognition systems4-15
Page 219 of 578

4-18Monitor, climate, audio, phone and voice recognition systems
This clock will indicate the time almost
exactly because it is always adjusted by
the GPS system.
Clock Format (24h):
When this item is turned to ON, the 24-
hour clock is displayed. When this item is
not turned to ON, the 12-hour clock is
displayed.
Offset (hour)/(min):
Adjust the time by increasing or decreasing
per hour or per minute.
Daylight Saving Time:
Turn this item to ON for daylight saving
time application.
Time Zone:
Choose the time zone from the following
.Pacific
. Mountain
. Central
. Eastern
. Atlantic
. Newfoundland
. Hawaii
. Alaska
SAA3007
Language & Units settings
The Language & Units settings display will
appear when pushing the SETTING button.
Select the “Others” key to show the
“Language & Units” key.
Select Language:
Select the “Select Language” key. Choose
“English”, “Français” or“Español” for your
favorite display appearance.
If you select the “Français”key, the French
language will be displayed, so please use
the French Owner’s Manual. To obtain a
French Owner’ s Manual, see “Owner’ s
Manual/Service Manual order information” in the
“9. Technical and consumer informa-
tion” section.
Select Units: Select the “Select Units” key. Choose“US”
(Mile, 8F, MPG) or “Metric”(km,8C, L/100
km) for your favorite display appearance.
Select Units (Tire Pressure):
Choose the “Select Units (Tire Pressure)”
key and push the ENTER button. From the
following display, select “kPa”or“psi”.
When the ignition switch is in the ACC
position, the “Select Units (Tire Pressure)”
key is not displayed.Voice Recognition settings
For details about the “Voice Recognition”
settings, see “INFINITI Voice Recognition
system” later in this section.
Infiniti Connection (if so equipped)
The information feeds history and the UNIT
ID can be confirmed and Infiniti Connection
history can be deleted. For further details,
see the separate Navigation System Own-
er’s Manual.
Page 253 of 578

4-52Monitor, climate, audio, phone and voice recognition systems
USB (Universal Serial Bus)
WARNING
Do not connect or disconnect the USB device
while driving. Doing so can be a distraction.
If distracted you could lose control of your
vehicle and cause an accident or serious
injury.
CAUTION
.Do not force the USB device into the USB
port. Inserting the USB device tilted or
up-side-down into the port may damage
the USB device and the port. Make sure
that the USB device is connected cor-
rectly into the USB port.
. Do not grab the USB port cover (if so
equipped) when pulling the USB device
out of the port. This could damage the
port and the cover.
. Do not leave the USB cable in a place
where it can be pulled unintentionally.
Pulling the cable may break the wire,
USB device or the port. .
To avoid damage and loss of function
when using a USB device, note the
following precautions.
—Do not bend the cable excessively
1.6 in (40 mm) radius minimum.
—Do not twist the cable excessively
(more than 180 degrees).
—Do not pull or drop the cable.
—Do not hit or press the USB port orUSB device with hands, feet, or
objects.
—Do not store objects with sharpedges in the storage area where the
cable is stored.
—Do not leave the USB device andattached devices in the vehicle com-
partment. When not in use for
extended periods of time, store the
cable and USB device in a clean, dust
free environment at room tempera-
ture and without direct sun exposure.
—Do not use the cable for any other
purposes than its intended use in the
vehicle.
The vehicle is not equipped with a USB device. USB devices should be purchased
separately as necessary.
This system cannot be used to format USB
devices. To format a USB device, use a
personal computer.
In some states/area, the USB device for the
front seats plays only sound without
images for regulatory reasons, even when
the vehicle is parked.
This system supports various USB memory
devices, USB hard drives and iPod
®
players. Some USB devices may not be
supported by this system.
.
Partitioned USB devices may not play
correctly.
. Some characters used in other lan-
guages (Chinese, Japanese, etc.) may
not appear properly in the display.
Using English language characters with
a USB device is recommended.
General notes for USB use:
. The USB device may not function when
the passenger compartment tempera-
ture is extremely high. Lower the
temperature before use.
. During cold weather or rainy days, the
player may malfunction due to humid-
ity. If this occurs, remove the USB
Page 267 of 578

4-66Monitor, climate, audio, phone and voice recognition systems
Hide: Hide the operation key.
Title Menu (DVD-VIDEO):
Some menus specific to each disc will be
shown. For details, see the instructions on
the disc.
Title Search (DVD-VIDEO, DVD-VR):
The scene with the specified title will be
displayed each time the “+”side or “−”
side is selected.
Group Search (VIDEO CD):
A scene in the specified group will be
displayed each time the “+”side or “−”
side is selected.
10 Key Search (DVD-VIDEO, VIDEO-CD,CD-
DA, DVD-VR):
Select the “10 Key Search” key to open the
number entry screen. Input the number to
be searched and select the “OK”key. The
specified Title/Chapter or Group/Track will
be played.
Select No. (VIDEO-CD):
Select the “Select No.” key to open the
number entry screen. Input the number to
be searched and select the “OK”key. The
specified scene will be played. Surround Information (DVD-VIDEO, VIDEO-
CD, CD-DA) (Models equipped with BOSE®
Surround Sound System):
Select the
“Surround Information” key and
push the ENTER button. The surround
information screen will appear.
Push the BACK button to return to the
previous screen.
Angle (DVD-VIDEO):
If the DVD contains different angles (such
as moving images), the current image
angle can be switched to another one.
Select the “Angle” key. The angle will
change each time the “+”side or “−”side
is selected.
Angle Mark (DVD-VIDEO):
When this item is turned on, an angle mark
will be shown on the bottom of the screen
if the scene can be seen from a different
angle.
Menu Skip (DVD-VIDEO):
DVD menus are automatically configured
and the contents will be played directly
when the “Menu Skip” key is turned on.
Note that some discs may not be played
directly even if this item is turned on. CM Skip (DVD-VIDEO):
Select the “CM Skip” key. Choose the
setting time from 15, 30 or 60 seconds by
selecting the “+”side or “−”side.
DRC (DVD-VIDEO, DVD-VR):
DRC (Dynamic Range Compression) auto-
matically adjusts the soundtrack volume
level to maintain a more even sound to the
speakers.
DOWN MIX (DVD-VIDEO):
Convert a multi-channel recording to a
traditional two-channel (stereo) recording.
DVD Language (DVD-VIDEO, VIDEO-CD):
Select the “DVD Language” key to open the
number entry screen. Input the number
corresponding to the preferred language
and select the “OK”key. The DVD top menu
language will be changed to the one
specified.
Display:
To adjust the image quality of the screen,
select the preferred adjustment items.
Audio:
Select the preferred language for audio.
Page 268 of 578

Subtitle (DVD-VIDEO, DVD-VR):
Select the preferred language for subtitles.
Display Mode (DVD-VIDEO, VIDEO-CD, DVD-
VR):
Select from the“Full”,“Wide”, “Normal” or
“Cinema” modes.
Title List (DVD-VR):
Select the preferred title from the list.
Play Mode:
Select the preferred play mode.
PG/PL Mode (DVD-VR):
Select the “PG”or“PL” mode.
Display settings
To adjust the front display mode, push the
SETTING button while the DVD is being
played, select the “Others”key and then
select the “Display”key.
To adjust the display ON/OFF, brightness,
tint, color and contrast, select the “Display
Adjustment” key and then select each key.
Then you can adjust each item using the
INFINITI controller. After changes have
been made push the BACK button to save
the setting.
SAA3260
USB MEMORY OPERATION
Audio main operation
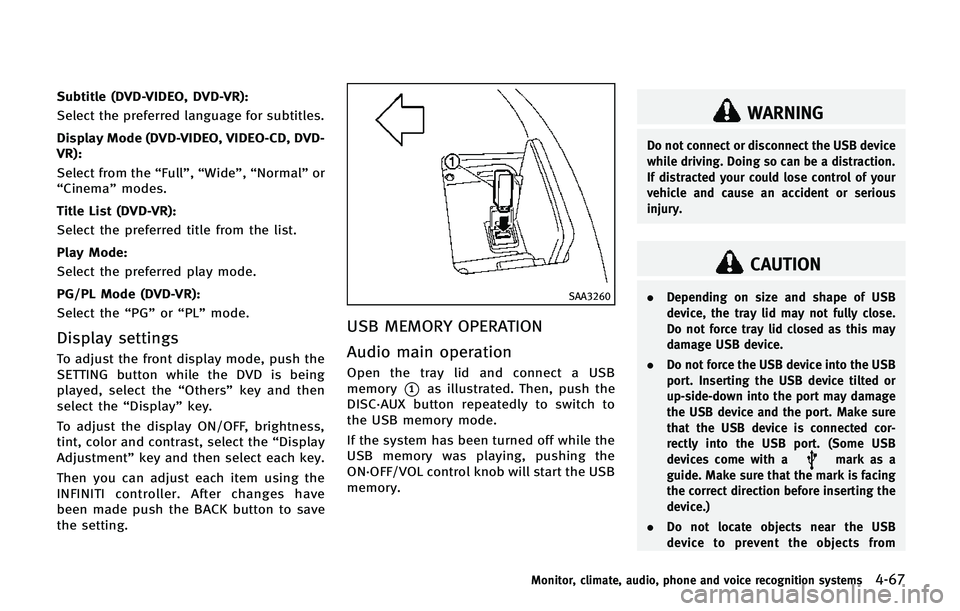
Open the tray lid and connect a USB
memory
*1as illustrated. Then, push the
DISC·AUX button repeatedly to switch to
the USB memory mode.
If the system has been turned off while the
USB memory was playing, pushing the
ON·OFF/VOL control knob will start the USB
memory.
WARNING
Do not connect or disconnect the USB device
while driving. Doing so can be a distraction.
If distracted your could lose control of your
vehicle and cause an accident or serious
injury.
CAUTION
. Depending on size and shape of USB
device, the tray lid may not fully close.
Do not force tray lid closed as this may
damage USB device.
. Do not force the USB device into the USB
port. Inserting the USB device tilted or
up-side-down into the port may damage
the USB device and the port. Make sure
that the USB device is connected cor-
rectly into the USB port. (Some USB
devices come with a
mark as a
guide. Make sure that the mark is facing
the correct direction before inserting the
device.)
. Do not locate objects near the USB
device to prevent the objects from
Monitor, climate, audio, phone and voice recognition systems4-67
Page 272 of 578

back the number of times the“”key is
selected.
List:
Select the “List”key on the movie file
operation screen to display the file list.
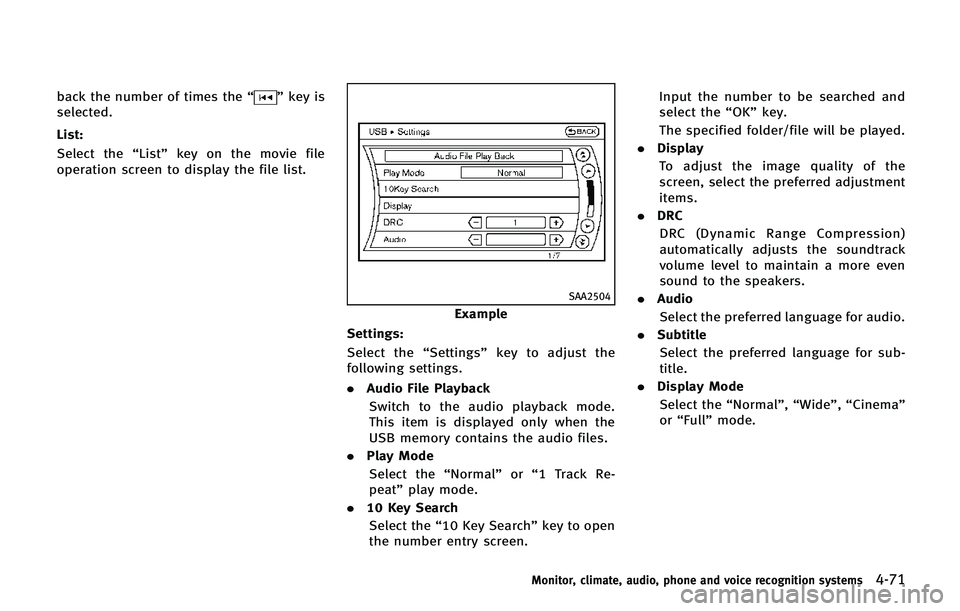
SAA2504
Example
Settings:
Select the “Settings”key to adjust the
following settings.
. Audio File Playback
Switch to the audio playback mode.
This item is displayed only when the
USB memory contains the audio files.
. Play Mode
Select the “Normal”or“1 Track Re-
peat” play mode.
. 10 Key Search
Select the “10 Key Search” key to open
the number entry screen. Input the number to be searched and
select the
“OK”key.
The specified folder/file will be played.
. Display
To adjust the image quality of the
screen, select the preferred adjustment
items.
. DRC
DRC (Dynamic Range Compression)
automatically adjusts the soundtrack
volume level to maintain a more even
sound to the speakers.
. Audio
Select the preferred language for audio.
. Subtitle
Select the preferred language for sub-
title.
. Display Mode
Select the “Normal”,“Wide”,“Cinema”
or “Full” mode.
Monitor, climate, audio, phone and voice recognition systems4-71
Page 296 of 578

angle.
Menu Skip (DVD-VIDEO):
DVD menus are automatically configured
and the contents will be played directly
when the“Menu Skip” key is turned on.
Note that some discs may not be played
directly even if this item is turned on.
CM Skip (DVD-VIDEO):
The amount of seconds for CM Skip can be
set to 15, 30 or 60 seconds.
DRC (DVD-VIDEO):
DRC (Dynamic Range Compression) allows
tuning of the dynamic range of sound
recorded in the Dolby Digital format.
DOWN MIX (DVD-VIDEO) (if so equipped):
Convert a multi-channel recording to a
traditional two-channel (stereo) recording.
DVD Language (DVD-VIDEO, VIDEO-CD):
Select the “DVD Language” key and push
the ENTER button to open the number entry
screen.
Input the number corresponding to the
preferred language and select the “OK”key
with the INFINITI controller. Then push the
ENTER button. The DVD top menu language
will be changed to the one selected. Display:
Adjust the image quality of the screen,
select the preferred adjustment items and
push the ENTER button.
Audio*:
Choose the preferred language using the
INFINITI controller and push the ENTER
button.
Subtitle* (DVD-VIDEO):
Choose the preferred language using the
INFINITI controller and push the ENTER
button.
To turn off the subtitles, push and hold the
ENTER button until a beep sounds.
Display Mode (DVD-VIDEO, VIDEO-CD):
Choose from the “Full”,“Wide”, “Normal”
or “Cinema” mode using the INFINITI
controller and push the ENTER button
again.
Play Mode:
Choose the preferred play mode using the
INFINITI controller and push the ENTER
button.
Surround Information* (if so equipped):
Display surround sound information.Remote controller operation
Use the remote controller to adjust the
following items.
Rear display select switch:
To activate the left screen or right screen,
move the rear display select switch on the
remote controller to the side correspond-
ing to the screen you want to activate (L or
R).
POWER button:
The rear displays can be activated or
deactivated individually.
To activate or deactivate the rear displays,
push the
button on the remote con-
troller.
SOURCE button:
The media available for playback will be
displayed when the SOURCE button is
pushed.
MENU button:
Push the MENU button to display the
operation screen for the source that is
being played.
Select button:
Push the select button
,to
select the items displayed on the rear
Monitor, climate, audio, phone and voice recognition systems4-95