2014 INFINITI Q70 HYBRID navigation
[x] Cancel search: navigationPage 242 of 522
Compressed Video Files (models
with navigation system)
Explanation of terms:
.DivX®- DivX®refers to the DivX®codec
owned by DivX, Inc. used for a lossy
compression of video based on MPEG-
4.
. AVI - AVI stands for Audio Video
Interleave. It is a standard file format
originated by Microsoft Corporation. A
“.divx” encoded file can be saved into
the “.avi” file format for playback on
this system if it meets the requirements
stated in the table in this section.
However, not all the “.avi”files are
playable on this system since different
encodings can be used than the DivX
®
codec.
. ASF - ASF stands for Advanced Systems
Format. It is a file format owned by
Microsoft Corporation. Note: Only “.
asf” files that meet the requirements
stated in the table in this section can
be played.
. Bit rate —Bit rate denotes the number
of bits per second used by a digital
video file. The size and quality of a
compressed digital audio file is deter- mined by the bit rate used when
encoding the file.
Monitor, climate, audio, phone and voice recognition systems4-59
Page 243 of 522
4-60Monitor, climate, audio, phone and voice recognition systems
Requirement for Supporting Video Playback:
MediaCD, CD-R, CD-RW, DVD, DVD±R, DVD±RW, DVD±RW DL, USB 2.0 Memory
File Systems CD,
CD-R,
CD-RW,
DVD,
DVD±R,
DVD±RW,
DVD±RW DL ISO9660 LEVEL1, ISO9660 LEVEL2, Romeo, Joliet, UDF Bridge (UDF1.02
+ISO9660), UDF1.5, UDF2.0
- ISO9660 Level 3 (packet writing) is not supported.
- Files saved using the Live File System component (on a Windows Vista-
based computer) are not supported.
- VDF1.5/VDF2.0 (packet writing) is not supported.
USB Memory FAT16, FAT32
File Types .divx, .avi
Video Codecs
DivX3, DivX4, DivX5, DivX6
Audio Codecs MP3, MPEG2.5 Audio Layer3, AC3, LPCM
.asf Video Codec
ISO-MPEG4
Audio Codec G.726
Bit Rates .divx, .avi Maximum Average 4Mbps
Maximum Peak
8Mbps
Resolution .divx, .avi
Minimum
32632
Maximum 7206480
.asf Minimum
32632
Maximum 720
6576
Bluetooth®Audio player (models
with navigation system)
Bluetooth®is a trademark
owned by Bluetooth SIG, Inc.
and licensed to Clarion Co., Ltd.
. Some Bluetooth®audio devices may
not be recognized by the in-vehicle
audio system.
. It is necessary to set up the wireless
connection between a compatible Blue-
tooth
®audio device and the in-vehicle
Bluetooth®module before using the
Bluetooth®audio player.
. Operating procedure of the Bluetooth®
audio player will vary depending on the
device. Make sure it is understood how
to operate an audio device before using
it with this system.
. The Bluetooth
®audio player may be
stopped under the following condi-
tions:
— Receiving a hands-free call.
— Checking the connection to the
hands-free phone.
. Do not place a Bluetooth
®audio device
in an area surrounded by metal or far
away from the in-vehicle Bluetooth
®
module to prevent tone quality degra-
Page 246 of 522
ON·OFF/Volume control:
Push the ignition switch to the ACC or ON
position, and then push the ON·OFF button
while the system is off to turn on the last
audio source, which was playing immedi-
ately before the system was turned off.
While the system is on, pushing the
ON·OFF button turns the system off.
Turn the VOL control knob to adjust the
volume.
Adjusting tone quality and speaker bal-
ance:
To adjust Bass, Treble, Balance and Fade,
push the Audio control knob. When the
display shows the setting you want to
change (Bass, Treble, Balance and Fade),
rotate the Audio control knob to set the
desired setting. For the other setting
methods, see“How to use SETTING button”
(P.4-16).
This vehicle has some sound effect func-
tions as follows:
. Speed Sensitive Vol.
. Precision Phased Audio (if so equipped)
. BOSE
®Centerpoint®2 (if so equipped)
. BOSE®AudioPilotTM2 (if so equipped)
. Surround effect (if so equipped) For more details, see
“How to use SETTING
button” (P.4-16).
Switching the display:
Pushing the DISC·AUX button will switch
the displays as follows:
. Models with navigation system
iPod
®/USB ?CD/DVD ?Bluetooth®
Audio ?iPod®/USB
. Models without navigation system
iPod
®/USB ?CD ?iPod®/USB
Linking Intelligent Key (models with navi-
gation system):
The audio settings can be memorized for
each Intelligent Key. For more details, see
“Setting memory function” (P.3-29).
FM-AM-SAT radio operation
When the radio band select button is
pushed while the ignition switch is in the
ACC or ON position, the radio will come on
at the channel last played.
The last channel played will also come on
when the ON·OFF button is pushed to ON.
If another audio source is playing when the
radio band select button is turned to ON,
the audio source will automatically be
turned off and the last radio channel played will come on.
When the stereo broadcast signal is weak,
the radio will automatically change from
stereo to monaural reception.
radio (FM·AM) band select :
Pushing the XM radio band select button
will change the band as follows:
AM ?FM1 ?FM2 ?AM
radio (XM) band select:
Pushing the XM radio band select button
will change the band as follows:
XM1 ?XM2 ?XM3 ?XM1
The satellite radio is not available in
Alaska, Hawaii and Guam.
TUNE (Tuning) : . For AM and FM radio
Turn the radio TUNE knob for manual
tuning.
. For SiriusXM Satellite Radio
Turn the radio TUNE knob to seek
channels from all of the categories
when any category is not selected.
Monitor, climate, audio, phone and voice recognition systems4-63
Page 247 of 522
4-64Monitor, climate, audio, phone and voice recognition systems
SEEK tuning/CATEGORY (CAT):
. For AM and FM radio
Push the SEEK button
orto
tune from low to high or high to low
frequencies and to stop at the next
broadcasting station.
. SiriusXM Satellite Radio
Push the SEEK button
orto
tune to the first channel of the next or
previous category.
During satellite radio reception, the follow-
ing notices will be displayed under certain
conditions.
. NO SIGNAL (No signal is received while
the SAT tuner is connected.)
. OFF AIR (Broadcasting signed off)
. CHECK ANTENNA (Antenna connection
error)
. LOADING (When the initial setting is
performed)
. UPDATING (When the satellite radio
subscription is not active)
SCAN tuning:
Push the SCAN tuning button to tune from
low to high frequencies and stop at each
broadcasting station/channel for 5 sec- onds. Pushing the button again during this
5 seconds period will stop SCAN tuning
and the radio will remain tuned to that
station/channel.
If the SCAN tuning button is not pushed
within 5 seconds, SCAN tuning moves to
the next station/channel.
toStation memory operations:
12 stations/channels can be set for the FM
band (6 each for FM1 and FM2), 18 for
SiriusXM Satellite Radio (6 each for XM1,
XM2 and XM3) and 6 stations can be set
for the AM band.
1. Choose the radio band using the radio band select button.
2. Tune to the desired station/channel using the
, SCAN button or the
radio TUNE knob.
3. Push and hold the desired station preset button
tountil the radio
mutes.
4. The station indicator will then come on and the sound will resume. Memorizing
is now complete.
5. Other buttons can be set in the same manner.
If the 12-volt battery cable is disconnected, or if the fuse opens, the radio memory will
be erased. In that case, reset the desired
stations/channels.
Menu (SiriusXM Satellite Radio) (models
with navigation system):
When the
“Menu”key on the display is
selected while the SiriusXM Satellite Radio
is being played, the menu list will be
displayed.
The following items are available.
. Preset List
Displays the preset channel list. If 1 of
the 6 preset stations listed is touched
and held, the current station will be
stored as the new preset.
. Customize Channel List
Selects specific channels to skip while
using the TUNE, SEEK/CATEGORY or
Menu-Categories feature.
. Favorite Artists & Songs
Stores the current artist or song that is
being played. Touch the “Alert”key to
be reminded when the stored artist or
song is playing on a station while
listening to SiriusXM Satellite Radio.
. Categories
Selecting a category will go to the first
channel in that category as defined by
Page 248 of 522
SiriusXM Satellite Radio.
. Direct Tune
Inputs the channel number by using a
keypad.
Text (models without navigation system):
When the “Text”key is selected with the
INFINITI controller on the display and then
the ENTER button is pushed while the
satellite radio is being played, the text
information listed below will be displayed
on the screen.
. CH Name
. Category
. Name
. Title
. Other
Compact Disc (CD) player operation
Push the ignition switch to the ACC or ON
position and insert the Compact Disc (CD)
into the slot with the label side facing up.
The CD will be guided automatically into
the slot and start playing.
After loading the CD, the number of tracks
on the CD and the play time will appear on
the display.
If the radio is already operating, it will
automatically turn off and the CD will play. If the system has been turned off while the
CD was playing, pushing the ON·OFF
button will start the CD.
Do not use 3.1 in (8 cm) discs.
PLAY:
When the DISC·AUX (CD play) button is
pushed with the system off and the CD
loaded, the system will turn on and the CD
will start to play.
When the DISC·AUX button is pushed with
the CD loaded and the radio playing, the
radio will automatically be turned off and
the CD will start to play.
Menu (models with navigation system):
When the “Menu”key on the display is
selected while the CD is being played, the
menu screen will be displayed. The follow-
ing menu options are available.
. Folder List (for CD with compressed
audio files)
Displays the folder list.
. Track List
Displays the track list.
. Play Mode
Select a play mode from the following
items. —
Normal
— 1 Folder Repeat (for CD with com-
pressed audio files)
— 1 Track Repeat
— 1 Disc Random
— 1 Folder Random (for CD with
compressed audio files)
Text (models without navigation system): When the “Text”key is selected in the
screen using the INFINITI controller and
then the ENTER button is pushed while the
CD is being played, the music information
below will be displayed on the screen.
CD:
. Disc title
. Track title
CD with compressed audio files:
. Folder title
. File title
. Song title
. Album title
. Artist
Next/Previous Track and Fast For-
ward/Rewind:
When the
orbutton is pushed for
more than 1.5 seconds while the CD is
Monitor, climate, audio, phone and voice recognition systems4-65
Page 253 of 522
4-70Monitor, climate, audio, phone and voice recognition systems
CAUTION
Do not close the tray lid with the USB
memory inserted. It may damage the tray lid
and the USB memory .
NOTE:
.Do not force the USB device into the
USB port. Inserting the USB device
tilted or up-side-down into the port
may damage the USB device and the
port. Make sure that the USB device is
connected correctly into the USB port.
(Some USB devices come with a
mark as a guide. Make sure that the
mark is facing the correct direction
before inserting the device.)
. Do not locate objects near the USB
device to prevent the objects from
leaning on the USB device and the
port. Pressure from the objects may
damage the USB device and the port.
SAA2500
File selection (models with naviga-
tion system)
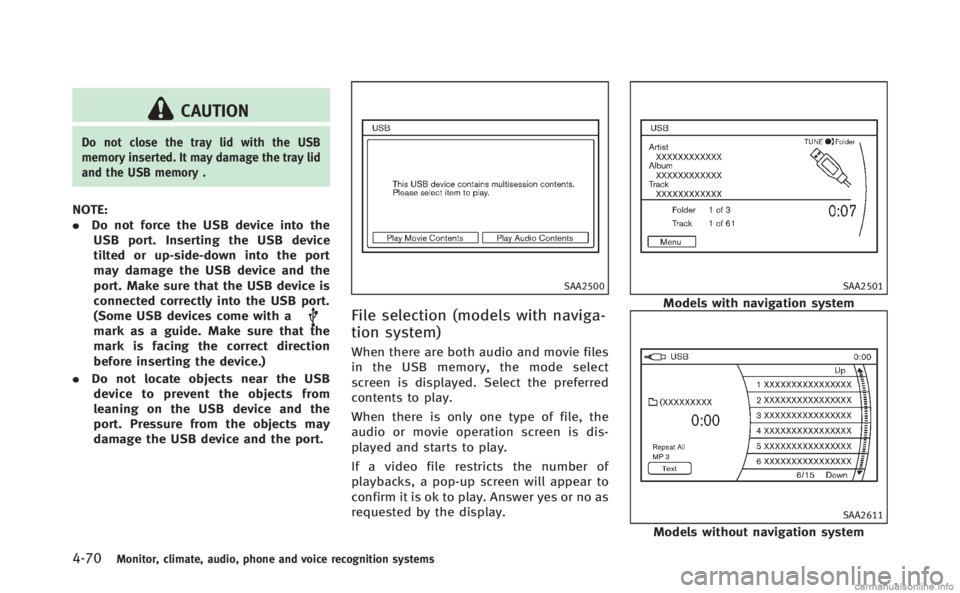
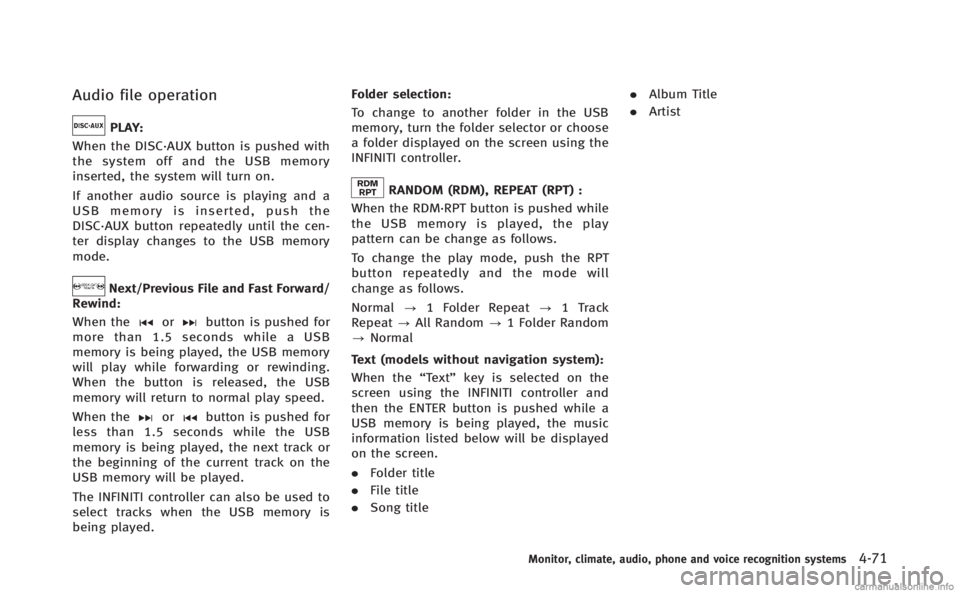
When there are both audio and movie files
in the USB memory, the mode select
screen is displayed. Select the preferred
contents to play.
When there is only one type of file, the
audio or movie operation screen is dis-
played and starts to play.
If a video file restricts the number of
playbacks, a pop-up screen will appear to
confirm it is ok to play. Answer yes or no as
requested by the display.
SAA2501
Models with navigation system
SAA2611
Models without navigation system
Page 254 of 522
Audio file operation
PLAY:
When the DISC·AUX button is pushed with
the system off and the USB memory
inserted, the system will turn on.
If another audio source is playing and a
USB memory is inserted, push the
DISC·AUX button repeatedly until the cen-
ter display changes to the USB memory
mode.
Next/Previous File and Fast Forward/
Rewind:
When the
orbutton is pushed for
more than 1.5 seconds while a USB
memory is being played, the USB memory
will play while forwarding or rewinding.
When the button is released, the USB
memory will return to normal play speed.
When the
orbutton is pushed for
less than 1.5 seconds while the USB
memory is being played, the next track or
the beginning of the current track on the
USB memory will be played.
The INFINITI controller can also be used to
select tracks when the USB memory is
being played. Folder selection:
To change to another folder in the USB
memory, turn the folder selector or choose
a folder displayed on the screen using the
INFINITI controller.
RANDOM (RDM), REPEAT (RPT) :
When the RDM·RPT button is pushed while
the USB memory is played, the play
pattern can be change as follows.
To change the play mode, push the RPT
button repeatedly and the mode will
change as follows.
Normal ?1 Folder Repeat ?1 Track
Repeat ?All Random ?1 Folder Random
? Normal
Text (models without navigation system):
When the “Text”key is selected on the
screen using the INFINITI controller and
then the ENTER button is pushed while a
USB memory is being played, the music
information listed below will be displayed
on the screen.
. Folder title
. File title
. Song title .
Album Title
. Artist
Monitor, climate, audio, phone and voice recognition systems4-71
Page 255 of 522
4-72Monitor, climate, audio, phone and voice recognition systems
SAA2502
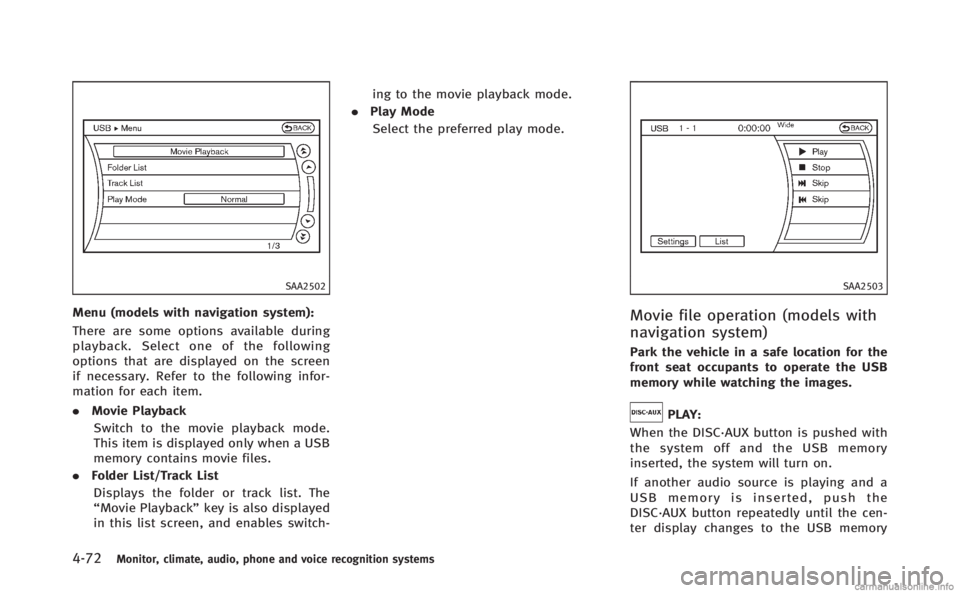
Menu (models with navigation system):
There are some options available during
playback. Select one of the following
options that are displayed on the screen
if necessary. Refer to the following infor-
mation for each item.
.Movie Playback
Switch to the movie playback mode.
This item is displayed only when a USB
memory contains movie files.
. Folder List/Track List
Displays the folder or track list. The
“Movie Playback” key is also displayed
in this list screen, and enables switch- ing to the movie playback mode.
. Play Mode
Select the preferred play mode.
SAA2503
Movie file operation (models with
navigation system)
Park the vehicle in a safe location for the
front seat occupants to operate the USB
memory while watching the images.
PLAY:
When the DISC·AUX button is pushed with
the system off and the USB memory
inserted, the system will turn on.
If another audio source is playing and a
USB memory is inserted, push the
DISC·AUX button repeatedly until the cen-
ter display changes to the USB memory