2014 INFINITI Q50 mirror
[x] Cancel search: mirrorPage 2 of 274

Table of Contents
1Introduction
How to use this manual ................... 1-2
Safety information ........................... 1-3
Laser product .................................. 1-4
2Getting Started
Control buttons and functions .......... 2-2
Starting system ............................... 2-7
Touch panel operation .................... 2-8
Menu screen and
operation method ........................... 2-9
How to operate dual display .......... 2-10
Items to be set initially .................. 2-16
3Heater and air conditioner
Heater and air conditioner
operation precautions ...................... 3-2
Heater and air
conditioner controls ......................... 3-3
Automatic climate control system ..... 3-6Heated seats (if so equipped) .......... 3-9
Heated steering-wheel (if
so equipped) ................................. 3-10
Rear window and outside
mirror defroster ............................. 3-11
Heater and air
conditioner settings ....................... 3-11
4Audio system
Audio operation precautions ............ 4-2
Names and functions of audio
control buttons .............................. 4-10
Audio operations ........................... 4-11
Audio settings ............................... 4-31
CD/USB memory device care
and cleaning .................................. 4-33
Gracenote
®End User
License Agreement ......................... 4-33
5Hands-Free Phone
Bluetooth®Hands-Free
Phone System .................................. 5-2
6Infiniti InTouch Apps
Infiniti InTouch Apps Overview ......... 6-2
Using applications ........................... 6-3
Vehicle Apps .................................... 6-3
Mobile Apps ................................... 6-8
7Monitor system
RearView Monitor (if so equipped) ... 7-2
Around View®Monitor (AVM) (if
so equipped) ................................... 7-6
Difference between predictive and
actual distances ............................. 7-19
8Information and settings
Information screen ........................... 8-2
SiriusXM Travel Link®..................... 8-4
Infiniti Connection
TM..................... 8-10
Settings screen .............................. 8-22
Fully customizable
digital environment ........................ 8-28
Page 32 of 274

3 Heater and air conditioner
Heater and air conditioner
operation precautions .......................................... 3-2
Heater and air conditioner controls...................... 3-3
Automatic climate control system ........................ 3-6Automatic operation ........................................ 3-6
Advanced Climate Control System (if
so equipped) ................................................... 3-7 Operating tips................................................ 3-8
In-cabin microfilter......................................... 3-8
Servicing heater and air conditioner .............. 3-9
Heated seats (if so equipped) ............................. 3-9
Heated steering-wheel (if so equipped) ............. 3-10
Rear window and outside mirror defroster......... 3-11
Heater and air conditioner settings ................... 3-11
Page 36 of 274
![INFINITI Q50 2014 Infiniti Intouch *4<>and []:
The current air flow mode is displayed
on the CLIMATE screen. Push <
>to
change the air flow mode. The air flow
mode can also be changed by touching
[
] on the lower screen.
Air flows from INFINITI Q50 2014 Infiniti Intouch *4<>and []:
The current air flow mode is displayed
on the CLIMATE screen. Push <
>to
change the air flow mode. The air flow
mode can also be changed by touching
[
] on the lower screen.
Air flows from](/manual-img/42/34966/w960_34966-35.png)
*4<>and []:
The current air flow mode is displayed
on the CLIMATE screen. Push <
>to
change the air flow mode. The air flow
mode can also be changed by touching
[
] on the lower screen.
Air flows from the center and side
ventilators.
Air flows from the center and side
ventilators, and foot outlets.
Air flows mainly from the foot out-
lets.
Air flows from the defroster and foot
outlets.
*5<> and [] (if so equipped):
The driver’s seat and front passenger
seat can be heated.
“Heated seats” (page 3-9)
*6Lower touch screen display (lower
display) :
When
MATE screen will be displayed on the
lower display.
*7<>:
Push <
>to toggle the ventilation
between the air recirculation mode (indicator light on) and the fresh air
mode (indicator light off).
*8<>:
Push <
>to defrost/defog the wind-
shield ([] is displayed lower
screen).
When <
>is pushed, the air condi-
tioner will turn on automatically if the
outside temperature is above 238 F
(−58C), and switches to the fresh air
mode to for better defogging perfor-
mance.
*9<>:
Push to activate the rear window and
the outside mirror defroster.
“Rear window and outside mirror
defroster” (page 3-11)
*10
Push to turn on/off the Climate Control
system.
*11
Push to show the CLIMATE screen on
the lower display.
*12Temperature setting indicators:
Indicates temperature settings. In the
dual mode, the driver’s side and front
passenger side temperatures are dis- played independently.
*13Mode indicators:
The active mode status is displayed.
DUAL Dual mode is active.
Driver/front passenger side tempera-
tures can be set independently.
AUTO Auto mode is active. Temperature and fan speed are con-
trolled automatically.
*14[Steering Heater] (if so equipped):
Touch to turn on/off the steering-wheel
heater. When the steering-wheel hea-
ter is on, the indicator light is on.
“Heated steering-wheel”
(page 3-10)
*15[DUAL]:
Touch to turn on/off the dual mode.
When the dual mode is set, the
temperature for the driver seat and
the front passenger seat can be
adjusted independently. When the
dual mode is on, the indicator light is
on.
*16[Auto Recirc] (if so equipped):
Touch to turn on/off the auto recircula-
tion mode. When the auto recirculation
3. Heater and air conditioner
3-5
Page 42 of 274
![INFINITI Q50 2014 Infiniti Intouch materials.
. If any malfunctions are found or the
steering-wheel heater does not operate,
turn the switch off and have the system
checked by an INFINITI retailer.
Touch [Steering Heater] on the CLIMAT INFINITI Q50 2014 Infiniti Intouch materials.
. If any malfunctions are found or the
steering-wheel heater does not operate,
turn the switch off and have the system
checked by an INFINITI retailer.
Touch [Steering Heater] on the CLIMAT](/manual-img/42/34966/w960_34966-41.png)
materials.
. If any malfunctions are found or the
steering-wheel heater does not operate,
turn the switch off and have the system
checked by an INFINITI retailer.
Touch [Steering Heater] on the CLIMATE
screen to turn on/off the steering-wheel
heating manually. The steering-wheel heat-
ing will turn on and will turn off auto-
matically after 30 minutes. When the
steering-wheel heating is turned on, the
indicator above [Steering Heater] will turn
on.
If the surface temperature of the steering-
wheel is above the temperature within
which the system is designed to operate,
the system will not heat the steering-
wheel. This is not a malfunction.
Automatic steering-wheel heating can be
turned on/off from the climate control
settings screen.
“Heater and air conditioner settings”
(page 3-11)
REAR WINDOW AND OUTSIDE MIRROR
DEFROSTER
CAUTION!
When cleaning the inner side of the rear
window, be careful not to scratch or damage
the rear window defroster.
To defog/defrost the rear window glass
and outside mirrors, start the engine or the
hybrid system and push <
>. The indi-
cator light on the button will illuminate.
Push the button again to turn off the
defroster.
The defroster will automatically turn off in
approximately 15 minutes.
HEATER AND AIR CONDITIONER SET-
TINGS
Heater and air conditioner settings can be
changed on the screen.
1. Push
Page 105 of 274

7. Monitor system
7-2
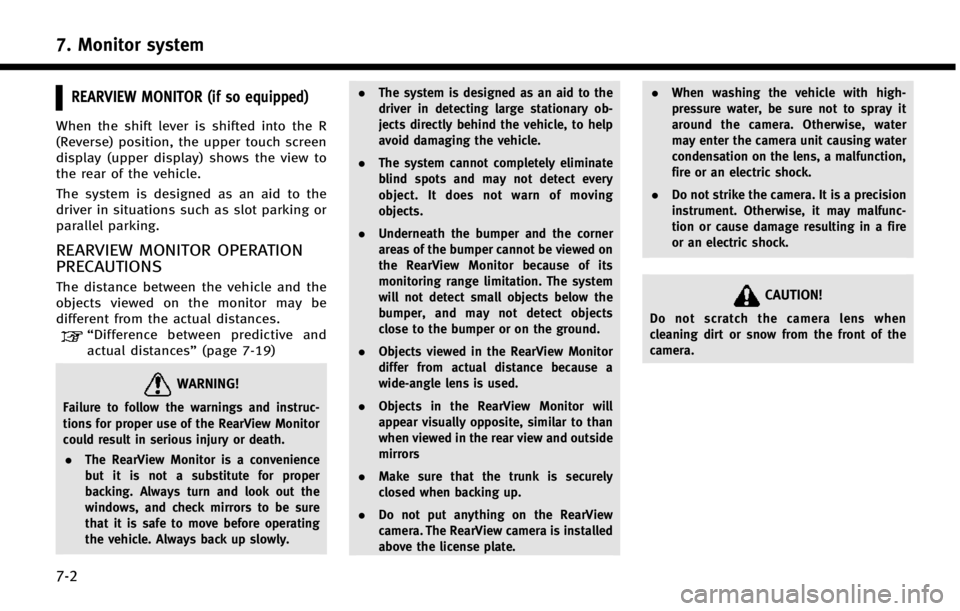
REARVIEW MONITOR (if so equipped)
When the shift lever is shifted into the R
(Reverse) position, the upper touch screen
display (upper display) shows the view to
the rear of the vehicle.
The system is designed as an aid to the
driver in situations such as slot parking or
parallel parking.
REARVIEW MONITOR OPERATION
PRECAUTIONS
The distance between the vehicle and the
objects viewed on the monitor may be
different from the actual distances.
“Difference between predictive and
actual distances” (page 7-19)
WARNING!
Failure to follow the warnings and instruc-
tions for proper use of the RearView Monitor
could result in serious injury or death.
. The RearView Monitor is a convenience
but it is not a substitute for proper
backing. Always turn and look out the
windows, and check mirrors to be sure
that it is safe to move before operating
the vehicle. Always back up slowly. .
The system is designed as an aid to the
driver in detecting large stationary ob-
jects directly behind the vehicle, to help
avoid damaging the vehicle.
. The system cannot completely eliminate
blind spots and may not detect every
object. It does not warn of moving
objects.
. Underneath the bumper and the corner
areas of the bumper cannot be viewed on
the RearView Monitor because of its
monitoring range limitation. The system
will not detect small objects below the
bumper, and may not detect objects
close to the bumper or on the ground.
. Objects viewed in the RearView Monitor
differ from actual distance because a
wide-angle lens is used.
. Objects in the RearView Monitor will
appear visually opposite, similar to than
when viewed in the rear view and outside
mirrors
. Make sure that the trunk is securely
closed when backing up.
. Do not put anything on the RearView
camera. The RearView camera is installed
above the license plate. .
When washing the vehicle with high-
pressure water, be sure not to spray it
around the camera. Otherwise, water
may enter the camera unit causing water
condensation on the lens, a malfunction,
fire or an electric shock.
. Do not strike the camera. It is a precision
instrument. Otherwise, it may malfunc-
tion or cause damage resulting in a fire
or an electric shock.
CAUTION!
Do not scratch the camera lens when
cleaning dirt or snow from the front of the
camera.
Page 107 of 274

7. Monitor system
7-4
vehicle down a hill, objects viewed in the
monitor are closer than they appear. Use
the inside mirror or glance over your
shoulder to properly judge distances to
other objects.
HOW TO PARK WITH PREDICTIVE
COURSE LINES
1. Visually check that the parking space issafe before parking your vehicle. 2. The rear view of the vehicle
*Ais
displayed as illustrated when the shift
lever is shifted to the R (Reverse)
position.
3. Slowly back up the vehicle adjusting the steering-wheel so that the predic-
tive course lines
*Benter the parking
space
*C.
4. When the back of the vehicle enters the parking space
*C, maneuver the steer-
ing-wheel to make the vehicle width
guide lines
*Dparallel to the parking
space
*C. 5. When the vehicle is parked in the space
completely, move the shift lever to the
P (Park) position and apply the parking
brake.
REAVIEW MONITOR SETTINGS
The RearView Monitor settings can be
changed with the following procedure.
1. Push
Page 109 of 274

7. Monitor system
7-6
AROUND VIEW®MONITOR (AVM) (if so
equipped)
When you push the
INFINITI Controller or shift the shift lever
into the R (Reverse) position while the
ignition switch is in the ON position, the
Around View Monitor operates with the
sonar system. The upper touch screen
display (upper display) shows the view to
the Around View Monitor. The Around View
Monitor shows various views of the posi-
tion of the vehicle.
Available views:
. Bird-Eye View
The surrounding view of the vehicle.
. Front-Side View
The view around and ahead of the front
passenger’s side wheel.
. Front View
An approximately 150-degree view of
the front of the vehicle.
. Front-Wide View
An approximately 180-degree view of
the front of the vehicle. .
Rear View
An approximately 150-degree view of
the rear of the vehicle.
. Rear-Wide View
An approximately 180-degree view of
the rear of the vehicle.
AROUND VIEW MONITOR OPERA-
TION PRECAUTIONS
The system is designed as an aid to the
driver in situations such as slot parking or
parallel parking.
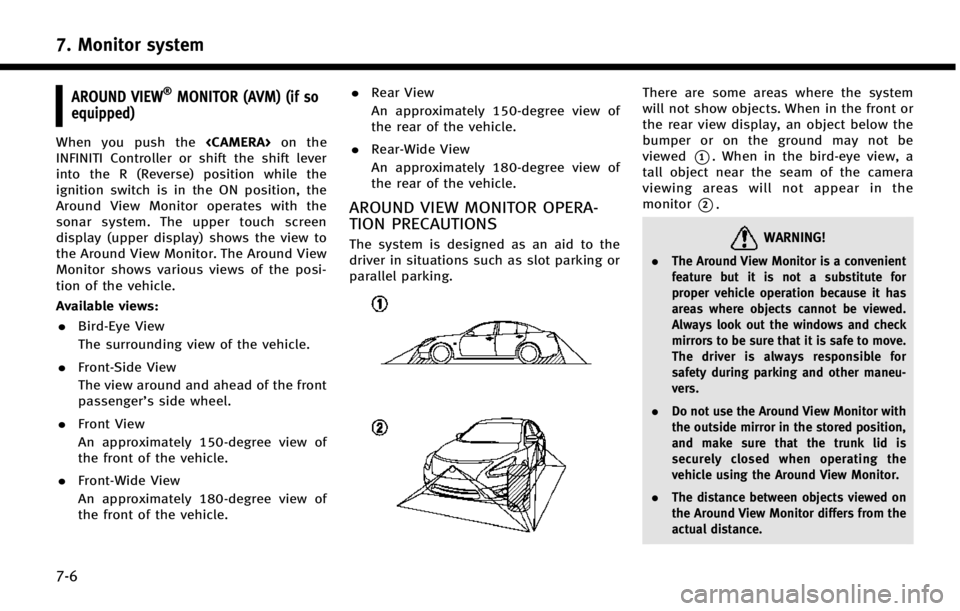
There are some areas where the system
will not show objects. When in the front or
the rear view display, an object below the
bumper or on the ground may not be
viewed
*1. When in the bird-eye view, a
tall object near the seam of the camera
viewing areas will not appear in the
monitor
*2.
WARNING!
. The Around View Monitor is a convenient
feature but it is not a substitute for
proper vehicle operation because it has
areas where objects cannot be viewed.
Always look out the windows and check
mirrors to be sure that it is safe to move.
The driver is always responsible for
safety during parking and other maneu-
vers.
. Do not use the Around View Monitor with
the outside mirror in the stored position,
and make sure that the trunk lid is
securely closed when operating the
vehicle using the Around View Monitor.
. The distance between objects viewed on
the Around View Monitor differs from the
actual distance.
Page 110 of 274

.The cameras are installed above the front
grille, the outside mirrors and above the
rear license plate. Do not put anything on
the cameras.
. When washing the vehicle with high-
pressure water, be sure not to spray it
around the cameras. Otherwise, water
may enter the camera unit causing water
condensation on the lens, a malfunction,
fire or an electric shock.
. Do not strike the cameras. They are
precision instruments. Doing so could
cause a malfunction or cause damage
resulting in a fire or an electric shock.
CAUTION!
Do not scratch the lens when cleaning dirt or
snow from the front of the camera.
AROUND VIEW MONITOR MAIN OP-
ERATION
Starting the system
To start the system, push
change the shift lever position into “R”
while the ignition switch is in the ON
position.
Switching views
Views on the AVM screen can be switched
by pushing
View] or by changing the shift lever
position.
Push
When
screen is displayed, Around View Monitor
operates and the front view and bird-eye
view are displayed. Push
switch the display to the front view and
front-side view screen or front-wide view
screen. Changing shift lever position:
When the shift lever is in the
“R”position,
the rear or rear-wide view is displayed.
When the shift lever is not in the “R”
position, the front or front-wide view is
displayed.
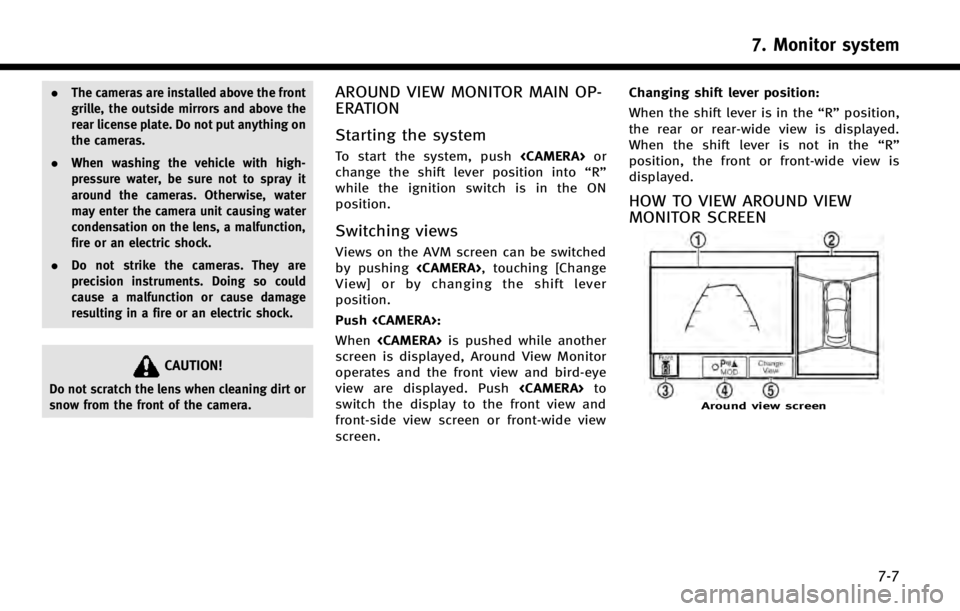
HOW TO VIEW AROUND VIEW
MONITOR SCREEN
Around view screen
7. Monitor system
7-7