Page 164 of 542

3-78
Convenient features of your vehicle
✽✽NOTICE
Make sure to refuel your vehicle according to the "Fuel
Requirements" suggested in the
Introduction chapter.
Do not spill fuel on the exterior surfaces of the vehicle. Any type of
fuel spilled on painted surfaces
may damage the paint.
(Continued)
Do not use matches or a lighter and do not smoke or
leave a lit cigarette in your
vehicle while at a gas station,
especially during refueling.
Do not over-fill or top-off your
vehicle tank, which can cause
gasoline spillage.
If a fire breaks out during refu-
eling, leave the vicinity of the
vehicle, and immediately con-
tact the manager of the gasstation and then contact the
local fire department. Follow
any safety instructions they
provide.
If pressurized fuel sprays out,
it can cover your clothes or
skin and thus subject you to
the risk of fire and burns.
Always remove the fuel cap
carefully and slowly. If the cap
is venting fuel or if you hear a
hissing sound, wait until the
condition stops before com-
pletely removing the cap.
(Continued)
(Continued)
Always check that the fuel cap
is installed securely to pre-
vent fuel spillage in the eventof an accident.
If the fuel filler cap requires
replacement, use only a gen-
uine HYUNDAI cap or the equiv-
alent specified for your vehicle.An incorrect fuel filler cap canresult in a serious malfunctionof the fuel system or emission
control system.
CAUTION
(Continued)
When using an approved
portable fuel container, be sureto place the container on the
ground prior to refueling. Static
electricity discharge from the
container can ignite fuel vapors
causing a fire. Once refueling
has begun, contact between
your bare hand and the vehicleshould be maintained until the
filling is complete.
Use only approved portable
plastic fuel containers designed
to carry and store gasoline.
When refueling, always move
the shift lever to the P (Park)
position, set the parking
brake, and place the ignition
switch to the LOCK/OFF posi-
tion. Sparks produced byelectrical components relatedto the engine can ignite fuel
vapors causing a fire.(Continued)
Page 166 of 542

3-80
Convenient features of your vehicle
AUTO light position
When the light switch is in the AUTO
position, the parking lights and the
headlights will be turned ON or OFFautomatically depending on the
amount of light outside the vehicle.
Even with the AUTO Light feature in
operation, it is recommended to
manually turn ON the lights when
driving at night or in a fog, or when
you enter dark areas, such as tun-
nels and parking facilities.
Daytime Running Light (DRL)
- For Canada
Daytime Running Lights (DRL) can
make it easier for others to see the
front of your vehicle during the day,
especially after dawn and beforesunset.
The DRL will turn off when:
The headlight switch is in the ONposition.
The parking brake is applied.
The engine is turned off.
OLMB043260
Do not cover or spill anything on the sensor (1) located onthe instrument panel.
Do not clean the sensor using
a window cleaner. The cleaner
may leave a light film which
could interfere with sensoroperation.
If your vehicle has window tint or other types of metallic
coating on the front wind-
shield, the AUTO light system
may not work properly.
CAUTION
Page 167 of 542

3-81
Convenient features of your vehicle
3
High beam operation
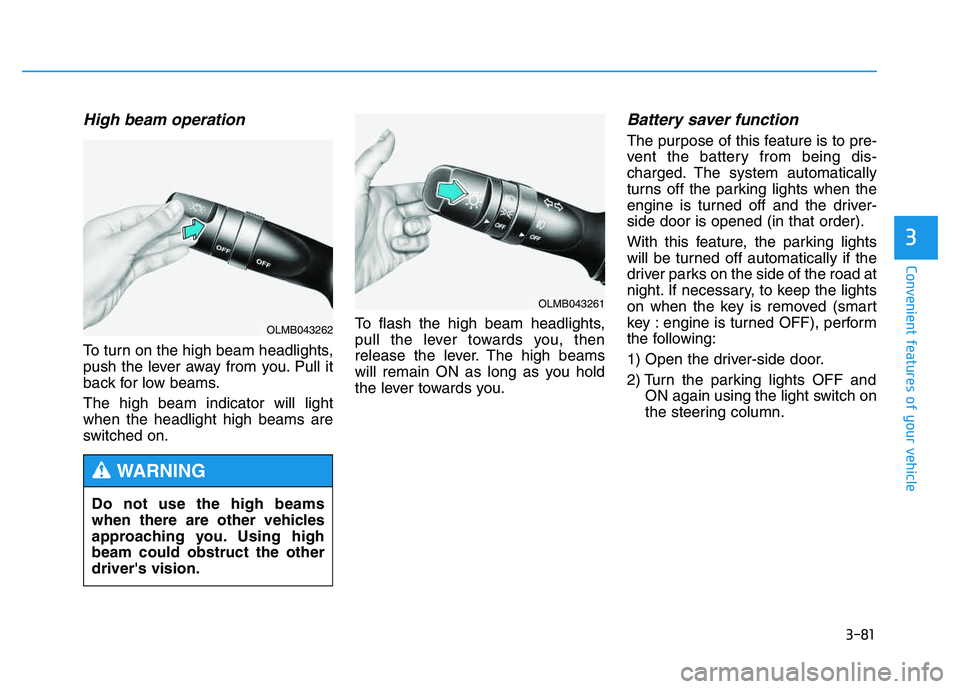
To turn on the high beam headlights,
push the lever away from you. Pull it
back for low beams. The high beam indicator will light when the headlight high beams are
switched on.To flash the high beam headlights,
pull the lever towards you, then
release the lever. The high beams
will remain ON as long as you hold
the lever towards you.
Battery saver function
The purpose of this feature is to pre-
vent the battery from being dis-
charged. The system automatically
turns off the parking lights when the
engine is turned off and the driver-side door is opened (in that order).
With this feature, the parking lights
will be turned off automatically if the
driver parks on the side of the road at
night. If necessary, to keep the lights
on when the key is removed (smart
key : engine is turned OFF), perform
the following:
1) Open the driver-side door.
2) Turn the parking lights OFF and
ON again using the light switch on
the steering column.
Do not use the high beams
when there are other vehicles
approaching you. Using highbeam could obstruct the otherdriver's vision.
WARNING
OLMB043261
OLMB043262
Page 170 of 542

3-84
Convenient features of your vehicle
You can use the fog lights only when
the headlights are on low beam.
When the headlight switch is in the
AUTO position, you can also use the
fog lights when the headlights turn on
automatically. The fog lights will go
OFF when the headlights turn OFF.Hazard warning flasher
The Hazard Warning Flasher should
be used whenever you find it neces-
sary to stop the car in a hazardous
location. When you must make such
an emergency stop, always pull off
the road as far as possible.
The hazard warning lights are turned
on and off by pushing in the hazard
switch. This causes all turn signal
lights to blink. The Hazard Warning
Lights will operate even though the
ignition switch is in the LOCK/OFFposition.
Interior lights
When in operation, the fog lights
consume large amounts of vehi-
cle electrical power. Only use the
fog lights when visibility is poor.
CAUTION
OLMB063020Do not use the interior lights for
an extended period of timewhen the engine is turned off or
the battery will discharge.
CAUTION
Do not use the interior lights
when driving in the dark. The
interior lights may obscure your
view and cause an accident.
WARNING
Page 174 of 542

3-88
Convenient features of your vehicle
AUTO control (if equipped)
The rain sensor located on the upper end of the windshield glass senses
the amount of rainfall and controls
the wiping cycle for the proper inter-
val. The more it rains, the faster the
wiper operates. When the rain stops,
the wiper stops. To vary the speed
setting, turn the speed control knob
(1). If the wiper switch is set in AUTO
mode when ignition switch is in the
ON position, the wiper will operate
once to perform a self-check of the
system. Set the wiper to OFF posi-
tion when the wiper is not in use.To avoid personal injury from
the windshield wipers, when theengine is running and the wind-
shield wiper switch is placed in
the AUTO mode:
Do not touch the upper end of the windshield glass facing
the rain sensor.
Do not wipe the upper end of the windshield glass with a
damp or wet cloth.
Do not put pressure on the windshield glass.
WARNING
If there is heavy accumulation
of snow or ice on the wind-
shield, defrost the windshield
for about 10 minutes, or until
the snow and/or ice is
removed before using the
windshield wipers to ensure
proper operation.
When you operate the wipers,
if your vehicle has a problem
in any part of the wiper opera-
tion system, the wiper mayoperate in the LO mode
regardless of the wiper switch
position. In this case, have
your vehicle checked by an
authorized HYUNDAI dealer
as soon as possible.
When the engine is turned off,
the wiper blade sometimes
may move slightly to helpreduce the deterioration of the
windshield wipers.
CAUTION
OLMB043268
Rain sensor
Page 177 of 542

3-91
Convenient features of your vehicle
3
✽✽NOTICE
If you want to defrost and defog
the front windshield, refer to
“Windshield defrosting and defog-
ging” in this chapter.
Rear window defroster
The defroster heats the window to
help remove frost, fog and thin ice
from the rear window, while the
engine is running.
To activate the rear window
defroster, press the rear window
defroster button located in the center
facia switch panel. The indicator on
the rear window defroster button illu-minates when the defroster is ON.
If there is heavy accumulation of
snow on the rear window, brush it off
before operating the rear defroster. The rear window defroster automati-
cally turns off after approximately 20
minutes or when the ignition switch is
turned off. To turn off the defroster,
press the rear window defroster but-ton again.
DD
EEFFRR OO SSTT EERR
To prevent damage to the con-
ductors bonded to the inside
surface of the rear window,
never use sharp instruments or
window cleaners containing
abrasives to clean the window.
CAUTION
OLMB043101
Page 180 of 542
3-94
Convenient features of your vehicle
Heating and air conditioning
1. Start the engine.
2. Set the mode to the desired posi-tion.
To improve the effectiveness of heating and cooling; - Heating:- Cooling:
3. Set the temperature control to the desired position.
4. Set the air intake control to the outside (fresh) air position.
5. Set the fan speed control to the desired speed.
6. If air conditioning is desired, turn the air conditioning system on.
OLMB043106
Page 185 of 542

3-99
Convenient features of your vehicle
3
System operation
Ventilation
1. Set the mode to the position.
2. Set the air intake control to theoutside (fresh) air position.
3. Set the temperature control to the desired position.
4. Set the fan speed control to the desired speed.
Heating
1. Set the mode to the position.
2. Set the air intake control to theoutside (fresh) air position.
3. Set the temperature control to the desired position.
4. Set the fan speed control to the desired speed.
5. If dehumidified heating is desired, turn the air conditioning system on.
If the windshield fogs up, set the mode to the or position.
Operation Tips
To keep dust or unpleasant odorfrom entering the car through the
ventilation system, temporarily set
the air intake control to the recircu-
lated air position. Be sure to returnthe control to the fresh air positionwhen the unpleasant odor has
passed to keep fresh air in the
vehicle. This will help keep the driv-
er alert and comfortable.
Air for the heating/cooling system is drawn in through the grilles just
ahead of the windshield. Care
should be taken that the grille open-
ings are not blocked by leaves,
snow, ice or other obstructions.
To prevent the inside of the wind- shied from fogging, set the air intakecontrol to the fresh air position and
fan speed to the desired position,
turn on the air conditioning system,
and adjust the temperature control
to desired temperature.
Air conditioning
HYUNDAI Air Conditioning Systems
are filled with environmentally friendly
R-134a refrigerant.
1. Start the engine. Push the air con- ditioning button.
2. Set the mode to the position.
3. Set the air intake control to the out- side air or recirculated air position.
4. Adjust the fan speed control and temperature control to maintain
the desired comfort.
When maximum cooling is desired, set the temperature con-
trol to the extreme left position, setthe mode control to the MAX A/C
position, then set the fan speedcontrol to the highest speed.