2014 Hyundai Santa Fe service indicator
[x] Cancel search: service indicatorPage 103 of 711
Mirrors . . . . . . . . . . . . . . . . . . . . . . . . . . . . . . . . . . 4-48
• Inside rearview mirror . . . . . . . . . . . . . . . . . . . . . . . . 4-48
• Outside rearview mirror . . . . . . . . . . . . . . . . . . . . . . . 4-52
Instrument cluster . . . . . . . . . . . . . . . . . . . . . . . . . 4-56
• Instrument Cluster Control . . . . . . . . . . . . . . . . . . . . 4-58
• LCD Display Control . . . . . . . . . . . . . . . . . . . . . . . . . 4-59
• Gauges . . . . . . . . . . . . . . . . . . . . . . . . . . . . . . . . . . . . . 4-59
• Transaxle Shift Indicator . . . . . . . . . . . . . . . . . . . . . . 4-64
LCD display . . . . . . . . . . . . . . . . . . . . . . . . . . . . . . 4-66
• LCD Modes . . . . . . . . . . . . . . . . . . . . . . . . . . . . . . . . . 4-66
• Service Mode . . . . . . . . . . . . . . . . . . . . . . . . . . . . . . . . 4-67
• User Settings Mode . . . . . . . . . . . . . . . . . . . . . . . . . . . 4-68
• A/V Mode . . . . . . . . . . . . . . . . . . . . . . . . . . . . . . . . . . . 4-71
• Turn By Turn Mode. . . . . . . . . . . . . . . . . . . . . . . . . . . 4-71
• Warning Messages . . . . . . . . . . . . . . . . . . . . . . . . . . . . 4-72
Trip computer . . . . . . . . . . . . . . . . . . . . . . . . . . . . . 4-79
• Overview. . . . . . . . . . . . . . . . . . . . . . . . . . . . . . . . . . . . 4-79
• Trip A/B . . . . . . . . . . . . . . . . . . . . . . . . . . . . . . . . . . . . 4-80
• Fuel Economy . . . . . . . . . . . . . . . . . . . . . . . . . . . . . . . 4-81
Warning and indicator lights . . . . . . . . . . . . . . . . 4-83
• Warning lights . . . . . . . . . . . . . . . . . . . . . . . . . . . . . . . 4-83
• Indicator Lights . . . . . . . . . . . . . . . . . . . . . . . . . . . . . . 4-93
Rear parking assist system . . . . . . . . . . . . . . . . . . 4-98
• Operation . . . . . . . . . . . . . . . . . . . . . . . . . . . . . . . . . . . 4-98
• Non-operational conditions . . . . . . . . . . . . . . . . . . . . 4-99• Self-diagnosis . . . . . . . . . . . . . . . . . . . . . . . . . . . . . . . 4-100
Parking assist system . . . . . . . . . . . . . . . . . . . . . . 4-101
• Operation . . . . . . . . . . . . . . . . . . . . . . . . . . . . . . . . . . 4-101
• Non-operational conditions . . . . . . . . . . . . . . . . . . . 4-103
• Self-diagnosis . . . . . . . . . . . . . . . . . . . . . . . . . . . . . . . 4-105
Smart parking assist system(SPAS) . . . . . . . . . . 4-106
• Operation . . . . . . . . . . . . . . . . . . . . . . . . . . . . . . . . . . 4-107
• Non-operational conditions . . . . . . . . . . . . . . . . . . . 4-107
• How the system works . . . . . . . . . . . . . . . . . . . . . . . 4-110
• Additional instructions . . . . . . . . . . . . . . . . . . . . . . . 4-117
• System malfunction . . . . . . . . . . . . . . . . . . . . . . . . . . 4-118
Rearview camera . . . . . . . . . . . . . . . . . . . . . . . . . 4-119
Hazard warning flasher . . . . . . . . . . . . . . . . . . . . 4-120
Lighting . . . . . . . . . . . . . . . . . . . . . . . . . . . . . . . . . 4-121
• Battery saver function. . . . . . . . . . . . . . . . . . . . . . . . 4-121
• Headlamp escort function. . . . . . . . . . . . . . . . . . . . . 4-121
• Smart cornering light . . . . . . . . . . . . . . . . . . . . . . . . 4-121
• Lighting control . . . . . . . . . . . . . . . . . . . . . . . . . . . . . 4-122
• Traffic change . . . . . . . . . . . . . . . . . . . . . . . . . . . . . . 4-124
• High - beam operation . . . . . . . . . . . . . . . . . . . . . . . 4-125
• Turn signals and lane change signals . . . . . . . . . . . 4-126
• Front fog light . . . . . . . . . . . . . . . . . . . . . . . . . . . . . . 4-127
• Rear fog light . . . . . . . . . . . . . . . . . . . . . . . . . . . . . . . 4-128
• Daytime running light . . . . . . . . . . . . . . . . . . . . . . . . 4-128
• Headlight leveling device . . . . . . . . . . . . . . . . . . . . . 4-129
4
Page 171 of 711
Features of your vehicle
70 4
Settings
Language (if equipped)
Choose the language you prefer
within the LCD display.
Temperature Unit
Convert the temperature unit from °C
to °F or from °F to °C.
Welcome Sound
If this item is checked, the welcome
sound function will be activated.
Shift Indicator (if equipped)
If this item is checked, the shift indi-
cator function will be activated.
For more details, refer to “Instrument
Cluster” in this chapter.
Seat Easy Access (if equipped)
If this item is checked, the driver’s
seat will automatically move forward
or rearward for the driver to enter or
exit the vehicle comfortably.AVG Fuel Eco Reset
• Auto Reset:
The average fuel economy will
reset automatically when refueling.
• Manual Reset:
The average fuel economy will not
reset automatically whenever refu-
eling.
For more details, refer to “Trip
Computer” in this chapter.
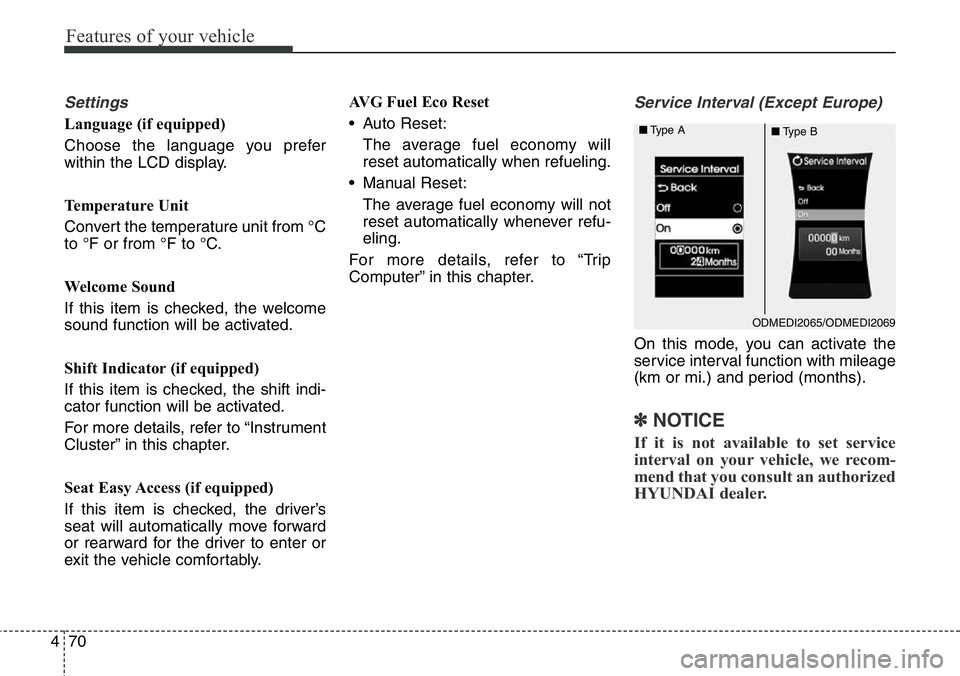
Service Interval (Except Europe)
On this mode, you can activate the
service interval function with mileage
(km or mi.) and period (months).
✽NOTICE
If it is not available to set service
interval on your vehicle, we recom-
mend that you consult an authorized
HYUNDAI dealer.
ODMEDI2065/ODMEDI2069 ■Type A
■Type B
Page 472 of 711
523
Driving your vehicle
Transaxle ranges
The indicator lights in the instrument
cluster displays the shift lever posi-
tion when the ignition switch is in the
ON position.
P (Park)
Always come to a complete stop
before shifting into P (Park). This
position locks the transaxle and pre-
vents the front wheels from rotating.R (Reverse)
Use this position to drive the vehicle
backward.N (Neutral)
The wheels and transaxle are not
engaged. The vehicle will roll freely
even on the slightest incline unless
the parking brake or service brakes
are applied.
WARNING
• Shifting into P (Park) while the
vehicle is in motion will cause
the drive wheels to lock which
will cause you to lose control
of the vehicle.
• Do not use the P (Park) posi-
tion in place of the parking
brake. Always make sure the
shift lever is latched in the P
(Park) position and set the
parking brake fully.
• Never leave a child unattend-
ed in a vehicle.
CAUTION
Always come to a complete stop
before shifting into or out of R
(Reverse); you may damage the
transaxle if you shift into R
(Reverse) while the vehicle is in
motion, except as explained in
“Rocking the vehicle”, in this
manual.
CAUTION
The transaxle may be damaged
if you shift into P (Park) while
the vehicle is in motion.
WARNING
Do not drive with the shift lever
in N (Neutral).
The engine brake will not work
and lead to an accident.
Page 487 of 711
Driving your vehicle
38 5
In the event of brake failure
If service brakes fail to operate while
the vehicle is in motion, you can
make an emergency stop with the
parking brake. The stopping dis-
tance, however, will be much greater
than normal.
Disc brakes wear indicator
When your brake pads are worn and
new pads are required, you will hear
a high-pitched warning sound from
your front brakes or rear brakes. You
may hear this sound come and go or
it may occur whenever you depress
the brake pedal.
Please remember that some driving
conditions or climates may cause a
brake squeal when you first apply (or
lightly apply) the brakes. This is nor-
mal and does not indicate a problem
with your brakes.
WARNING - Parking
brake
Applying the parking brake
while the vehicle is moving at
normal speeds can cause a
sudden loss of control of the
vehicle. If you must use the
parking brake to stop the vehi-
cle, use great caution in apply-
ing the brake.
WARNING - Brake wear
This brake wear warning sound
means your vehicle needs serv-
ice. If you ignore this audible
warning, you will eventually
lose braking performance,
which could lead to a serious
accident.
CAUTION
• To avoid costly brake repairs,
do not continue to drive with
worn brake pads.
• Always replace the front or
rear brake pads as pairs.
Page 551 of 711
What to do in an emergency
Road warning . . . . . . . . . . . . . . . . . . . . . . . . . . . . . . 6-2
• Hazard warning flasher . . . . . . . . . . . . . . . . . . . 6-2
In case of an emergency while driving . . . . . . . . . . 6-3
• If the engine stalls at a crossroad or crossing . . 6-3
• If you have a flat tire while driving . . . . . . . . . . 6-3
• If engine stalls while driving . . . . . . . . . . . . . . . . 6-3
If the engine does not start . . . . . . . . . . . . . . . . . . . 6-4
• If engine doesn’t turn over or turns over
slowly. . . . . . . . . . . . . . . . . . . . . . . . . . . . . . . . . . 6-4
• If engine turns over normally but does not
start . . . . . . . . . . . . . . . . . . . . . . . . . . . . . . . . . . . 6-4
Emergency starting . . . . . . . . . . . . . . . . . . . . . . . . . 6-5
• Jump starting . . . . . . . . . . . . . . . . . . . . . . . . . . . . 6-5
• Push-starting . . . . . . . . . . . . . . . . . . . . . . . . . . . . 6-6
If the engine overheats . . . . . . . . . . . . . . . . . . . . . . . 6-7
Tire Pressure Monitoring System (TPMS) . . . . . . 6-8
• Low tire pressure (position) telltale . . . . . . . . . . 6-9
• TPMS (Tire Pressure Monitoring System)
malfunction indicator . . . . . . . . . . . . . . . . . . . 6-11
• Changing a tire with TPMS . . . . . . . . . . . . . . . 6-11If you have a flat tire (with spare tire) . . . . . . . . . 6-13
• Jack and tools . . . . . . . . . . . . . . . . . . . . . . . . . . . 6-13
• Removing and storing the spare tire . . . . . . . . 6-14
• Changing tires . . . . . . . . . . . . . . . . . . . . . . . . . . 6-16
• Wheel nut tightening torque . . . . . . . . . . . . . . . 6-19
• Jack label . . . . . . . . . . . . . . . . . . . . . . . . . . . . . . 6-22
• EC declaration of conformity for jack . . . . . . 6-23
If you have a flat tire (with Tire Mobility Kit) . . 6-24
• Introduction . . . . . . . . . . . . . . . . . . . . . . . . . . . . 6-24
• Components of the Tire Mobility Kit . . . . . . . 6-25
• Using the Tire Mobility Kit. . . . . . . . . . . . . . . . 6-26
• Distributing the sealant . . . . . . . . . . . . . . . . . . . 6-28
• Checking the tire inflation pressure. . . . . . . . . 6-28
• Notes on the safe use of the Tire Mobility Kit . . 6-29
• Technical Data . . . . . . . . . . . . . . . . . . . . . . . . . . 6-29
Towing . . . . . . . . . . . . . . . . . . . . . . . . . . . . . . . . . . . 6-30
• Towing service . . . . . . . . . . . . . . . . . . . . . . . . . . 6-30
• Removable towing hook . . . . . . . . . . . . . . . . . . 6-31
• Emergency towing . . . . . . . . . . . . . . . . . . . . . . . 6-32
Emergency commodity . . . . . . . . . . . . . . . . . . . . . 6-35
• Fire extinguisher . . . . . . . . . . . . . . . . . . . . . . . . 6-35
• First aid kit . . . . . . . . . . . . . . . . . . . . . . . . . . . . . 6-35
• Triangle reflector . . . . . . . . . . . . . . . . . . . . . . . . 6-35
• Tire pressure gauge . . . . . . . . . . . . . . . . . . . . . . 6-35
6
Page 559 of 711
69
What to do in an emergency
Always check the TPMS malfunction
telltale after replacing one or more
tires or wheels on your vehicle to
ensure that the replacement or alter-
nate tires and wheels allow the
TPMS to continue to function proper-
ly.
✽NOTICE
If any of the below happens, we rec-
ommend that the system be checked
by an authorized HYUNDAI dealer.
1.The low tire pressure telltale/
TPMS malfunction indicator do
not illuminate for 3 seconds when
the ignition switch is turned to the
ON position or engine is running.
2. The TPMS malfunction indicator
remains illuminated after blinking
for approximately 1 minute.
3. The Low tire pressure position
telltale remains illuminated.
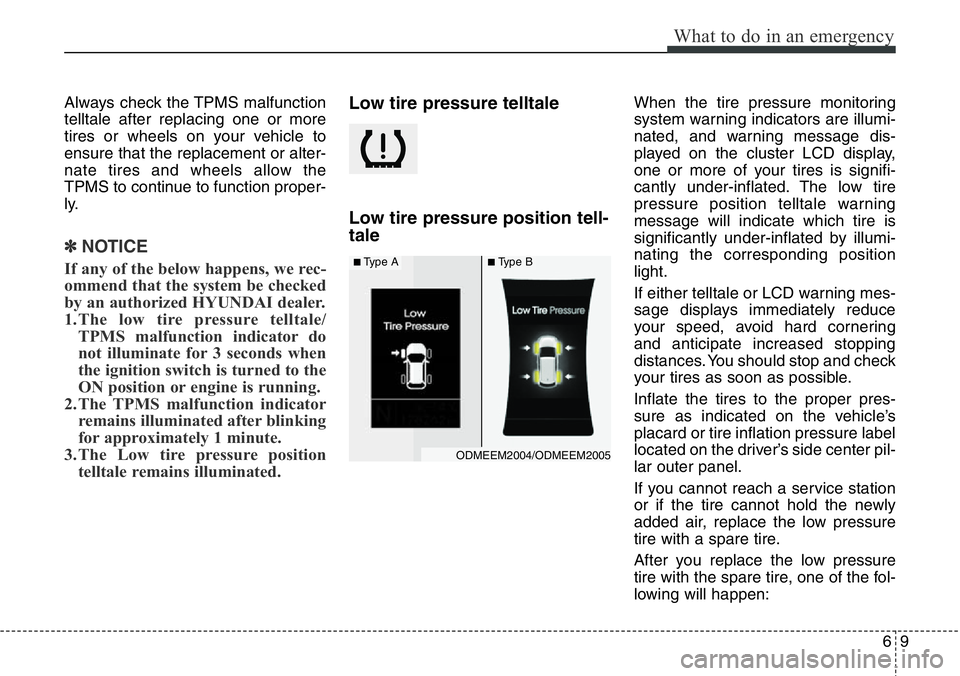
Low tire pressure telltale
Low tire pressure position tell-
taleWhen the tire pressure monitoring
system warning indicators are illumi-
nated, and warning message dis-
played on the cluster LCD display,
one or more of your tires is signifi-
cantly under-inflated. The low tire
pressure position telltale warning
message will indicate which tire is
significantly under-inflated by illumi-
nating the corresponding position
light.
If either telltale or LCD warning mes-
sage displays immediately reduce
your speed, avoid hard cornering
and anticipate increased stopping
distances. You should stop and check
your tires as soon as possible.
Inflate the tires to the proper pres-
sure as indicated on the vehicle’s
placard or tire inflation pressure label
located on the driver’s side center pil-
lar outer panel.
If you cannot reach a service station
or if the tire cannot hold the newly
added air, replace the low pressure
tire with a spare tire.
After you replace the low pressure
tire with the spare tire, one of the fol-
lowing will happen:
ODMEEM2004/ODMEEM2005
■Type A■Type B
Page 561 of 711
611
What to do in an emergency
TPMS (Tire Pressure
Monitoring System)
malfunction indicator
The TPMS malfunction indicator will
illuminate after it blinks for approxi-
mately one minute when there is a
problem with the Tire Pressure
Monitoring System.
We recommend that the system be
checked by an authorized HYUNDAI
dealer to determine the cause of the
problem.
✽NOTICE
If there is a malfunction with the
TPMS, the low tire pressure position
telltale will not be displayed even
though the vehicle has an under-
inflated tire.
Changing a tire with TPMS
If you have a flat tire, the low Tire
Pressure and Position telltales will
come on. We recommend that the
system be checked by an authorized
HYUNDAI dealer.
Each wheel is equipped with a tire
pressure sensor mounted inside the
tire behind the valve stem. You must
use TPMS specific wheels. It is rec-
ommended that you have your tires
serviced by an authorized HYUNDAI
dealer.If you drive the vehicle for about 10
minutes at speeds above 25 km/h
after replaceing the low pressure tire
with the spare tire, one of the follow-
ing will happen:
• The TPMS malfunction indicator
may blink for approximately 1
minute and then remain continu-
ously illuminated because the
TPMS sensor is not mounted on
the spare wheel. (changed tire
equipped with a sensor not in the
vehicle)
• The TPMS malfunction indicator
will remain continuously illuminat-
ed while driving because the
TPMS sensor is not mounted on
the spare wheel. (changed tire
equipped with a sensor in the vehi-
cle)
CAUTION
We recommend that you use the
sealant approved by HYUNDAI.
The sealant on the tire pressure
sensor and wheel shall be elem-
inated when you replace the tire
with a new one.