Page 128 of 711
427
Features of your vehicle
(1) Driver’s door power window
switch
(2) Front passenger’s door power
window switch
(3) Rear door (left) power window
switch
(4) Rear door (right) power window
switch
(5) Window opening and closing
(6) Automatic power window
up*/down*
(7) Power window lock switch
*: if equipped
✽NOTICE
In cold and wet climates, power win-
dows may not work properly due to
freezing conditions.
WINDOWS
ODM042019
Page 129 of 711
Features of your vehicle
28 4
Power windows
The ignition switch must be in the ON
position for power windows to oper-
ate. Each door has a power window
switch that controls the door’s win-
dow. The driver’s door has a master
power window switch that controls all
the windows in the vehicle. Also, the
driver has a power window lock
switch which can block the operation
of rear passenger windows.
The power windows can be operated
for approximately 30 seconds after
the ignition key is removed or turned
to the ACC or LOCK position.
However, if the front doors are
opened, the power windows cannot
be operated even within the 30 sec-
onds period.
✽NOTICE
While driving with the rear windows
down or with the sunroof (if
equipped) in an open (or partially
open position), your vehicle may
demonstrate a wind buffeting or
pulsation noise. This noise is a nor-
mal occurrence and can be reduced
or eliminated by taking the follow-
ing actions. If the noise occurs with
one or both of the rear windows
down, partially lower both front
windows approximately one inch.
If you experience the noise with the
sunroof open, slightly reduce the
size of the sunroof opening.
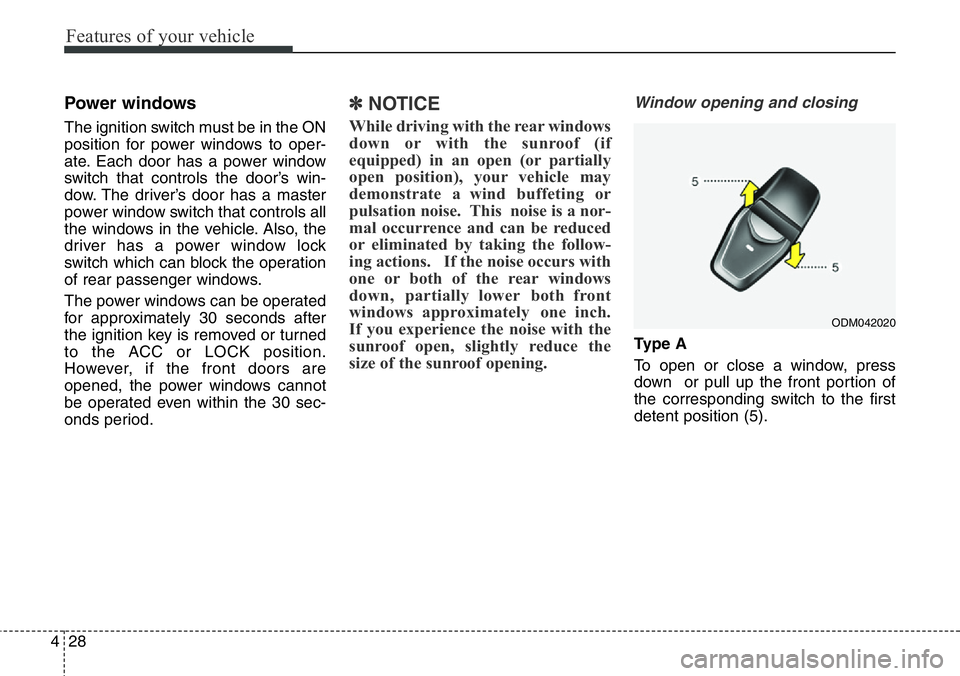
Window opening and closing
Ty p e A
To open or close a window, press
down or pull up the front portion of
the corresponding switch to the first
detent position (5).
ODM042020
Page 131 of 711
Features of your vehicle
30 4
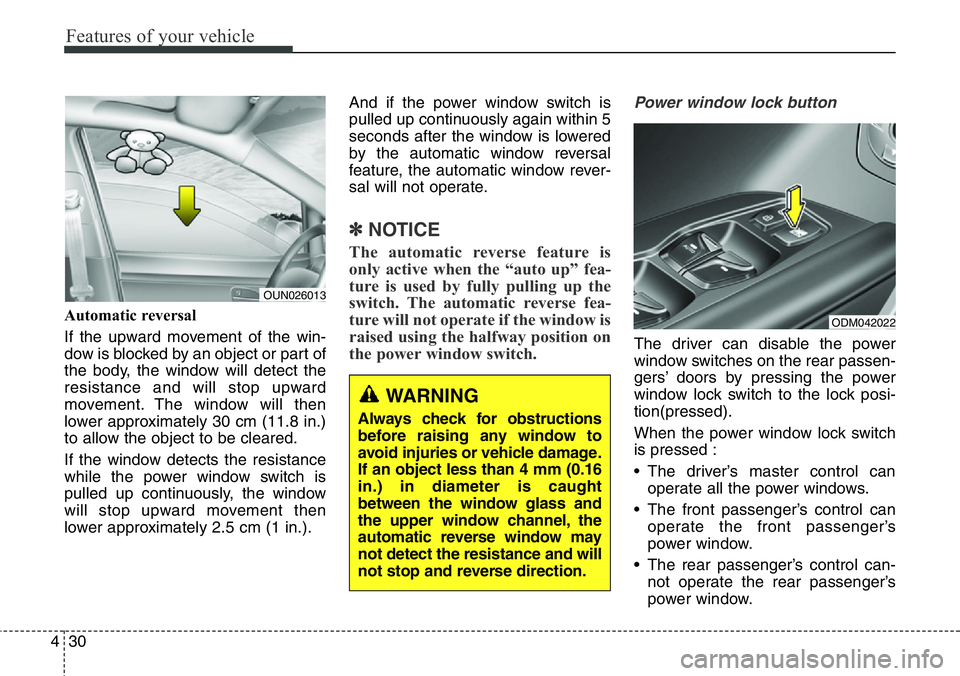
Automatic reversal
If the upward movement of the win-
dow is blocked by an object or part of
the body, the window will detect the
resistance and will stop upward
movement. The window will then
lower approximately 30 cm (11.8 in.)
to allow the object to be cleared.
If the window detects the resistance
while the power window switch is
pulled up continuously, the window
will stop upward movement then
lower approximately 2.5 cm (1 in.).And if the power window switch is
pulled up continuously again within 5
seconds after the window is lowered
by the automatic window reversal
feature, the automatic window rever-
sal will not operate.
✽NOTICE
The automatic reverse feature is
only active when the “auto up” fea-
ture is used by fully pulling up the
switch. The automatic reverse fea-
ture will not operate if the window is
raised using the halfway position on
the power window switch.
Power window lock button
The driver can disable the power
window switches on the rear passen-
gers’ doors by pressing the power
window lock switch to the lock posi-
tion(pressed).
When the power window lock switch
is pressed :
• The driver’s master control can
operate all the power windows.
• The front passenger’s control can
operate the front passenger’s
power window.
• The rear passenger’s control can-
not operate the rear passenger’s
power window.
WARNING
Always check for obstructions
before raising any window to
avoid injuries or vehicle damage.
If an object less than 4 mm (0.16
in.) in diameter is caught
between the window glass and
the upper window channel, the
automatic reverse window may
not detect the resistance and will
not stop and reverse direction.
ODM042022
OUN026013
Page 132 of 711
431
Features of your vehicle
WARNING - Windows
• NEVER leave the keys in your
vehicle with unsupervised
children, when the engine is
running.
• NEVER leave any child unat-
tended in the vehicle. Even
very young children may inad-
vertently cause the vehicle to
move, entangle themselves in
the windows, or otherwise
injure themselves or others.
• Always double check to make
sure all arms, hands, head
and other obstructions are
safely out of the way before
closing a window.
• Do not allow children to play
with the power windows. Keep
the driver’s door power win-
dow lock switch in the LOCK
position (pressed). Serious
injury can result from uninten-
tional window operation by
the child.
• Do not extend face or arms
outside the window while
driving.CAUTION
• To prevent possible damage
to the power window system,
do not open or close two win-
dows or more at the same
time. This will also ensure the
longevity of the fuse.
• Never try to operate the main
switch on the driver's door
and the individual door win-
dow switch in opposing direc-
tions at the same time. If this
is done, the window will stop
and cannot be opened or
closed.
Page 135 of 711
Features of your vehicle
34 4
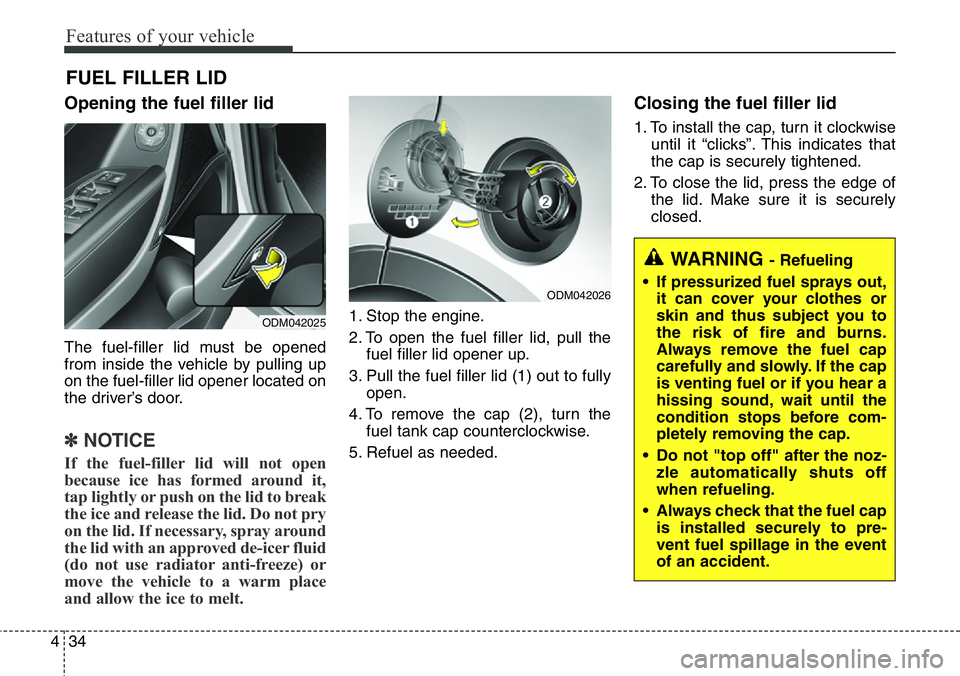
Opening the fuel filler lid
The fuel-filler lid must be opened
from inside the vehicle by pulling up
on the fuel-filler lid opener located on
the driver’s door.
✽NOTICE
If the fuel-filler lid will not open
because ice has formed around it,
tap lightly or push on the lid to break
the ice and release the lid. Do not pry
on the lid. If necessary, spray around
the lid with an approved de-icer fluid
(do not use radiator anti-freeze) or
move the vehicle to a warm place
and allow the ice to melt.
1. Stop the engine.
2. To open the fuel filler lid, pull the
fuel filler lid opener up.
3. Pull the fuel filler lid (1) out to fully
open.
4. To remove the cap (2), turn the
fuel tank cap counterclockwise.
5. Refuel as needed.
Closing the fuel filler lid
1. To install the cap, turn it clockwise
until it “clicks”. This indicates that
the cap is securely tightened.
2. To close the lid, press the edge of
the lid. Make sure it is securely
closed.
FUEL FILLER LID
ODM042025
ODM042026
WARNING - Refueling
• If pressurized fuel sprays out,
it can cover your clothes or
skin and thus subject you to
the risk of fire and burns.
Always remove the fuel cap
carefully and slowly. If the cap
is venting fuel or if you hear a
hissing sound, wait until the
condition stops before com-
pletely removing the cap.
• Do not "top off" after the noz-
zle automatically shuts off
when refueling.
• Always check that the fuel cap
is installed securely to pre-
vent fuel spillage in the event
of an accident.
Page 155 of 711
Features of your vehicle
54 4
Left or Right: When the outside
rearview mirror con-
trol switch is in the L
(Left) or R (Right)
position, both outside
rearview mirrors will
move downward.
Neutral: When the outside rearview
mirror control switch is in
the neutral (center) posi-
tion, the outside rearview
mirrors will not operate.
✽NOTICE
The outside rearview mirrors will
automatically revert to their original
positions under the following condi-
tions:
• When the ignition switch or engine
start/stop button is set to the ACC
or OFF position.
• When the shift lever is moved to
any position except the R
(Reverse) position.
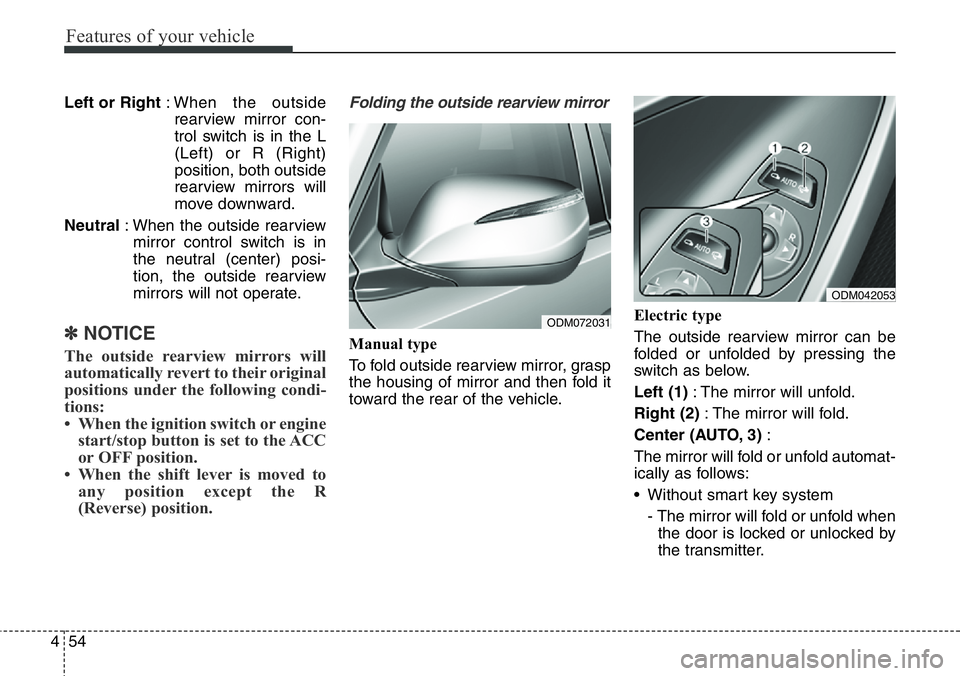
Folding the outside rearview mirror
Manual type
To fold outside rearview mirror, grasp
the housing of mirror and then fold it
toward the rear of the vehicle.Electric type
The outside rearview mirror can be
folded or unfolded by pressing the
switch as below.
Left (1): The mirror will unfold.
Right (2): The mirror will fold.
Center (AUTO, 3):
The mirror will fold or unfold automat-
ically as follows:
• Without smart key system
- The mirror will fold or unfold when
the door is locked or unlocked by
the transmitter.
ODM072031
ODM042053
Page 156 of 711
455
Features of your vehicle
• With smart key system
- The mirror will fold or unfold when
the door is locked or unlocked by
the smart key.
- The mirror will fold or unfold when
the door is locked or unlocked by
the button on the outside door
handle.
- The mirror will unfold when you
approach the vehicle (all doors
closed and locked) with a smart
key in possession. (if equipped)
CAUTION
In case it is an electric type out-
side rearview mirror, don’t fold it
by hand. It could cause motor
failure.
CAUTION
The electric type outside
rearview mirror operates even
though the ignition switch is in
the OFF position. However, to
prevent unnecessary battery
discharge, do not adjust the
mirrors longer than necessary
while the engine is not running.
Page 169 of 711
Features of your vehicle
68 4
Service in OFF
If the service interval is not set,
“Service in OFF” message is dis-
played on the LCD display.
✽NOTICE
If any of the following conditions
occurs, the mileage and days may be
incorrect.
- The battery cable is disconnected.
- The fuse switch is turned off.
- The battery is discharged.
User Settings Mode
Description
On this mode, you can change set-
ting of the doors, lamps, and so on.
Door
Auto Door Lock (if equipped)
• Off:
The auto door lock operation will
be deactivated.
• Speed:
All doors will be automatically
locked when the vehicle speed
exceeds 15km/h (9.3mph).
• Shift Lever:
All doors will be automatically
locked if the automatic transaxle
shift lever is shifted from the P
(Park) position to the R (Reverse),
N (Neutral), or D (Drive) position.
ODMEDI2068/ODMEDI2072 ■Type A
■Type B
ODMEDI2025/ODMEDI2054 ■Type A
■Type B