2014 HYUNDAI IX35 ignition
[x] Cancel search: ignitionPage 1151 of 1534
Features of your vehicle
80
4
4WD LOCK indicator
(if equipped)
The 4WD LOCK indicator light is illumi-
nated when the 4WD LOCK button is
pushed. The purpose of this 4WD LOCK
mode is to increase the drive power
when driving on wet pavement, snow-
covered roads and/or off-road.The 4WD
LOCK indicator light is turned off by
pushing the button again.
Engine coolant tempera-ture warning light (if equipped)
The warning light illuminates if the tem-
perature of the engine coolant is above120±3°C (248±5.4°F).
Do not continue driving with an overheat-
ed engine. If your vehicle overheats, refer
to “Overheating” in section 6.
✽✽ NOTICE
If the engine coolant temperature warn- ing light illuminates, it indicates over-heating that may damage the engine.
Electronic power steering (EPS) system warninglight (if equipped)
This indicator light comes on after the
ignition key is turned to the ON positionand then it will go out. This light also comes on when the EPS
has some troubles. If it comes on whilst
driving, we recommend that the system
be inspected by a HYUNDAI authorised
repairer.
CAUTION
Do not use 4WD LOCK mode on drypaved roads or motorway, it can cause noise, vibration or damage of4WD related parts.
EL(FL) UK 4A.QXP 8/5/2013 6:42 PM Page 80
Page 1153 of 1534
Features of your vehicle
82
4
Operating condition
This system will activate when backing
up with the ignition switch ON.
If the vehicle is moving at a speed over
10 km/h (6 mph), the system may not
be activated correctly.
This system will activate when the indi- cator on the rear parking assist OFF
button is not illuminated. If you desire
to deactivate the rear parking assist
system, press the rear parking assist
OFF button again. (The indicator on
the button will illuminate.) To turn the
system on, press the button again.
(The indicator on the button will go off.)
The sensing distance whilst the rear parking assist system is in operation is
approximately 120 cm (47 in.).
When more than two objects are sensed at the same time, the closest
one will be recognized first.
Types of warning sound
When an object is 120 cm to 61 cm(47.2 in. to 24 in.) from the rear bumper:
Buzzer beeps intermittently.
When an object is 60 cm to 31 cm (23.6 in. to 12.2 in.) from the rear bumper:
Buzzer beeps more frequently.
When an object is within 30 cm (11.8 in.) of the rear bumper:
Buzzer sounds continuously.WARNING
The rear parking assist system is a
supplementary function only. Theoperation of the rear parking assist
system can be affected by several
factors (including environmental
conditions). It is the responsibility
of the driver to always check the
area behind the vehicle before and
whilst backing up.
EL(FL) UK 4A.QXP 8/5/2013 6:42 PM Page 82
Page 1156 of 1534
485
Features of your vehicle
Front/Rear parking assist system type (if equipped)
The front/rear parking assist system
detects the object distance by using the
front/rear sensor and front side sensor.
When you select the smart parking assist
system*, the front/rear parking assist
system will be operated.When it is the step controlling the steer-
ing wheel if you cancel the front/rear
parking assist system, the smart parkingassist system will be cancelled.
Operating condition
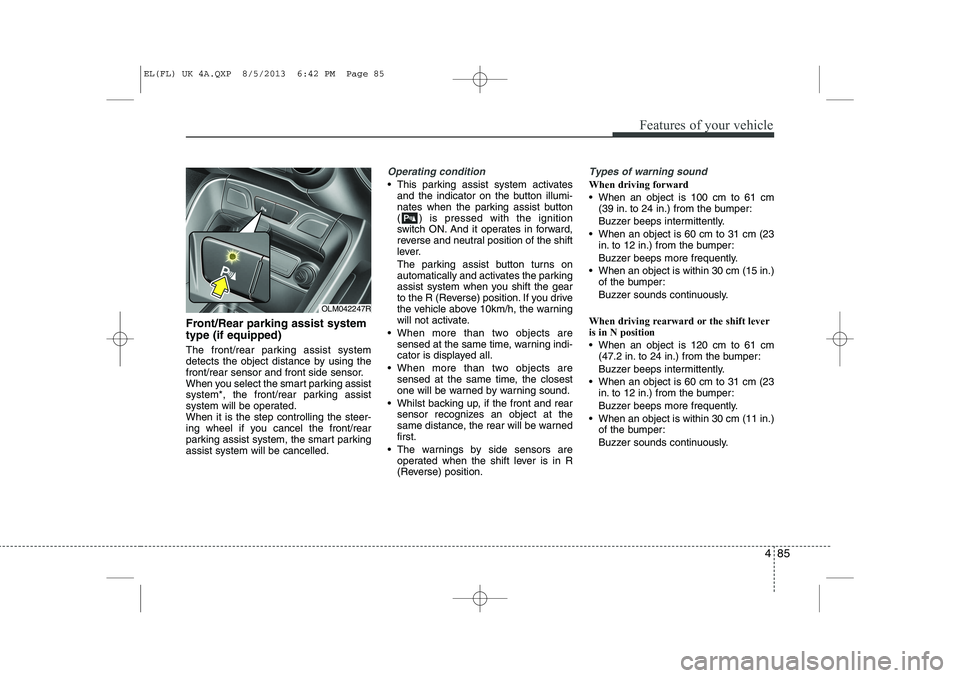
This parking assist system activatesand the indicator on the button illumi-
nates when the parking assist button
( ) is pressed with the ignition
switch ON. And it operates in forward,
reverse and neutral position of the shift
lever.
The parking assist button turns on
automatically and activates the parking
assist system when you shift the gear
to the R (Reverse) position. If you drive
the vehicle above 10km/h, the warning
will not activate.
When more than two objects are sensed at the same time, warning indi-
cator is displayed all.
When more than two objects are sensed at the same time, the closest
one will be warned by warning sound.
Whilst backing up, if the front and rear sensor recognizes an object at the
same distance, the rear will be warnedfirst.
The warnings by side sensors are operated when the shift lever is in R
(Reverse) position.
Types of warning sound
When driving forward
When an object is 100 cm to 61 cm (39 in. to 24 in.) from the bumper:
Buzzer beeps intermittently.
When an object is 60 cm to 31 cm (23 in. to 12 in.) from the bumper:
Buzzer beeps more frequently.
When an object is within 30 cm (15 in.) of the bumper:
Buzzer sounds continuously.
When driving rearward or the shift lever is in N position
When an object is 120 cm to 61 cm (47.2 in. to 24 in.) from the bumper:
Buzzer beeps intermittently.
When an object is 60 cm to 31 cm (23 in. to 12 in.) from the bumper:
Buzzer beeps more frequently.
When an object is within 30 cm (11 in.) of the bumper:
Buzzer sounds continuously.
OLM042247R
EL(FL) UK 4A.QXP 8/5/2013 6:42 PM Page 85
Page 1169 of 1534
Features of your vehicle
98
4
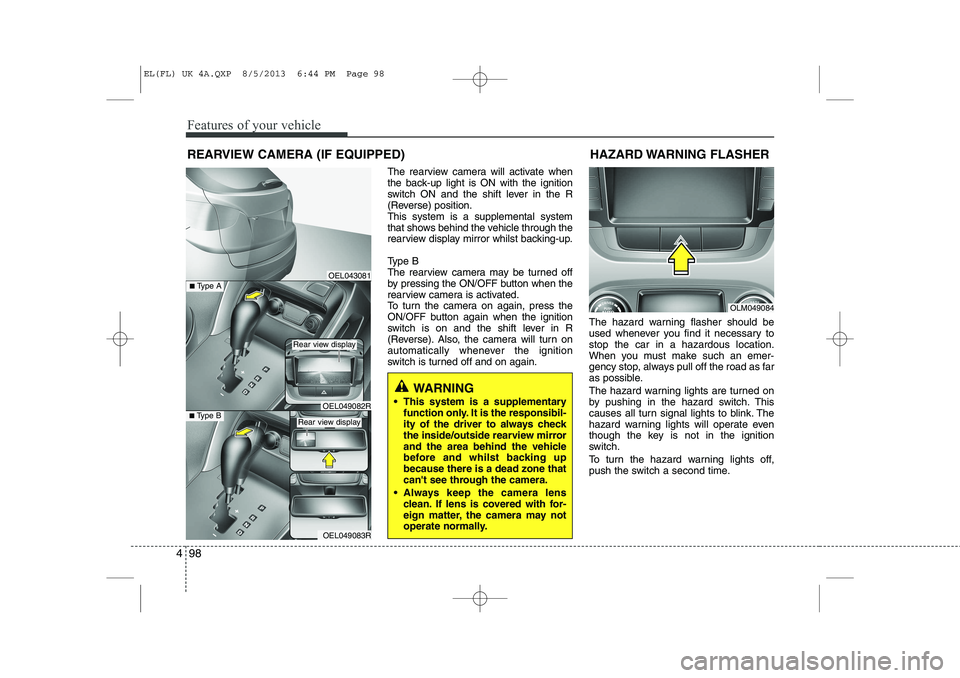
The rearview camera will activate when
the back-up light is ON with the ignition
switch ON and the shift lever in the R
(Reverse) position.This system is a supplemental system
that shows behind the vehicle through the
rearview display mirror whilst backing-up.
Type B
The rearview camera may be turned off
by pressing the ON/OFF button when the
rearview camera is activated.
To turn the camera on again, press the
ON/OFF button again when the ignition
switch is on and the shift lever in R
(Reverse). Also, the camera will turn on
automatically whenever the ignition
switch is turned off and on again. The hazard warning flasher should be
used whenever you find it necessary tostop the car in a hazardous location.
When you must make such an emer-
gency stop, always pull off the road as far
as possible.
The hazard warning lights are turned on
by pushing in the hazard switch. This
causes all turn signal lights to blink. The
hazard warning lights will operate even
though the key is not in the ignition
switch.
To turn the hazard warning lights off,
push the switch a second time.
REARVIEW CAMERA (IF EQUIPPED)
WARNING
This system is a supplementary function only. It is the responsibil-
ity of the driver to always check
the inside/outside rearview mirror
and the area behind the vehicle
before and whilst backing upbecause there is a dead zone that
can't see through the camera.
Always keep the camera lens clean. If lens is covered with for-
eign matter, the camera may not
operate normally.
OEL043081
OLM049084
HAZARD WARNING FLASHER
OEL049083R
■
Type BOEL049082R
■Type A
Rear view display
Rear view display
EL(FL) UK 4A.QXP 8/5/2013 6:44 PM Page 98
Page 1170 of 1534
499
Features of your vehicle
Battery saver function
The purpose of this feature is to pre-vent the battery from being dis-
charged. The system automatically
turns off the parking lights when the
driver removes the ignition key and
opens the driver- side door.
With this feature, the parking lights will be turned off automatically if the driver
parks on the side of road at night.
If necessary, to keep the lights on
when the ignition key is removed, per-
form the following :
1) Open the driver-side door.
2) Turn the parking lights OFF and ON again using the light switch on the
steering column. Headlight escort function (if equipped) IThe headlights (and/or taillights) remain
on for approximately 5 minutes after the
ignition key is removed or turned to the
ACC or LOCK position. However, if the
driver’s door is opened and closed, the
headlights are turned off after 15 sec-
onds.
The headlights can be turned off by
pressing the lock button on the transmit-
ter (or smart key) twice or turning off the
light switch from the headlight or Autolight position.
Headlight welcome function (if equipped)
When the headlight switch is in the ON or
AUTO position and all doors (and tail-
gate) are closed and locked, if you press
the door unlock button on the transmitter
(or smart key), the headlights will come
on for about 15 seconds.
If the headlight switch is in the AUTO
position, the function can only operate atnight.
At this time, if you press the door unlock
button again or door lock button on the
transmitter (or smart key), the headlights
will turn off immediately.
LIGHTING
CAUTION
If the driver gets out of the vehicle
through other doors (except dri-ver’s door), the battery saver func- tion does not operate and the head- light escort function does not turn
off automatically. Therefore, it caus- es the battery to be discharged. In this case, make sure to turn off thelamp before getting out of the vehi-
cle.
EL(FL) UK 4A.QXP 8/5/2013 6:44 PM Page 99
Page 1171 of 1534
Features of your vehicle
100
4
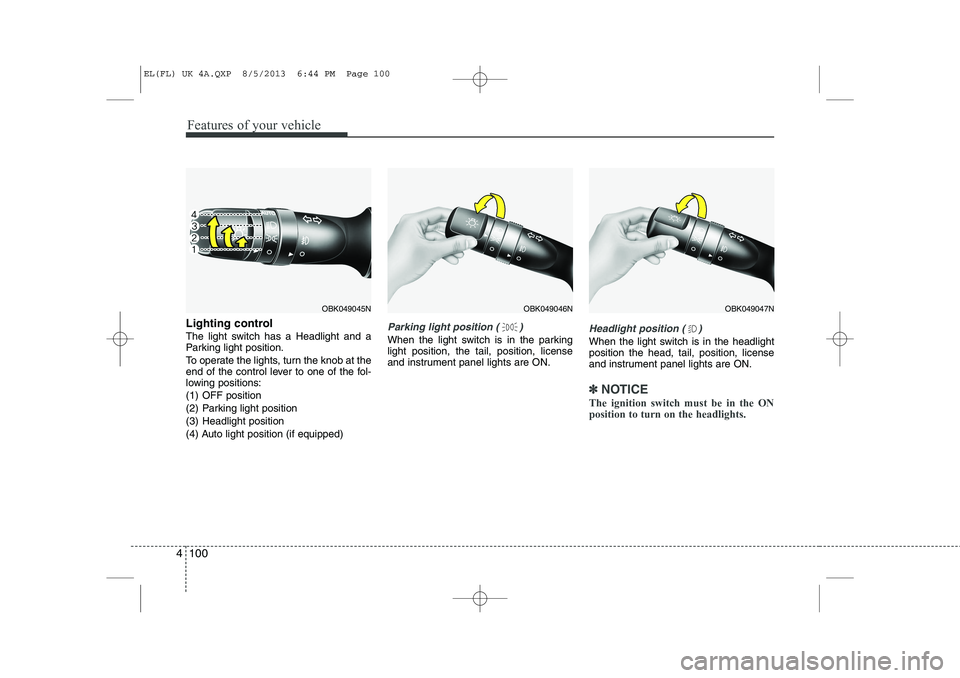
Lighting control
The light switch has a Headlight and a
Parking light position.
To operate the lights, turn the knob at the
end of the control lever to one of the fol-
lowing positions:
(1) OFF position
(2) Parking light position
(3) Headlight position
(4) Auto light position (if equipped)Parking light position ( )
When the light switch is in the parking light position, the tail, position, license
and instrument panel lights are ON.Headlight position ( )
When the light switch is in the headlight position the head, tail, position, license
and instrument panel lights are ON.
✽✽
NOTICE
The ignition switch must be in the ON position to turn on the headlights.
OBK049047NOBK049046NOBK049045N
EL(FL) UK 4A.QXP 8/5/2013 6:44 PM Page 100
Page 1173 of 1534
Features of your vehicle
102
4
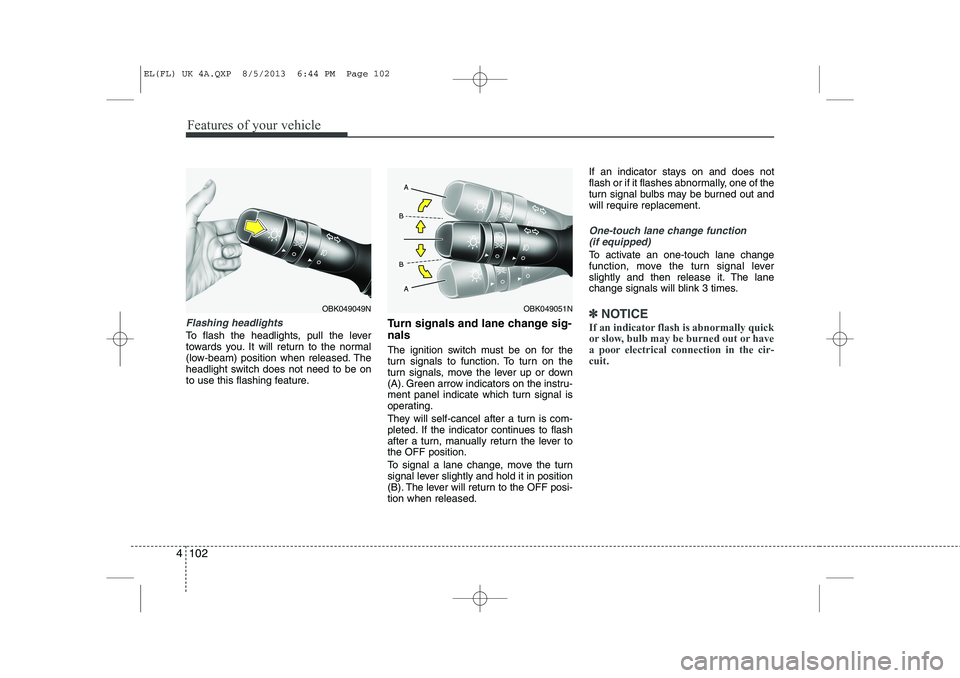
Flashing headlights
To flash the headlights, pull the lever
towards you. It will return to the normal
(low-beam) position when released. The
headlight switch does not need to be on
to use this flashing feature. Turn signals and lane change sig- nals
The ignition switch must be on for the
turn signals to function. To turn on the
turn signals, move the lever up or down
(A). Green arrow indicators on the instru-
ment panel indicate which turn signal is
operating.
They will self-cancel after a turn is com-
pleted. If the indicator continues to flash
after a turn, manually return the lever tothe OFF position.
To signal a lane change, move the turn
signal lever slightly and hold it in position
(B). The lever will return to the OFF posi-tion when released.If an indicator stays on and does not
flash or if it flashes abnormally, one of the
turn signal bulbs may be burned out andwill require replacement.
One-touch lane change function
(if equipped)
To activate an one-touch lane change
function, move the turn signal lever
slightly and then release it. The lane
change signals will blink 3 times.
✽✽ NOTICE
If an indicator flash is abnormally quick
or slow, bulb may be burned out or have
a poor electrical connection in the cir-cuit.OBK049051NOBK049049N
EL(FL) UK 4A.QXP 8/5/2013 6:44 PM Page 102
Page 1174 of 1534
4 103
Features of your vehicle
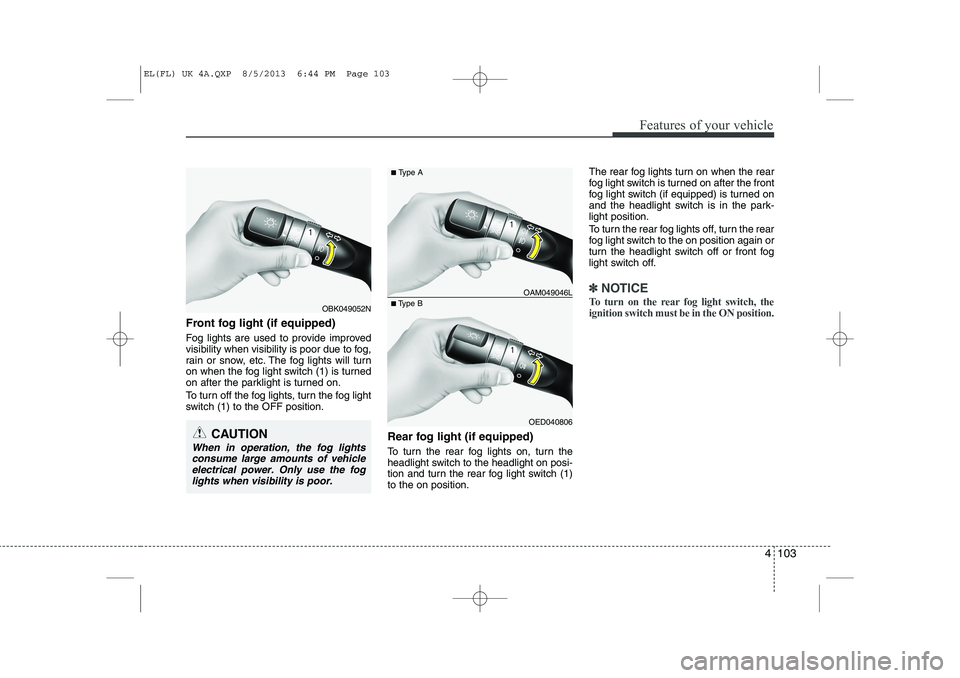
Front fog light (if equipped)
Fog lights are used to provide improved
visibility when visibility is poor due to fog,
rain or snow, etc. The fog lights will turn
on when the fog light switch (1) is turned
on after the parklight is turned on.
To turn off the fog lights, turn the fog light
switch (1) to the OFF position.Rear fog light (if equipped)
To turn the rear fog lights on, turn the
headlight switch to the headlight on posi-
tion and turn the rear fog light switch (1)to the on position.The rear fog lights turn on when the rear
fog light switch is turned on after the front
fog light switch (if equipped) is turned on
and the headlight switch is in the park-light position.
To turn the rear fog lights off, turn the rear
fog light switch to the on position again or
turn the headlight switch off or front fog
light switch off.
✽✽
NOTICE
To turn on the rear fog light switch, the ignition switch must be in the ON position.
OED040806
■
Type B OAM049046L
■
Type A
OBK049052N
CAUTION
When in operation, the fog lights
consume large amounts of vehicle electrical power. Only use the foglights when visibility is poor.
EL(FL) UK 4A.QXP 8/5/2013 6:44 PM Page 103