2014 HYUNDAI IX35 reset
[x] Cancel search: resetPage 138 of 1534

Features of your vehicle
66
4
Average Fuel Economy (2)
The average fuel economy is calculat-
ed by the total driving distance and fuel
consumption since the last average fuel
economy reset.
- Fuel economy range: 0.0 ~ 99.9L/100km or MPG
The average fuel economy can be reset both manually and automatically.
Manual reset
To clear the average fuel economy manu-
ally, press the trip b utton (Type A : TRIP,
Type B : )
for more than 1 second
when the average fuel economy is dis-
played. Automatic reset
The average fuel economy will be
cleared to zero (---) when the vehicle
speed exceeds 1 km/h after refuellingmore than 6 litres (1.6 gallons).
✽✽
NOTICE
The average fuel economy is not dis-
played for more accurate calculation if
the vehicle does not drive more than 10
seconds or 50 meters (0.03 miles) since
the ignition switch or Engine Start/Stopbutton is turned to ON.
Instant Fuel Economy (3)
This mode displays the instant fuel economy during the last few seconds
when the vehicle speed is more than10 km/h (6.2 MPH).
- Fuel economy range:
Type A : 0 ~ 99.9 L/100 km or MPG
Type B : 0 ~ 30 L/100 km or 0 ~ 50 MPG
EL(FL) Aust 4a.QXP 7/26/2013 2:35 PM Page 66
Page 189 of 1534

4 117
Features of your vehicle
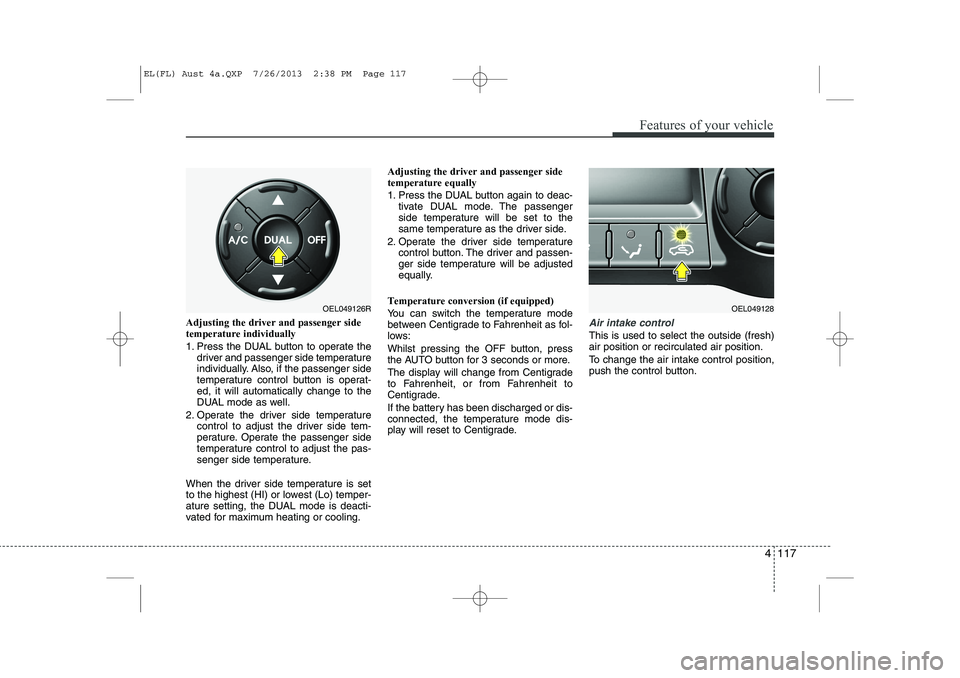
Adjusting the driver and passenger side temperature individually
1. Press the DUAL button to operate thedriver and passenger side temperature
individually. Also, if the passenger side
temperature control button is operat-ed, it will automatically change to the
DUAL mode as well.
2. Operate the driver side temperature control to adjust the driver side tem-
perature. Operate the passenger side
temperature control to adjust the pas-
senger side temperature.
When the driver side temperature is set
to the highest (HI) or lowest (Lo) temper-
ature setting, the DUAL mode is deacti-
vated for maximum heating or cooling. Adjusting the driver and passenger sidetemperature equally
1. Press the DUAL button again to deac-
tivate DUAL mode. The passenger
side temperature will be set to the
same temperature as the driver side.
2. Operate the driver side temperature control button. The driver and passen-
ger side temperature will be adjusted
equally.
Temperature conversion (if equipped)
You can switch the temperature mode
between Centigrade to Fahrenheit as fol-
lows:
Whilst pressing the OFF button, press
the AUTO button for 3 seconds or more.
The display will change from Centigrade
to Fahrenheit, or from Fahrenheit to
Centigrade.
If the battery has been discharged or dis-
connected, the temperature mode dis-
play will reset to Centigrade.Air intake control
This is used to select the outside (fresh) air position or recirculated air position.
To change the air intake control position,
push the control button.
OEL049126ROEL049128
EL(FL) Aust 4a.QXP 7/26/2013 2:38 PM Page 117
Page 201 of 1534

4 129
Features of your vehicle
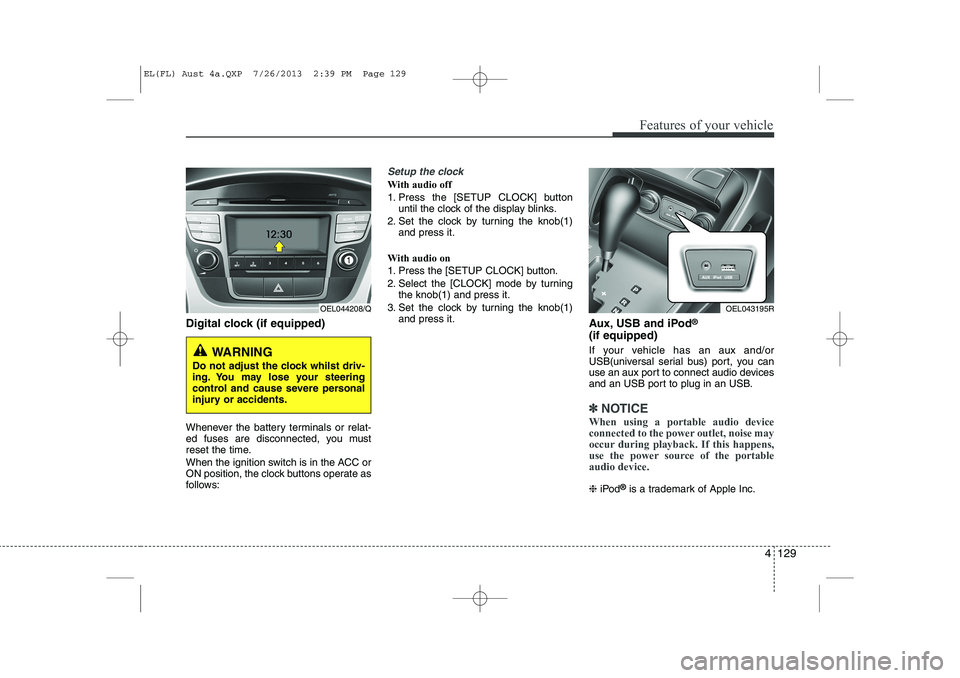
Digital clock (if equipped)
Whenever the battery terminals or relat-
ed fuses are disconnected, you must
reset the time.
When the ignition switch is in the ACC or
ON position, the clock buttons operate as
follows:
Setup the clock
With audio off
1. Press the [SETUP CLOCK] buttonuntil the clock of the display blinks.
2. Set the clock by turning the knob(1) and press it.
With audio on
1. Press the [SETUP CLOCK] button.
2. Select the [CLOCK] mode by turning the knob(1) and press it.
3. Set the clock by turning the knob(1) and press it. Aux, USB and iPod®
(if equipped)
If your vehicle has an aux and/or
USB(universal serial bus) port, you can
use an aux port to connect audio devices
and an USB port to plug in an USB.
✽✽ NOTICE
When using a portable audio device
connected to the power outlet, noise may
occur during playback. If this happens,
use the power source of the portableaudio device.
❈ iPod ®
is a trademark of Apple Inc.
OEL044208/Q
WARNING
Do not adjust the clock whilst driv-
ing. You may lose your steering
control and cause severe personal
injury or accidents.
OEL043195R
EL(FL) Aust 4a.QXP 7/26/2013 2:39 PM Page 129
Page 254 of 1534

549
Driving your vehicle
Each of these actions will cancel cruisecontrol operation (the SET indicator lightin the instrument cluster will go off), but itwill not turn the system off. If you wish to
resume cruise control operation, moveup the lever (to RES+) located on yoursteering wheel. You will return to your
previously preset speed.
To resume cruising speed at
more than approximately 40 km/h(25 mph):
If any method other than the cruise
ON/OFF symbol switch was used to can-
cel cruising speed and the system is still
activated, the most recent set speed will
automatically resume when you move
the lever (1) up (to RES+).
It will not resume, however, if the vehicle
speed has dropped below approximately40 km/h (25 mph). To turn cruise control off, do one
of the following:
Push the Cruise ON-OFF symbol but-
ton (the Cruise indicator light in the
instrument cluster will go off).
Turn the ignition off.
Both of these actions cancel cruise con- trol operation. If you want to resume cruise control operation, repeat the stepsprovided in “To set cruise control speed”
on the previous page.
OEL059032OEL059031
EL(FL) Aust 5.QXP 7/26/2013 2:09 PM Page 49
Page 333 of 1534

739
Maintenance
Battery recharging
Your vehicle has a maintenance-free,
calcium-based battery.
If the battery becomes discharged in ashort time (because, for example, the
headlights or interior lights were left on
whilst the vehicle was not in use),
recharge it by slow charging (trickle)
for 10 hours.
If the battery gradually discharges because of high electric load whilst the
vehicle is being used, recharge it at 20-
30A for two hours. Reset items
Items should be reset after the battery
has been discharged or the battery hasbeen disconnected.
Auto up/down window (See section 4)
Sunroof (See section 4)
Trip computer (See section 4)
Climate control system
(See section 4)
Clock (See section 4)
Audio (See section 4)(Continued)
Before performing maintenance or recharging the battery, turn off all accessories and stop the
engine.
The negative battery cable must be removed first and installed
last when the battery is discon-nected.WARNING - Recharging
battery
When recharging the battery,
observe the following precautions:
The battery must be removed from the vehicle and placed in an area with good ventilation.
Do not allow cigarettes, sparks, or flame near the battery.
Watch the battery during charg- ing, and stop or reduce the charg-
ing rate if the battery cells begin
gassing (boiling) violently or if
the temperature of the electrolyte
of any cell exceeds 49°C (120°F).
Wear eye protection when check- ing the battery during charging.
Disconnect the battery charger in the following order.
1. Turn off the battery charger main switch.
2. Unhook the negative clamp from the negative battery ter- minal.
3. Unhook the positive clamp from the positive battery termi-nal.
(Continued)
EL(FL) Aust 7.QXP 7/26/2013 2:24 PM Page 39
Page 338 of 1534

Maintenance
44
7
Wheel alignment and tyre balance
The wheels on your vehicle were aligned and balanced carefully at the
factory to give you the longest tyre
life and best overall performance.
In most cases, you will not need to
have your wheels aligned again.
However, if you notice unusual tyre
wear or your vehicle pulling one way
or the other, the alignment may needto be reset.
If you notice your vehicle vibrating
when driving on a smooth road, your
wheels may need to be rebalanced. Tyre replacement
If the tyre is worn evenly, a tread
wear indicator will appear as a solid
band across the tread. This showsthere is less than 1.6 mm (1/16 in.) of
tread left on the tyre. Replace the
tyre when this happens.
Do not wait for the band to appear
across the entire tread before replac-
ing the tyre.
CAUTION
Improper wheel weights can
damage your vehicle's alu-minum wheels. Use only approved wheel weights.
WARNING - Replacing
tyres
Driving on worn-out tyres is very hazardous and will
reduce braking effectiveness,
steering accuracy, and trac-tion.
Your vehicle is equipped with tyres designed to provide for
safe ride and handling capa-
bility. Do not use a size andtype of tyre and wheel that is
different from the one that is
originally installed on your
vehicle. It can affect the safety
and performance of your vehi-
cle, which could lead to han-
dling failure or rollover and
serious injury. When replacing
the tyres, be sure to equip all
four tyres with the tyre and
wheel of the same size, type,
tread, brand and load-carrying
capacity.
(Continued)
OEN076053
Tread wear indicator
EL(FL) Aust 7.QXP 7/26/2013 2:24 PM Page 44
Page 429 of 1534

Safety features of your vehicle
4
3
(Continued)
When resetting the seatback to
the upright position, make sure it
is securely latched by pushing it
forward and backwards.WARNING - Rear seatbacks
The rear seatback must be securely latched. If not, passen-
gers and objects could be thrown
forward resulting in serious
injury or death in the event of a
sudden stop or collision.
Luggage and other cargo should be laid flat in the cargo area. If
objects are large, heavy, or must
be piled, they must be secured.
Under no circumstances should
cargo be piled higher than the
seatbacks. Failure to follow thesewarnings could result in serious
injury or death in the event of a
sudden stop, collision or rollover.
No passenger should ride in the cargo area or sit or lie on folded
seatbacks while the vehicle is
moving. All passengers must be
properly seated in seats and
restrained properly while riding.
(Continued)
WARNING
After adjusting the seat, always
check that it is securely locked into
place by attempting to move the
seat forward or backward without
using the lock release lever.
Sudden or unexpected movement
of the driver's seat could cause you
to lose control of the vehicle result-ing in an accident.
WARNING
Use extreme caution so that hands or other objects are not
caught in the seat mechanisms
while the seat is moving.
Do not put a cigarette lighter on the floor or seat. When you oper-
ate the seat, gas may gush out of
the lighter and cause fire.
EL(FL) Eng 3.QXP 7/11/2013 10:54 AM Page 4
Page 513 of 1534

423
Features of your vehicle
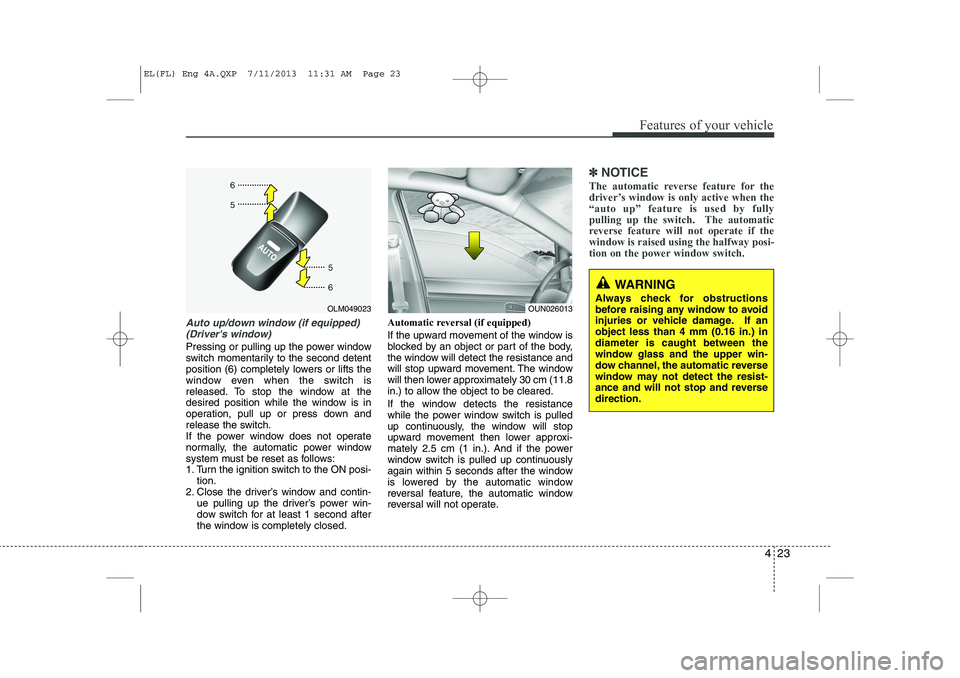
Auto up/down window (if equipped)(Driver's window)
Pressing or pulling up the power window
switch momentarily to the second detent
position (6) completely lowers or lifts the
window even when the switch is
released. To stop the window at the
desired position while the window is in
operation, pull up or press down and
release the switch.
If the power window does not operate
normally, the automatic power window
system must be reset as follows:
1. Turn the ignition switch to the ON posi- tion.
2. Close the driver’s window and contin- ue pulling up the driver’s power win-
dow switch for at least 1 second after
the window is completely closed. Automatic reversal (if equipped)
If the upward movement of the window is
blocked by an object or part of the body,
the window will detect the resistance and
will stop upward movement. The window
will then lower approximately 30 cm (11.8
in.) to allow the object to be cleared.
If the window detects the resistance
while the power window switch is pulled
up continuously, the window will stop
upward movement then lower approxi-
mately 2.5 cm (1 in.). And if the power
window switch is pulled up continuously
again within 5 seconds after the window
is lowered by the automatic window
reversal feature, the automatic window
reversal will not operate.
✽✽
NOTICE
The automatic reverse feature for the
driver’s window is only active when the
“auto up” feature is used by fully
pulling up the switch. The automatic
reverse feature will not operate if thewindow is raised using the halfway posi-
tion on the power window switch.
OLM049023OUN026013
WARNING
Always check for obstructions
before raising any window to avoid
injuries or vehicle damage. If anobject less than 4 mm (0.16 in.) indiameter is caught between the
window glass and the upper win-
dow channel, the automatic reverse
window may not detect the resist-
ance and will not stop and reversedirection.
EL(FL) Eng 4A.QXP 7/11/2013 11:31 AM Page 23