2014 HYUNDAI IX35 window
[x] Cancel search: windowPage 1063 of 1534
357
Safety features of your vehicle
(Continued)
Do not allow the passengers tolean their heads or bodies onto
doors, put their arms on the
doors, stretch their arms out of
the window, or place objects
between the doors and passen-
gers when they are seated onseats equipped with side and/or
curtain air bags.
Never try to open or repair any components of the side curtain
air bag system. We recommend
that the system be serviced by a
HYUNDAI authorised repairer.
Failure to follow the above men-tioned instructions can result in
injury or death to the vehicle occu-pants in an accident.
EL(FL) UK 3.QXP 8/5/2013 6:34 PM Page 57
Page 1075 of 1534
Features of your vehicle
4
4
Record your key number
The key code number is
stamped on the keycode tag attached to the
key set.
Should you lose your
keys, we recommend that you contact a
HYUNDAI authorised repairer. Remove
the key code tag and store it in a safe
place. Also, record the code number and
keep it in a safe and handy place, but not
in the vehicle. Key operations
• Used to start the engine.
Used to lock and unlock the doors.
Used to lock and unlock the glove box.
(if equipped)
KEYS
WARNING
- Ignition key
(Smart key)
Leaving children unattended in a
vehicle with the ignition key (Smart
key) is dangerous even if the key is
not in the ignition or start button is
ACC or ON position.
Children copy adults and they
could place the key in the ignition
or press the start button.
The ignition key (Smart key) would
enable children to operate power
windows or other controls, or even
make the vehicle move, which
could result in serious bodily injury
or even death.
Never leave the keys in your vehicle
with unsupervised children, whenthe engine is running.
WARNING
We recommend that you use parts
for replacement from a HYUNDAI
authorised repairer. If an aftermar-
ket key is used, the ignition switch
may not return to ON after START.
If this happens, the starter will con-
tinue to operate causing damage to
the starter motor and possible fire
due to excessive current in thewiring.
EL(FL) UK 4A.QXP 8/5/2013 6:38 PM Page 4
Page 1088 of 1534
417
Features of your vehicle
Deadlocks (if equipped)
Some vehicles are equipped with a
deadlocking system. Deadlocks preventopening of a door from either inside or
outside the vehicle once the deadlocks
have been activated providing an addi-
tional measure of vehicle security.
To lock the vehicle using the deadlock
function, the doors must be locked using
the (Smart) key or the Remote Keyless
Entry transmitter. To unlock the vehicle,
the (Smart) key or the transmitter mustagain be used.
WARNING - Doors
The doors should always be fully closed and locked whilst the
vehicle is in motion to prevent
accidental opening of the door.
Locked doors will also discour-
age potential intruders when the
vehicle stops or slows.
Be careful when opening doors and watch for vehicles, motorcy-
cles, bicycles or pedestrians
approaching the vehicle in the
path of the door. Opening a door
when something is approaching
can cause damage or injury.
WARNING
Do not lock the doors with the
(smart) key or the transmitter with
anybody left in the vehicle. The pas-
senger in the vehicle cannot unlock
the doors with the door lock button.
For example, if the door is locked
with the transmitter, the passenger
in the vehicle cannot unlock the
door without the transmitter.
WARNING - Unlocked
vehicles
Leaving your vehicle unlocked can
invite theft or possible harm to you
or others from someone hiding in
your vehicle whilst you are gone.
Always remove the ignition key,
engage the parking brake, close all
windows and lock all doors when
leaving your vehicle unattended.
WARNING - Unattended
children
An enclosed vehicle can become
extremely hot, causing death or
severe injury to unattended chil-dren or animals who cannot escape
the vehicle. Furthermore, children
might operate features of the vehi-
cle that could injure them, or they
could encounter other harm, possi-
bly from someone gaining entry to
the vehicle. Never leave children or
animals unattended in your vehicle.
EL(FL) UK 4A.QXP 8/5/2013 6:39 PM Page 17
Page 1092 of 1534
421
Features of your vehicle
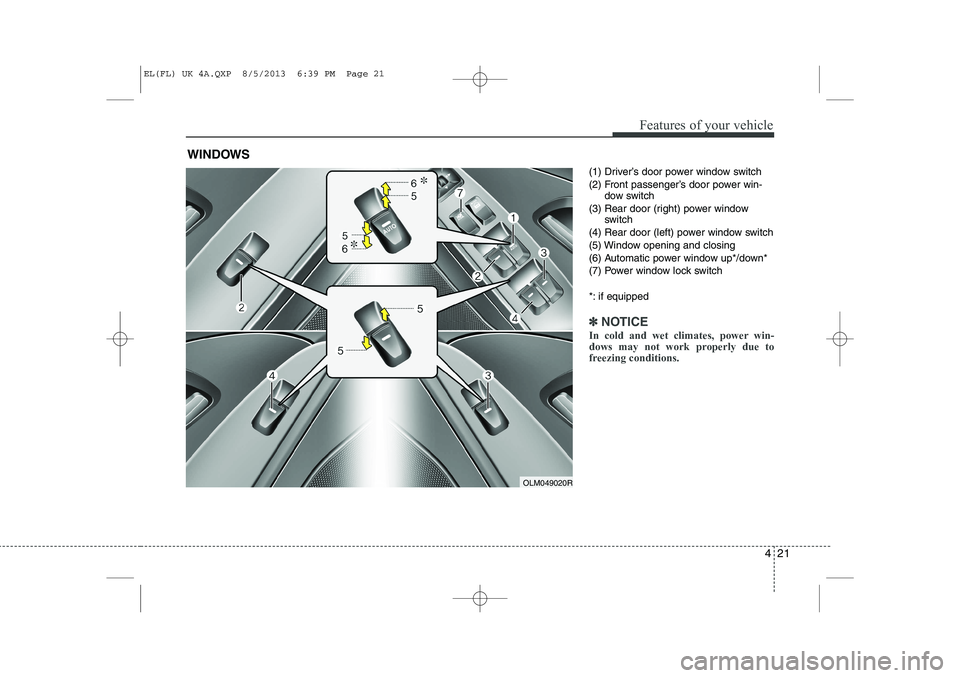
(1) Driver’s door power window switch
(2) Front passenger’s door power win-dow switch
(3) Rear door (right) power window switch
(4) Rear door (left) power window switch
(5) Window opening and closing
(6) Automatic power window up*/down*
(7) Power window lock switch
*: if equipped
✽✽ NOTICE
In cold and wet climates, power win-
dows may not work properly due to
freezing conditions.
WINDOWS
OLM049020R
EL(FL) UK 4A.QXP 8/5/2013 6:39 PM Page 21
Page 1093 of 1534
Features of your vehicle
22
4
Power windows
The ignition switch must be in the ON
position for power windows to operate.
Each door has a power window switch
that controls the door’s window. The driv-
er has a power window lock switch which
can block the operation of rear (or front)
passenger windows.
The power windows can be operated for
approximately 30 seconds after the igni-
tion key is removed or turned to the ACC
or LOCK position. However, if the front
doors are opened, the power windows
cannot be operated even within the 30
seconds period. The driver’s door has a
master power window switch that con-
trols all the windows in the vehicle.
✽✽
NOTICE
Whilst driving with the rear windows
down or with the sunroof (if equipped)
in an open (or partially open position),
your vehicle may demonstrate a wind
buffeting or pulsation noise. This
noise is a normal occurrence and can be
reduced or eliminated by taking the fol-
lowing actions. If the noise occurs with
one or both of the rear windows down,
partially lower both front windows
approximately one inch. If you experi-
ence the noise with the sunroof open,
slightly reduce the size of the sunroofopening.
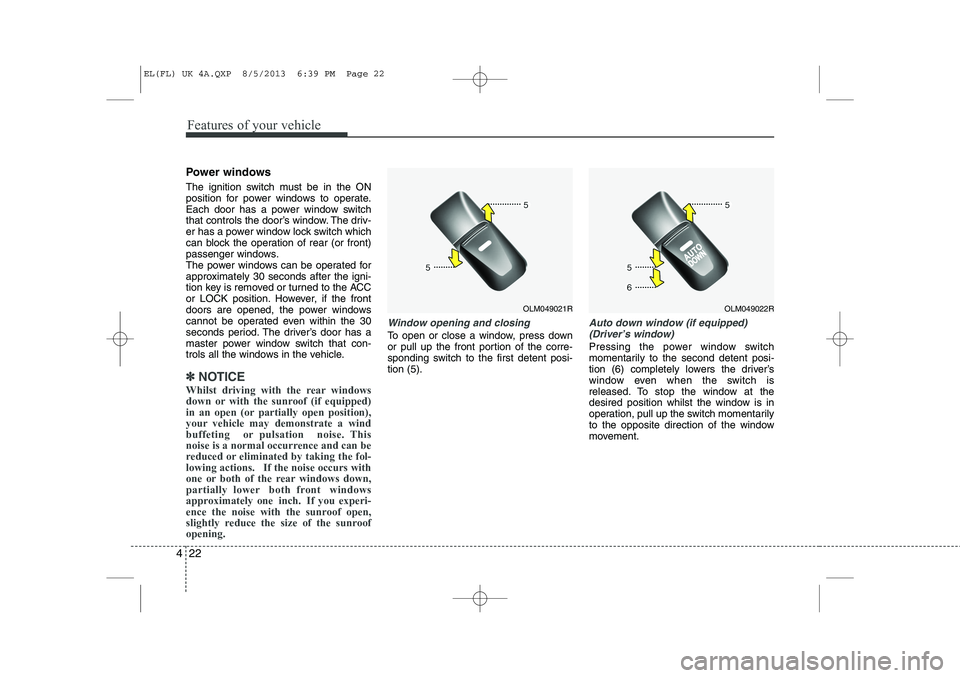
Window opening and closing
To open or close a window, press down
or pull up the front portion of the corre-
sponding switch to the first detent posi-tion (5).
Auto down window (if equipped) (Driver’s window)
Pressing the power window switch
momentarily to the second detent posi-
tion (6) completely lowers the driver’s
window even when the switch is
released. To stop the window at the
desired position whilst the window is in
operation, pull up the switch momentarily
to the opposite direction of the window
movement.
OLM049021ROLM049022R
EL(FL) UK 4A.QXP 8/5/2013 6:39 PM Page 22
Page 1094 of 1534
423
Features of your vehicle
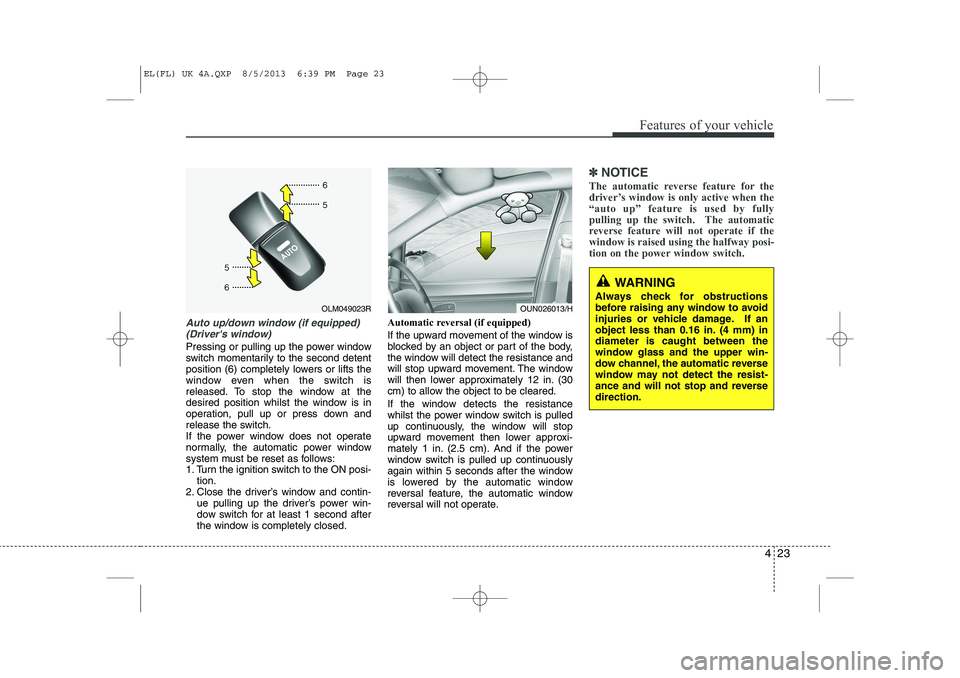
Auto up/down window (if equipped)(Driver's window)
Pressing or pulling up the power window
switch momentarily to the second detent
position (6) completely lowers or lifts the
window even when the switch is
released. To stop the window at the
desired position whilst the window is in
operation, pull up or press down and
release the switch.
If the power window does not operate
normally, the automatic power window
system must be reset as follows:
1. Turn the ignition switch to the ON posi- tion.
2. Close the driver’s window and contin- ue pulling up the driver’s power win-
dow switch for at least 1 second after
the window is completely closed. Automatic reversal (if equipped)
If the upward movement of the window is
blocked by an object or part of the body,
the window will detect the resistance and
will stop upward movement. The window
will then lower approximately 12 in. (30
cm) to allow the object to be cleared.
If the window detects the resistance
whilst the power window switch is pulled
up continuously, the window will stop
upward movement then lower approxi-
mately 1 in. (2.5 cm). And if the power
window switch is pulled up continuously
again within 5 seconds after the window
is lowered by the automatic window
reversal feature, the automatic window
reversal will not operate.
✽✽
NOTICE
The automatic reverse feature for the
driver’s window is only active when the
“auto up” feature is used by fully
pulling up the switch. The automatic
reverse feature will not operate if thewindow is raised using the halfway posi-
tion on the power window switch.
OLM049023ROUN026013/H
WARNING
Always check for obstructions
before raising any window to avoid
injuries or vehicle damage. If an
object less than 0.16 in. (4 mm) indiameter is caught between the
window glass and the upper win-
dow channel, the automatic reverse
window may not detect the resist-
ance and will not stop and reversedirection.
EL(FL) UK 4A.QXP 8/5/2013 6:39 PM Page 23
Page 1095 of 1534
Features of your vehicle
24
4
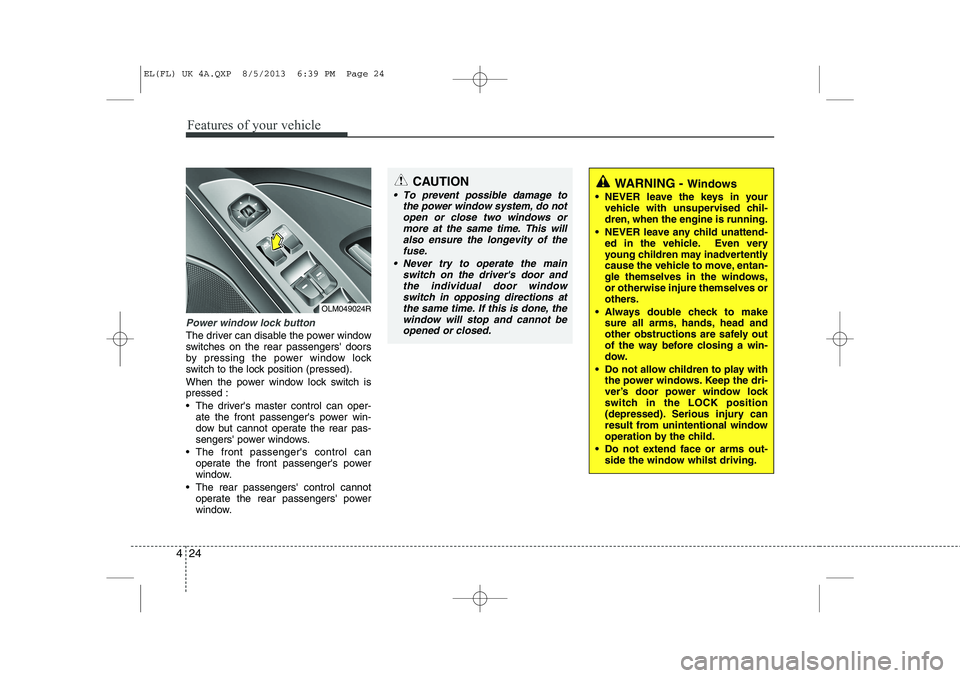
Power window lock button
The driver can disable the power window
switches on the rear passengers' doors
by pressing the power window lock
switch to the lock position (pressed).
When the power window lock switch is pressed :
The driver's master control can oper-
ate the front passenger's power win-
dow but cannot operate the rear pas-
sengers' power windows.
The front passenger's control can operate the front passenger's power
window.
The rear passengers' control cannot operate the rear passengers' power
window.
OLM049024R
CAUTION
To prevent possible damage to
the power window system, do not
open or close two windows ormore at the same time. This willalso ensure the longevity of thefuse.
Never try to operate the main switch on the driver's door andthe individual door windowswitch in opposing directions at
the same time. If this is done, the window will stop and cannot beopened or closed.WARNING - Windows
NEVER leave the keys in your vehicle with unsupervised chil-
dren, when the engine is running.
NEVER leave any child unattend- ed in the vehicle. Even very
young children may inadvertently
cause the vehicle to move, entan-
gle themselves in the windows,or otherwise injure themselves or
others.
Always double check to make sure all arms, hands, head and
other obstructions are safely out
of the way before closing a win-
dow.
Do not allow children to play with the power windows. Keep the dri-
ver’s door power window lock
switch in the LOCK position
(depressed). Serious injury can
result from unintentional window
operation by the child.
Do not extend face or arms out- side the window whilst driving.
EL(FL) UK 4A.QXP 8/5/2013 6:39 PM Page 24
Page 1110 of 1534
439
Features of your vehicle
Inside rearview mirror
Adjust the rearview mirror to centre on
the view through the rear window. Make
this adjustment before you start driving.
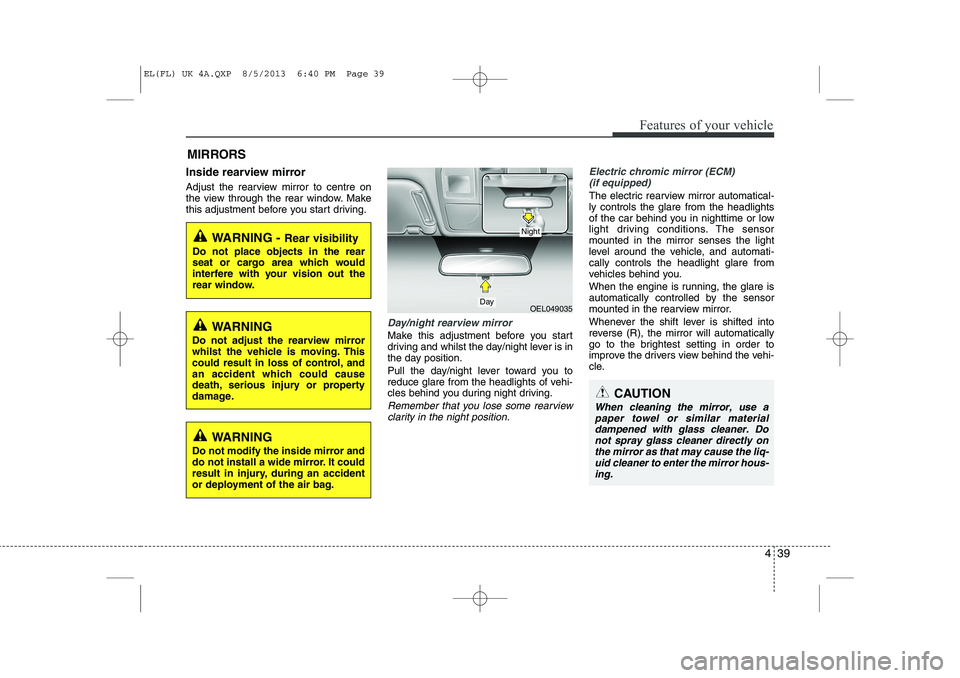
Day/night rearview mirror
Make this adjustment before you start
driving and whilst the day/night lever is in
the day position.
Pull the day/night lever toward you to
reduce glare from the headlights of vehi-
cles behind you during night driving.
Remember that you lose some rearviewclarity in the night position.
Electric chromic mirror (ECM) (if equipped)
The electric rearview mirror automatical- ly controls the glare from the headlights
of the car behind you in nighttime or low
light driving conditions. The sensormounted in the mirror senses the light
level around the vehicle, and automati-cally controls the headlight glare from
vehicles behind you.
When the engine is running, the glare is
automatically controlled by the sensor
mounted in the rearview mirror.
Whenever the shift lever is shifted into
reverse (R), the mirror will automatically
go to the brightest setting in order to
improve the drivers view behind the vehi-
cle.
MIRRORS
WARNING -
Rear visibility
Do not place objects in the rear
seat or cargo area which would
interfere with your vision out the
rear window.
OEL049035
CAUTION
When cleaning the mirror, use a paper towel or similar materialdampened with glass cleaner. Do not spray glass cleaner directly on
the mirror as that may cause the liq- uid cleaner to enter the mirror hous-ing.
Day
Night
WARNING
Do not adjust the rearview mirror
whilst the vehicle is moving. This
could result in loss of control, and
an accident which could cause
death, serious injury or property
damage.
WARNING
Do not modify the inside mirror and
do not install a wide mirror. It could
result in injury, during an accident
or deployment of the air bag.
EL(FL) UK 4A.QXP 8/5/2013 6:40 PM Page 39