Page 111 of 353

441
Features of your vehicle
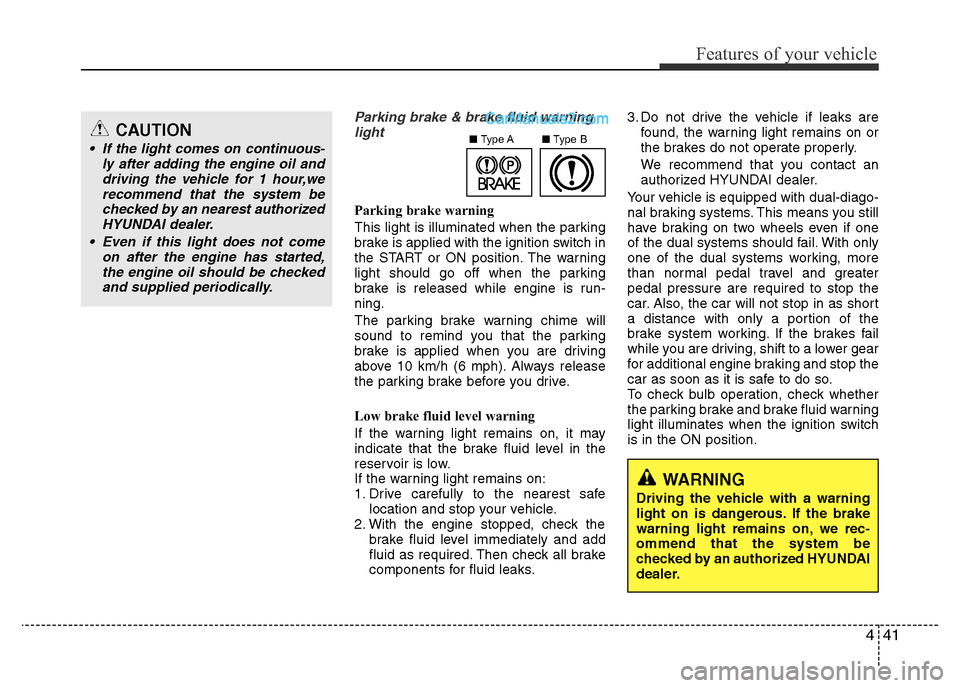
Parking brake & brake fluid warning
light
Parking brake warning
This light is illuminated when the parking
brake is applied with the ignition switch in
the START or ON position. The warning
light should go off when the parking
brake is released while engine is run-
ning.
The parking brake warning chime will
sound to remind you that the parking
brake is applied when you are driving
above 10 km/h (6 mph). Always release
the parking brake before you drive.
Low brake fluid level warning
If the warning light remains on, it may
indicate that the brake fluid level in the
reservoir is low.
If the warning light remains on:
1. Drive carefully to the nearest safe
location and stop your vehicle.
2. With the engine stopped, check the
brake fluid level immediately and add
fluid as required. Then check all brake
components for fluid leaks.3. Do not drive the vehicle if leaks are
found, the warning light remains on or
the brakes do not operate properly.
We recommend that you contact an
authorized HYUNDAI dealer.
Your vehicle is equipped with dual-diago-
nal braking systems. This means you still
have braking on two wheels even if one
of the dual systems should fail. With only
one of the dual systems working, more
than normal pedal travel and greater
pedal pressure are required to stop the
car. Also, the car will not stop in as short
a distance with only a portion of the
brake system working. If the brakes fail
while you are driving, shift to a lower gear
for additional engine braking and stop the
car as soon as it is safe to do so.
To check bulb operation, check whether
the parking brake and brake fluid warning
light illuminates when the ignition switch
is in the ON position.
CAUTION
• If the light comes on continuous-
ly after adding the engine oil and
driving the vehicle for 1 hour,we
recommend that the system be
checked by an nearest authorized
HYUNDAI dealer.
• Even if this light does not come
on after the engine has started,
the engine oil should be checked
and supplied periodically.■Type A■Type B
WARNING
Driving the vehicle with a warning
light on is dangerous. If the brake
warning light remains on, we rec-
ommend that the system be
checked by an authorized HYUNDAI
dealer.
Page 331 of 353

767
Maintenance
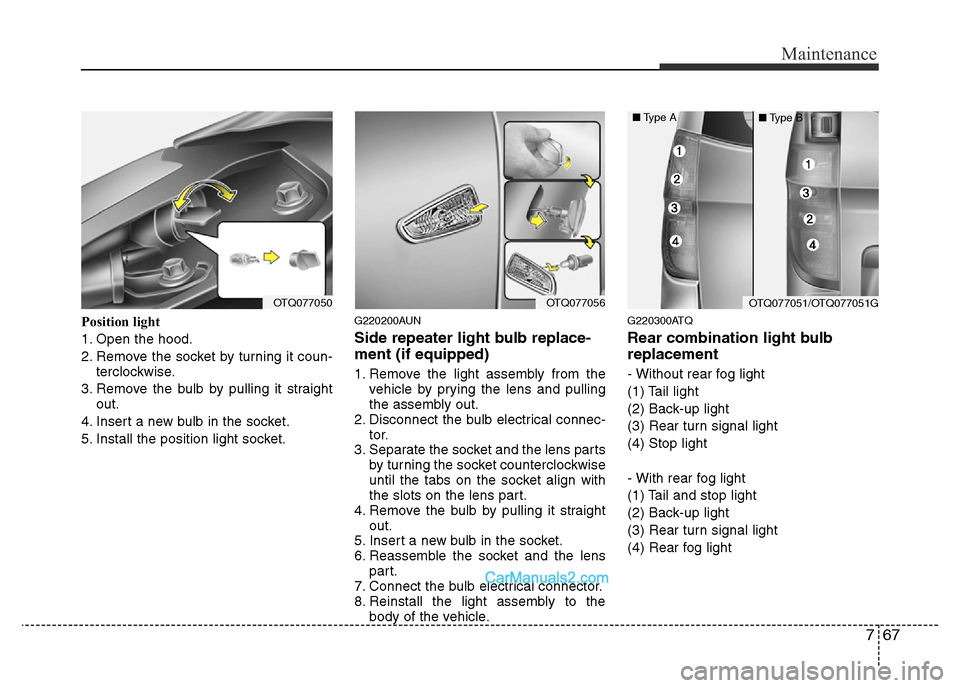
Position light
1. Open the hood.
2. Remove the socket by turning it coun-
terclockwise.
3. Remove the bulb by pulling it straight
out.
4. Insert a new bulb in the socket.
5. Install the position light socket.G220200AUN
Side repeater light bulb replace-
ment (if equipped)
1. Remove the light assembly from the
vehicle by prying the lens and pulling
the assembly out.
2. Disconnect the bulb electrical connec-
tor.
3. Separate the socket and the lens parts
by turning the socket counterclockwise
until the tabs on the socket align with
the slots on the lens part.
4. Remove the bulb by pulling it straight
out.
5. Insert a new bulb in the socket.
6. Reassemble the socket and the lens
part.
7. Connect the bulb electrical connector.
8. Reinstall the light assembly to the
body of the vehicle.
G220300ATQ
Rear combination light bulb
replacement
- Without rear fog light
(1) Tail light
(2) Back-up light
(3) Rear turn signal light
(4) Stop light
- With rear fog light
(1) Tail and stop light
(2) Back-up light
(3) Rear turn signal light
(4) Rear fog light
OTQ077050OTQ077056OTQ077051/OTQ077051G
■Type A
■Type B
Page 333 of 353
769
Maintenance
G220400ATQ
High mounted stop light
replacement (if equipped)
1. Open the tailgate.
2. Loosen the light assembly retaining
bolts with a proper tool.3. Remove the light assembly from the
body of the vehicle.
4. Separate the socket and the lens parts
by removing the screws with a philips
head screwdriver.
5. Remove the bulb by pulling it straight
out.
6. Insert a new bulb in the socket.
7. Reassemble the socket and the lens
part.
8. Reinstall the light assembly to the
body of the vehicle.
G220500AUN
License plate light bulb replace-
ment
1. Loosen the lens retaining screws with
a philips head screwdriver.
2. Remove the lens.
3. Remove the bulb by pulling it straight
out.
OTQ077092
OEN076039
OTQ077081
Type B
Type A
OTQ077060G
OTQ077091
Page 334 of 353
Maintenance
70 7
4. Install a new bulb.
5. Reinstall the lens securely with the
lens retaining screws.
G220600AUN
Interior light bulb replacement
1. Using a flat-blade screwdriver, gently
pry the lens from the interior light
housing.
2. Remove the bulb by pulling it straight
out.
3. Install a new bulb in the socket.
4. Align the lens tabs with the interior
light housing notches and snap the
lens into place.
WARNING
Prior to working on the Interior
Lights, ensure that the “OFF” but-
ton is depressed to avoid burning
your fingers or receiving an electric
shock.
CAUTION
Use care not to dirty or damage
lens, lens tab, and plastic housings.
OTQ077065
OTQ077065G
OTQ077065L
Type A
Type B
Type C