2014 Hyundai H-1 (Grand Starex) Signal light
[x] Cancel search: Signal lightPage 15 of 353

Your vehicle at a glance
4 2
INSTRUMENT PANEL OVERVIEW
1. Instrument cluster.............................4-32
2. Light control / Turn signals ...............4-50
3. Horn .................................................4-27
4. Wiper/Washer ...................................4-55
5. Steering wheel audio controls* ........4-83
6. Driver’s front air bag* .......................3-44
7. Ignition switch .....................................5-4
8. Digital clock* ....................................4-80
9. Audio* ...............................................4-82
10. Hazard warning flasher
switch ......................................4-50, 6-2
11. Climate control system* .................4-61
12. Parking brake .................................5-20
13. Shift lever ................................5-12, 5-9
14. AUX, USB and iPod port* ..............4-84
15. Passenger’s front air bag* ..............3-44
16. Glove box .......................................4-74
* : if equipped
OTQ027002GB020000BTQ Left-Hand drive type
Page 16 of 353

25
Your vehicle at a glance
1. Instrument cluster.............................4-32
2. Light control / Turn signals ...............4-50
3. Horn .................................................4-27
4. Wiper/Washer ...................................4-55
5. Steering wheel audio controls* ........4-83
6. Driver’s front air bag* .......................3-44
7. Ignition switch .....................................5-4
8. Digital clock* ....................................4-80
9. Audio* ...............................................4-82
10. Hazard warning flasher
switch ......................................4-50, 6-2
11. Climate control system* .................4-61
12. Parking brake .................................5-20
13. Shift lever ................................5-12, 5-9
14. AUX, USB and iPod port* ..............4-84
15. Passenger’s front air bag* ..............3-44
16. Glove box .......................................4-74
* : if equipped
OTQ027002RB020000BTQ Right-Hand drive type
Page 74 of 353

Features of your vehicle
4 4
Remote keyless entry system
operations
D020101APA
Lock
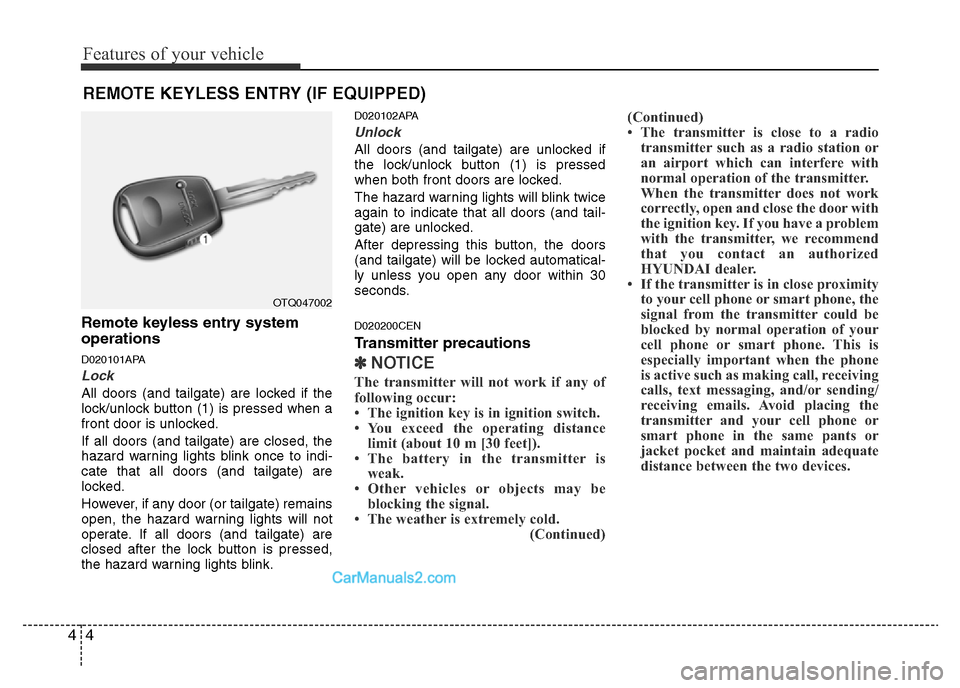
All doors (and tailgate) are locked if the
lock/unlock button (1) is pressed when a
front door is unlocked.
If all doors (and tailgate) are closed, the
hazard warning lights blink once to indi-
cate that all doors (and tailgate) are
locked.
However, if any door (or tailgate) remains
open, the hazard warning lights will not
operate. If all doors (and tailgate) are
closed after the lock button is pressed,
the hazard warning lights blink.
D020102APA
Unlock
All doors (and tailgate) are unlocked if
the lock/unlock button (1) is pressed
when both front doors are locked.
The hazard warning lights will blink twice
again to indicate that all doors (and tail-
gate) are unlocked.
After depressing this button, the doors
(and tailgate) will be locked automatical-
ly unless you open any door within 30
seconds.
D020200CEN
Transmitter precautions
✽NOTICE
The transmitter will not work if any of
following occur:
• The ignition key is in ignition switch.
• You exceed the operating distance
limit (about 10 m [30 feet]).
• The battery in the transmitter is
weak.
• Other vehicles or objects may be
blocking the signal.
• The weather is extremely cold.
(Continued)(Continued)
• The transmitter is close to a radio
transmitter such as a radio station or
an airport which can interfere with
normal operation of the transmitter.
When the transmitter does not work
correctly, open and close the door with
the ignition key. If you have a problem
with the transmitter, we recommend
that you contact an authorized
HYUNDAI dealer.
• If the transmitter is in close proximity
to your cell phone or smart phone, the
signal from the transmitter could be
blocked by normal operation of your
cell phone or smart phone. This is
especially important when the phone
is active such as making call, receiving
calls, text messaging, and/or sending/
receiving emails. Avoid placing the
transmitter and your cell phone or
smart phone in the same pants or
jacket pocket and maintain adequate
distance between the two devices.
REMOTE KEYLESS ENTRY (IF EQUIPPED)
OTQ047002
Page 102 of 353

Features of your vehicle
32 4
INSTRUMENT CLUSTER
1. Tachometer*
2. Turn signal indicators
3. Speedometer
4. Engine coolant temperature gauge
5. Warning and indicator lights
6. Shift position indicator*
7. Odometer/Tripmeter
8. Fuel gauge
* : if equipped
❈The actual cluster in the vehicle may
differ from the illustration.
OTQ044044L/OTQ044044F/OTQ044046k
■Type A
■Type B
■Type C
Page 109 of 353

439
Features of your vehicle
Electronic brake force distribution (EBD)
system warning light
If two warning lights illuminate at the
same time while driving, your vehicle
may have a malfunction with the ABS
and EBD system.
In this case, your ABS and regular brake
system may not work normally. We rec-
ommend that the system be checked by
an authorized HYUNDAI dealer.D150304AEN-EE
Seat belt warning
Seat belt warning light (if equipped)
As a reminder to the driver, the seat belt
warning light will blink for approximately
6 seconds each time you turn the ignition
switch ON regardless of belt fastening.
If the driver’s seat belt is unfastened after
the ignition switch is ON, the seat belt
warning light blinks again for approxi-
mately 6 seconds.
Seat belt warning chime (if equipped)
If the driver's seat belt is not fastened
when the ignition switch is turned ON or
if it is unfastened after the ignition switch
is ON, the seat belt warning chime will
sound for approximately 6 seconds. At
this time, if the seat belt is fastened, the
chime will stop at once.
D150305AUN
Turn signal indicator
The blinking green arrows on the instru-
ment panel show the direction indicated
by the turn signals. If the arrow comes on
but does not blink, blinks more rapidly
than normal, or does not illuminate at all,
a malfunction in the turn signal system is
indicated. Your dealer should be consult-
ed for repairs.
D150306AUN
High beam indicator
This indicator illuminates when the head-
lights are on and in the high beam posi-
tion or when the turn signal lever is pulled
into the Flash-to-Pass position.
■Type A■Type B
WARNING
If the both ABS and brake warning
lights are on and stay on, your vehi-
cle’s brake system will not work
normally during sudden braking. In
this case, avoid high speed driving
and abrupt braking. We recommend
that the system be checked by an
authorized HYUNDAI dealer.
Page 120 of 353

Features of your vehicle
50 4
D180000AUN
The hazard warning flasher should be
used whenever you find it necessary to
stop the car in a hazardous location. When
you must make such an emergency stop,
always pull off the road as far as possible.
The hazard warning lights are turned on by
pushing in the hazard switch. This causes
all turn signal lights to blink. The hazard
warning lights will operate even though the
key is not in the ignition switch.
To turn the hazard warning lights off, push
the switch a second time.
D190100CUN
Battery saver function
• The purpose of this feature is to pre-
vent the battery from being dis-
charged. The system automatically
turns off the parking lights when the
driver removes the ignition key and
opens the driver-side door.
• With this feature, the parking lights will
be turned off automatically if the driver
parks on the side of road at night.
If necessary, to keep the lights on
when the ignition key is removed, per-
form the following:
1) Open the driver-side door.
2) Turn the parking lights OFF and ON
again using the light switch on the
steering column.
D190400ATQ
Lighting control
The light switch has a Headlight and a
Parking light position.
To operate the lights, turn the knob at the
end of the control lever to one of the fol-
lowing positions:
(1) OFF position
(2) Parking light position
(3) Headlight position
LIGHTING
OTQ049131
CAUTION
If the driver gets out of the vehicle
through other doors (except dri-
ver’s door), the battery saver func-
tion does not operate. Therefore, it
causes the battery to be dis-
charged. In this case, make sure to
turn off the lamp before getting out
of the vehicle.
HAZARD WARNING FLASHER
OTQ067001L
OTQ067001R
Right-Hand drive type
Left-Hand drive type
Page 122 of 353

Features of your vehicle
52 4
To flash the headlights, pull the lever
towards you. It will return to the normal
(low beam) position when released. The
headlight switch does not need to be on
to use this flashing feature.D190600AUN
Turn signals and lane change sig-
nals
The ignition switch must be on for the
turn signals to function. To turn on the
turn signals, move the lever up or down
(A). Green arrow indicators on the instru-
ment panel indicate which turn signal is
operating.
They will self-cancel after a turn is com-
pleted. If the indicator continues to flash
after a turn, manually return the lever to
the OFF position.
To signal a lane change, move the turn
signal lever slightly and hold it in position
(B). The lever will return to the OFF posi-
tion when released.If an indicator stays on and does not
flash or if it flashes abnormally, one of the
turn signal bulbs may be burned out and
will require replacement.
✽NOTICE
If an indicator flash is abnormally quick
or slow, a bulb may be burned out or
have a poor electrical connection in the
circuit.
OTQ049304OTQ049305
Page 234 of 353

543
Driving your vehicle
E140400AUN
Driving with a trailer
Towing a trailer requires a certain
amount of experience. Before setting out
for the open road, you must get to know
your trailer. Acquaint yourself with the
feel of handling and braking with the
added weight of the trailer. And always
keep in mind that the vehicle you are
driving is now a good deal longer and not
nearly so responsive as your vehicle is
by itself.
Before you start, check the trailer hitch
and platform, safety chains, electrical
connector(s), lights, tires and mirror
adjustment. If the trailer has electric
brakes, start your vehicle and trailer mov-
ing and then apply the trailer brake con-
troller by hand to be sure the brakes are
working. This lets you check your electri-
cal connection at the same time.
During your trip, check occasionally to be
sure that the load is secure, and that the
lights and any trailer brakes are still work-
ing.
E140401AUN
Following distance
Stay at least twice as far behind the vehi-
cle ahead as you would when driving
your vehicle without a trailer. This can
help you avoid situations that require
heavy braking and sudden turns.
E140402AUN
Passing
You’ll need more passing distance up
ahead when you’re towing a trailer. And,
because of the increased vehicle length,
you’ll need to go much farther beyond the
passed vehicle before you can return to
your lane.
E140403AUN
Backing up
Hold the bottom of the steering wheel
with one hand. Then, to move the trailer
to the left, just move your hand to the left.
To move the trailer to the right, move your
hand to the right. Always back up slowly
and, if possible, have someone guide
you.
E140404AUN
Making turns
When you’re turning with a trailer, make
wider turns than normal. Do this so your
trailer won’t strike soft shoulders, curbs,
road signs, trees, or other objects. Avoid
jerky or sudden maneuvers. Signal well
in advance.
E140405AFD
Turn signals when towing a trailer
When you tow a trailer, your vehicle has
to have a different turn signal flasher and
extra wiring. The green arrows on your
instrument panel will flash whenever you
signal a turn or lane change. Properly
connected, the trailer lights will also flash
to alert other drivers you’re about to turn,
change lanes, or stop.
When towing a trailer, the green arrows
on your instrument panel will flash for
turns even if the bulbs on the trailer are
burned out. Thus, you may think drivers
behind you are seeing your signals
when, in fact, they are not. It’s important
to check occasionally to be sure the trail-
er bulbs are still working. You must also
check the lights every time you discon-
nect and then reconnect the wires.
Do not connect a trailer lighting system
directly to your vehicle’s lighting system.
Use only an approved trailer wiring har-
ness.
An authorized HYUNDAI dealer can
assist you in installing the wiring harness.
WARNING
Failure to use an approved trailer
wiring harness could result in dam-
age to the vehicle electrical system
and/or personal injury.