Page 301 of 353
737
Maintenance
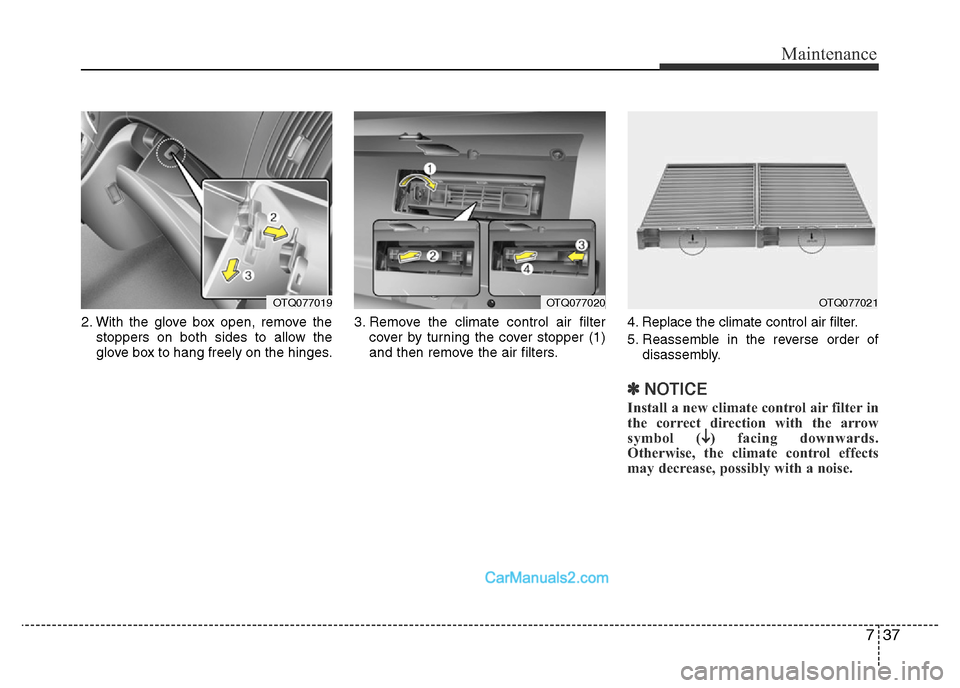
2. With the glove box open, remove the
stoppers on both sides to allow the
glove box to hang freely on the hinges.3. Remove the climate control air filter
cover by turning the cover stopper (1)
and then remove the air filters.4. Replace the climate control air filter.
5. Reassemble in the reverse order of
disassembly.
✽NOTICE
Install a new climate control air filter in
the correct direction with the arrow
symbol (
↓) facing downwards.
Otherwise, the climate control effects
may decrease, possibly with a noise.
OTQ077019OTQ077020OTQ077021
Page 318 of 353
Maintenance
54 7
Low aspect ratio tire (if equipped)
Low aspect ratio tires, whose aspect
ratio is lower than 50, are provided
for sporty looks.
Because the low aspect ratio tires
are optimized for handling and brak-
ing, it may be more uncomfortable to
ride in and there is more noise com-
pare with normal tires.CAUTION
Because the sidewall of the low
aspect ratio tire is shorter than
the normal, the wheel and tire of
the low aspect ratio tire is easi-
er to be damaged. So, follow the
instructions below.
- When driving on a rough road
or off road, drive cautiously
because tires and wheels may
be damaged. And after driving,
inspect tires and wheels.
- When passing over a pothole,
speed bump, manhole, or curb
stone, drive slowly so that the
tires and wheels are not dam-
aged.
- If the tire is impacted, we rec-
ommend that you inspect the
tire condition or contact an
authorized HYUNDAI dealer.
- To prevent damage to the tire,
inspect the tire condition and
pressure every 3,000km.
CAUTION
• It is not easy to recognize the
tire damage with your own
eyes. But if there is the slight-
est hint of tire damage, even
though you cannot see the tire
damage with your own eyes,
have the tire checked or
replaced because the tire
damage may cause air leak-
age from the tire.
• If the tire is damaged by driv-
ing on a rough road, off road,
pothole, manhole, or curb
stone, it will not be covered by
the warranty.
• You can find out the tire infor-
mation on the tire sidewall.
Page 320 of 353

Maintenance
56 7
G210100AFD
Instrument panel fuse replace-
ment
1. Turn the ignition switch and all other
switches off.
2. Open the fuse panel cover.3. Pull the suspected fuse straight out.
Use the removal tool provided in the
engine compartment fuse panel.
4. Check the removed fuse; replace it if it
is blown.
Spare fuses are provided in the inner
fuse panel (or in the engine compart-
ment fuse panel).
5. Push in a new fuse of the same rating,
and make sure it fits tightly in the clips.
If it fits loosely, we recommend that you
consult an authorized HYUNDAI dealer.
If you do not have a spare, use a fuse of
the same rating from a circuit you may
not need for operating the vehicle, such
as the cigarette lighter fuse.
OTQ077041OTQ077040
CAUTION
• When replacing a blown fuse or
relay with a new one, make sure
the new fuse or relay fits tightly
into the clips. The incomplete fas-
tening fuse or relay may cause
the vehicle wiring and electric
systems damage and a possible
fire.
• Do not remove fuses, relays and
terminals fastened with bolts or
nuts. The fuses, relays and termi-
nals may be fastened incomplete-
ly, and it may cause a possible
fire. If fuses, relays and terminals
fastened with bolts or nuts are
blown, we recommend that you
consult an authorized HYUNDAI
dealer.
• Do not input any other objects
except fuses or relays into
fuse/relay terminals such as a
driver or wiring. It may cause con-
tact failure and system malfunc-
tion.
Page 321 of 353
757
Maintenance
If the headlights or other electrical com-
ponents do not work and the fuses are
OK, check the fuse panel in the engine
compartment. If a fuse is blown, it must
be replaced.
G210101AUN
Memory fuse
Your vehicle is equipped with a memory
fuse to prevent battery discharge if your
vehicle is parked without being operated
for prolonged periods. Use the following
procedures before parking the vehicle for
prolonged periods.
1. Turn off the engine.
2. Turn off the headlights and tail lights.
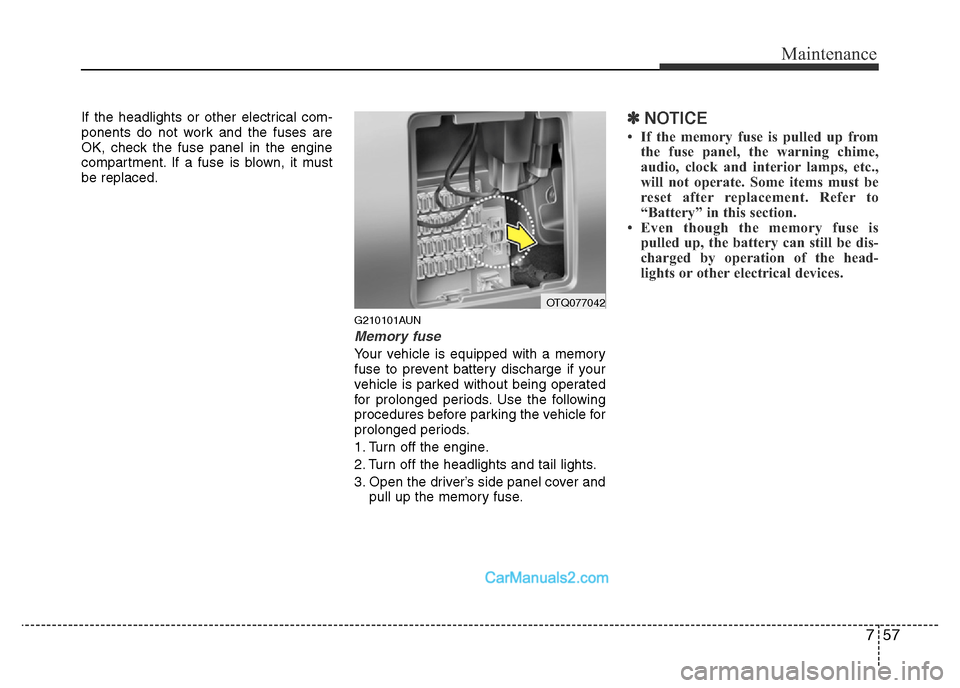
3. Open the driver’s side panel cover and
pull up the memory fuse.
✽NOTICE
• If the memory fuse is pulled up from
the fuse panel, the warning chime,
audio, clock and interior lamps, etc.,
will not operate. Some items must be
reset after replacement. Refer to
“Battery” in this section.
• Even though the memory fuse is
pulled up, the battery can still be dis-
charged by operation of the head-
lights or other electrical devices.
OTQ077042
Page 322 of 353
Maintenance
58 7
G210200AEN
Engine compartment fuse
replacement
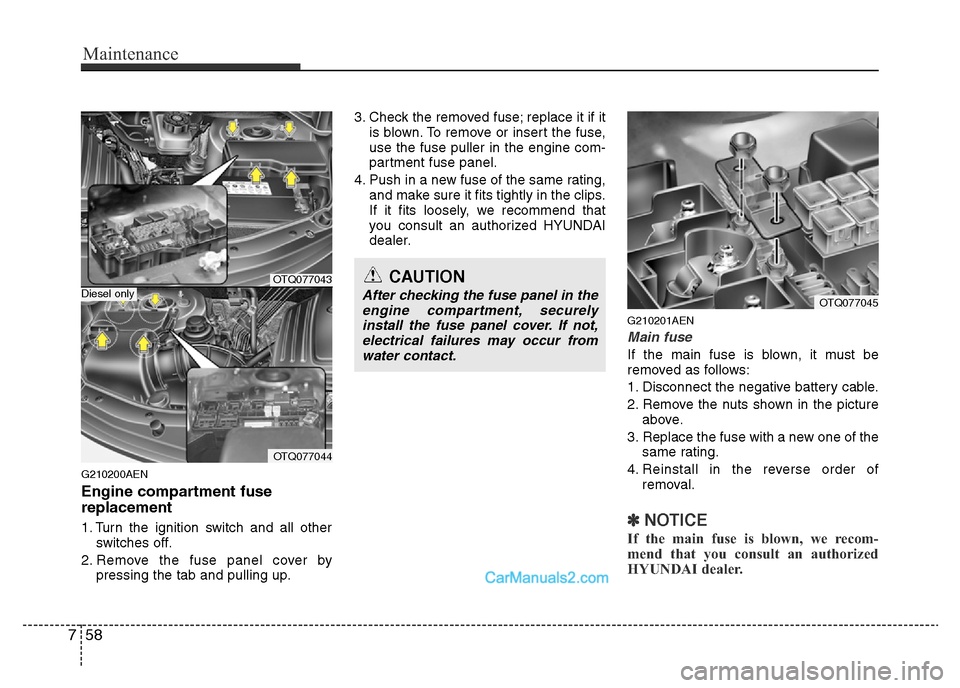
1. Turn the ignition switch and all other
switches off.
2. Remove the fuse panel cover by
pressing the tab and pulling up.3. Check the removed fuse; replace it if it
is blown. To remove or insert the fuse,
use the fuse puller in the engine com-
partment fuse panel.
4. Push in a new fuse of the same rating,
and make sure it fits tightly in the clips.
If it fits loosely, we recommend that
you consult an authorized HYUNDAI
dealer.
G210201AEN
Main fuse
If the main fuse is blown, it must be
removed as follows:
1. Disconnect the negative battery cable.
2. Remove the nuts shown in the picture
above.
3. Replace the fuse with a new one of the
same rating.
4. Reinstall in the reverse order of
removal.
✽NOTICE
If the main fuse is blown, we recom-
mend that you consult an authorized
HYUNDAI dealer.
CAUTION
After checking the fuse panel in the
engine compartment, securely
install the fuse panel cover. If not,
electrical failures may occur from
water contact.OTQ077045
OTQ077043
OTQ077044
Diesel only
Page 323 of 353
759
Maintenance
✽NOTICE
Not all fuse panel descriptions in this
manual may be applicable to your vehi-
cle. It is accurate at the time of printing.
When you inspect the fuse panel in your
vehicle, refer to the fuse panel label.
Instrument panel fuse panel
Engine compartment fuse panel
OTQ077046/OTQ077047/OTQ077048 G210300ATQ
Fuse/relay panel description
Inside the fuse/relay panel covers, you can find the fuse/relay label describing fuse/relay name and capacity.
Diesel only
Page 329 of 353
765
Maintenance
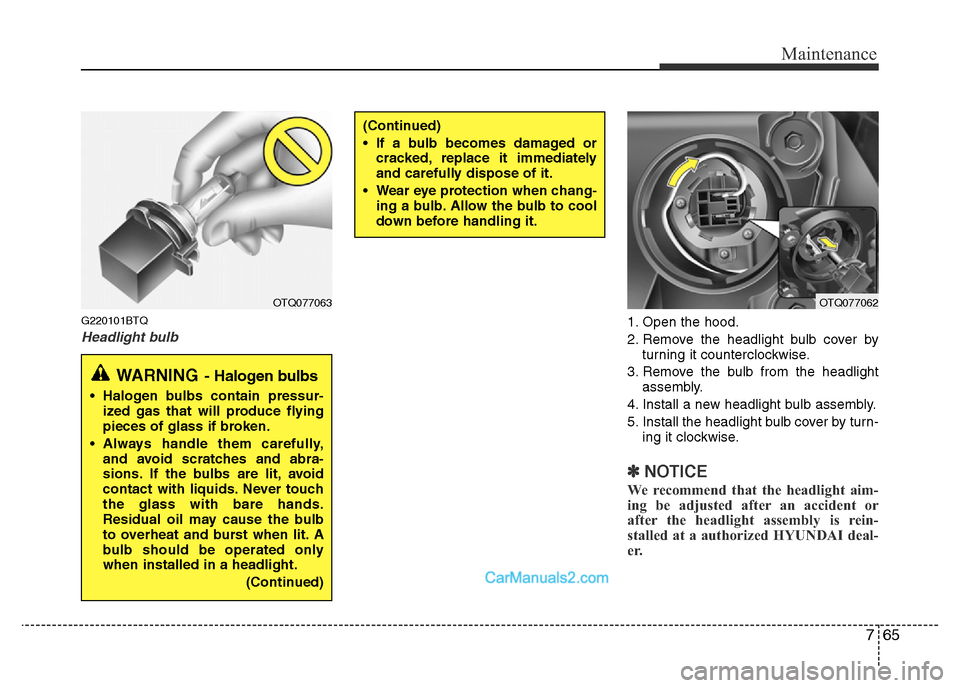
G220101BTQ
Headlight bulb1. Open the hood.
2. Remove the headlight bulb cover by
turning it counterclockwise.
3. Remove the bulb from the headlight
assembly.
4. Install a new headlight bulb assembly.
5. Install the headlight bulb cover by turn-
ing it clockwise.
✽NOTICE
We recommend that the headlight aim-
ing be adjusted after an accident or
after the headlight assembly is rein-
stalled at a authorized HYUNDAI deal-
er.
(Continued)
• If a bulb becomes damaged or
cracked, replace it immediately
and carefully dispose of it.
• Wear eye protection when chang-
ing a bulb. Allow the bulb to cool
down before handling it.
OTQ077063OTQ077062
WARNING- Halogen bulbs
• Halogen bulbs contain pressur-
ized gas that will produce flying
pieces of glass if broken.
• Always handle them carefully,
and avoid scratches and abra-
sions. If the bulbs are lit, avoid
contact with liquids. Never touch
the glass with bare hands.
Residual oil may cause the bulb
to overheat and burst when lit. A
bulb should be operated only
when installed in a headlight.
(Continued)
Page 330 of 353
Maintenance
66 7
G220102ATQ
Turn signal light/position light, fog
light bulb (if equipped)
Turn signal light
1. If necessary, remove the headlight
assembly by loosening the headlight
installation bolts. When you remove
the headlight assembly, you may need
to remove the bumper according to the
vehicle.
2. Replace the malfunctioned light bulb.
3. Install the headlight assembly.
Fog light bulb (if equipped)
1. Remove the fog light under cover by
loosening the screw.
2. Replace the malfunctioned light bulb.
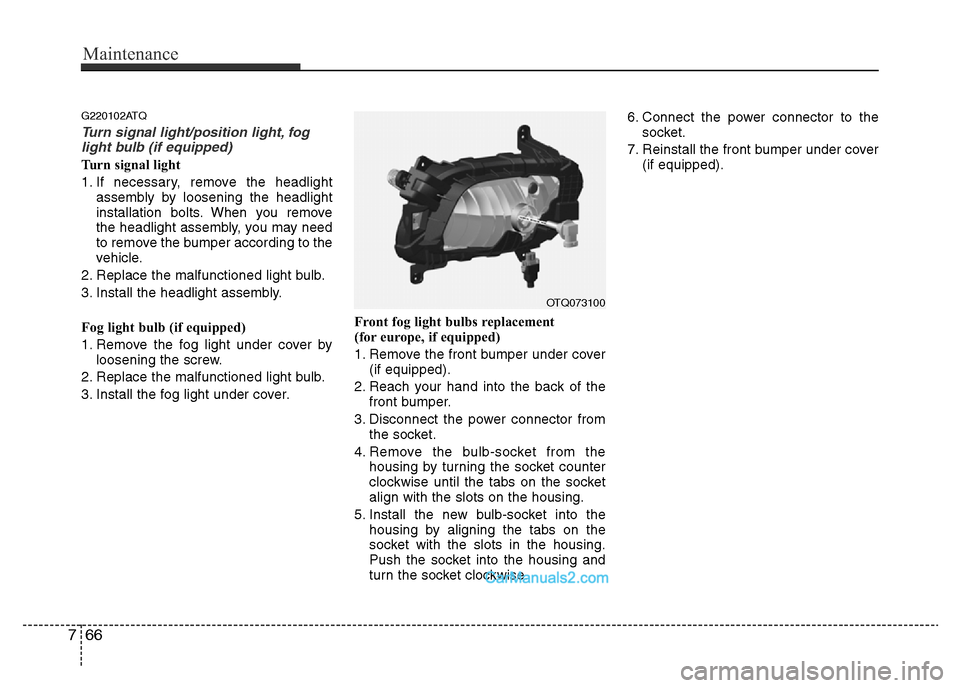
3. Install the fog light under cover.Front fog light bulbs replacement
(for europe, if equipped)
1. Remove the front bumper under cover
(if equipped).
2. Reach your hand into the back of the
front bumper.
3. Disconnect the power connector from
the socket.
4. Remove the bulb-socket from the
housing by turning the socket counter
clockwise until the tabs on the socket
align with the slots on the housing.
5. Install the new bulb-socket into the
housing by aligning the tabs on the
socket with the slots in the housing.
Push the socket into the housing and
turn the socket clockwise.6. Connect the power connector to the
socket.
7. Reinstall the front bumper under cover
(if equipped).
OTQ073100