2014 Hyundai H-1 (Grand Starex) instrument panel
[x] Cancel search: instrument panelPage 62 of 353
345
Safety features of your vehicle
(Continued)
• Front air bags can injure occu-
pants improperly positioned in
the front seats.
• Move your seat as far back as
practical from the front air bags,
while still maintaining control of
the vehicle.
• You and your passengers should
never sit or lean unnecessarily
close to the air bags. Improperly
positioned drivers and passen-
gers can be severely injured by
inflating air bags.
• Never lean against the door or
center console – always sit in an
upright position.
(Continued)(Continued)
• No objects should be placed over
or near the air bag modules on
the steering wheel, instrument
panel, and the front passenger's
panel above the glove box,
because any such object could
cause harm if the vehicle is in a
crash severe enough to cause
the air bags to deploy.
• Do not tamper with or disconnect
SRS wiring or other components
of the SRS system. Doing so
could result in injury, due to acci-
dental deployment of the air bags
or by rendering the SRS inopera-
tive.
• If the SRS air bag warning light
remains illuminated while the
vehicle is being driven, we rec-
ommend that the system be
inspected by an authorized
HYUNDAI dealer.
(Continued)(Continued)
• Air bags can only be used once –
we recommend that the system
be replaced by an authorized
HYUNDAI dealer.
• The SRS is designed to deploy
the front air bags only when an
impact is sufficiently severe and
when the impact angle is less
than 30° from the forward longitu-
dinal axis of the vehicle.
Additionally, the air bags will only
deploy once. Seat belts must be
worn at all times.
• Front air bags are not intended to
deploy in side-impact, rear-
impact or rollover crashes. In
addition, front air bags will not
deploy in frontal crashes below
the deployment threshold.
(Continued)
Page 69 of 353
Safety features of your vehicle
52 3
C041300ATQ
Additional safety precautions
•Never let passengers ride in the
cargo area or on top of a folded-
down back seat.All occupants should
sit upright, fully back in their seats with
their seat belts on and their feet on the
floor.
•Passengers should not move out of
or change seats while the vehicle is
moving.A passenger who is not wear-
ing a seat belt during a crash or emer-
gency stop can be thrown against the
inside of the vehicle, against other
occupants, or out of the vehicle.
•Each seat belt is designed to
restrain one occupant.If more than
one person uses the same seat belt,
they could be seriously injured or killed
in a collision.
•Do not use any accessories on seat
belts.Devices claiming to improve
occupant comfort or reposition the seat
belt can reduce the protection provided
by the seat belt and increase the
chance of serious injury in a crash.
•Passengers should not place hard
or sharp objects between them-
selves and the air bags.Carrying
hard or sharp objects on your lap or in
your mouth can result in injuries if an
air bag inflates.
WARNING
• Modification to SRS components
or wiring, including the addition
of any kind of badges to the pad
covers or modifications to the
body structure, can adversely
affect SRS performance and lead
to possible injury.
• For cleaning the air bag pad cov-
ers, use only a soft, dry cloth or
one which has been moistened
with plain water. Solvents or
cleaners could adversely affect
the air bag covers and proper
deployment of the system.
•
No objects should be placed over
or near the air bag modules on the
steering wheel, instrument panel,
and the front passenger's panel
above the glove box, because any
such object could cause harm if the
vehicle is in a crash severe enough
to cause the air bags to inflate.
• If the air bags inflate, we recom-
mend that the system be
replaced by an authorized
HYUNDAI dealer.
(Continued)
(Continued)
• Do not tamper with or disconnect
SRS wiring, or other components
of the SRS system. Doing so
could result in injury, due to acci-
dental inflation of the air bags or
by rendering the SRS inopera-
tive.
• If components of the air bag sys-
tem must be discarded, or if the
vehicle must be scrapped, certain
safety precautions must be
observed. An authorized
HYUNDAI dealer knows these
precautions and can give you the
necessary information. Failure to
follow these precautions and pro-
cedures could increase the risk
of personal injury.
• If your car was flooded and has
soaked carpeting or water on the
flooring, you shouldn't try to start
the engine; we recommend that
you contact an authorized
HYUNDAI dealer.
Page 103 of 353
433
Features of your vehicle
Instrument Cluster Control
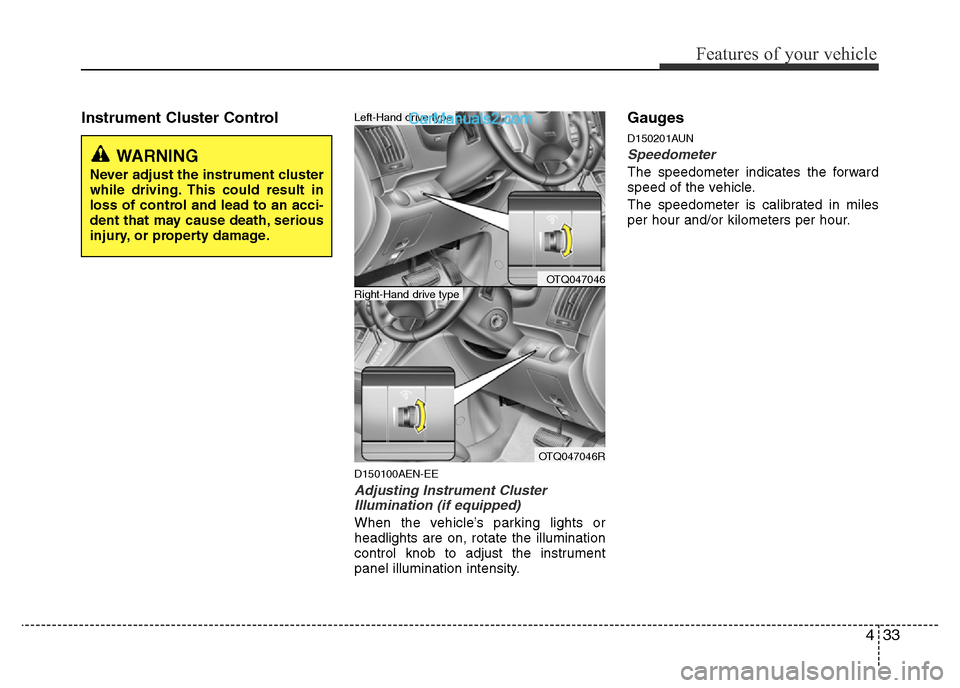
D150100AEN-EE
Adjusting Instrument Cluster
Illumination (if equipped)
When the vehicle’s parking lights or
headlights are on, rotate the illumination
control knob to adjust the instrument
panel illumination intensity.
Gauges
D150201AUN
Speedometer
The speedometer indicates the forward
speed of the vehicle.
The speedometer is calibrated in miles
per hour and/or kilometers per hour.
OTQ047046
OTQ047046R
Right-Hand drive type
Left-Hand drive type
WARNING
Never adjust the instrument cluster
while driving. This could result in
loss of control and lead to an acci-
dent that may cause death, serious
injury, or property damage.
Page 121 of 353
451
Features of your vehicle
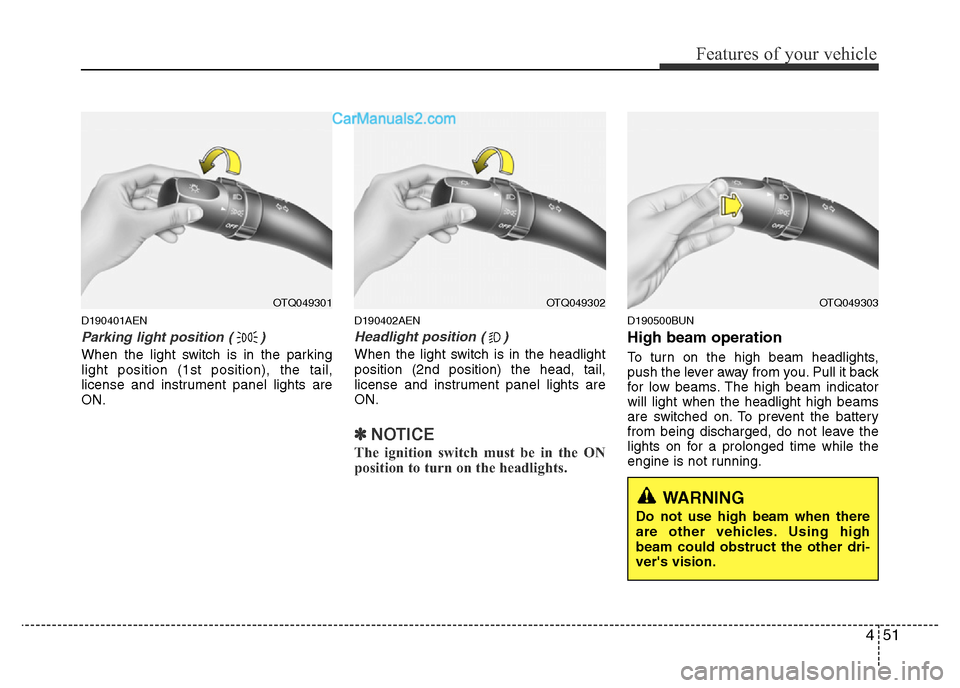
D190401AEN
Parking light position ( )
When the light switch is in the parking
light position (1st position), the tail,
license and instrument panel lights are
ON.
D190402AEN
Headlight position ( )
When the light switch is in the headlight
position (2nd position) the head, tail,
license and instrument panel lights are
ON.
✽NOTICE
The ignition switch must be in the ON
position to turn on the headlights.
D190500BUN
High beam operation
To turn on the high beam headlights,
push the lever away from you. Pull it back
for low beams. The high beam indicator
will light when the headlight high beams
are switched on. To prevent the battery
from being discharged, do not leave the
lights on for a prolonged time while the
engine is not running.
OTQ049301OTQ049302OTQ049303
WARNING
Do not use high beam when there
are other vehicles. Using high
beam could obstruct the other dri-
ver's vision.
Page 130 of 353
DEFROSTER (IF EQUIPPED)
➃MOOD : Push the switch to turn the
mood lamp on when the
room lamp is off. Once the
mood lamp is on, each time
you press the button the color
of the light will change. The
mood lamp will turn off when
the button is pressed again
after the last color or when
the mood lamp button is
pressed for approximately 4
seconds or when the ROOM,
DOOR or DIMMER button is
pressed.
➄DIMMER : Whenever you push this
button when the room lamp
is turned on, the brightness
of the room lamp will
change within 3 level.
D220000AUN
✽NOTICE
If you want to defrost and defog the
front windshield, refer to “Windshield
defrosting and defogging” in this sec-
tion.
D220100AUN
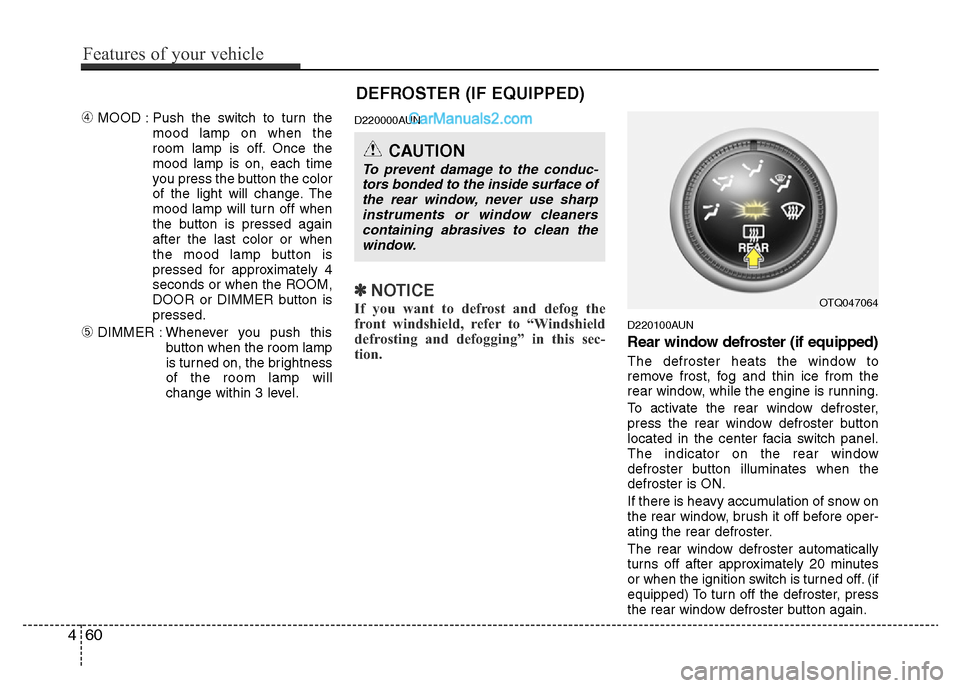
Rear window defroster (if equipped)
The defroster heats the window to
remove frost, fog and thin ice from the
rear window, while the engine is running.
To activate the rear window defroster,
press the rear window defroster button
located in the center facia switch panel.
The indicator on the rear window
defroster button illuminates when the
defroster is ON.
If there is heavy accumulation of snow on
the rear window, brush it off before oper-
ating the rear defroster.
The rear window defroster automatically
turns off after approximately 20 minutes
or when the ignition switch is turned off. (if
equipped) To turn off the defroster, press
the rear window defroster button again.
OTQ047064
CAUTION
To prevent damage to the conduc-
tors bonded to the inside surface of
the rear window, never use sharp
instruments or window cleaners
containing abrasives to clean the
window.
460
Features of your vehicle
Page 133 of 353
463
Features of your vehicle
D230101ATQ
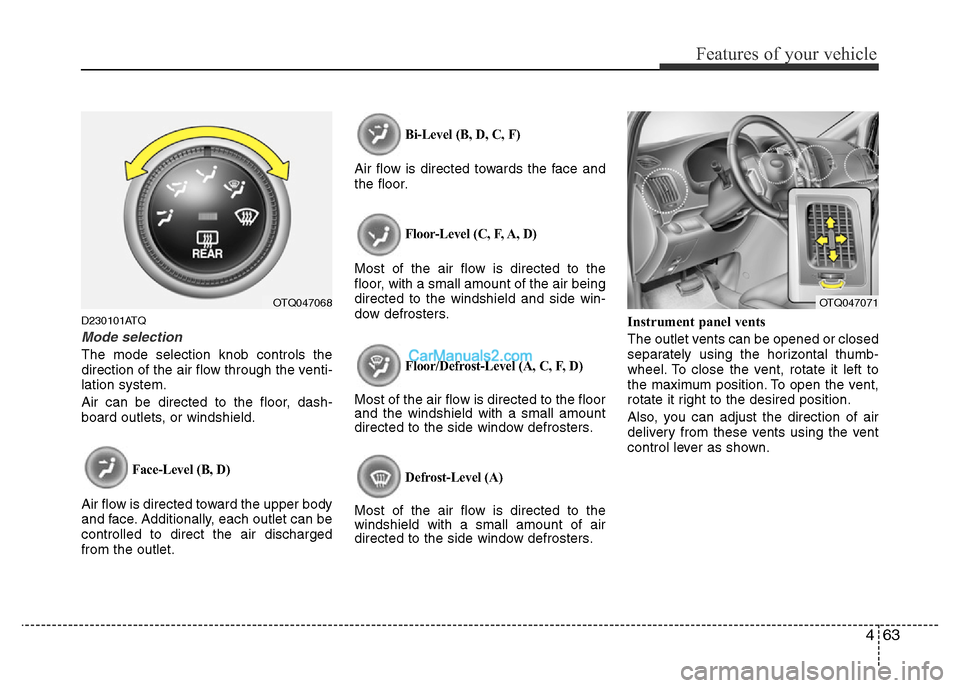
Mode selection
The mode selection knob controls the
direction of the air flow through the venti-
lation system.
Air can be directed to the floor, dash-
board outlets, or windshield.
Face-Level (B, D)
Air flow is directed toward the upper body
and face. Additionally, each outlet can be
controlled to direct the air discharged
from the outlet.
Bi-Level (B, D, C, F)
Air flow is directed towards the face and
the floor.
Floor-Level (C, F, A, D)
Most of the air flow is directed to the
floor, with a small amount of the air being
directed to the windshield and side win-
dow defrosters.
Floor/Defrost-Level (A, C, F, D)
Most of the air flow is directed to the floor
and the windshield with a small amount
directed to the side window defrosters.
Defrost-Level (A)
Most of the air flow is directed to the
windshield with a small amount of air
directed to the side window defrosters.Instrument panel vents
The outlet vents can be opened or closed
separately using the horizontal thumb-
wheel. To close the vent, rotate it left to
the maximum position. To open the vent,
rotate it right to the desired position.
Also, you can adjust the direction of air
delivery from these vents using the vent
control lever as shown.
OTQ047068OTQ047071
Page 207 of 353
Driving your vehicle
16 5
The transmission will not shift to 4th gear
until the O/D system button is pressed
again to release the switch.
When driving down a sloping road with
the transmission in O/D (4th), you can
decrease the vehicle speed without using
the brakes by pressing the O/D button.
When the ignition is switched OFF, O/D
OFF mode is automatically cancelled.
O/D OFF Indicator
This indicator light illuminates in the
instrument panel when the O/D mode is
cancelled.
E060102BTQ
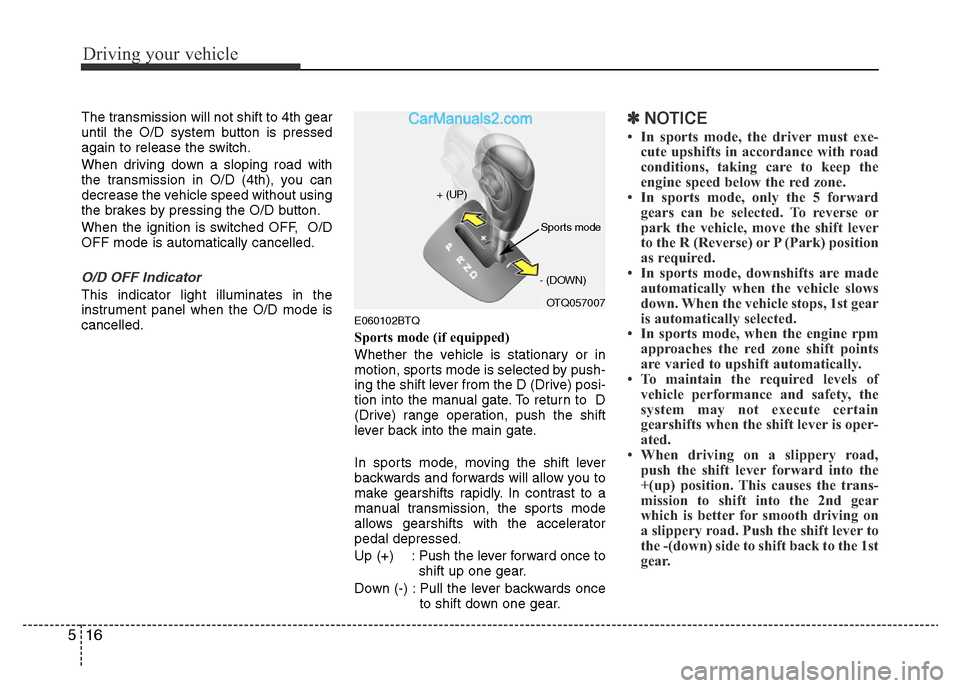
Sports mode (if equipped)
Whether the vehicle is stationary or in
motion, sports mode is selected by push-
ing the shift lever from the D (Drive) posi-
tion into the manual gate. To return to D
(Drive) range operation, push the shift
lever back into the main gate.
In sports mode, moving the shift lever
backwards and forwards will allow you to
make gearshifts rapidly. In contrast to a
manual transmission, the sports mode
allows gearshifts with the accelerator
pedal depressed.
Up (+) : Push the lever forward once to
shift up one gear.
Down (-) : Pull the lever backwards once
to shift down one gear.
✽NOTICE
• In sports mode, the driver must exe-
cute upshifts in accordance with road
conditions, taking care to keep the
engine speed below the red zone.
• In sports mode, only the 5 forward
gears can be selected. To reverse or
park the vehicle, move the shift lever
to the R (Reverse) or P (Park) position
as required.
• In sports mode, downshifts are made
automatically when the vehicle slows
down. When the vehicle stops, 1st gear
is automatically selected.
• In sports mode, when the engine rpm
approaches the red zone shift points
are varied to upshift automatically.
• To maintain the required levels of
vehicle performance and safety, the
system may not execute certain
gearshifts when the shift lever is oper-
ated.
• When driving on a slippery road,
push the shift lever forward into the
+(up) position. This causes the trans-
mission to shift into the 2nd gear
which is better for smooth driving on
a slippery road. Push the shift lever to
the -(down) side to shift back to the 1st
gear.
OTQ057007 + (UP)
- (DOWN)
Sports mode
Page 234 of 353
543
Driving your vehicle
E140400AUN
Driving with a trailer
Towing a trailer requires a certain
amount of experience. Before setting out
for the open road, you must get to know
your trailer. Acquaint yourself with the
feel of handling and braking with the
added weight of the trailer. And always
keep in mind that the vehicle you are
driving is now a good deal longer and not
nearly so responsive as your vehicle is
by itself.
Before you start, check the trailer hitch
and platform, safety chains, electrical
connector(s), lights, tires and mirror
adjustment. If the trailer has electric
brakes, start your vehicle and trailer mov-
ing and then apply the trailer brake con-
troller by hand to be sure the brakes are
working. This lets you check your electri-
cal connection at the same time.
During your trip, check occasionally to be
sure that the load is secure, and that the
lights and any trailer brakes are still work-
ing.
E140401AUN
Following distance
Stay at least twice as far behind the vehi-
cle ahead as you would when driving
your vehicle without a trailer. This can
help you avoid situations that require
heavy braking and sudden turns.
E140402AUN
Passing
You’ll need more passing distance up
ahead when you’re towing a trailer. And,
because of the increased vehicle length,
you’ll need to go much farther beyond the
passed vehicle before you can return to
your lane.
E140403AUN
Backing up
Hold the bottom of the steering wheel
with one hand. Then, to move the trailer
to the left, just move your hand to the left.
To move the trailer to the right, move your
hand to the right. Always back up slowly
and, if possible, have someone guide
you.
E140404AUN
Making turns
When you’re turning with a trailer, make
wider turns than normal. Do this so your
trailer won’t strike soft shoulders, curbs,
road signs, trees, or other objects. Avoid
jerky or sudden maneuvers. Signal well
in advance.
E140405AFD
Turn signals when towing a trailer
When you tow a trailer, your vehicle has
to have a different turn signal flasher and
extra wiring. The green arrows on your
instrument panel will flash whenever you
signal a turn or lane change. Properly
connected, the trailer lights will also flash
to alert other drivers you’re about to turn,
change lanes, or stop.
When towing a trailer, the green arrows
on your instrument panel will flash for
turns even if the bulbs on the trailer are
burned out. Thus, you may think drivers
behind you are seeing your signals
when, in fact, they are not. It’s important
to check occasionally to be sure the trail-
er bulbs are still working. You must also
check the lights every time you discon-
nect and then reconnect the wires.
Do not connect a trailer lighting system
directly to your vehicle’s lighting system.
Use only an approved trailer wiring har-
ness.
An authorized HYUNDAI dealer can
assist you in installing the wiring harness.
WARNING
Failure to use an approved trailer
wiring harness could result in dam-
age to the vehicle electrical system
and/or personal injury.