2014 HYUNDAI GENESIS G80 change time
[x] Cancel search: change timePage 133 of 432

Features of your vehicle
54 4
DISP Button
Press the DISP button to change
between modes.Distance to empty (mi. or km)
This mode indicates the estimated dis-
tance to empty based on the current fuel
in the fuel tank and the amount of fuel
delivered to the engine. When the
remaining distance is below 30 miles (50
km), “----” will be displayed and the dis-
tance to empty indicator will blink.
The meter’s working range is from 30 to
990 miles (50 to 990 km).
OBH043056OBH042057N
Type IType IIDistance to empty
Elapsed time
Average speed
Instant fuel consumption
ECO Driving ON/OFF
(if equipped)
Average fuel consumption
AV information (if equipped)
Turn by turn navigation
(if equipped)
Page 137 of 432

Features of your vehicle
58 4
D150300AEN
Warnings and indicators
All warning lights are checked by turning
the ignition switch ON (do not start the
engine). Any light that does not illuminate
should be checked by an authorized
HYUNDAI dealer.
After starting the engine, check to make
sure that all warning lights are off. If any
are still on, this indicates a situation that
needs attention. When releasing the
parking brake, the brake system warning
light should go off. The fuel warning light
will stay on if the fuel level is low.
ECO indicator
(if equipped)
The ECO indicator light helps that you to
drive economically.
It is displayed if you drive fuel efficiently
to help you improve fuel efficiency.
The ECO indicator (green) will turn on
when you are driving fuel efficiently in
the ECO Driving ON mode.
If you don't want the indicator dis-
played, you can turn the ECO Driving
ON mode to OFF mode by pressing the
DISP button (or the RESET button).
As per ECO Driving ON/OFF mode
operation, refer to the previous page.
The fuel-efficiency can be changed by
the driver's driving habits and road
conditions.
The ECO indicator will not display if the
condition doesn't meet economical
driving such as P (Park), N (Neutral), R
(Reverse) or sports mode.
While the instant fuel consumption
mode is displayed on the LCD screen,
the ECO indicator turns off (if equipped).
D150302ABH
Air bag warning light
This warning light will illuminate for
approximately 6 seconds each time you
turn the ignition switch to the ON posi-
tion.
This light also comes on when the
Supplemental Restraint System (SRS) is
not working properly. If the SRS air bag
warning light does not come on, or
continuously remains on after operating
for about 6 seconds when you turned the
ignition switch to the ON position or start-
ed the engine, or if it comes on while
driving, have the SRS inspected by an
authorized HYUNDAI dealer.
ECOWARNING
Do not watch the indicator while
driving. This will distract you and
may cause an accident that results
in severe personal injury.
Page 159 of 432

Features of your vehicle
80 4
To flash the headlights, pull the lever
towards you. It will return to the normal
(low beam) position when released. The
headlight switch does not need to be on
to use this flashing feature.D190600AUN
Turn signals and lane change sig-
nals
The ignition switch must be on for the
turn signals to function. To turn on the
turn signals, move the lever up or down
(A). Green arrow indicators on the instru-
ment panel indicate which turn signal is
operating. They will self-cancel after a
turn is completed. If the indicator contin-
ues to flash after a turn, manually return
the lever to the OFF position.To signal a lane change, move the turn
signal lever slightly and hold it in position
(B). The lever will return to the OFF posi-
tion when released.
If an indicator stays on and does not
flash or if it flashes abnormally, one of the
turn signal bulbs may be burned out and
will require replacement.
One-touch triple turn signal
(if equipped)
To activate an one-touch triple turn signal
move the turn signal lever slightly for less
than 1.8 seconds and then release it. The
lane change signals will blink 3 times.
✽ ✽
NOTICE
If an indicator flash is abnormally quick
or slow, a bulb may be burned out or
have a poor electrical connection in the
circuit.
OBH049078OBH049076
Page 177 of 432

Features of your vehicle
98 4
D230503AEN
Air conditioning
HYUNDAI Air Conditioning Systems are
filled with environmentally friendly
R-134a refrigerant.
1. Start the engine. Push the air condi-
tioning button.
2. Set the mode to the position.
3. Set the air intake control to the outside
air or recirculated air position.
4. Adjust the fan speed control and tem-
perature control to maintain maximum
comfort.
✽ ✽
NOTICE
• When using the air conditioning sys-
tem, monitor the engine temperature
gauge closely while driving up hills or
in heavy traffic when outside temper-
atures are high. Air conditioning sys-
tem operation may cause engine over-
heating. Continue to use the blower
fan but turn the air conditioning sys-
tem off if the engine temperature
gauge indicates engine overheating.
• When opening the windows in humid
weather air conditioning may create
water droplets inside the vehicle.
Since excessive water droplets may
cause damage to electrical equipment,
air conditioning should only be oper-
ated with the windows closed.
Air conditioning system operation tips
If the vehicle has been parked in direct
sunlight during hot weather, open the
windows for a short time to let the hot
air inside the vehicle escape.
To help reduce moisture inside of the
windows on rainy or humid days,
decrease the humidity inside the vehi-
cle by operating the air conditioning
system.
During air conditioning system opera-
tion, you may occasionally notice a
slight change in engine speed as the
air conditioning compressor cycles.
This is a normal system operation
characteristic.
Use the air conditioning system every
month only for a few minutes to ensure
maximum system performance.
Page 178 of 432

499
Features of your vehicle
When using the air conditioning sys-
tem, you may notice clear water drip-
ping (or even puddling) on the ground
under the passenger side of the vehi-
cle. This is a normal system operation
characteristic.
Operating the air conditioning system
in the recirculated air position provides
maximum cooling, however, continual
operation in this mode may cause the
air inside the vehicle to become stale.
After sufficient cooling has been
achieved, switch back from the recircu-
lated air to the fresh outside air posi-
tion.
During cooling operation, you may
occasionally notice a misty air flow
because of rapid cooling and humid air
intake. This is a normal system opera-
tion characteristic.
D230300AEN
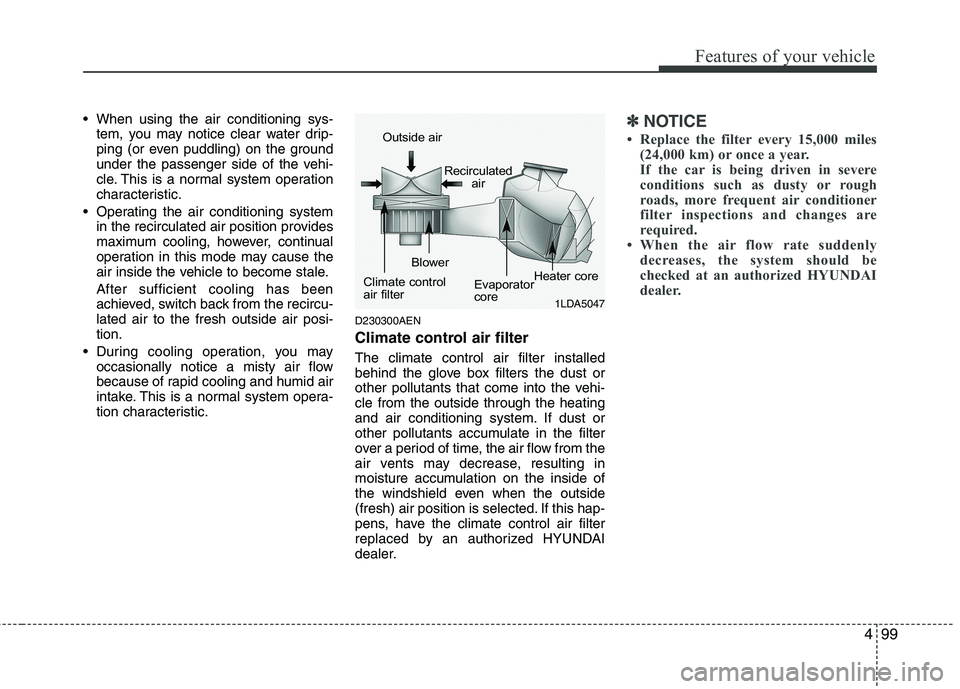
Climate control air filter
The climate control air filter installed
behind the glove box filters the dust or
other pollutants that come into the vehi-
cle from the outside through the heating
and air conditioning system. If dust or
other pollutants accumulate in the filter
over a period of time, the air flow from the
air vents may decrease, resulting in
moisture accumulation on the inside of
the windshield even when the outside
(fresh) air position is selected. If this hap-
pens, have the climate control air filter
replaced by an authorized HYUNDAI
dealer.
✽ ✽
NOTICE
• Replace the filter every 15,000 miles
(24,000 km) or once a year.
If the car is being driven in severe
conditions such as dusty or rough
roads, more frequent air conditioner
filter inspections and changes are
required.
• When the air flow rate suddenly
decreases, the system should be
checked at an authorized HYUNDAI
dealer.
1LDA5047
Outside air
Recirculated
air
Climate control
air filterBlower
Evaporator
coreHeater core
Page 188 of 432

4109
Features of your vehicle
D280600AEN
Digital clock
Whenever the battery terminals or relat-
ed fuses are disconnected, you must
reset the time.
When the ignition switch is in the ACC or
ON position, the clock buttons operate as
follows:
D280601AUN
Hour (1)
Pressing the H button with your finger, a
pencil or similar object will advance the
time displayed by one hour.
D280602AUN
Minute (2)
Pressing the M button with your finger, a
pencil or similar object will advance the
time displayed by one minute.
D280603ABH
Reset (3)
To clear away minutes, press the R but-
ton with your finger, a pencil or similar
object. Then the clock will be set precise-
ly on the hour.
For example, if the R button is pressed
while the time is between 9:01 and 9:29,
the display will be reset to 9:00.
9:01 ~ 9:29 display changed to 9:00
9:30 ~ 9:59 display changed to 10:00
WARNING
Do not put a finger or a foreign ele-
ment (pin, etc.) into a power outlet
and do not touch with a wet hand.
You may get an electric shock.
OBH048121L
WARNING
Do not adjust the clock while driv-
ing. You may lose your steering
control and cause an accident that
results in severe personal injury or
death.
Page 189 of 432

Features of your vehicle
110 4
D280604AEN
Display conversion
To change the 12 hour format to the 24
hour format, press the R button until the
display blinks.
For example, if the R button is pressed
while the time is 10:15 p.m., the display
will be changed to 22:15.
D281200ABH
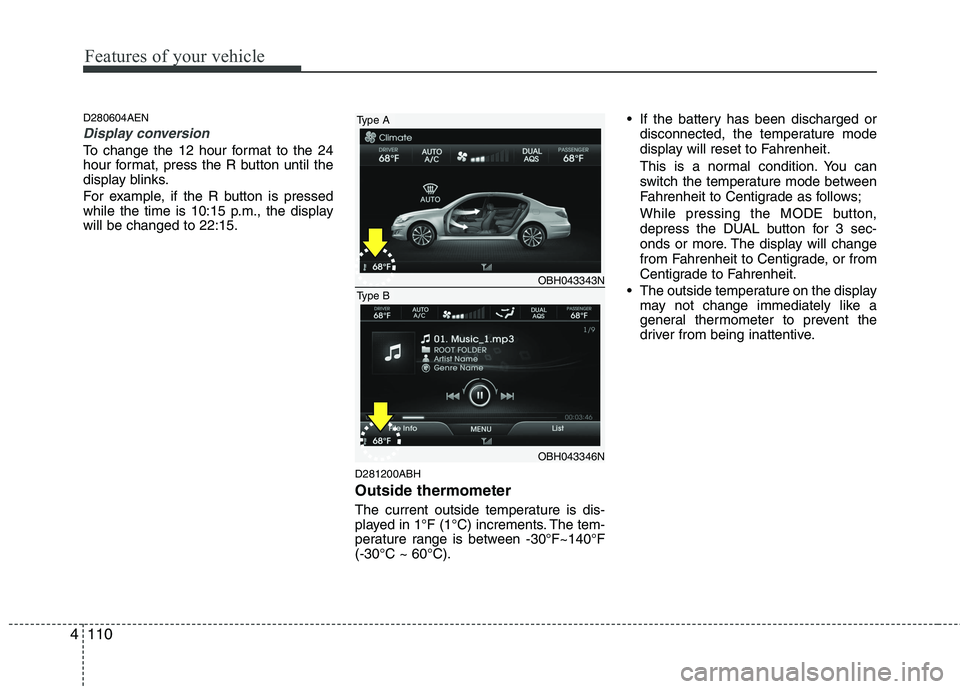
Outside thermometer
The current outside temperature is dis-
played in 1°F (1°C) increments. The tem-
perature range is between -30°F~140°F
(-30°C ~ 60°C). If the battery has been discharged or
disconnected, the temperature mode
display will reset to Fahrenheit.
This is a normal condition. You can
switch the temperature mode between
Fahrenheit to Centigrade as follows;
While pressing the MODE button,
depress the DUAL button for 3 sec-
onds or more. The display will change
from Fahrenheit to Centigrade, or from
Centigrade to Fahrenheit.
The outside temperature on the display
may not change immediately like a
general thermometer to prevent the
driver from being inattentive.
OBH043343N
OBH043346N
Type A
Type B
Page 211 of 432

Features of your vehicle
132 4
Using XM Satellite Radio
1. XM Button
Turns to XM Satellite Radio Mode.
XM mode toggles in order to XM1
➟XM2➟XM3➟XM1... when the button is pressed
each time.
2. SEEK Button
] button for less
than 0.8 second to select previous
channel.
] button for 0.8 sec-
ond or longer to continuously move to
previous channel.
] button for less
than 0.8 second to select next channel.
] button for 0.8 sec-
ond or longer to continuously move to
next channel.
Seek or Tune to XM channel
0 to display the Radio ID.
3. SCAN Button
Press to hear a brief sampling of all
channels. To cancel the scan mode,
press the button once again.
4. PRESET Buttons
Push [1]~[6] buttons less than 0.8 sec-
ond to play the channel saved in each
button. Push pre-set button for 0.8 sec-
ond or longer to save the current channel
to the respective button with a beep.
5. TUNE Knob & SETUP Button
Turn this button clockwise to display
channels after.
Also, turn this button counterclockwise to
display channels before current channel.
XM setup mode : It will be able to change
the XM display. (ex, Display by category/
channel or artist/song title.)
6. INFO Button
Displays the information of the current
channel in the order of Artist/Song title➟Category/Channel name➟Current Play
Channel➟Artist/Song title➟Category/Cha-
nnel name... when the button is pressed
each time.
If the complete text information is not dis-
played, rotate the tune button to see the
next page.
7. CAT/FOLDER Button
Press [CAT ] button to search previ-
ous category.
Press [CAT ] button to search next
category.
To listen to the displayed category, press
the TUNE/SETUP button.
To scan channel in displayed category,
press the scan button.
To search channel in displayed category,
press seek buttons or turn the tune but-
ton clockwise/counterclockwise.
(CATEGORY icon will be turned on in
Category mode)