Page 17 of 479
25
Your vehicle at a glance
INSTRUMENT PANEL OVERVIEW
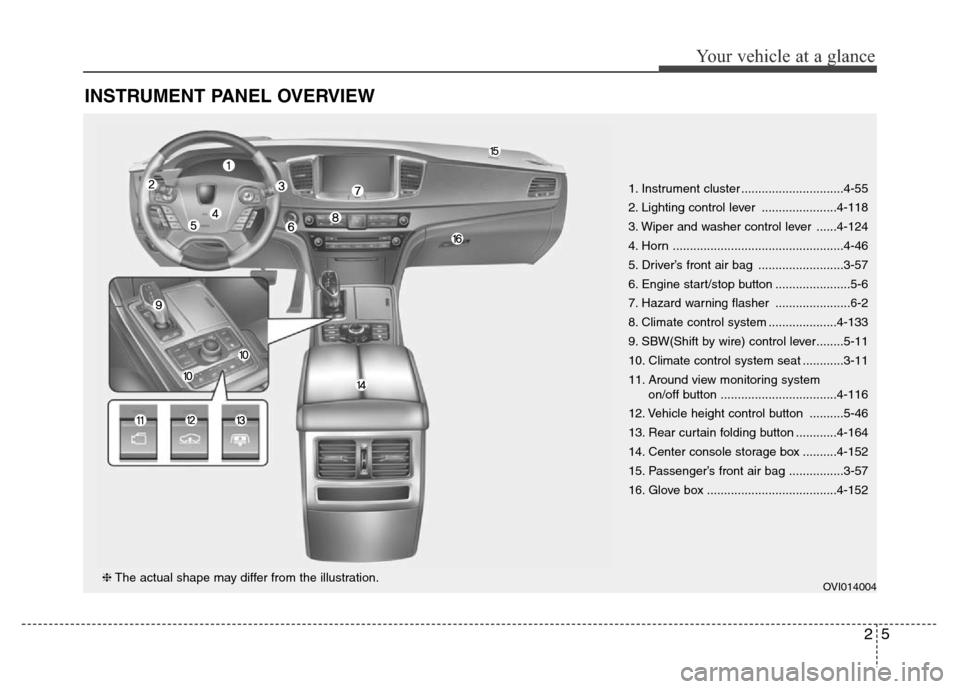
1. Instrument cluster ..............................4-55
2. Lighting control lever ......................4-118
3. Wiper and washer control lever ......4-124
4. Horn ..................................................4-46
5. Driver’s front air bag .........................3-57
6. Engine start/stop button ......................5-6
7. Hazard warning flasher ......................6-2
8. Climate control system ....................4-133
9. SBW(Shift by wire) control lever........5-11
10. Climate control system seat ............3-11
11. Around view monitoring system
on/off button ..................................4-116
12. Vehicle height control button ..........5-46
13. Rear curtain folding button ............4-164
14. Center console storage box ..........4-152
15. Passenger’s front air bag ................3-57
16. Glove box ......................................4-152
OVI014004❈The actual shape may differ from the illustration.
Page 21 of 479
Safety features of your vehicle
2 3
Driver’s seat
(1) Seat sliding forward or back-
ward**/ Seat height and cushion
tilting adjustment
(2) Seat cushion length adjustment
(3) Seatback angle adjustment
(4) Headrest height adjustment
(5) Driver position memory system
(6) Climate control system seat*
(7) Lumbar support adjustment
Front passenger’s seat
(8) Seat sliding forward or back-
ward/ Seat height and cushion
tilting adjustment*
(9) Seatback angle adjustment
(10) Headrestheight adjustment
(11) Climate control system seat*
SEATS
OVI033001
■Type A■Type B■Type C
Page 22 of 479
33
Safety features of your vehicle
Rear seat
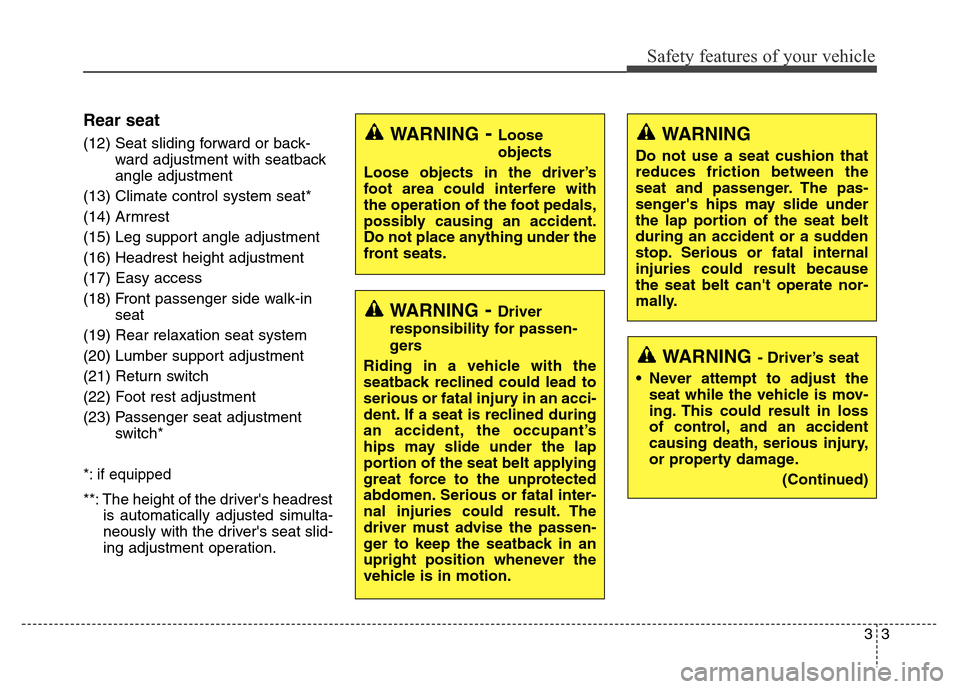
(12) Seat sliding forward or back-
ward adjustment with seatback
angle adjustment
(13) Climate control system seat*
(14) Armrest
(15) Leg support angle adjustment
(16) Headrest height adjustment
(17) Easy access
(18) Front passenger side walk-in
seat
(19) Rear relaxation seat system
(20) Lumber support adjustment
(21) Return switch
(22) Foot rest adjustment
(23) Passenger seat adjustment
switch*
*: if equipped
**: The height of the driver's headrest
is automatically adjusted simulta-
neously with the driver's seat slid-
ing adjustment operation.
WARNING- Loose
objects
Loose objects in the driver’s
foot area could interfere with
the operation of the foot pedals,
possibly causing an accident.
Do not place anything under the
front seats.
WARNING- Driver
responsibility for passen-
gers
Riding in a vehicle with the
seatback reclined could lead to
serious or fatal injury in an acci-
dent. If a seat is reclined during
an accident, the occupant’s
hips may slide under the lap
portion of the seat belt applying
great force to the unprotected
abdomen. Serious or fatal inter-
nal injuries could result. The
driver must advise the passen-
ger to keep the seatback in an
upright position whenever the
vehicle is in motion.
WARNING
Do not use a seat cushion that
reduces friction between the
seat and passenger. The pas-
senger's hips may slide under
the lap portion of the seat belt
during an accident or a sudden
stop. Serious or fatal internal
injuries could result because
the seat belt can't operate nor-
mally.
WARNING- Driver’s seat
• Never attempt to adjust the
seat while the vehicle is mov-
ing. This could result in loss
of control, and an accident
causing death, serious injury,
or property damage.
(Continued)
Page 25 of 479
Safety features of your vehicle
6 3
Seatback angle
Push the upper part of the control
switch forward or backward to move
the seatback to the desired angle.
Release the switch once the seat
reaches the desired position.
Seat cushion height
Push the front portion of the control
switch up to raise or down to lower
the front part of the seat cushion.
Push the rear portion of the control
switch up to raise or down to lower
the height of the seat cushion.
Release the switch once the seat
reaches the desired position.
Lumbar support (for driver’s seat)
The lumbar support can be adjusted
by pressing the lumbar support
switch. Press the front portion of the
switch (1) to increase support or the
rear portion of the switch (2) to
decrease support.
To move the support position up or
down, press the switch (3) or (4).
OVI033004OVI033005OVI033006
Page 26 of 479
37
Safety features of your vehicle
Headrest
The driver's and front passenger's
seats are equipped with a headrest
for the occupant's safety and com-
for t.
The headrest not only provides com-
fort for the driver and front passen-
ger, but also helps to protect the
head and neck in the event of a colli-
sion.Forward and backward adjustment
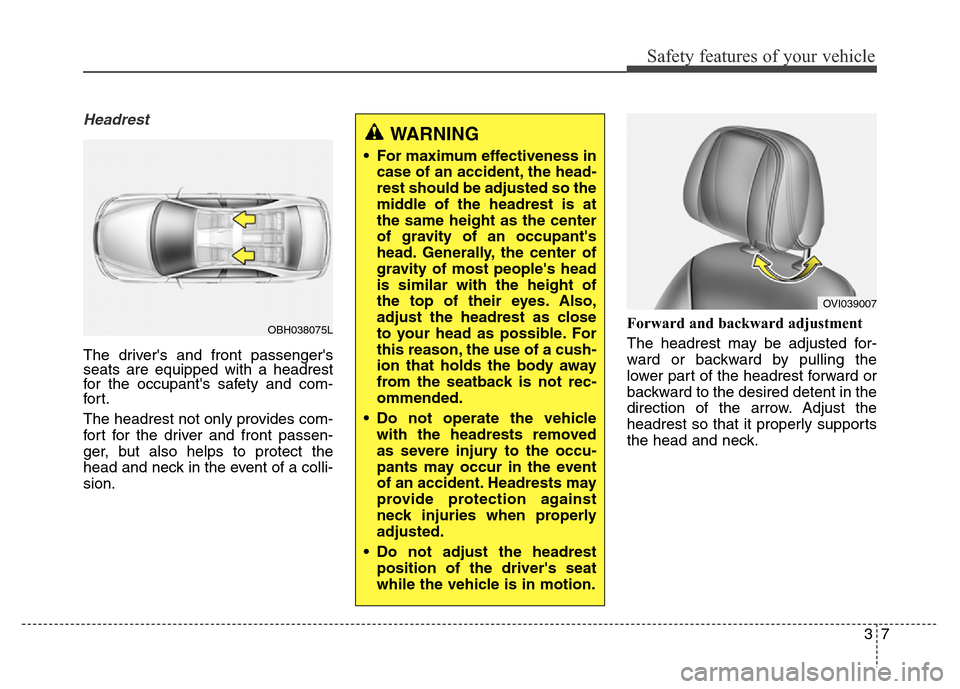
The headrest may be adjusted for-
ward or backward by pulling the
lower part of the headrest forward or
backward to the desired detent in the
direction of the arrow. Adjust the
headrest so that it properly supports
the head and neck.
OBH038075L
WARNING
• For maximum effectiveness in
case of an accident, the head-
rest should be adjusted so the
middle of the headrest is at
the same height as the center
of gravity of an occupant's
head. Generally, the center of
gravity of most people's head
is similar with the height of
the top of their eyes. Also,
adjust the headrest as close
to your head as possible. For
this reason, the use of a cush-
ion that holds the body away
from the seatback is not rec-
ommended.
• Do not operate the vehicle
with the headrests removed
as severe injury to the occu-
pants may occur in the event
of an accident. Headrests may
provide protection against
neck injuries when properly
adjusted.
• Do not adjust the headrest
position of the driver's seat
while the vehicle is in motion.
OVI039007
Page 28 of 479
39
Safety features of your vehicle
Reinstall
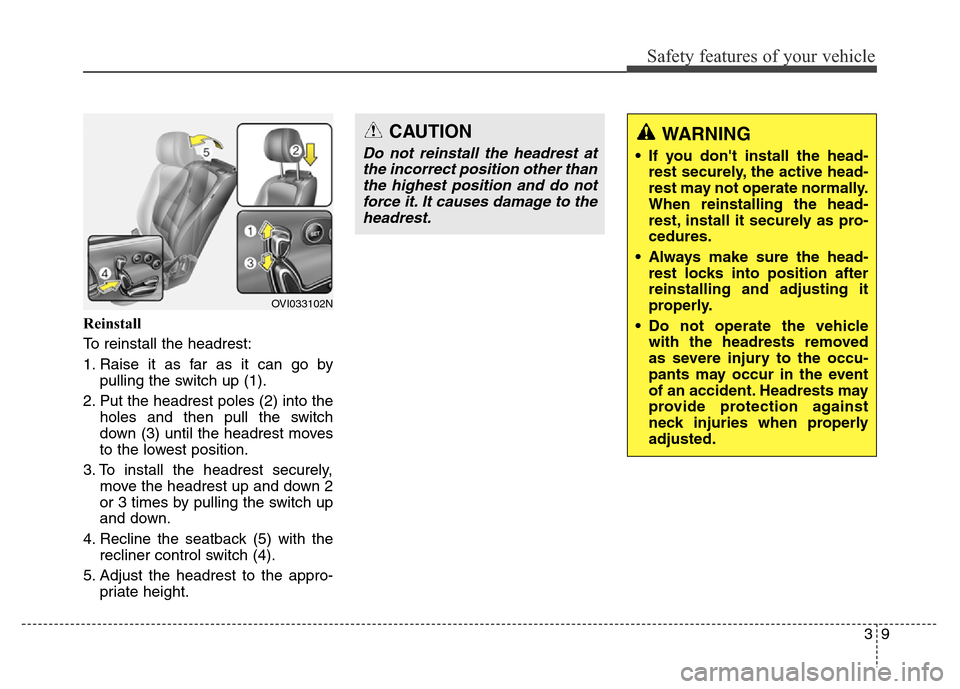
To reinstall the headrest:
1. Raise it as far as it can go by
pulling the switch up (1).
2. Put the headrest poles (2) into the
holes and then pull the switch
down (3) until the headrest moves
to the lowest position.
3. To install the headrest securely,
move the headrest up and down 2
or 3 times by pulling the switch up
and down.
4. Recline the seatback (5) with the
recliner control switch (4).
5. Adjust the headrest to the appro-
priate height.
WARNING
• If you don't install the head-
rest securely, the active head-
rest may not operate normally.
When reinstalling the head-
rest, install it securely as pro-
cedures.
• Always make sure the head-
rest locks into position after
reinstalling and adjusting it
properly.
• Do not operate the vehicle
with the headrests removed
as severe injury to the occu-
pants may occur in the event
of an accident. Headrests may
provide protection against
neck injuries when properly
adjusted.
CAUTION
Do not reinstall the headrest at
the incorrect position other than
the highest position and do not
force it. It causes damage to the
headrest.
OVI033102N
Page 39 of 479
Safety features of your vehicle
20 3
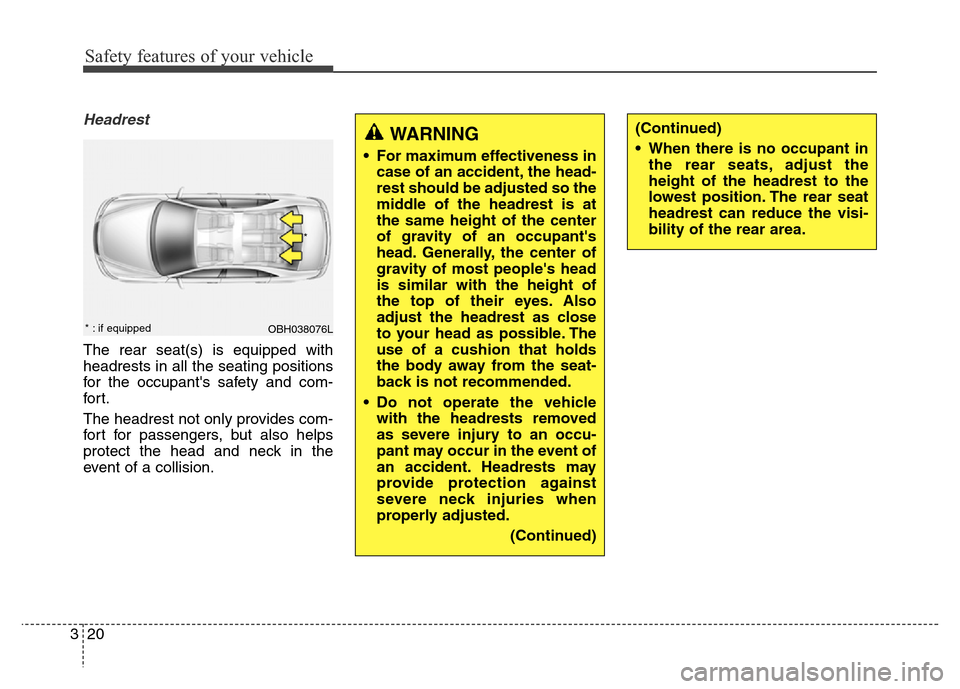
Headrest
The rear seat(s) is equipped with
headrests in all the seating positions
for the occupant's safety and com-
for t.
The headrest not only provides com-
fort for passengers, but also helps
protect the head and neck in the
event of a collision.
OBH038076L * : if equipped*
WARNING
• For maximum effectiveness in
case of an accident, the head-
rest should be adjusted so the
middle of the headrest is at
the same height of the center
of gravity of an occupant's
head. Generally, the center of
gravity of most people's head
is similar with the height of
the top of their eyes. Also
adjust the headrest as close
to your head as possible. The
use of a cushion that holds
the body away from the seat-
back is not recommended.
• Do not operate the vehicle
with the headrests removed
as severe injury to an occu-
pant may occur in the event of
an accident. Headrests may
provide protection against
severe neck injuries when
properly adjusted.
(Continued)
(Continued)
• When there is no occupant in
the rear seats, adjust the
height of the headrest to the
lowest position. The rear seat
headrest can reduce the visi-
bility of the rear area.
Page 49 of 479

Safety features of your vehicle
30 3
✽NOTICE
If you are not able to pull out the
seat belt from the retractor, firmly
pull the belt out and release it. Then
you will be able to pull the belt out
smoothly.
Height adjustment (front seat)
You can adjust the height of the
shoulder belt anchor to one of 4 posi-
tions for maximum comfort and safe-
ty.
The height of the adjusting seat belt
should not be too near your neck.
The shoulder portion should be
adjusted so that it lies across your
chest and midway over your shoulder
nearest the door and not your neck.
To adjust the height of the seat belt
anchor, lower or raise the height
adjuster into an appropriate position.To raise the height adjuster, pull it up
(1). To lower it, push it down (3) while
pressing the height adjuster button
(2).
Release the button to lock the
anchor into position. Try sliding the
height adjuster to make sure that it
has locked into position.
WARNING
• Verify the shoulder belt
anchor is locked into position
at the appropriate height.
Never position the shoulder
belt across your neck or face.
Improperly positioned seat
belts can cause serious
injuries in an accident.
• Failure to replace seat belts
after an accident could leave
you with damaged seat belts
that will not provide protec-
tion in the event of another
collision leading to personal
injury or death. Replace your
seat belts after being in an
accident as soon as possible.OBH038022
Front seat