Page 134 of 476

449
Features of your vehicle
Electric chromic mirror with
homelink system (if equipped)
To operate the electric rearview mirror
Press the I button (1) to turn the
automatic- dimming function on. The
mirror indicator light will illuminate.
Press the O button (2) to turn the
automatic- dimming function off. The
mirror indicator light will turn off.HomeLink
®Wireless Control System
Your new mirror comes with an inte-
grated HomeLink Universal
Transceiver, which allows you to pro-
gram the mirror to activate your
garage door(s), estate gate, home
lighting, etc. The mirror actually
learns the codes from your various
existing transmitters.
OHD046025NOHD046305N Glare detection sensor
Indicator light
Homelink buttons
WARNING
When programming the
HomeLink®Wireless Control
System, you may be operating
a garage door or gate operator.
Make sure that people and
objects are out of the way of
the moving door or gate to pre-
vent potential harm or damage.
Do not use HomeLink with
any garage door opener that
lacks the safety stop and
reverse feature as required by
federal safety standards. (This
includes any garage door
opener model manufactured
before April 1, 1982.) A garage
door opener which cannot
detect an object, signaling the
door to stop and reverse,
does not meet current federal
safety standards. Using a
garage door opener without
these features increases risk
of serious injury or death. For
more information, call 1-800-
355-3515 or on the internet at
www.homelink.com.
Page 135 of 476

Features of your vehicle
50 4
Retain the original transmitter for
future programming procedures (i.e.,
new vehicle purchase). It is also sug-
gested that upon the sale of the vehi-
cle, the programmed HomeLink but-
tons be erased for security purposes
(follow step 1 in the “Programming”
portion of this text).Programming
Your vehicle may require the ignition
switch to be turned to the ACC posi-
tion for programming and/or opera-
tion of HomeLink. It is also recom-
mended that a new battery be
replaced in the hand-held transmitter
of the device being programmed to
HomeLink for quicker training and
accurate transmission of the radio-
frequency.
Follow these steps to train your
HomeLink mirror:
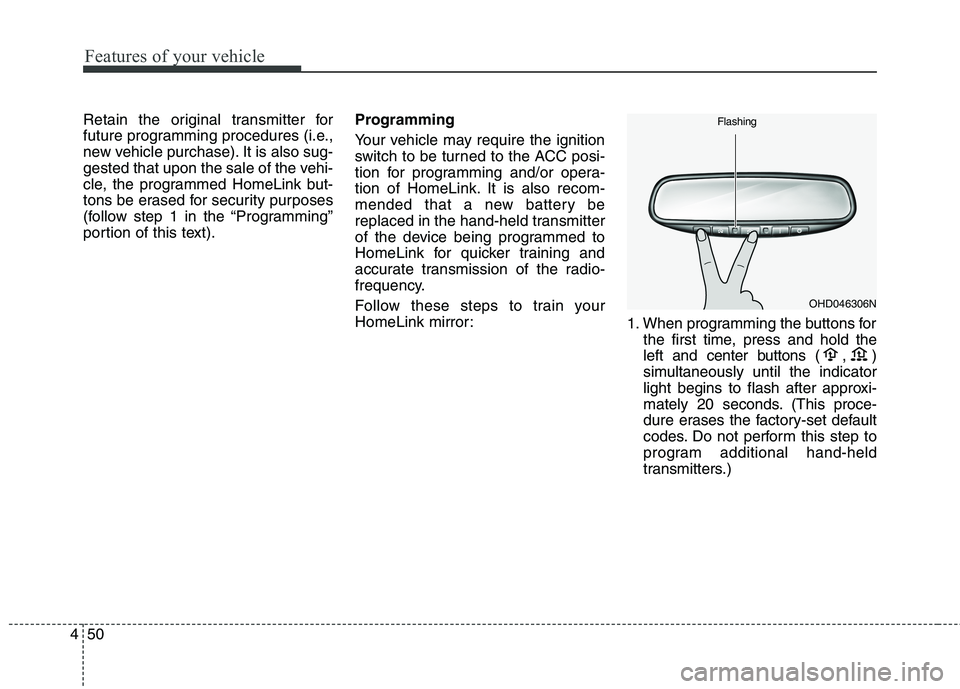
1. When programming the buttons for
the first time, press and hold
the
left and center buttons (
,)
simultaneously until the indicator
light begins to flash after approxi-
mately 20 seconds. (This proce-
dure erases the factory-set default
codes. Do not perform this step to
program additional hand-held
transmitters.)
OHD046306N Flashing
Page 136 of 476

451
Features of your vehicle
✽ ✽
NOTICE
For non rolling code garage door
openers, follow steps 2 - 3.
For rolling code garage door open-
ers, follow steps 2 - 6.
For Canadian Programming, please
follow the Canadian Programming
section.
For help with determining whether
your garage is non-rolling code or
rolling code, please refer to the
garage door openers owner’s manu-
al or contact HomeLink customer
service at 1-800-355-3515.
2. Press and hold the button on the
HomeLink system you wish to train
and the button on the transmitter
while the transmitter is approxi-
mately 1 to 3 inches away from the
mirror. Do not release the buttons
until step 3 has been completed.
3. The HomeLink indicator light will
flash, first slowly and then rapidly.
When the indicator light flashes
rapidly, both buttons may be
released. (The rapid flashing light
indicates successful programming
of the new frequency signal.)
✽ ✽
NOTICE
Some gate operators and garage
door openers may require you to
replace step #3 with the “cycling”
procedure noted in the “Canadian
Programming” section of this docu-
ment.
OHD046307N Flashing
1-3inches
Transmitter
Page 137 of 476

Features of your vehicle
52 4
Rolling code programming
To train a garage door opener (or
other rolling code equipped devices)
with the rolling code feature, follow
these instructions after completing
the “Programming” portion of this
text. (A second person may make the
following training procedures quicker
& easier.)
4. Locate the “learn” or “smart” but-
ton on the device’s motor head
unit. Exact location and color of
the button may vary by product
brand. If there is difficulty locating
the “learn” or “smart” button, refer-
ence the device’s owner’s manual
or contact HomeLink at 1-800-
355-3515 or on the internet at
www.homelink.com.
5. Press and release the “learn” or
“smart” button on the device’s
motor head unit.You have 30
seconds to complete step num-
ber 6.6. Return to the vehicle and firmly
press and release the pro-
grammed HomeLink button up to
three times. The rolling code
equipped device should now rec-
ognize the HomeLink signal and
activate when the HomeLink but-
ton is pressed. The remaining two
buttons may now be programmed
if this has not previously been
done. Refer to the “Programming”
portion of this text.Operating HomeLink
To operate, simply press the pro-
grammed HomeLink button.
Activation will now occur for the
trained product (garage door, securi-
ty system, entry door lock, estate
gate, or home or office lighting). For
convenience, the hand-held trans-
mitter of the device may also be used
at any time. The HomeLink Wireless
Controls System (once programmed)
or the original hand-held transmitter
may be used to activate the device
(e.g. garage door, entry door lock,
etc.). In the event that there are still
programming difficulties, contact
HomeLink at 1-800-355-3515 or on
the internet at www.homelink.com.
Page 138 of 476

453
Features of your vehicle
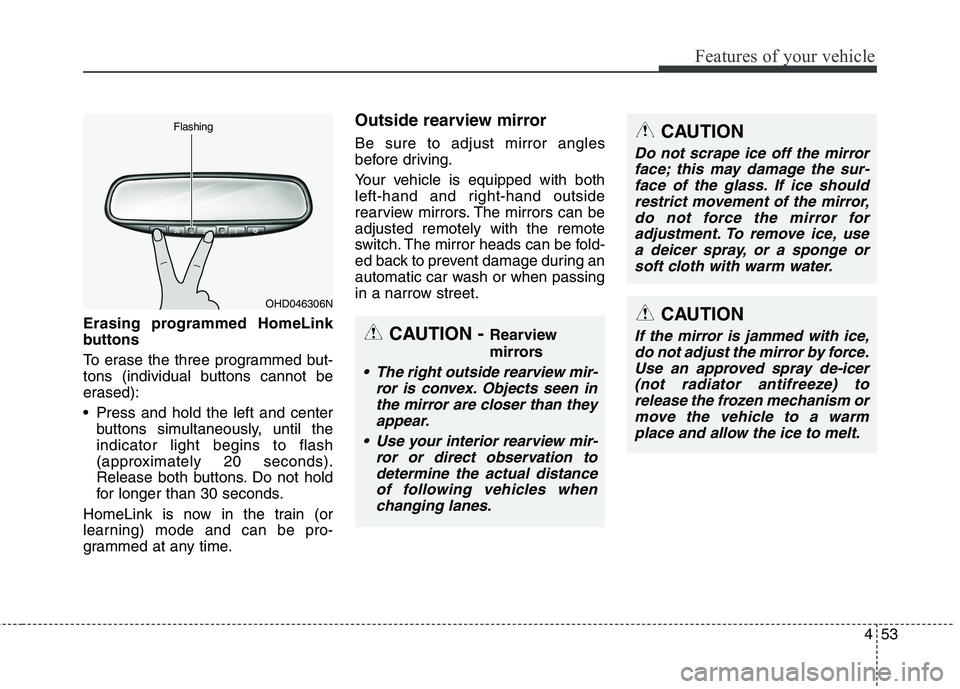
Erasing programmed HomeLink
buttons
To erase the three programmed but-
tons (individual buttons cannot be
erased):
Press and hold the left and center
buttons simultaneously, until the
indicator light begins to flash
(approximately 20 seconds).
Release both buttons. Do not hold
for longer than 30 seconds.
HomeLink is now in the train (or
learning) mode and can be pro-
grammed at any time.
Outside rearview mirror
Be sure to adjust mirror angles
before driving.
Your vehicle is equipped with both
left-hand and right-hand outside
rearview mirrors. The mirrors can be
adjusted remotely with the remote
switch. The mirror heads can be fold-
ed back to prevent damage during an
automatic car wash or when passing
in a narrow street.
OHD046306N Flashing
CAUTION - Rearview
mirrors
The right outside rearview mir-
ror is convex. Objects seen in
the mirror are closer than they
appear.
Use your interior rearview mir-
ror or direct observation to
determine the actual distance
of following vehicles when
changing lanes.
CAUTION
Do not scrape ice off the mirror
face; this may damage the sur-
face of the glass. If ice should
restrict movement of the mirror,
do not force the mirror for
adjustment. To remove ice, use
a deicer spray, or a sponge or
soft cloth with warm water.
CAUTION
If the mirror is jammed with ice,
do not adjust the mirror by force.
Use an approved spray de-icer
(not radiator antifreeze) to
release the frozen mechanism or
move the vehicle to a warm
place and allow the ice to melt.
Page 141 of 476
Features of your vehicle
56 4
INSTRUMENT CLUSTER
OGD042040N
1. Tachometer
2. Turn signal indicators
3. Speedometer
4. Engine temperature gauge
5. Warning and indicator lights
6. Fuel gauge
7. Odometer/Trip computer
* The actual cluster in the vehicle may dif-
fer from the illustration.
For more details refer to the "Gauges"
section in the next pages.
Page 142 of 476
457
Features of your vehicle
Instrument panel illumination
When the vehicle’s parking lights or
headlights are on, press the upper or
lower part of the switch to adjust the
brightness of the instrument panel
illumination.
The illumination intensity will show
on the LCD screen.
Gauges
Speedometer
The speedometer indicates the
speed of the vehicle.
The speedometer is calibrated in
miles per hour and/or kilometers per
hour.
Tachometer
The tachometer indicates the
approximate number of engine revo-
lutions per minute (rpm).
Use the tachometer to select the cor-
rect shift points and to prevent lug-
ging and/or over-revving the engine.
OGDE041042OMD040044NOGD042044N
Page 143 of 476

Features of your vehicle
58 4
When the door is open, or if the
engine is not started within 1 minute,
the tachometer pointer may move
slightly with the ignition in the ON
position with the engine OFF. This
movement is normal and will not
affect the accuracy of the tachometer
once the engine is running.
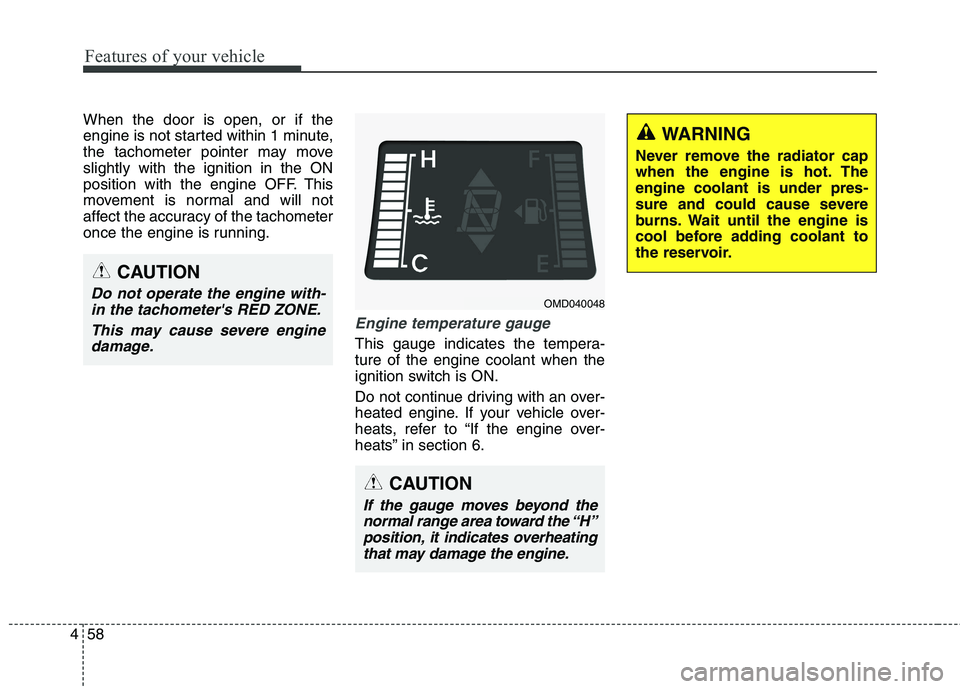
Engine temperature gauge
This gauge indicates the tempera-
ture of the engine coolant when the
ignition switch is ON.
Do not continue driving with an over-
heated engine. If your vehicle over-
heats, refer to “If the engine over-
heats” in section 6.
WARNING
Never remove the radiator cap
when the engine is hot. The
engine coolant is under pres-
sure and could cause severe
burns. Wait until the engine is
cool before adding coolant to
the reservoir.
CAUTION
If the gauge moves beyond the
normal range area toward the “H”
position, it indicates overheating
that may damage the engine.
CAUTION
Do not operate the engine with-
in the tachometer's RED ZONE.
This may cause severe engine
damage.OMD040048