Page 343 of 422
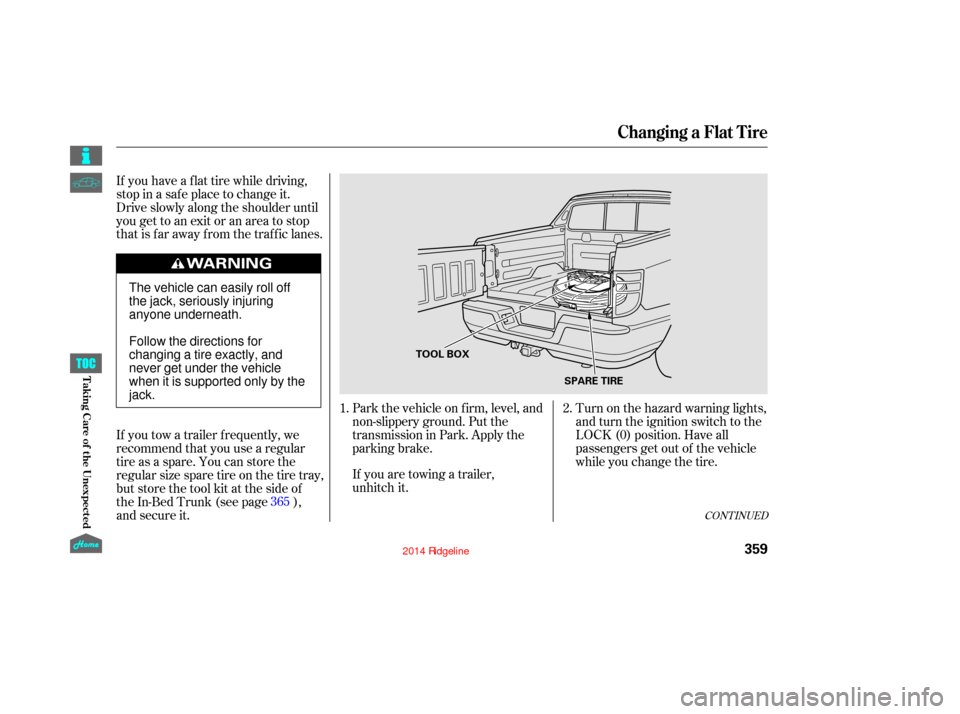
Remove the three mounting
screws f rom the light assembly.
Remove the lens from the
light assembly.
Pull the bulb straight out of its
socket. Push the new bulb straight
into the socket until it bottoms.
Place a cloth on the edge of the
lens segment to prevent scratches.
Remove each lens segment by
caref ully prying on its edge with a
small f lat-tip screwdriver.
Remove the screw under each lens.
Pull the high-mount brake light
assembly out of the vehicle.
Install the new bulb into
the socket.
Push the socket into the light
assembly, and turn it clockwise
until it locks.
Turn on the lights to make sure
the new bulb is working.
Install the rear light assembly in
the rear pillar. Tighten the two
bolts securely.
1.
2.
3. 4.
5.
6.
6.
7.
8.
9.
Replacing a High-mount Brake
Light Bulb
Lights
338
LENS SEGMENT
SCREW SCREW
BULB
12/08/09 16:43:48 31SJC670_345
Maint enance
Page 344 of 422
Pull the bulb straight out of its
socket. Push the new bulb straight
into the socket until it bottoms.
Push the socket into the light
assembly, and turn it clockwise
until it locks.
Remove the license plate light
assembly by pulling it
towards you, and then pulling the
front edge upward.
Remove the socket f rom the light
assembly by turning it one-quarter
turn counterclockwise.
Put the lens back on the light
assembly, and tighten the
mounting bolts securely.
Turn on the lights to make sure
the new bulb is working.
Put the light assembly back into
the vehicle. Install the screws and
tighten them securely.
Reinstall the lens segments.
1.
2. 3.
4.
8. 7.
9.
CONT INUED
Replacing a Rear
License Plate Bulb
Lights
339
BULB
SOCKET
12/08/09 16:43:56 31SJC670_346
Maint enance
Page 345 of 422
Pull the bulb straight out of its
socket. Push the new bulb straight
into the socket until it bottoms.
Push the socket into the light
assembly, and turn it clockwise
until it locks.
Remove the mounting screw f rom
the bed light assembly.
Pull out the light assembly.
Remove the socket f rom the light
assembly by turning it one-quarter
turn counterclockwise.
Turn on the lights to make sure
the new bulb is working.
Reinstall the light assembly in
1.
2.
3. 4.
5.
5.
6.
Replacing a Bed L ight Bulb
Lights
340
SCREW
SCREW BULB
SOCKET
12/08/09 16:44:04 31SJC670_347
Maint enance
the bumper.
Page 346 of 422
If your seat belts get dirty, use a sof t
brush with a mixture of mild soap
and warm water to clean them. Do
not use bleach, dye, or cleaning
solvents. Let the belts air-dry bef ore
you use the vehicle.Dirt build-up in the loops of the seat
belt anchors can cause the belts to
retract slowly. Wipe the insides of
the loops with a clean cloth
dampened in mild soap and warm
water or isopropyl alcohol.
Reinstall the light assembly.
Turn on the lights to make sure
the new bulb is working.
Reinstall the mounting screw, and
tighten it securely.
6.
7.
8.
Cleaning the Seat Belts
Lights, Cleaning the Seat Belts
341
LOOP
12/08/09 16:44:11 31SJC670_348
Maint enance
Page 364 of 422

Turn on the hazard warning lights,
and turn the ignition switch to the
LOCK (0) position. Have all
passengers get out of the vehicle
while you change the tire.
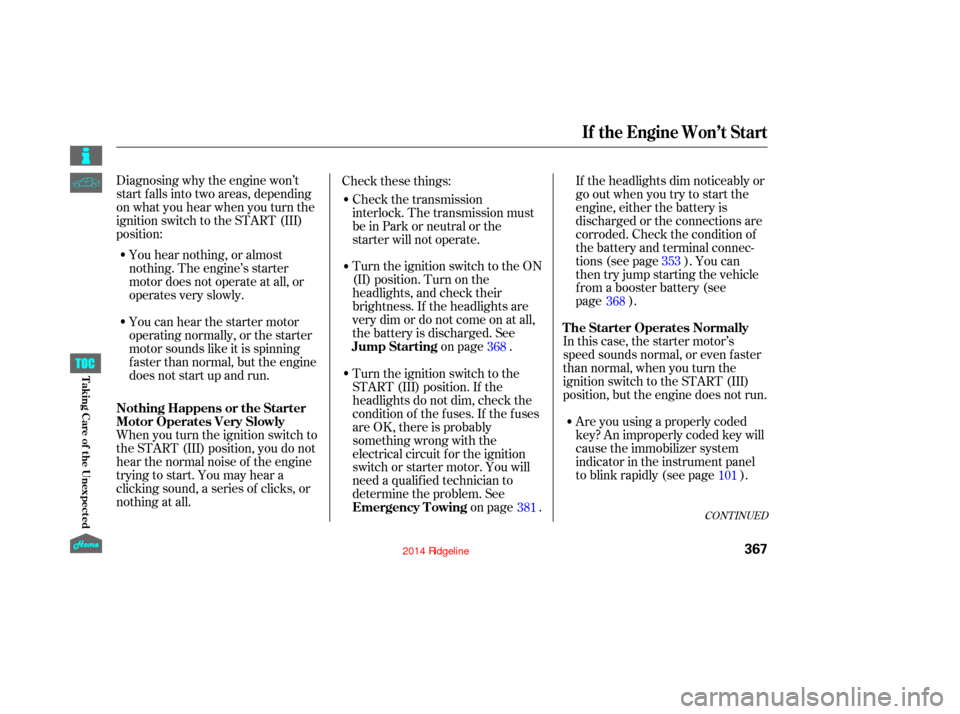
Park the vehicle on f irm, level, and
non-slippery ground. Put the
transmission in Park. Apply the
parking brake.
If you are towing a trailer,
unhitch it.
If you have a f lat tire while driving,
stop in a saf e place to change it.
Drive slowly along the shoulder until
you get to an exit or an area to stop
that is far away from the traffic lanes.
If you tow a trailer f requently, we
recommend that you use a regular
tire as a spare. You can store the
regular size spare tire on the tire tray,
but store the tool kit at the side of
the In-Bed Trunk (see page ),
and secure it.
2.
1.
365
CONT INUED
Changing a Flat Tire
T aking Care of t he Unexpect ed
359
TOOL BOX SPARE TIRE
The vehicle can easily roll off
the jack, seriously injuring
anyone underneath.
Follow the directions for
changing a tire exactly, and
never get under the vehicle
when it is supported only by the
jack.
12/08/09 16:46:27 31SJC670_366
Page 372 of 422

Diagnosing why the engine won’t
start f alls into two areas, depending
on what you hear when you turn the
ignition switch to the START (III)
position:Check the transmission
interlock. The transmission must
be in Park or neutral or the
starter will not operate.
Turn the ignition switch to the ON
(II) position. Turn on the
headlights, and check their
brightness. If the headlights are
very dim or do not come on at all,
the battery is discharged. See
on page . If the headlights dim noticeably or
go out when you try to start the
engine, either the battery is
discharged or the connections are
corroded. Check the condition of
the battery and terminal connec-
tions (see page ). You can
then try jump starting the vehicle
from a booster battery (see
page ).
In this case, the starter motor’s
speed sounds normal, or even f aster
than normal, when you turn the
ignition switch to the START (III)
position, but the engine does not run. Are you using a properly coded
key? An improperly coded key will
cause the immobilizer system
indicator in the instrument panel
to blink rapidly (see page ).
Turn the ignition switch to the
START (III) position. If the
headlights do not dim, check the
condition of the f uses. If the f uses
areOK,thereisprobably
something wrong with the
electrical circuit for the ignition
switch or starter motor. You will
need a qualif ied technician to
determine the problem. See
on page .
Check these things:
When you turn the ignition switch to
the START (III) position, you do not
hear the normal noise of the engine
trying to start. You may hear a
clicking sound, a series of clicks, or
nothing at all. You can hear the starter motor
operating normally, or the starter
motor sounds like it is spinning
f aster than normal, but the engine
does not start up and run. You hear nothing, or almost
nothing. The engine’s starter
motor does not operate at all, or
operates very slowly.
101
368
381 353
368
CONT INUED
Jump Starting T he Starter Operates Normally
Emergency T owing
Nothing Happens or the Starter
Motor Operates Very Slowly
If theEngineWon’tStart
367
12/08/09 16:47:27 31SJC670_374
T aking Care of t he Unexpect ed
Page 373 of 422

Are you using the proper starting
procedure? Ref er toon page .
There may be an electrical
problem, such as no power to the
f uel pump. Check all the f uses
(see page ).
If youfindnothingwrong,youwill
need a qualif ied technician to f ind
the problem. See on page . Although this seems like a simple
procedure, you should take
several precautions.
You cannot start your vehicle by
pushing or pulling it.
Do you have f uel? Check the f uel
gauge; the low f uel indicator may
not be working.
Turn of f all electrical accessories:
heater, A/C, climate control, audio
system, lights, etc. Put the
transmission in Park, and set the
parking brake. Open the hood, and check the
physical condition of the battery.
In very cold weather, check the
condition of the electrolyte. If it
seems slushy or f rozen, do not try
jump starting until it thaws.
1.
2.
268
376 381 Starting the
Engine
Emergency
Towing Jump Starting
If the Engine Won’t Start, Jump Starting
To Jump Start Your Vehicle:
368
A battery can explode if you do
not follow the correct procedure,
seriously injuring anyone
nearby.
Keep all sparks, open flames,
and smoking materials away
from the battery.
If a battery sits in extreme cold, the
electrolyte inside can f reeze.
Attempting to jump start with a f rozen
battery can cause it to rupture.
12/08/09 16:47:36 31SJC670_375
T aking Care of t he Unexpect ed
Page 375 of 422

If you see steam and/or spray
coming f rom under the hood, turn
of f the engine. Wait until you see
no more signs of steam or spray,
then open the hood.
If you do not see steam or spray,
leave the engine running and
watch the temperature gauge. If
the high heat is due to overloading,
the engine should start to cool
down almost immediately. If it
does, wait until the temperature
gauge comes down to the midpoint,
then continue driving. Saf ely pull to the side of the road.
Put the transmission in Park, and
set the parking brake. Turn of f all
the accessories, and turn on the
hazard warning lights.
The pointer of your vehicle’s
temperature gauge should stay in
the midrange under most conditions.
If it climbs to the red mark, you
should determine the reason (hot
day, driving up a steep hill, etc.).
If the vehicle overheats, you should
take immediate action. The only
indication may be the temperature
gauge climbing to or above the red
mark. Or you may see steam or
spray coming f rom under the hood. 1.
2.
3.
If theEngineOverheats
370
Steam and spray from an
overheated engine can
seriously scald you.
Do not open the hood if steam
is coming out.
Driving with the temperature gauge
pointer at the red mark can cause
serious damage to the engine.
12/08/09 16:47:51 31SJC670_377
T aking Care of t he Unexpect ed