Page 429 of 488

428
Maintenance
Cleaning
Interior Care
Use a damp cloth with a mixture of mild detergent and warm water to remove dirt.
Use a clean cloth to remove detergent residue.
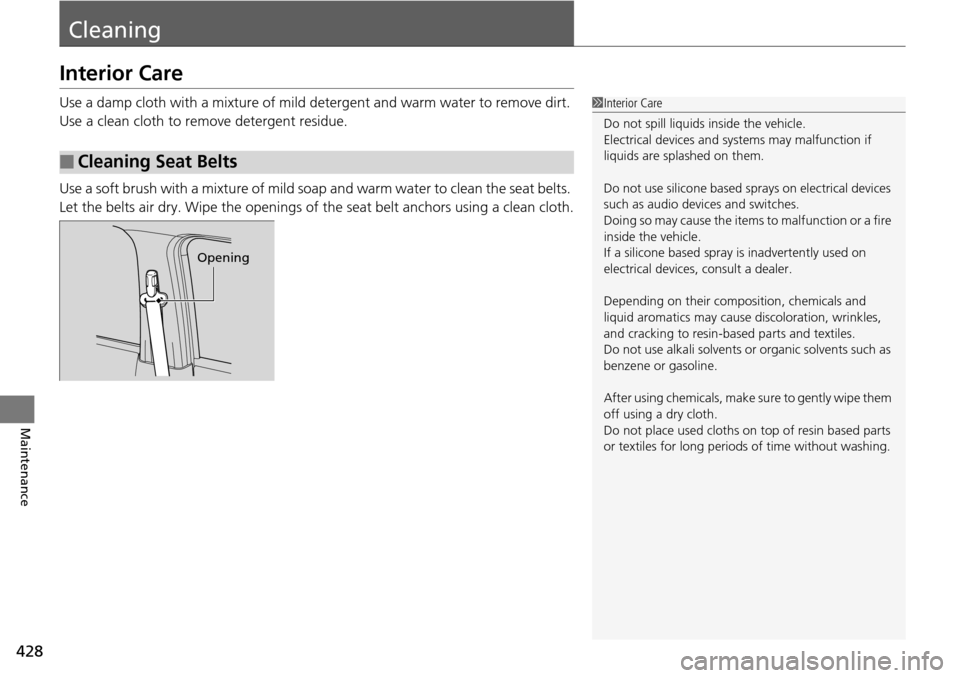
Use a soft brush with a mixture of mild soap and warm
water to clean the seat belts.
Let the belts air dry. Wipe the openings of the seat belt anchors using a clean cloth.
■Cleaning Seat Belts
1 Interior Care
Do not spill liquids inside the vehicle.
Electrical devices and sy stems may malfunction if
liquids are splashed on them.
Do not use silicone based sprays on electrical devices
such as audio devices and switches.
Doing so may cause the items to malfunction or a fire
inside the vehicle.
If a silicone based spray is inadvertently used on
electrical devices, consult a dealer.
Depending on their compos ition, chemicals and
liquid aromatics may cause discoloration, wrinkles,
and cracking to resin-ba sed parts and textiles.
Do not use alkali solvents or organic solvents such as
benzene or gasoline.
After using chemical s, make sure to gently wipe them
off using a dry cloth.
Do not place used cloths on top of resin based parts
or textiles for long periods of time without washing.
Opening
Page 451 of 488

450
Handling the Unexpected
Indicator, Coming On/Blinking
If the Low Oil Pressure Indicator Comes On
■Reasons for the indicator to come on
Comes on when the engine oil pressure is low.
■What to do as soon as the indicator comes on
1. Immediately park the
vehicle on level ground in a safe place.
2. If
necessary, turn the ha zard warning lights on.
■What to do after parking the vehicle
1. Stop the e
ngine and let it sit for about three minutes.
2. Open the hoo
d and check the oil level.
2Oil Check P. 393
3. Start the engine and check th e low oil pressure indicator.
u The light
goes out: Start driving again.
u The l
ight does not go out within 10 seconds: Stop the engine and
contact a dealer for repairs immediately.
If the Charging System Indicator Comes On
■Reasons for the indicator to come on
Comes on when the battery is not being charged.
■What to do when the indicator comes on
Turn off the climate con trol system, rear
defogger, and other electrical
systems, and immediately contact a dealer for repairs.
1 If the Low Oil Pressure Indicator Comes On
NOTICE
Running the engine with low oil pressure can cause
serious mechanical damage almost immediately.
1If the Charging System Indicator Comes On
If you need to stop temporarily, do not turn off the
engine. Restarting the engi ne may rapidly discharge
the battery.
Page 455 of 488

454
Handling the Unexpected
Fuses
Fuse Locations
If any electrical devices are not working,
turn the ignition switch to LOCK
(0
and
check to see if any appl icable fuse is blown.
Fuse locations are shown on the fuse box
co
ver. Locate the fuse in question by the
fuse number and box cover number.
Located on the passenger’s side, near the
wi
ndshield washer reservoir. Push the tabs
to open the box.
■Engine Compartment Fuse Box
■Circuit protected and fuse rating
Circuit ProtectedAmps
1Main Fuse120 A
−−
2OP Main80 A
IG Main50 A
3Blower40 A
AC Inverter30 A
4 Head Light Main
50 A
Power Window Main 40
A
5−−
6 Condenser Fan 30
A
7Cooling Fan30 A
8 Rear Defogger 30
A
9−−
10 Fog Lights *(20 A)
11Sub15 A
12 ACM 10
A
13Front Passenger’s Power
Seat Reclining *(20 A)
14 Front Passenger’s Power
S
eat Slide *(20 A)
15Oil Level7.5 A
16 FI ECU (7.5
A)
17Radio20 A
18 IG Coil 15
A
19Main15 A
20 MG Clutch 7.5 A
21DBW15 A
22 Interior Lights 7.5
A
23Back Up10 A
Circuit ProtectedAmps
* Not available on all models
Page 459 of 488
458
uu Fuses u Inspecting and Changing Fuses
Handling the Unexpected
Inspecting and Changing Fuses
1. Turn the ignition switch to LOCK (0
. Turn
headlights and all accessories off.
2. R
emove the fuse box cover.
3.Check
the large fuse in the engine
compartment.
u If
the fuse is blown, use a Phillips-head
screwdriver to remo ve the screw and
replace it with a new one.
4. Inspect
the small fuses in the engine
compartment and the vehicle interior.
u If
there is a burned out fuse, remove it
with the fuse puller and replace it with a
new one.
1Inspecting and Changing Fuses
NOTICE
Replacing a fuse with on e that has a higher rating
greatly increases the chances of damaging the
electrical system.
Replace fuse with a spare fuse of the same specified
amperage.
Confirm the specified amperage using the charts on
P. 454 to 457.
There is a fuse puller on the back of the engine
compartment fuse box cover.
Blown Fuse
Fuse Puller
Page 475 of 488
474
Information
Authorized Manuals
■Service Express
For electronic copies of service publications, you can purchase a subscription to
Service Express.
Visit www.techinfo.honda.com for pricing and options.
■For U.S. Owners:
Manuals can be purchased from Helm Incorporated. You can order a manual by
ph
one at (800) 782-4356 (credit card orders only), or online at www.helminc.com.
1Authorized Manuals
Service Manual:
Covers maintenance and recommended procedures
for repair to engine and chassis components. It is
written for the journeyman te chnician, but it is simple
enough for most mechanically inclined owners to
understand.
Electrical Troubleshooting Manual:
Complements the Service Manual by providing in-
depth troubleshooting inform ation for each electrical
circuit in your vehicle.
Body Repair Manual:
Describes the procedures involved in the replacement
of damaged body parts.
For Canadian Owners:
Please contact a dealer to order any manuals that you
may require.