Page 206 of 289

205
uuMaintenance Under the HooduChanging the Engine Oil and Oil Filter
Maintenance
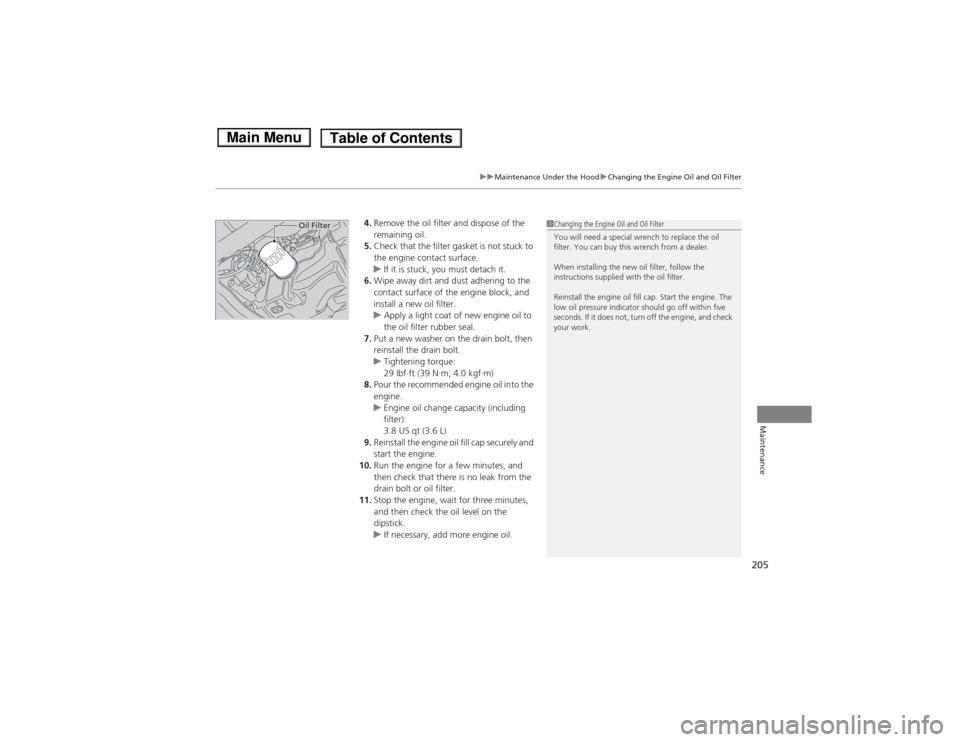
4.Remove the oil filter and dispose of the
remaining oil.
5.Check that the filter gasket is not stuck to
the engine contact surface.
uIf it is stuck, you must detach it.
6.Wipe away dirt and dust adhering to the
contact surface of the engine block, and
install a new oil filter.
uApply a light coat of new engine oil to
the oil filter rubber seal.
7.Put a new washer on the drain bolt, then
reinstall the drain bolt.
uTightening torque:
29 lbf∙ft (39 N∙m, 4.0 kgf∙m)
8.Pour the recommended engine oil into the
engine.
uEngine oil change capacity (including
filter):
3.8 US qt (3.6 L)
9.Reinstall the engine oil fill cap securely and
start the engine.
10.Run the engine for a few minutes, and
then check that there is no leak from the
drain bolt or oil filter.
11.Stop the engine, wait for three minutes,
and then check the oil level on the
dipstick.
uIf necessary, add more engine oil.
1Changing the Engine Oil and Oil Filter
You will need a special wrench to replace the oil
filter. You can buy this wrench from a dealer.
When installing the new oil filter, follow the
instructions supplied with the oil filter.
Reinstall the engine oil fill cap. Start the engine. The
low oil pressure indicator should go off within five
seconds. If it does not, turn off the engine, and check
your work.
Oil Filter
Page 213 of 289

212Maintenance
Replacing Light BulbsHeadlight BulbsWhen replacing, use the following bulbs.
1.Remove the coupler.
2.Remove the rubber weather seal.
3.Remove the hold-down wire, then remove
the bulb.
4.Insert a new bulb.High/Low beam headlight: 60/55 W (HB2)■High/Low Beam Headlight
1Headlight BulbsNOTICEHalogen bulbs get very hot when lit.
Oil, perspiration, or a scratch on the glass can cause
the bulb to overheat and shatter.
The headlight aim is set by the factory, and does not
need to be adjusted. However, if you regularly carry
heavy items in the cargo area, have the aiming
readjusted at a dealer or by a qualified technician.
The HB2 type is halogen bulb.
When replacing a bulb, handle it by its base, and
protect the glass from contact with your skin or hard
objects. If you touch the glass, clean it with
denatured alcohol and a clean cloth.
The exterior lights’ inside lenses (headlights, brake
lamps, etc.) may fog temporarily after a vehicle wash
or while driving in the rain. This does not impact the
exterior light function.
However, if you see a large amount of water or ice
accumulated inside the lenses, have your vehicle
inspected by a dealer.
Rubber Weather Seal
Coupler
Bulb
Hold-Down Wire
Page 214 of 289
213
uuReplacing Light BulbsuFront Turn Signal Light Bulbs
Maintenance
5.Reinstall the hold-down wire. Hook the end
of the wire on the knob in the slot.
uYou can see if the hold-down wire is in
the right place from the inspection
window.
6.Reinstall the rubber weather seal.
7.Insert the coupler into the connector of the
bulb.
Front Turn Signal Light BulbsWhen replacing, use the following bulbs.
1.Turn the socket to the left and remove it.
2.Push in the old bulb, rotate to the left until
it unlocks, and remove.
3.Insert a new bulb.
Hold-Down WireInspection Window
Front Turn Signal Light: 21 W (Amber)
Bulb
Socket
Page 215 of 289
214
uuReplacing Light BulbsuParking/Side Marker Light Bulbs
Maintenance
Parking/Side Marker Light BulbsWhen replacing, use the following bulbs.
1.Turn the socket to the left and remove it.
2.Remove the old bulb and insert a new bulb.Fog Light Bulbs
*
When replacing, use the following bulbs.
1.Pry on the edge of the cover using a flat-tip
screwdriver to remove the cover.
uWrap the flat-tip screwdriver with a cloth
to prevent scratches.Parking/Side Marker Light: 3.8 W (Amber)
Bulb
SocketFog Light: 55 W (H11)
1Fog Light Bulbs
*
NOTICEHalogen bulbs get very hot when lit. Oil, perspiration,
or a scratch on the glass can cause the bulb to
overheat and shatter.
The fog lights are halogen bulbs.
When replacing a bulb, handle it by its plastic case,
and protect the glass from contact with your skin or
hard objects. If you touch the glass, clean it with
denatured alcohol and a clean cloth.
Cover* Not available on all models
Page 216 of 289
215
uuReplacing Light BulbsuFog Light Bulbs
*
Maintenance
2.Remove the screw using a Phillips-head
screwdriver and carefully pull the fog light
assembly out of the bumper.
3.Remove the coupler.
uIt can be removed by pushing the tab.
4.Rotate the old bulb to the left to remove.
5.Insert a new bulb into the fog light
assembly and turn it to the right.
6.Insert the coupler into the connector of the
bulb.
Screw
Bulb
Coupler
Tab
Page 217 of 289
216
uuReplacing Light BulbsuBrake Light, Taillight, Back-Up Light and Rear Turn Signal Light Bulbs
Maintenance
Brake Light, Taillight, Back-Up Light and Rear Turn Signal Light BulbsWhen replacing, use the following bulbs.
1.Pry on the edge of the cover using a flat-tip
screwdriver to remove the cover.
uWrap the flat-tip screwdriver with a cloth
to prevent scratches.
2.Turn the socket to the left and remove it.
Remove the old bulb.
3.Insert a new bulb.Brake/Taillight: 21/5 W
Back-Up Light: 16 W
Rear Turn Signal Light: 21 W (Amber)
CoverBulb Socket
Page 218 of 289
217
uuReplacing Light BulbsuHigh-Mount Brake Light Bulb
Maintenance
High-Mount Brake Light BulbHigh-mount brake light bulb is a LED type. Have an authorized Honda dealer inspect
and replace the light bulb.Rear License Plate Light BulbWhen replacing, use the following bulb.
1.Push the lens on the left and pull out the
lens and the socket attached to it.
2.Remove the license plate light assembly by
squeezing the tabs on both sides of the
socket.
3.Remove the old bulb and insert a new bulb.Rear License Plate Light: 5 W
Lens
Bulb
Page 240 of 289

239
Continued
Handling the Unexpected
If a Tire Goes FlatChanging a Flat Tire
*
If a tire goes flat while driving, grasp the steering wheel firmly, and brake gradually
to reduce speed. Then, stop in a safe place. Replace the flat tire with a compact
spare tire. Go to a dealer as soon as possible to have the full size tire repaired or
replaced.
1.Park the vehicle on firm, level, non-slippery surface and apply the parking brake.
2.Move the shift lever to
(P.
2.Move the shift lever to (R.
3.Turn on the hazard warning lights and turn the ignition switch to LOCK
(0.
1Changing a Flat Tire
*
Periodically check the tire pressure of the compact
spare. It should be set to the specified pressure.
Specified Pressure: 60 psi (420 kPa, 4.2 kgf/cm
2)
When driving with the compact spare tire, keep the
vehicle speed under 50 mph (80 km/h). Replace with
a full size tire as soon as possible.
The compact spare tire and wheel in your vehicle are
specifically for this model.
Do not use them with another vehicle.
Do not use another type of compact spare tire or
wheel with your vehicle.
Do not mount tire chains on a compact spare tire.
If a chain-mounted front tire goes flat, remove one of
the full-size rear tires and replace it with the compact
spare tire. Remove the flat front tire and replace it
with the full size tire that was removed from the rear.
Mount the tire chains on the front tire.
Do not use a puncture-repairing agent on a flat tire,
as it can damage the tire pressure sensor.
U.S. models only
Automatic transmission modelsManual transmission modelsAll models* Not available on all models