2014 HONDA FIT ECU
[x] Cancel search: ECUPage 204 of 289
203
uuMaintenance Under the HooduAdding Engine Oil
Maintenance
Adding Engine Oil
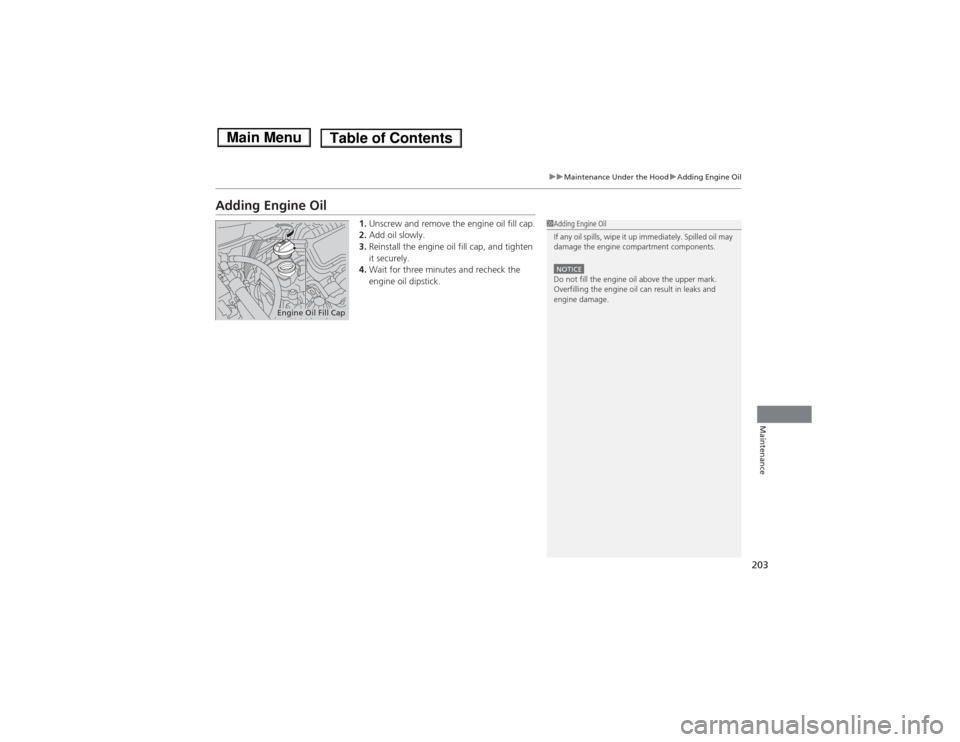
1.Unscrew and remove the engine oil fill cap.
2.Add oil slowly.
3.Reinstall the engine oil fill cap, and tighten
it securely.
4.Wait for three minutes and recheck the
engine oil dipstick.
1Adding Engine Oil
If any oil spills, wipe it up immediately. Spilled oil may
damage the engine compartment components.NOTICEDo not fill the engine oil above the upper mark.
Overfilling the engine oil can result in leaks and
engine damage.
Engine Oil Fill Cap
Page 206 of 289
205
uuMaintenance Under the HooduChanging the Engine Oil and Oil Filter
Maintenance
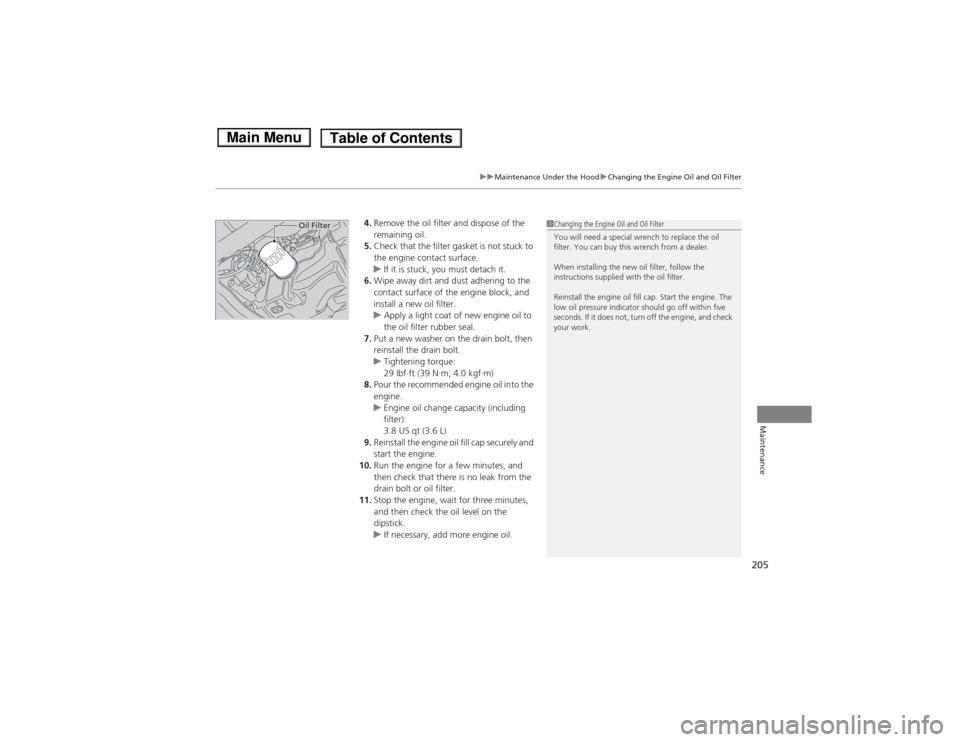
4.Remove the oil filter and dispose of the
remaining oil.
5.Check that the filter gasket is not stuck to
the engine contact surface.
uIf it is stuck, you must detach it.
6.Wipe away dirt and dust adhering to the
contact surface of the engine block, and
install a new oil filter.
uApply a light coat of new engine oil to
the oil filter rubber seal.
7.Put a new washer on the drain bolt, then
reinstall the drain bolt.
uTightening torque:
29 lbf∙ft (39 N∙m, 4.0 kgf∙m)
8.Pour the recommended engine oil into the
engine.
uEngine oil change capacity (including
filter):
3.8 US qt (3.6 L)
9.Reinstall the engine oil fill cap securely and
start the engine.
10.Run the engine for a few minutes, and
then check that there is no leak from the
drain bolt or oil filter.
11.Stop the engine, wait for three minutes,
and then check the oil level on the
dipstick.
uIf necessary, add more engine oil.
1Changing the Engine Oil and Oil Filter
You will need a special wrench to replace the oil
filter. You can buy this wrench from a dealer.
When installing the new oil filter, follow the
instructions supplied with the oil filter.
Reinstall the engine oil fill cap. Start the engine. The
low oil pressure indicator should go off within five
seconds. If it does not, turn off the engine, and check
your work.
Oil Filter
Page 209 of 289

208
uuMaintenance Under the HooduTransmission Fluid
Maintenance
Transmission FluidCheck the fluid level when the engine is at normal operating temperature.
1.Park on level ground, and start the engine.
2.Wait until the radiator fan starts and then
turn off the engine.
uPerform step 3 after waiting for about 60
seconds (less than 90 seconds).
3.Remove the dipstick (yellow loop) from the
transmission and wipe it with a clean cloth.
4.Insert the dipstick all the way back into the
transmission securely, as shown in the
image.
5.Remove the dipstick and check the fluid
level.
uIt should be between the upper and
lower marks in the HOT range.
6.If the level is below the lower mark, add
fluid into the dipstick hole to bring it to the
level between the upper and lower marks,
and have your vehicle checked by a dealer
immediately.■Automatic Transmission FluidSpecified fluid: Honda ATF DW-1 (automatic transmission fluid)
1Automatic Transmission FluidNOTICEDo not mix Honda ATF DW-1 with other
transmission fluids.
Using a transmission fluid other than Honda ATF
DW-1 may adversely affect the operation and
durability of your vehicle’s transmission, and damage
the transmission.
Any damage caused by using a transmission fluid that
is not equivalent to Honda ATF DW-1 is not covered
by Honda’s new vehicle warranty.NOTICEPour the fluid slowly and carefully so you do not spill
any. Clean up any spills immediately; they can
damage components in the engine compartment.
Upper Mark
Lower Mark HOT
Range
Page 232 of 289
231Maintenance
BatteryChecking the Battery
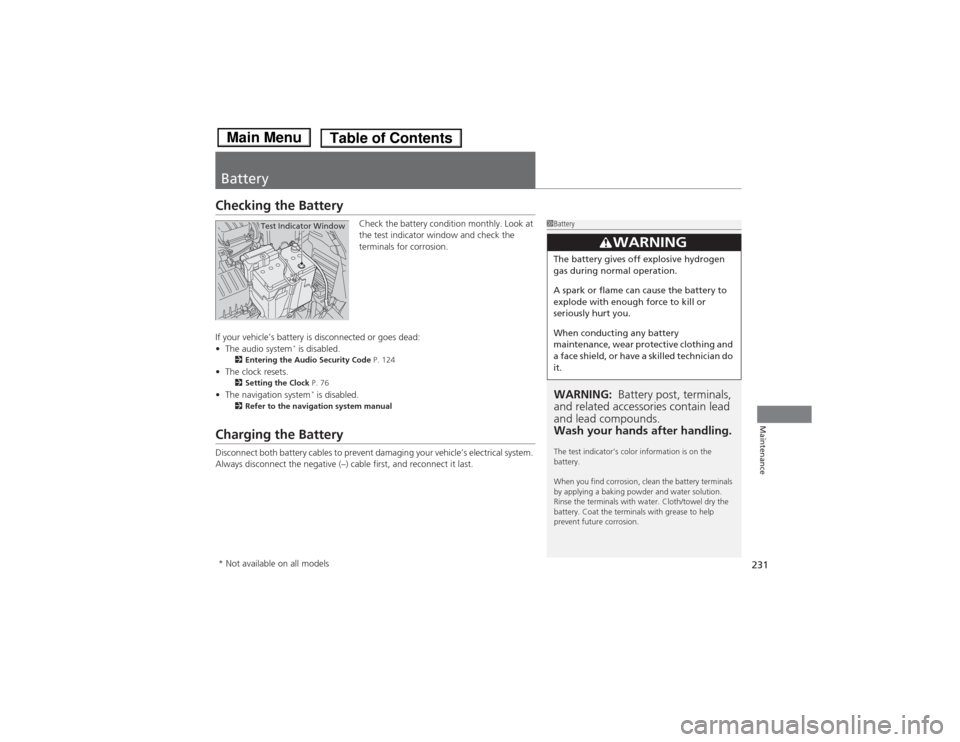
Check the battery condition monthly. Look at
the test indicator window and check the
terminals for corrosion.
If your vehicle’s battery is disconnected or goes dead:
•The audio system
* is disabled.
2Entering the Audio Security Code P. 124
•The clock resets.
2Setting the Clock P. 76
•The navigation system
* is disabled.
2Refer to the navigation system manual
Charging the BatteryDisconnect both battery cables to prevent damaging your vehicle’s electrical system.
Always disconnect the negative (–) cable first, and reconnect it last.
1BatteryWARNING: Battery post, terminals,
and related accessories contain lead
and lead compounds.
Wash your hands after handling.The test indicator’s color information is on the
battery.
When you find corrosion, clean the battery terminals
by applying a baking powder and water solution.
Rinse the terminals with water. Cloth/towel dry the
battery. Coat the terminals with grease to help
prevent future corrosion.
3
WARNING
The battery gives off explosive hydrogen
gas during normal operation.
A spark or flame can cause the battery to
explode with enough force to kill or
seriously hurt you.
When conducting any battery
maintenance, wear protective clothing and
a face shield, or have a skilled technician do
it.
Test Indicator Window
* Not available on all models
Page 235 of 289
234Maintenance
CleaningInterior CareUse a damp cloth with a mixture of mild detergent and warm water to remove dirt.
Use a clean cloth to remove detergent residue.
Use a soft brush with a mixture of mild soap and warm water to clean the seat belts.
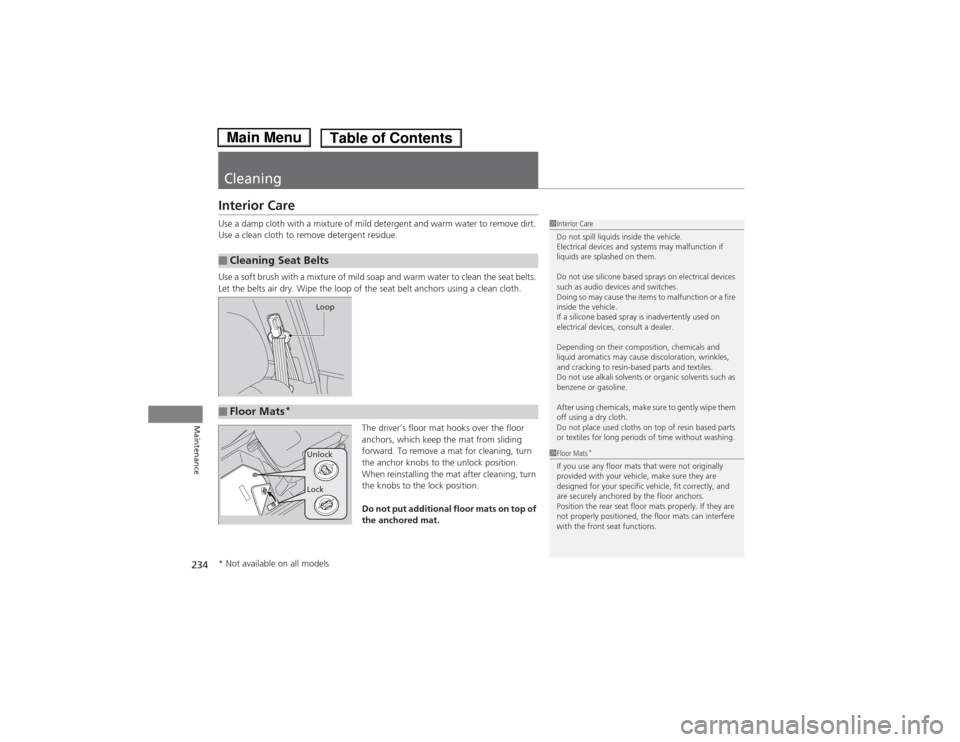
Let the belts air dry. Wipe the loop of the seat belt anchors using a clean cloth.
The driver’s floor mat hooks over the floor
anchors, which keep the mat from sliding
forward. To remove a mat for cleaning, turn
the anchor knobs to the unlock position.
When reinstalling the mat after cleaning, turn
the knobs to the lock position.
Do not put additional floor mats on top of
the anchored mat.■Cleaning Seat Belts
1Interior Care
Do not spill liquids inside the vehicle.
Electrical devices and systems may malfunction if
liquids are splashed on them.
Do not use silicone based sprays on electrical devices
such as audio devices and switches.
Doing so may cause the items to malfunction or a fire
inside the vehicle.
If a silicone based spray is inadvertently used on
electrical devices, consult a dealer.
Depending on their composition, chemicals and
liquid aromatics may cause discoloration, wrinkles,
and cracking to resin-based parts and textiles.
Do not use alkali solvents or organic solvents such as
benzene or gasoline.
After using chemicals, make sure to gently wipe them
off using a dry cloth.
Do not place used cloths on top of resin based parts
or textiles for long periods of time without washing.
Loop
■Floor Mats
*
1Floor Mats
*
If you use any floor mats that were not originally
provided with your vehicle, make sure they are
designed for your specific vehicle, fit correctly, and
are securely anchored by the floor anchors.
Position the rear seat floor mats properly. If they are
not properly positioned, the floor mats can interfere
with the front seat functions.
Lock Unlock
* Not available on all models
Page 245 of 289
uuIf a Tire Goes FlatuChanging a Flat Tire
*
244Handling the Unexpected
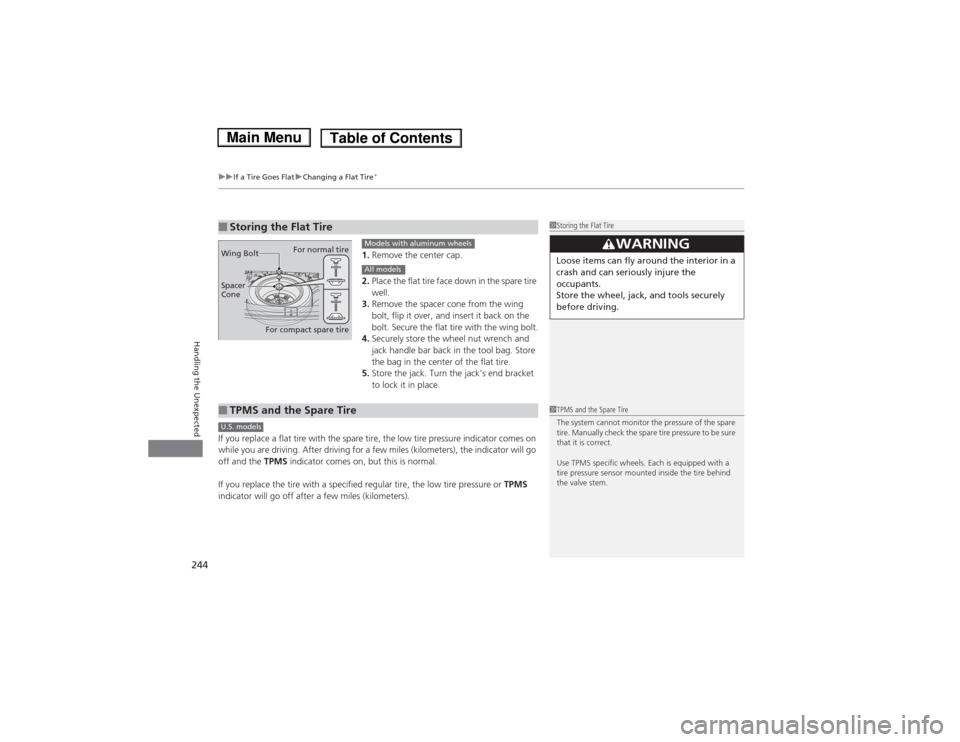
1.Remove the center cap.
2.Place the flat tire face down in the spare tire
well.
3.Remove the spacer cone from the wing
bolt, flip it over, and insert it back on the
bolt. Secure the flat tire with the wing bolt.
4.Securely store the wheel nut wrench and
jack handle bar back in the tool bag. Store
the bag in the center of the flat tire.
5.Store the jack. Turn the jack’s end bracket
to lock it in place.
If you replace a flat tire with the spare tire, the low tire pressure indicator comes on
while you are driving. After driving for a few miles (kilometers), the indicator will go
off and the TPMS indicator comes on, but this is normal.
If you replace the tire with a specified regular tire, the low tire pressure or TPMS
indicator will go off after a few miles (kilometers).
■Storing the Flat Tire
1Storing the Flat Tire
3
WARNING
Loose items can fly around the interior in a
crash and can seriously injure the
occupants.
Store the wheel, jack, and tools securely
before driving.
For normal tire
For compact spare tire Wing Bolt
Spacer
Cone
Models with aluminum wheelsAll models
■TPMS and the Spare Tire
1TPMS and the Spare Tire
The system cannot monitor the pressure of the spare
tire. Manually check the spare tire pressure to be sure
that it is correct.
Use TPMS specific wheels. Each is equipped with a
tire pressure sensor mounted inside the tire behind
the valve stem.
U.S. models
Page 252 of 289
251
Continued
Handling the Unexpected
Jump StartingTurn off the power to electric devices, such as audio and lights. Turn off the engine,
then open the hood.
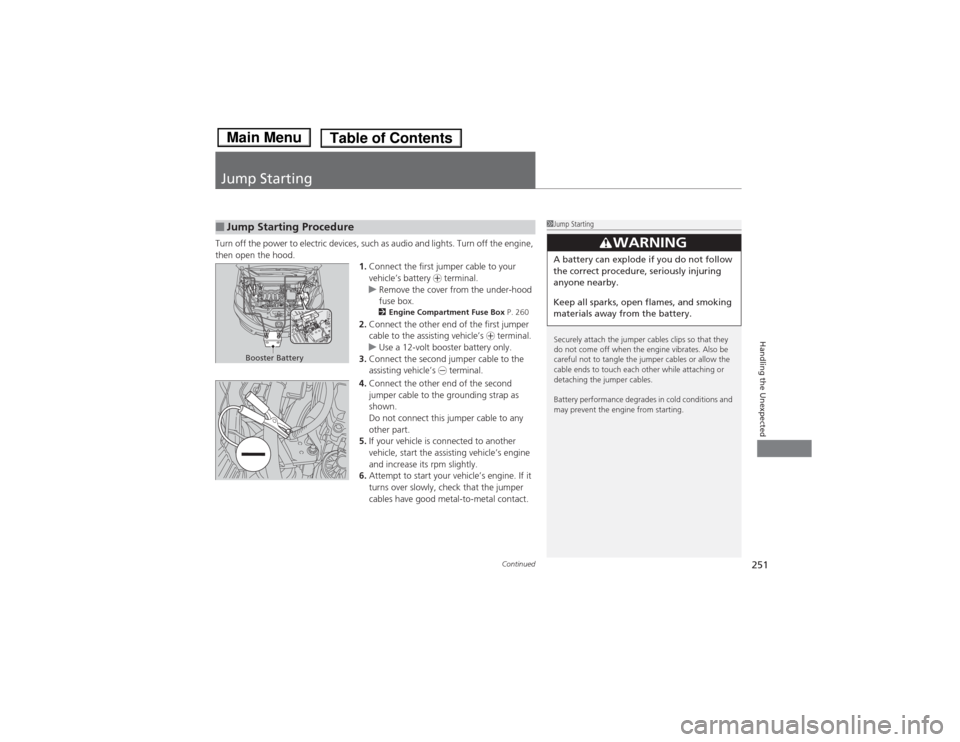
1.Connect the first jumper cable to your
vehicle’s battery + terminal.
uRemove the cover from the under-hood
fuse box.
2Engine Compartment Fuse Box P. 260
2.Connect the other end of the first jumper
cable to the assisting vehicle’s + terminal.
uUse a 12-volt booster battery only.
3.Connect the second jumper cable to the
assisting vehicle’s - terminal.
4.Connect the other end of the second
jumper cable to the grounding strap as
shown.
Do not connect this jumper cable to any
other part.
5.If your vehicle is connected to another
vehicle, start the assisting vehicle’s engine
and increase its rpm slightly.
6.Attempt to start your vehicle’s engine. If it
turns over slowly, check that the jumper
cables have good metal-to-metal contact.
■Jump Starting Procedure
1Jump Starting
Securely attach the jumper cables clips so that they
do not come off when the engine vibrates. Also be
careful not to tangle the jumper cables or allow the
cable ends to touch each other while attaching or
detaching the jumper cables.
Battery performance degrades in cold conditions and
may prevent the engine from starting.
3
WARNING
A battery can explode if you do not follow
the correct procedure, seriously injuring
anyone nearby.
Keep all sparks, open flames, and smoking
materials away from the battery.
Booster Battery
Page 280 of 289

Index
279Index
Index
AABS (Anti-lock Brake System).................. 183
Accessories and Modifications................ 190
Accessory Power Socket........................... 115
Active Head Restraints............................. 107
Additives
Coolant .................................................. 206
Engine Oil ............................................... 201
Washer ................................................... 211
Additives, Engine Oil............................... 201
Adjusting
Armrest .................................................. 110
Front Seats.............................................. 103
Head Restraints ....................................... 105
Headlights .............................................. 212
Mirrors.................................................... 102
Rear Seats ............................................... 108
Steering Wheel ....................................... 101
Air Conditioning System (Heating and
Cooling System)...................................... 118
Cooling................................................... 120
Defrosting the Windshield and
Windows .............................................. 120
Dust and Pollen Filter .............................. 233
Heating................................................... 119
Air Pressure...................................... 223, 269
Airbags....................................................... 34
Advanced Airbags ..................................... 40
After a Collision ........................................ 38
Airbag Care .............................................. 48
Event Data Recorder ................................. 19Front Airbags (SRS) .................................... 37
Indicator ........................................ 45, 67, 69
Passenger Airbag Off Indicator .................. 46
Sensors...................................................... 34
Side Airbag Cutoff System ......................... 43
Side Airbag Off Indicator ........................... 47
Side Airbags .............................................. 41
Side Curtain Airbags .................................. 44
Anti-lock Brake System (ABS).................. 183
Indicator .................................................... 67
Armrest..................................................... 110
Audio System............................................ 122
Adjusting the Sound ................................ 126
Auxiliary Input Jack .................................. 123
Error Messages ........................................ 135
General Information ................................ 137
MP3/WMA/AAC ...................................... 133
Recommended CDs ................................. 137
Recommended Devices ............................ 139
Remote Controls ......................................... 3
Security Code .......................................... 124
Theft Protection....................................... 124
USB Adapter Cable .................................. 123
USB Flash Drives ...................................... 139
Authorized Manuals................................. 277
Auto Door Locking/Unlocking................... 84
Customize ................................................. 85
Automatic Transmission........................... 164
Creeping ................................................. 164
Fluid ........................................................ 208
Kickdown ................................................ 164Operating the Shift Lever........... 13, 166, 168
Sequential Shift Mode ............................. 169
Shift Lever Does Not Move ...................... 253
Shifting ........................................... 165, 167
Auxiliary Input Jack.................................. 123
Average Fuel Economy.............................. 74
BBattery...................................................... 231
Charging System Indicator................. 65, 256
Jump Starting .......................................... 251
Maintenance (Checking the Battery) ........ 231
Maintenance (Replacing) ......................... 232
Belts (Seat).................................................. 26
Beverage Holders..................................... 114
Bluetooth® HandsFreeLink®..................... 140
Booster Seats (For Children)...................... 60
Brake System............................................ 181
Anti-lock Brake System (ABS)................... 183
Brake Assist System ................................. 184
Fluid ........................................................ 210
Foot Brake............................................... 182
Indicator............................................ 64, 258
Parking Brake .......................................... 181
Brightness Control (Instrument Panel)...... 99