Page 327 of 573
uuBluetooth® HandsFreeLink®uHFL Menus
326Features
You can make calls using any phone number or a name in the HFL phonebook, and
redial the last number called.■Direct dialing a phone number
1.Say “Call” or “Dial.”
2.Say the number you want to dial after the prompts.
3.Say “Call” or “Dial” after the prompts.■From the HFL phonebook
1.Say “Call” or “Dial.”
2.Say the name stored in the HFL phonebook after the prompts.
3.Follow the HFL prompts.■To redial the last number called by HFL
Say “Redial.”■To end a call
Press the (HFL back) button.■Making a Call
1Making a Call
Press the button and wait for a beep before
giving a command.
HFL uses a Class 2 Bluetooth, with has a maximum
range of about 30 feet (10 meters).
HFL allows you to talk up to 30 minutes after you
remove the key from the ignition switch. However,
this may weaken the vehicle’s battery.
Once a call is connected, you can hear the voice of
the person you are calling through the audio
speakers.
Page 332 of 573
331
uuBluetooth® HandsFreeLink®uHFL Menus
Features
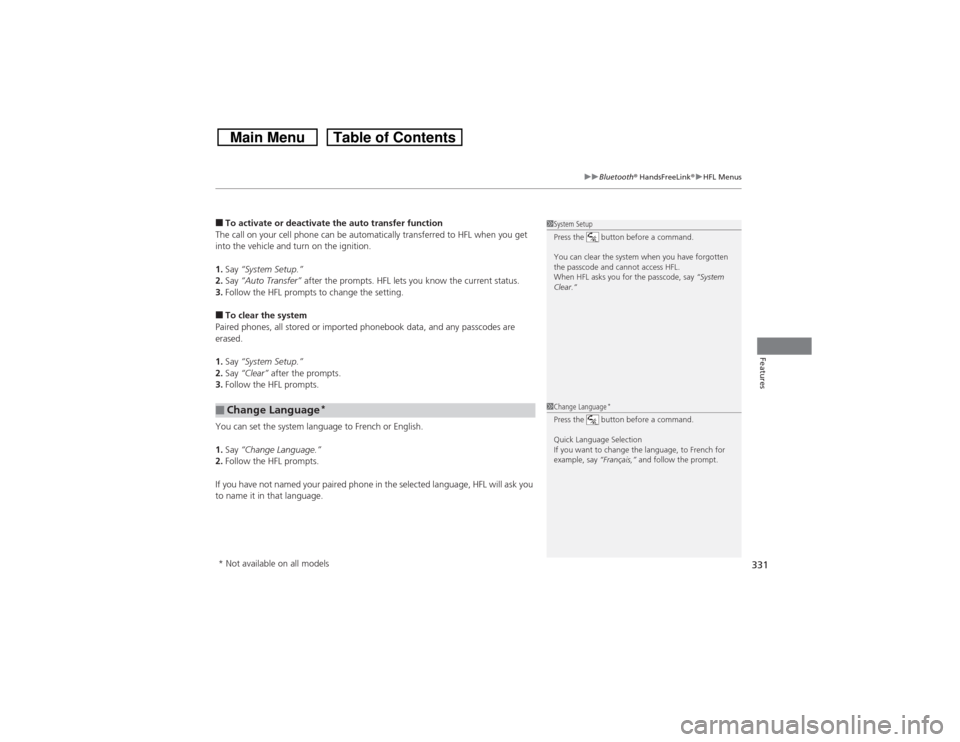
■To activate or deactivate the auto transfer function
The call on your cell phone can be automatically transferred to HFL when you get
into the vehicle and turn on the ignition.
1.Say “System Setup.”
2.Say “Auto Transfer” after the prompts. HFL lets you know the current status.
3.Follow the HFL prompts to change the setting.■To clear the system
Paired phones, all stored or imported phonebook data, and any passcodes are
erased.
1.Say “System Setup.”
2.Say “Clear” after the prompts.
3.Follow the HFL prompts.
You can set the system language to French or English.
1.Say “Change Language.”
2.Follow the HFL prompts.
If you have not named your paired phone in the selected language, HFL will ask you
to name it in that language.■Change Language
*
1System Setup
Press the button before a command.
You can clear the system when you have forgotten
the passcode and cannot access HFL.
When HFL asks you for the passcode, say “System
Clear.”1Change Language
*
Press the button before a command.
Quick Language Selection
If you want to change the language, to French for
example, say “Français,” and follow the prompt.
* Not available on all models
Page 335 of 573
334
uuBluetooth® HandsFreeLink®uHFL Menus
Features
HFL MenusThe ignition switch must be in ACCESSORY
(q or ON
(w*1 to use HFL.
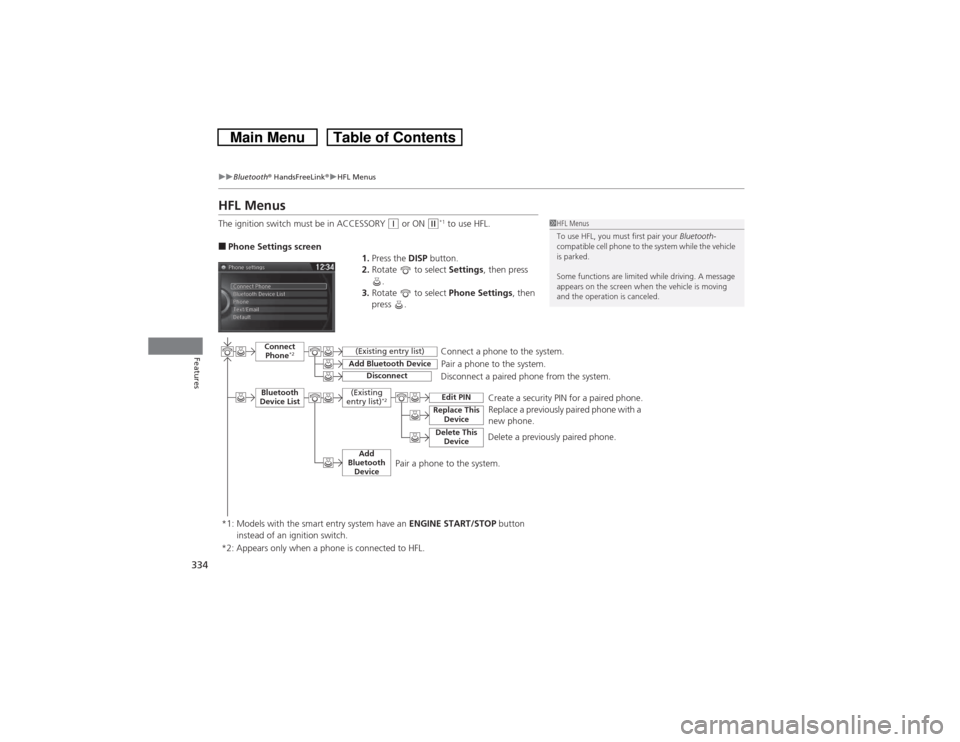
■Phone Settings screen
1.Press the DISP button.
2.Rotate to select Settings, then press
.
3.Rotate to select Phone Settings, then
press .
1HFL Menus
To use HFL, you must first pair your Bluetooth-
compatible cell phone to the system while the vehicle
is parked.
Some functions are limited while driving. A message
appears on the screen when the vehicle is moving
and the operation is canceled.
Pair a phone to the system.
Replace a previously paired phone with a
new phone.
Connect
Phone
*2
Bluetooth
Device List
Add Bluetooth Device
Edit PIN
(Existing entry list)Disconnect
Connect a phone to the system.
Disconnect a paired phone from the system.
*1: Models with the smart entry system have an ENGINE START/STOP button
instead of an ignition switch.
(Existing
entry list)
*2
Replace This
DeviceDelete This
Device
Delete a previously paired phone.Create a security PIN for a paired phone.
Add
Bluetooth
Device
*2: Appears only when a phone is connected to HFL.
Pair a phone to the system.
Page 370 of 573
369
uuBluetooth® HandsFreeLink®uHFL Menus
Continued
Features
HFL MenusThe ignition switch must be in ACCESSORY
(q or ON
(w*1 to use HFL.
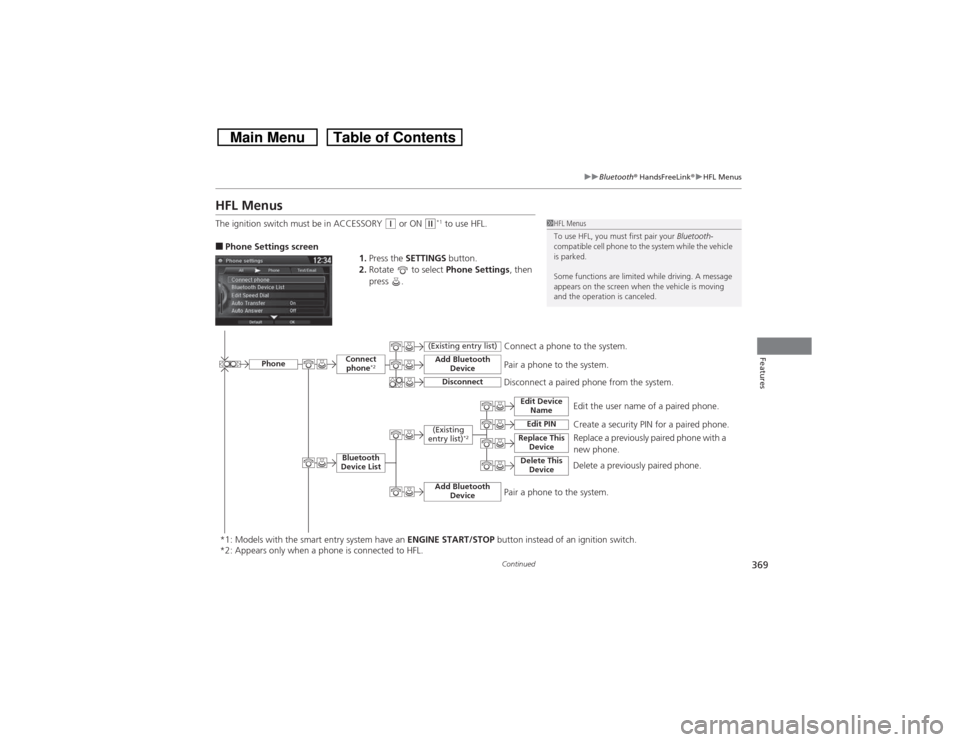
■Phone Settings screen
1.Press the SETTINGS button.
2.Rotate to select Phone Settings, then
press .
1HFL Menus
To use HFL, you must first pair your Bluetooth-
compatible cell phone to the system while the vehicle
is parked.
Some functions are limited while driving. A message
appears on the screen when the vehicle is moving
and the operation is canceled.
Edit the user name of a paired phone.
Phone
Edit Device
Name
Connect
phone
*2
Bluetooth
Device List
(Existing
entry list)
*2
Replace This
Device
Add Bluetooth
Device
Disconnect a paired phone from the system.Connect a phone to the system.
Disconnect
(Existing entry list)
Pair a phone to the system.
Edit PIN
Create a security PIN for a paired phone.
Replace a previously paired phone with a
new phone.
Delete This
Device
Delete a previously paired phone.
Add Bluetooth
Device
Pair a phone to the system.
*1: Models with the smart entry system have an ENGINE START/STOP button instead of an ignition switch.
*2: Appears only when a phone is connected to HFL.
Page 406 of 573
405Features
Compass
*
When you turn the ignition switch to ON
(w, the compass self-calibrates, and the
compass display appears.
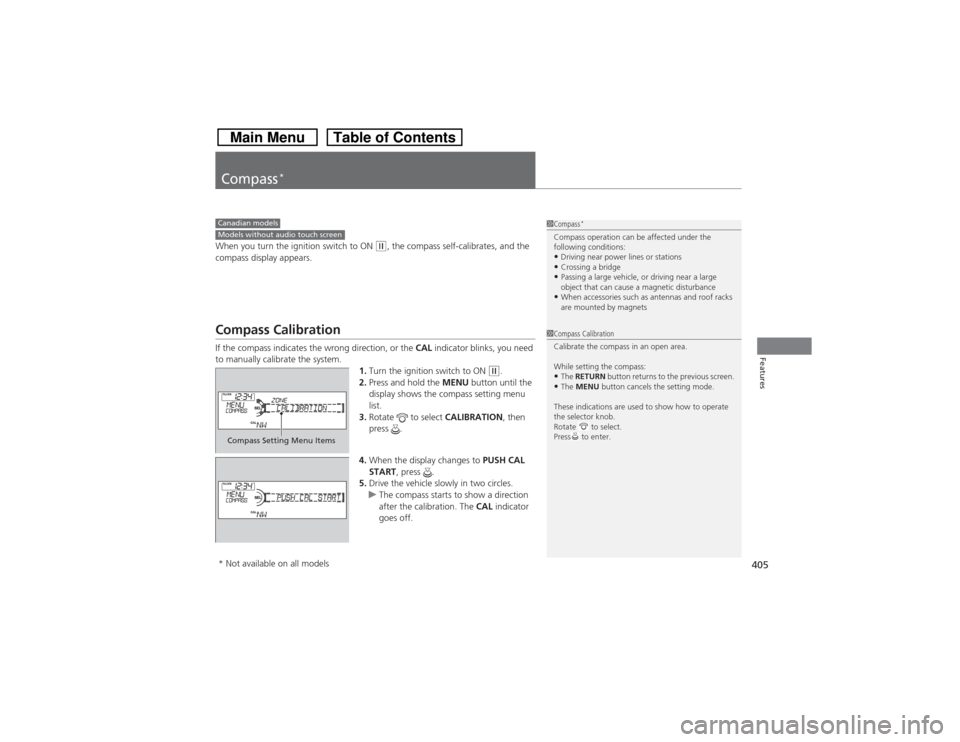
Compass CalibrationIf the compass indicates the wrong direction, or the CAL indicator blinks, you need
to manually calibrate the system.
1.Turn the ignition switch to ON
(w.
2.Press and hold the MENU button until the
display shows the compass setting menu
list.
3.Rotate to select CALIBRATION, then
press .
4.When the display changes to PUSH CAL
START, press .
5.Drive the vehicle slowly in two circles.
uThe compass starts to show a direction
after the calibration. The CAL indicator
goes off.
1Compass
*
Compass operation can be affected under the
following conditions:•Driving near power lines or stations•Crossing a bridge•Passing a large vehicle, or driving near a large
object that can cause a magnetic disturbance•When accessories such as antennas and roof racks
are mounted by magnets
Canadian modelsModels without audio touch screen
1Compass Calibration
Calibrate the compass in an open area.
While setting the compass:•The RETURN button returns to the previous screen.•The MENU button cancels the setting mode.
These indications are used to show how to operate
the selector knob.
Rotate to select.
Press to enter.
Compass Setting Menu Items* Not available on all models
Page 407 of 573
406
uuCompass
*uCompass Zone Selection
Features
Compass Zone Selection
1.Turn the ignition switch to ON
(w.
2.Press and hold the MENU button until the
display shows the compass setting menu
list.
3.Rotate to select ZONE, then press .
The display shows the current zone
number.
4.Rotate to select the zone number of
your area (See Zone Map), then press .
1Compass Zone Selection
The zone selection is done to compensate the
variation between magnetic north and true north.
If the calibration starts while the audio system is in
use, the display returns to normal after the calibration
is completed.
Zone Number
2
3
4
5
6
78910111213 14 15
Zone Map
Guam Island: Zone 8
Puerto Rico: Zone 11
Page 408 of 573
407Features
Compass
*
When you turn the ignition switch to ON
(w*1, the compass self-calibrates, and the
compass display appears.
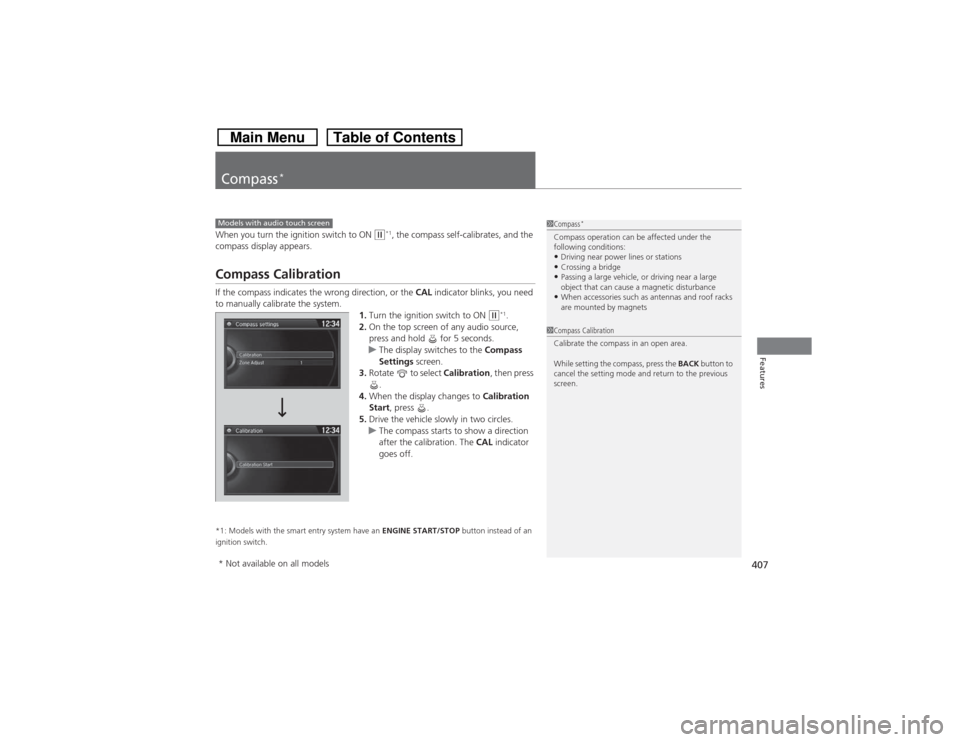
Compass CalibrationIf the compass indicates the wrong direction, or the CAL indicator blinks, you need
to manually calibrate the system.
1.Turn the ignition switch to ON
(w*1.
2.On the top screen of any audio source,
press and hold for 5 seconds.
uThe display switches to the Compass
Settings screen.
3.Rotate to select Calibration, then press
.
4.When the display changes to Calibration
Start, press .
5.Drive the vehicle slowly in two circles.
uThe compass starts to show a direction
after the calibration. The CAL indicator
goes off.
*1: Models with the smart entry system have an ENGINE START/STOP button instead of an
ignition switch.Models with audio touch screen
1Compass
*
Compass operation can be affected under the
following conditions:•Driving near power lines or stations•Crossing a bridge•Passing a large vehicle, or driving near a large
object that can cause a magnetic disturbance•When accessories such as antennas and roof racks
are mounted by magnets
1Compass Calibration
Calibrate the compass in an open area.
While setting the compass, press the BACK button to
cancel the setting mode and return to the previous
screen.
* Not available on all models
Page 409 of 573
408
uuCompass
*uCompass Zone Selection
Features
Compass Zone Selection
1.Turn the ignition switch to ON
(w*1.
2.On the top screen of any audio source,
press and hold for 5 seconds.
uThe display switches to the Compass
Settings screen.
3.Rotate to select Zone Adjust, then
press .
uThe display shows the current zone
number.
4.Rotate to select the zone number of
your area (See Zone Map), then press .
*1: Models with the smart entry system have an ENGINE START/STOP button instead of an
ignition switch.
2
3
4
5
6
78910111213 14 15
Zone Map
Guam Island: Zone 8
Puerto Rico: Zone 11
1Compass Zone Selection
The zone selection is done to compensate the
variation between magnetic north and true north.
If the calibration starts while the audio system is in
use, the display returns to normal after the calibration
is completed.