2014 GMC SIERRA change time
[x] Cancel search: change timePage 306 of 544

Black plate (36,1)GMC Sierra Owner Manual (GMNA-Localizing-U.S./Canada/Mexico-
5853626) - 2014 - CRC - 6/6/14
9-36 Driving and Operating
M (Manual Mode):This position
allows selection of a range of gears
appropriate for current driving
conditions. If equipped, see “Range
Selection Mode” underManual
Mode on page 9-37.
{Caution
Spinning the tires or holding the
vehicle in one place on a hill
using only the accelerator pedal
may damage the transmission.
The repair will not be covered by
the vehicle warranty. If you are
stuck, do not spin the tires. When
stopping on a hill, use the brakes
to hold the vehicle in place.
Normal Mode Grade Braking
If equipped with a gasoline engine
and an automatic transmission,
Normal Mode Grade Braking is
enabled when the vehicle is started,
but is not enabled in Range
Selection Mode. It assists in
maintaining desired vehicle speeds
when driving on downhill grades by
using the engine and transmission
to slow the vehicle. The first time
the system engages for each
ignition key cycle, a DIC message
will be displayed. See Transmission
Messages on page 5-42. To disable or enable Normal Mode
Grade Braking within the current
ignition key cycle, press and
hold the Tow/Haul button for
five seconds. When the button is
released, the requested mode
change is made. A DIC message
displays. See
Transmission
Messages on page 5-42.
For other forms of grade braking,
see Tow/Haul Mode on page 9-38
and Cruise Control on page 9-57.
Page 309 of 544

Black plate (39,1)GMC Sierra Owner Manual (GMNA-Localizing-U.S./Canada/Mexico-
5853626) - 2014 - CRC - 6/6/14
Driving and Operating 9-39
Also see“Tow/Haul Mode” under
Towing Equipment on page 9-89.
Tow/Haul Mode Grade Braking
Tow/Haul Mode Grade Braking is
only enabled while the Tow/Haul
Mode is selected and the vehicle is
not in the Range Selection Mode.
See “Tow/Haul Mode” listed
previously and Manual Mode on
page 9-37. Tow/Haul Mode Grade
Braking assists in maintaining
desired vehicle speeds when driving
on downhill grades by using the
engine and transmission to slow the
vehicle.
On vehicles with a gasoline engine,
to disable or enable Tow/Haul
Grade Braking within the current
ignition key cycle, press and
hold the Tow/Haul button for
five seconds. When the button is
released, the requested mode
change is made. A DIC message is
displayed. See Transmission
Messages on page 5-42. On vehicles with a diesel engine,
Tow/Haul Mode Grade Braking can
be enabled or disabled by pressing
the Tow/Haul Mode button. Use the
exhaust brake and Tow/Haul Mode
for maximum grade braking.
See
Towing Equipment on
page 9-89.
For other forms of grade braking,
see Automatic Transmission on
page 9-33 andCruise Control on
page 9-57.
Drive Systems
Four-Wheel Drive
If equipped, you can send the
engine's driving power to all four
wheels for extra traction. To get the
most satisfaction out of four-wheel
drive, you must be familiar with its
operation. Read the following before
using four-wheel drive. See the
appropriate text for the transfer case
in the vehicle.
{Caution
Driving on clean, dry pavement in
Four-Wheel Drive High or
Four-Wheel Drive Low for an
extended period of time may
cause premature wear on the
vehicle's powertrain. Do not drive
on clean, dry pavement in
Four-Wheel Drive High or
Four-Wheel Drive Low for
extended periods of time.
Page 322 of 544

Black plate (52,1)GMC Sierra Owner Manual (GMNA-Localizing-U.S./Canada/Mexico-
5853626) - 2014 - CRC - 6/6/14
9-52 Driving and Operating
Brakes
Antilock Brake
System (ABS)
This vehicle has ABS, an advanced
electronic braking system that helps
prevent a braking skid.
When the vehicle begins to drive
away, ABS checks itself.
A momentary motor or clicking noise
might be heard while this test is
going on, and it might even be
noticed that the brake pedal moves
a little. This is normal.
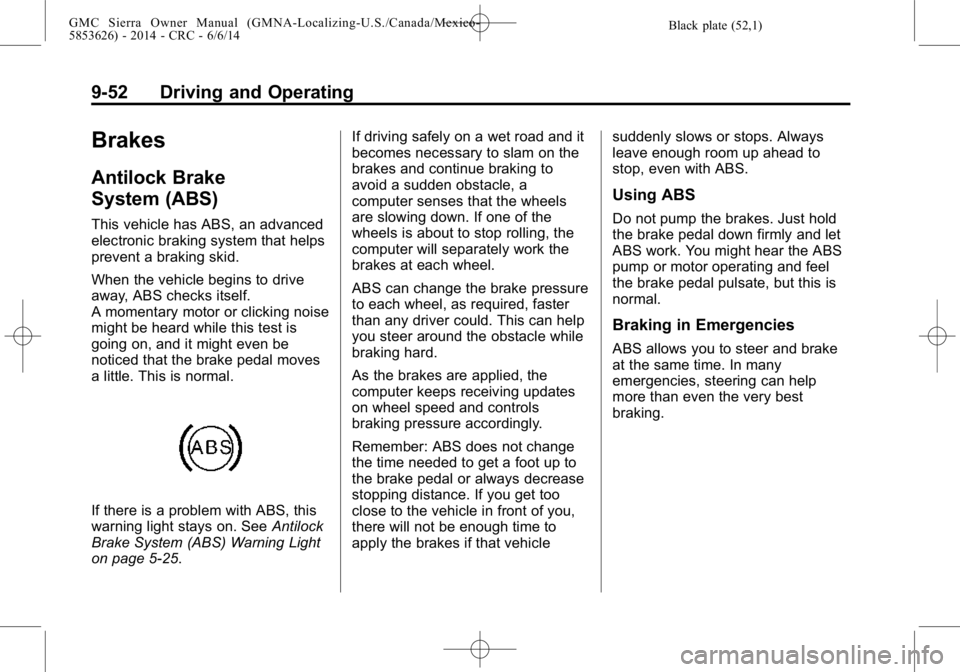
If there is a problem with ABS, this
warning light stays on. SeeAntilock
Brake System (ABS) Warning Light
on page 5-25. If driving safely on a wet road and it
becomes necessary to slam on the
brakes and continue braking to
avoid a sudden obstacle, a
computer senses that the wheels
are slowing down. If one of the
wheels is about to stop rolling, the
computer will separately work the
brakes at each wheel.
ABS can change the brake pressure
to each wheel, as required, faster
than any driver could. This can help
you steer around the obstacle while
braking hard.
As the brakes are applied, the
computer keeps receiving updates
on wheel speed and controls
braking pressure accordingly.
Remember: ABS does not change
the time needed to get a foot up to
the brake pedal or always decrease
stopping distance. If you get too
close to the vehicle in front of you,
there will not be enough time to
apply the brakes if that vehicle
suddenly slows or stops. Always
leave enough room up ahead to
stop, even with ABS.
Using ABS
Do not pump the brakes. Just hold
the brake pedal down firmly and let
ABS work. You might hear the ABS
pump or motor operating and feel
the brake pedal pulsate, but this is
normal.
Braking in Emergencies
ABS allows you to steer and brake
at the same time. In many
emergencies, steering can help
more than even the very best
braking.
Page 327 of 544

Black plate (57,1)GMC Sierra Owner Manual (GMNA-Localizing-U.S./Canada/Mexico-
5853626) - 2014 - CRC - 6/6/14
Driving and Operating 9-57
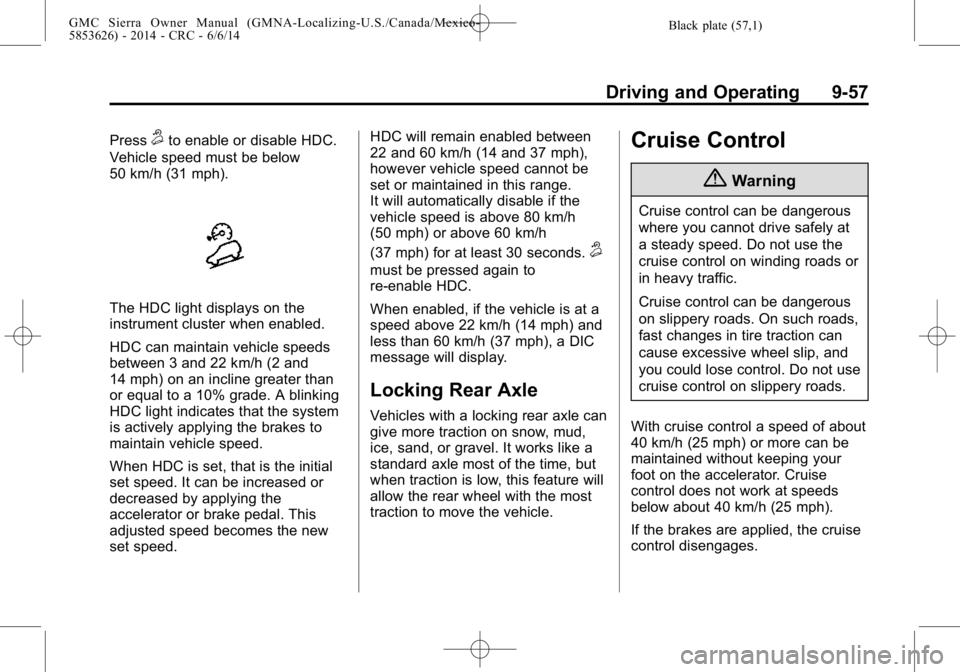
Press5to enable or disable HDC.
Vehicle speed must be below
50 km/h (31 mph).
The HDC light displays on the
instrument cluster when enabled.
HDC can maintain vehicle speeds
between 3 and 22 km/h (2 and
14 mph) on an incline greater than
or equal to a 10% grade. A blinking
HDC light indicates that the system
is actively applying the brakes to
maintain vehicle speed.
When HDC is set, that is the initial
set speed. It can be increased or
decreased by applying the
accelerator or brake pedal. This
adjusted speed becomes the new
set speed. HDC will remain enabled between
22 and 60 km/h (14 and 37 mph),
however vehicle speed cannot be
set or maintained in this range.
It will automatically disable if the
vehicle speed is above 80 km/h
(50 mph) or above 60 km/h
(37 mph) for at least 30 seconds.
5
must be pressed again to
re-enable HDC.
When enabled, if the vehicle is at a
speed above 22 km/h (14 mph) and
less than 60 km/h (37 mph), a DIC
message will display.
Locking Rear Axle
Vehicles with a locking rear axle can
give more traction on snow, mud,
ice, sand, or gravel. It works like a
standard axle most of the time, but
when traction is low, this feature will
allow the rear wheel with the most
traction to move the vehicle.
Cruise Control
{Warning
Cruise control can be dangerous
where you cannot drive safely at
a steady speed. Do not use the
cruise control on winding roads or
in heavy traffic.
Cruise control can be dangerous
on slippery roads. On such roads,
fast changes in tire traction can
cause excessive wheel slip, and
you could lose control. Do not use
cruise control on slippery roads.
With cruise control a speed of about
40 km/h (25 mph) or more can be
maintained without keeping your
foot on the accelerator. Cruise
control does not work at speeds
below about 40 km/h (25 mph).
If the brakes are applied, the cruise
control disengages.
Page 331 of 544

Black plate (61,1)GMC Sierra Owner Manual (GMNA-Localizing-U.S./Canada/Mexico-
5853626) - 2014 - CRC - 6/6/14
Driving and Operating 9-61
Warning (Continued)
Under many conditions, these
systems will not:
.Detect children, pedestrians,
bicyclists, or animals.
.Detect vehicles or objects
outside the area monitored by
the system.
.Work at all driving speeds.
.Warn you or provide you with
enough time to avoid a crash.
.Work under poor visibility or
bad weather conditions.
.Work if the detection sensor
is not cleaned or is covered
by ice, snow, mud, or dirt.
Complete attention is always
required while driving, and you
should be ready to take action
and apply the brakes and/or steer
the vehicle to avoid crashes. Audible or Safety Alert Seat
Some driver assistance features
alert the driver of obstacles by
beeping. To change the volume of
the warning chime, see
“Comfort
and Convenience” underVehicle
Personalization on page 5-45.
If equipped with the Safety Alert
Seat, the driver seat cushion may
provide a vibrating pulse alert
instead of beeping. To change this,
see “Collision/Detection Systems”
under Vehicle Personalization on
page 5-45.
Assistance Systems for
Parking or Backing
When the vehicle is in R (Reverse),
the Rear Vision Camera (RVC) and
Rear Parking Assist may help the
driver to avoid a crash or to reduce
crash damage. Some models may
also have Front Parking Assist. The RVC and Rear Parking Assist
will not work properly if the tailgate
is down. If the tailgate is down, do
not use these systems.
When the vehicle is shifted into
R (Reverse), the RVC displays an
image of the area behind the vehicle
in the center stack display. The
previous screen displays when the
vehicle is shifted out of R (Reverse)
after a short delay. To return to the
previous screen sooner, press a
button on the infotainment system,
shift into P (Park), or reach a vehicle
speed of 8 km/h (5 mph).
{Warning
The RVC system does not display
children, pedestrians, bicyclists,
animals, or any other object
located outside the camera's field
of view, below the bumper,
or under the vehicle. Perceived
distances may be different from
actual distances. Do not back the
(Continued)
Page 337 of 544

Black plate (67,1)GMC Sierra Owner Manual (GMNA-Localizing-U.S./Canada/Mexico-
5853626) - 2014 - CRC - 6/6/14
Driving and Operating 9-67
{Warning
The LDW system is an aid to help
the vehicle stay in the driving
lane. It does not steer the vehicle.
The LDW system may not:
.Provide enough time to avoid
a crash.
.Detect lane markings under
bad weather conditions or if
the windshield is dirty.
.Detect lane markings and will
not detect road edges.
.Warn that the vehicle is
crossing a lane marking if the
system does not detect the
lane marking.
If LDW only detects lane
markings on one side of the road,
it will only warn you when
departing the lane on the side
where it has detected a lane
marker. Even with LDW, always
keep your attention on the road (Continued)
Warning (Continued)
and maintain proper vehicle
position within the lane, or vehicle
damage, injury, or death could
occur. Always keep the
windshield clean and do not use
LDW in bad weather conditions.
How the System Works
The LDW camera sensor is on the
windshield ahead of the rearview
mirror.
To turn LDW on and off, press
@on
the center stack. The control
indicator will light when LDW is on.
When the vehicle is started, the
LDW indicator on the instrument
cluster will come on briefly. If LDW is on, the LDW indicator will
appear green if the system detects
a left or right lane marking while the
vehicle is traveling at 56 km/h
(35 mph) or greater. If the vehicle
crosses a detected lane marking
without using the turn signal in the
lane departure direction, this
indicator will change to amber and
flash. In addition, three beeps will
be sounded from the left or right
side, or the Safety Alert Seat will
pulse three times on either the left
or right side of the seat, depending
on the lane departure direction.
When the System Does Not
Seem to Work Properly
If the LDW symbol does not appear
when the system is on and the
vehicle is traveling at least 56 km/h
(35 mph):
.The lane markings on the road
may not be seen.
.The camera sensor may be
blocked by dirt, snow, or ice.
Page 347 of 544

Black plate (77,1)GMC Sierra Owner Manual (GMNA-Localizing-U.S./Canada/Mexico-
5853626) - 2014 - CRC - 6/6/14
Driving and Operating 9-77
Trailer Towing
If the vehicle has a diesel engine,
see the Duramax diesel
supplement.
If the vehicle is bi-fuel, see the
bi-fuel supplement.
Do not tow a trailer during break-in.
SeeNew Vehicle Break-In on
page 9-23.
{Warning
The driver can lose control when
pulling a trailer if the correct
equipment is not used or the
vehicle is not driven properly.
For example, if the trailer is too
heavy, the brakes may not work
well or even at all. The driver and
passengers could be seriously
injured. The vehicle may also be
damaged; the resulting repairs
would not be covered by the
vehicle warranty.
(Continued)
Warning (Continued)
Pull a trailer only if all the steps in
this section have been followed.
Ask your dealer for advice and
information about towing a trailer
with the vehicle.
{Caution
Pulling a trailer improperly can
damage the vehicle and result in
costly repairs not covered by the
vehicle warranty. To pull a trailer
correctly, follow the advice in this
section and see your dealer for
important information about
towing a trailer with the vehicle.
To identify the trailering capacity of
the vehicle, read the information in
“Weight of the Trailer” later in this
section. Trailering is different than just
driving the vehicle by itself.
Trailering means changes in
handling, acceleration, braking,
durability, and fuel economy.
Successful, safe trailering takes
correct equipment, and it has to be
used properly.
The following information has many
time-tested, important trailering tips
and safety rules. Many of these are
important for your safety and that of
your passengers. Read this section
carefully before pulling a trailer.
Page 365 of 544

Black plate (95,1)GMC Sierra Owner Manual (GMNA-Localizing-U.S./Canada/Mexico-
5853626) - 2014 - CRC - 6/6/14
Driving and Operating 9-95
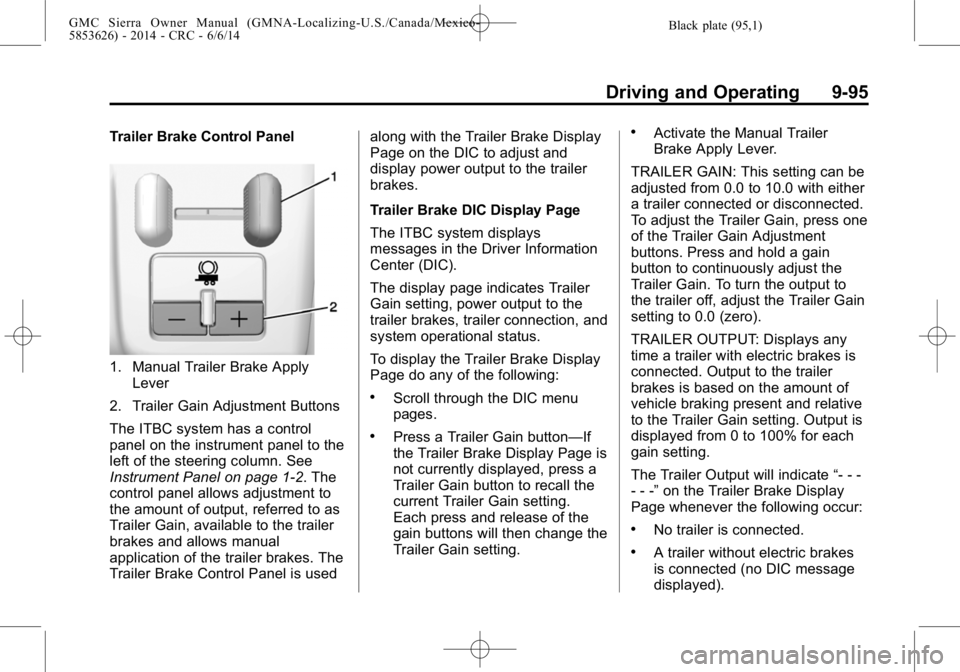
Trailer Brake Control Panel
1. Manual Trailer Brake ApplyLever
2. Trailer Gain Adjustment Buttons
The ITBC system has a control
panel on the instrument panel to the
left of the steering column. See
Instrument Panel on page 1-2. The
control panel allows adjustment to
the amount of output, referred to as
Trailer Gain, available to the trailer
brakes and allows manual
application of the trailer brakes. The
Trailer Brake Control Panel is used along with the Trailer Brake Display
Page on the DIC to adjust and
display power output to the trailer
brakes.
Trailer Brake DIC Display Page
The ITBC system displays
messages in the Driver Information
Center (DIC).
The display page indicates Trailer
Gain setting, power output to the
trailer brakes, trailer connection, and
system operational status.
To display the Trailer Brake Display
Page do any of the following:
.Scroll through the DIC menu
pages.
.Press a Trailer Gain button—If
the Trailer Brake Display Page is
not currently displayed, press a
Trailer Gain button to recall the
current Trailer Gain setting.
Each press and release of the
gain buttons will then change the
Trailer Gain setting.
.Activate the Manual Trailer
Brake Apply Lever.
TRAILER GAIN: This setting can be
adjusted from 0.0 to 10.0 with either
a trailer connected or disconnected.
To adjust the Trailer Gain, press one
of the Trailer Gain Adjustment
buttons. Press and hold a gain
button to continuously adjust the
Trailer Gain. To turn the output to
the trailer off, adjust the Trailer Gain
setting to 0.0 (zero).
TRAILER OUTPUT: Displays any
time a trailer with electric brakes is
connected. Output to the trailer
brakes is based on the amount of
vehicle braking present and relative
to the Trailer Gain setting. Output is
displayed from 0 to 100% for each
gain setting.
The Trailer Output will indicate “- - -
- - -” on the Trailer Brake Display
Page whenever the following occur:
.No trailer is connected.
.A trailer without electric brakes
is connected (no DIC message
displayed).