2014 GMC SIERRA 1500 wiring
[x] Cancel search: wiringPage 96 of 542

Black plate (36,1)GMC Sierra Owner Manual (GMNA-Localizing-U.S./Canada/Mexico-
5853626) - 2014 - 3rd crc - 8/15/13
3-36 Seats and Restraints
{Warning
For up to 10 seconds after the
vehicle is turned off and the
battery is disconnected, an airbag
can still inflate during improper
service. You can be injured if you
are close to an airbag when it
inflates. Avoid yellow connectors.
They are probably part of the
airbag system. Be sure to follow
proper service procedures, and
make sure the person performing
work for you is qualified to do so.
Adding Equipment to the
Airbag-Equipped Vehicle
Adding accessories that change the
vehicle's frame, bumper system,
height, front end, or side sheet
metal, may keep the airbag system
from working properly. The
operation of the airbag system can
also be affected by changing or
moving any parts of the front seats,
safety belts, the airbag sensing anddiagnostic module, steering wheel,
instrument panel, roof-rail airbag
modules, ceiling headliner or pillar
garnish trim, overhead console,
front sensors, side impact sensors,
or airbag wiring.
Your dealer and the service manual
have information about the location
of the airbag sensors, sensing and
diagnostic module, and airbag
wiring.
In addition, the vehicle may have a
passenger sensing system for the
front outboard passenger position,
which includes sensors that are part
of the passenger seat. The
passenger sensing system may not
operate properly if the original seat
trim is replaced with non-GM
covers, upholstery, or trim; or with
GM covers, upholstery, or trim
designed for a different vehicle. Any
object, such as an aftermarket seat
heater or a comfort-enhancing pad
or device, installed under or on top
of the seat fabric, could also
interfere with the operation of the
passenger sensing system. Thiscould either prevent proper
deployment of the passenger
airbag(s) or prevent the passenger
sensing system from properly
turning off the passenger airbag(s).
See
Passenger Sensing System on
page 3-31.
If the vehicle has rollover roof-rail
airbags, see Different Size Tires
and Wheels on page 10-72 for
additional important information.
If a snow plow is added to the
vehicle, the airbags should still work
properly. The airbag systems were
designed to work properly under a
wide range of conditions, including
snow plowing with vehicles that
have the optional snow plow prep
package (RPO VYU). Do not
change or defeat the snow plow's
“tripping mechanism.” If you do, it
can damage the snow plow and the
vehicle, and may cause an airbag
deployment.
Page 156 of 542

Black plate (18,1)GMC Sierra Owner Manual (GMNA-Localizing-U.S./Canada/Mexico-
5853626) - 2014 - 3rd crc - 8/15/13
5-18 Instruments and Controls
cycle continues several times if the
passenger remains or becomes
unbuckled while the vehicle is
moving.
If the passenger safety belt is
buckled, neither the chime nor the
light comes on.
The front passenger safety belt
warning light and chime may turn on
if an object is put on the seat such
as a briefcase, handbag, grocery
bag, laptop, or other electronic
device. To turn off the warning light
and/or chime, remove the object
from the seat or buckle the
safety belt.
Airbag Readiness Light
This light shows if there is an
electrical problem with the airbag
system. The system check includes
the airbag sensor(s), passenger
sensing system (if equipped), the
pretensioners, the airbag modules,
the wiring, and the crash sensingand diagnostic module. For more
information on the airbag system,
see
Airbag System on page 3-21.
The airbag readiness light comes on
for several seconds when the
vehicle is started. If the light does
not come on then, have it fixed
immediately.
{Warning
If the airbag readiness light stays
on after the vehicle is started or
comes on while driving, it means
the airbag system might not be
working properly. The airbags in
the vehicle might not inflate in a
crash, or they could even inflate
(Continued)
Warning (Continued)
without a crash. To help avoid
injury, have the vehicle serviced
right away.
If there is a problem with the airbag
system, a Driver Information Center
(DIC) message may also come on.
See Airbag System Messages on
page 5-41.
Airbag On-Off Light
If the vehicle has an airbag on-off
switch, it also has a passenger
airbag status indicator located in the
overhead console.
Page 174 of 542
Black plate (36,1)GMC Sierra Owner Manual (GMNA-Localizing-U.S./Canada/Mexico-
5853626) - 2014 - 3rd crc - 8/15/13
5-36 Instruments and Controls
When this message displays, power
is no longer available to the trailer
brakes.
As soon as it is safe to do so,
carefully pull your vehicle over to
the side of the road and turn the
ignition off. Check the wiring
connection to the trailer and turn the
ignition back on. If this message still
displays, either your vehicle or the
trailer needs service. See your
dealer.
See“Integrated Trailer Brake
Control System” underTowing
Equipment on page 9-89 for more
information.
Compass Messages
Dashes may be displayed if the
vehicle temporarily loses
communication with the Global
Positioning System (GPS).
Door Ajar Messages
DOOR OPEN
This message displays and a chime
may sound if a door is not fully
closed. Stop and turn off the
vehicle, check the door for
obstructions, and close the door
again. Check to see if the message
still appears on the DIC.
HOOD OPEN
This message displays and a chime
may sound if the hood is not fully
closed. Stop and turn off the
vehicle, check the hood for
obstructions, and close the hood
again. Check to see if the message
still appears on the DIC.
Engine Cooling System
Messages
AIR CONDITIONING OFF
This message displays when the
engine coolant becomes hotter than
the normal operating temperature.
See Engine Coolant Temperature
Gauge on page 5-16. To avoid
added strain on a hot engine, the air
conditioning compressor
automatically turns off. When the
coolant temperature returns to
normal, the air conditioning
compressor turns back on. You can
continue to drive your vehicle.
If this message continues to appear,
have the system repaired by your
dealer as soon as possible to avoid
damage to the engine.
Page 182 of 542
Black plate (44,1)GMC Sierra Owner Manual (GMNA-Localizing-U.S./Canada/Mexico-
5853626) - 2014 - 3rd crc - 8/15/13
5-44 Instruments and Controls
Vehicle Reminder
Messages
CHECK TRAILER WIRING
On vehicles with the Integrated
Trailer Brake Control (ITBC) system,
this message may display and a
chime may sound when one of the
following conditions exists:
.A trailer with electric brakes
becomes disconnected from the
vehicle.
‐If the disconnect occurs while
the vehicle is stopped, this
message clears itself after a
short time.
‐ If the disconnect occurs while
the vehicle is moving, this
message stays on until the
ignition is turned off.
.There is a short in the wiring to
the electric trailer brakes.
When this message displays, power
is no longer available to the trailer
brakes. As soon as it is safe to do so,
carefully pull the vehicle over to the
side of the road and turn the ignition
off. Check the wiring connection to
the trailer and turn the ignition back
on. This message clears if the trailer
is reconnected. This message also
clears if you acknowledge it. If this
message still displays, either the
vehicle or the trailer needs service.
See your dealer.
See
“Integrated Trailer Brake
Control System” underTowing
Equipment on page 9-89.
ICE POSSIBLE DRIVE
WITH CARE
This message displays when ice
conditions are possible.
TRAILER CONNECTED
On vehicles with the Integrated
Trailer Brake Control (ITBC) system,
this message displays briefly when
a trailer with electric or electric over
hydraulic brakes is first connected
to the vehicle. This message clears itself after
several seconds. This message also
clears if you acknowledge it. After
this message clears, the TRAILER
GAIN and OUTPUT displays appear
in the DIC.
See
Driver Information Center (DIC)
(Base Level) on page 5-30 orDriver
Information Center (DIC) (Uplevel)
on page 5-32 and“Integrated Trailer
Brake Control System” under
Towing Equipment on page 9-89.
Vehicle Speed Messages
REDUCE SPEED FOR HILL
DESCENT CONTROL
This message displays when
attempting to enable Hill Descent
Control (HDC) when the vehicle
speed is too high. See Hill Descent
Control (HDC) on page 9-56.
Page 198 of 542
Black plate (6,1)GMC Sierra Owner Manual (GMNA-Localizing-U.S./Canada/Mexico-
5853626) - 2014 - 3rd crc - 8/15/13
6-6 Lighting
When the headlamps are changed
to high beam, the fog lamps go off.
When the high-beam headlamps are
turned off, the fog lamps will come
on again.
Some localities have laws that
require the headlamps to be on with
the fog lamps.
Auxiliary
Roof-Mounted Lamp
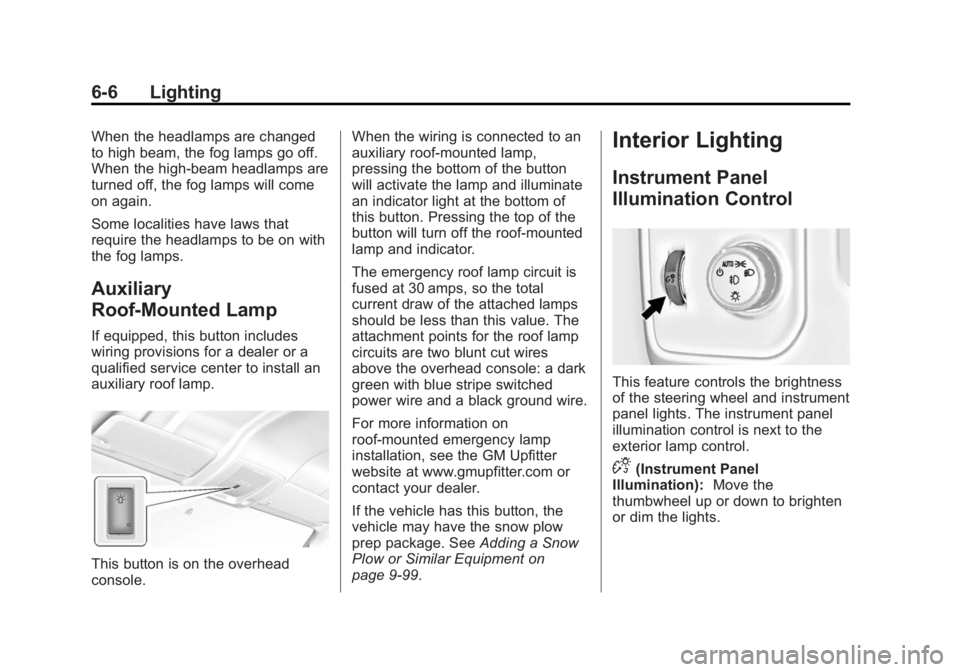
If equipped, this button includes
wiring provisions for a dealer or a
qualified service center to install an
auxiliary roof lamp.
This button is on the overhead
console.When the wiring is connected to an
auxiliary roof-mounted lamp,
pressing the bottom of the button
will activate the lamp and illuminate
an indicator light at the bottom of
this button. Pressing the top of the
button will turn off the roof-mounted
lamp and indicator.
The emergency roof lamp circuit is
fused at 30 amps, so the total
current draw of the attached lamps
should be less than this value. The
attachment points for the roof lamp
circuits are two blunt cut wires
above the overhead console: a dark
green with blue stripe switched
power wire and a black ground wire.
For more information on
roof-mounted emergency lamp
installation, see the GM Upfitter
website at www.gmupfitter.com or
contact your dealer.
If the vehicle has this button, the
vehicle may have the snow plow
prep package. See
Adding a Snow
Plow or Similar Equipment on
page 9-99.
Interior Lighting
Instrument Panel
Illumination Control
This feature controls the brightness
of the steering wheel and instrument
panel lights. The instrument panel
illumination control is next to the
exterior lamp control.
D(Instrument Panel
Illumination): Move the
thumbwheel up or down to brighten
or dim the lights.
Page 359 of 542
Black plate (91,1)GMC Sierra Owner Manual (GMNA-Localizing-U.S./Canada/Mexico-
5853626) - 2014 - 3rd crc - 8/15/13
Driving and Operating 9-91
forward that it will contact the back
of the cab in sharp turns. This is
especially important for short box
pickups. Trailer pin box extensions
and sliding fifth-wheel hitch
assemblies can help this condition.
There should be at least 15 cm (6 in)
of clearance between the top of the
pickup box and the bottom of the
trailer shelf that extends over
the box.
Make sure the hitch is attached to
the tow vehicle frame rails. Do not
use the pickup box for support.
Safety Chains
Always attach chains between the
vehicle and the trailer. Cross the
safety chains under the tongue of
the trailer to help prevent the tongue
from contacting the road if it
becomes separated from the hitch.
Instructions about safety chains
may be provided by the hitch
manufacturer or by the trailer
manufacturer. If the trailer being
towed weighs up to 2 271 kg
(5,000 lb) with a factory-installedstep bumper, safety chains may be
attached to the attaching points on
the bumper; otherwise, safety
chains should be attached to holes
on the trailer hitch platform. Always
leave just enough slack so the
combination can turn. Never allow
safety chains to drag on the ground.
Trailer Brakes
A loaded trailer that weighs more
than 900 kg (2,000 lb) needs to have
its own brake system that is
adequate for the weight of the
trailer. Be sure to read and follow
the instructions for the trailer brakes
so they are installed, adjusted, and
maintained properly.
Do not tap into the vehicle's
hydraulic brake system.
Auxiliary Battery
The auxiliary battery provision can
be used to supply electrical power
to additional equipment that may be
added, such as a slide-in camper.
If equipped, this relay will be on the
driver side of the vehicle, next to the
underhood electrical center.
Be sure to follow the proper
installation instructions included with
any electrical equipment that is
installed.
{Caution
Leaving electrical equipment on
for extended periods will drain the
battery. Always turn off electrical
equipment when not in use and
do not use equipment that
exceeds the maximum amperage
rating of 30 amps for the auxiliary
battery provision.
Trailer Wiring Harness
The vehicle is equipped with one of
the following wiring harnesses for
towing a trailer or hauling a slide-in
camper.
Page 360 of 542
Black plate (92,1)GMC Sierra Owner Manual (GMNA-Localizing-U.S./Canada/Mexico-
5853626) - 2014 - 3rd crc - 8/15/13
9-92 Driving and Operating
Basic Trailer Wiring
All regular, double cab, and crew
cab pickups have a seven-wire
trailer towing harness.
For vehicles not equipped with
heavy duty trailering, the harness is
secured to the vehicle's frame
behind the spare tire mount. The
harness requires the installation of a
trailer connector, which is available
through your dealer.
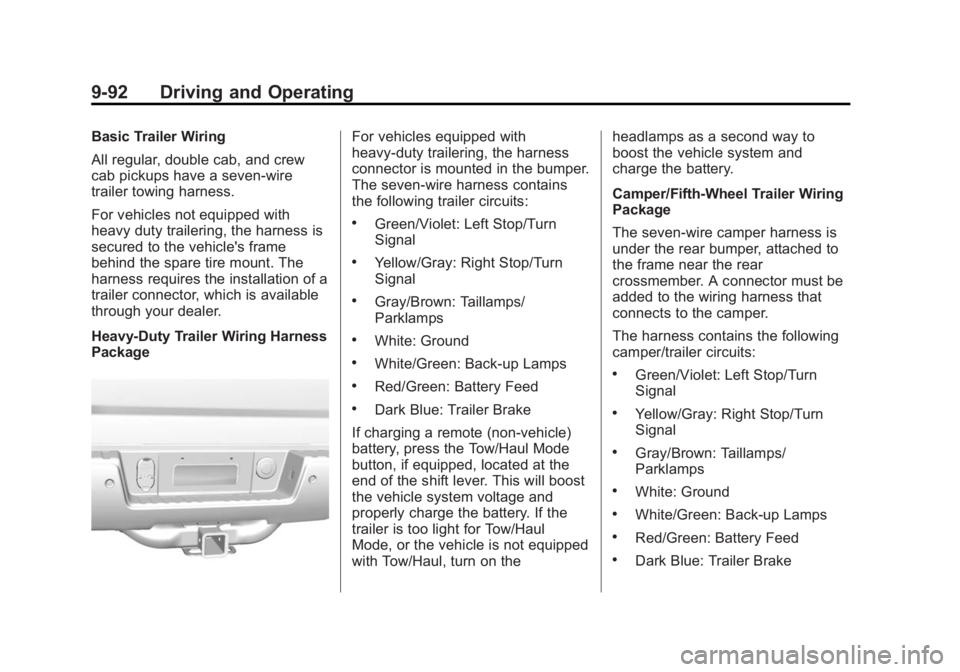
Heavy-Duty Trailer Wiring Harness
PackageFor vehicles equipped with
heavy-duty trailering, the harness
connector is mounted in the bumper.
The seven-wire harness contains
the following trailer circuits:
.Green/Violet: Left Stop/Turn
Signal
.Yellow/Gray: Right Stop/Turn
Signal
.Gray/Brown: Taillamps/
Parklamps
.White: Ground
.White/Green: Back-up Lamps
.Red/Green: Battery Feed
.Dark Blue: Trailer Brake
If charging a remote (non-vehicle)
battery, press the Tow/Haul Mode
button, if equipped, located at the
end of the shift lever. This will boost
the vehicle system voltage and
properly charge the battery. If the
trailer is too light for Tow/Haul
Mode, or the vehicle is not equipped
with Tow/Haul, turn on the headlamps as a second way to
boost the vehicle system and
charge the battery.
Camper/Fifth-Wheel Trailer Wiring
Package
The seven-wire camper harness is
under the rear bumper, attached to
the frame near the rear
crossmember. A connector must be
added to the wiring harness that
connects to the camper.
The harness contains the following
camper/trailer circuits:
.Green/Violet: Left Stop/Turn
Signal
.Yellow/Gray: Right Stop/Turn
Signal
.Gray/Brown: Taillamps/
Parklamps
.White: Ground
.White/Green: Back-up Lamps
.Red/Green: Battery Feed
.Dark Blue: Trailer Brake
Page 361 of 542
Black plate (93,1)GMC Sierra Owner Manual (GMNA-Localizing-U.S./Canada/Mexico-
5853626) - 2014 - 3rd crc - 8/15/13
Driving and Operating 9-93
If the vehicle is equipped with the
heavy-duty trailering option, see
“Heavy-Duty Trailer Wiring Harness
Package”earlier in this section.
When the camper-wiring harness is
ordered without the heavy-duty
trailering package, a seven-wire
harness with a seven-pin connector
is at the rear of the vehicle and is
tied to the vehicle's frame.
Electric Brake Control Wiring
Provisions
These wiring provisions are
included with the vehicle as part of
the trailer wiring package. These
provisions are for an electric brake
controller.
The harness should be installed by
your dealer or a qualified service
center.
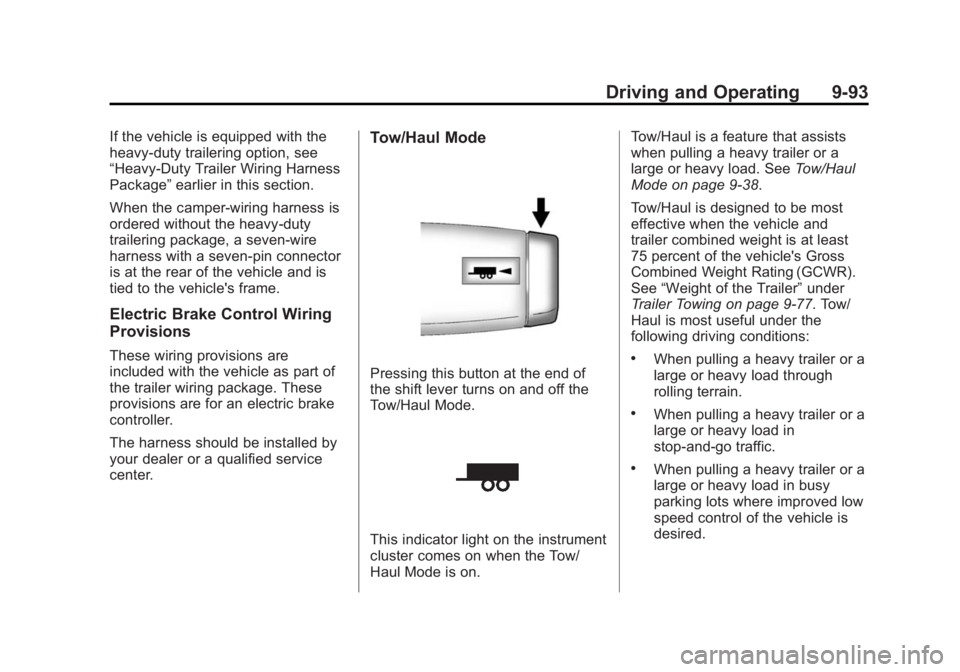
Tow/Haul Mode
Pressing this button at the end of
the shift lever turns on and off the
Tow/Haul Mode.
This indicator light on the instrument
cluster comes on when the Tow/
Haul Mode is on. Tow/Haul is a feature that assists
when pulling a heavy trailer or a
large or heavy load. See
Tow/Haul
Mode on page 9-38.
Tow/Haul is designed to be most
effective when the vehicle and
trailer combined weight is at least
75 percent of the vehicle's Gross
Combined Weight Rating (GCWR).
See “Weight of the Trailer” under
Trailer Towing on page 9-77. Tow/
Haul is most useful under the
following driving conditions:
.When pulling a heavy trailer or a
large or heavy load through
rolling terrain.
.When pulling a heavy trailer or a
large or heavy load in
stop-and-go traffic.
.When pulling a heavy trailer or a
large or heavy load in busy
parking lots where improved low
speed control of the vehicle is
desired.