2014 GMC SIERRA 1500 ECO mode
[x] Cancel search: ECO modePage 319 of 542
Black plate (51,1)GMC Sierra Owner Manual (GMNA-Localizing-U.S./Canada/Mexico-
5853626) - 2014 - 3rd crc - 8/15/13
Driving and Operating 9-51
5. Shift the transfer case toTwo-Wheel Drive High.
6. Turn the transfer case dial clockwise to N (Neutral) until it
stops and hold it there until the
N (Neutral) light starts blinking.
This will take at least
10 seconds. Then slowly release
the dial to the Four-Wheel Drive
Low position. The N (Neutral)
light will come on when the
transfer case shift to N (Neutral)
is complete.
7. If the engine is running, make sure that the transfer case is in
N (Neutral) by shifting the
transmission to R (Reverse) for
one second, then shift the
transmission to D (Drive) for
one second.
8. Turn the ignition to ACC/ ACCESSORY, which will turn the
engine off.
9. Place the transmission shift lever in P (Park). 10. Release the parking brake prior
to moving the vehicle.
11. Turn the ignition to LOCK/OFF.
Shifting Out of N (Neutral)
To shift out of N (Neutral):
1. Set the parking brake and apply the regular brake pedal.
2. Turn the ignition to ON/RUN with the engine off, and shift the
transmission to N (Neutral).
3. Turn the transfer case dial to Two-Wheel Drive High,
Four-Wheel Drive High,
or AUTO.
After the transfer case has
shifted out of N (Neutral), the
N (Neutral) light will go out.
4. Release the parking brake prior to moving the vehicle.{Caution
Shifting the transmission into gear
before the requested mode
indicator light has stopped
flashing could damage the
transfer case. To help avoid
damaging the vehicle, always wait
for the mode indicator lights to
stop flashing before shifting the
transmission into gear.
5. Start the engine and shift the transmission to the desired
position.
Page 328 of 542
Black plate (60,1)GMC Sierra Owner Manual (GMNA-Localizing-U.S./Canada/Mexico-
5853626) - 2014 - 3rd crc - 8/15/13
9-60 Driving and Operating
To disable and enable Cruise
Grade Braking for the current
ignition key cycle, press and
hold the Tow/Haul button for
five seconds. A DIC message
displays. SeeTransmission
Messages on page 5-42.
.Vehicles with a diesel engine
have Cruise Grade Braking
enabled when Tow/Haul Mode is
on, the exhaust brake is on,
or both are on.
For other forms of Grade Braking,
see Automatic Transmission on
page 9-34.Tow/Haul Mode on
page 9-38, and Hill Descent Control
(HDC) on page 9-56. Ending Cruise Control
There are three ways to end cruise
control:
.To disengage cruise control,
step lightly on the brake pedal.
.To disengage cruise control,
Press
*on the steering wheel.
.To turn off the cruise control,
press
5on the steering wheel.
Erasing Speed Memory
The cruise control set speed is
erased from memory by pressing
5
or if the ignition is turned off.
Driver Assistance
Systems
This vehicle may have features that
work together to help avoid crashes
or reduce crash damage while
driving, backing, and parking. Read
this entire section before using
these systems.
{Warning
Do not rely on the Driver
Assistance Systems. These
systems do not replace the need
for paying attention and driving
safely. You may not hear or feel
alerts or warnings provided by
these systems. Failure to use
proper care when driving may
result in injury, death, or vehicle
damage. See Defensive Driving
on page 9-3.
(Continued)
Page 346 of 542
Black plate (78,1)GMC Sierra Owner Manual (GMNA-Localizing-U.S./Canada/Mexico-
5853626) - 2014 - 3rd crc - 8/15/13
9-78 Driving and Operating
{Caution
Pulling a trailer improperly can
damage the vehicle and result in
costly repairs not covered by the
vehicle warranty. To pull a trailer
correctly, follow the advice in this
section and see your dealer for
important information about
towing a trailer with the vehicle.
To identify the trailering capacity of
the vehicle, read the information in
“Weight of the Trailer” later in this
section.
Trailering is different than just
driving the vehicle by itself.
Trailering means changes in
handling, acceleration, braking,
durability, and fuel economy.
Successful, safe trailering takes
correct equipment, and it has to be
used properly.
The following information has many
time-tested, important trailering tips
and safety rules. Many of these are important for your safety and that of
your passengers. Read this section
carefully before pulling a trailer.
Weight of the Trailer
How heavy can a trailer safely be?
It depends on how the rig is used.
Speed, altitude, road grades,
outside temperature, and how much
the vehicle is used to pull a trailer
are all important. It can depend on
any special equipment on the
vehicle, and the amount of tongue
weight the vehicle can carry. See
“Weight of the Trailer Tongue”
later
in this section for more information.
Trailer weight rating (TWR) is
calculated assuming the tow vehicle
has only the driver but all required
trailering equipment. Weight of
additional optional equipment,
passengers, and cargo in the tow
vehicle must be subtracted from the
trailer weight rating. For kingpin weight and trailer
tongue weight information, see
“Weight of the Trailer Tongue”
later
in this section.
Use the following chart to determine
how much the vehicle can weigh,
based upon the vehicle model and
options.
Weights listed apply for
conventional trailers and fifth-wheel
trailers unless otherwise noted.
Page 358 of 542
Black plate (90,1)GMC Sierra Owner Manual (GMNA-Localizing-U.S./Canada/Mexico-
5853626) - 2014 - 3rd crc - 8/15/13
9-90 Driving and Operating
Vehicle SeriesTrailer WeightWeight Distributing Hitch
Usage Hitch Distribution
1500 Up to 7,000 lbOptionalRefer to trailer
manufacturer ’s
recommendation
1500 Over 7,000 lbRequired 50%
2500/3500 Up to 18,000 lbOptionalRefer to trailer
manufacturer ’s
recommendation
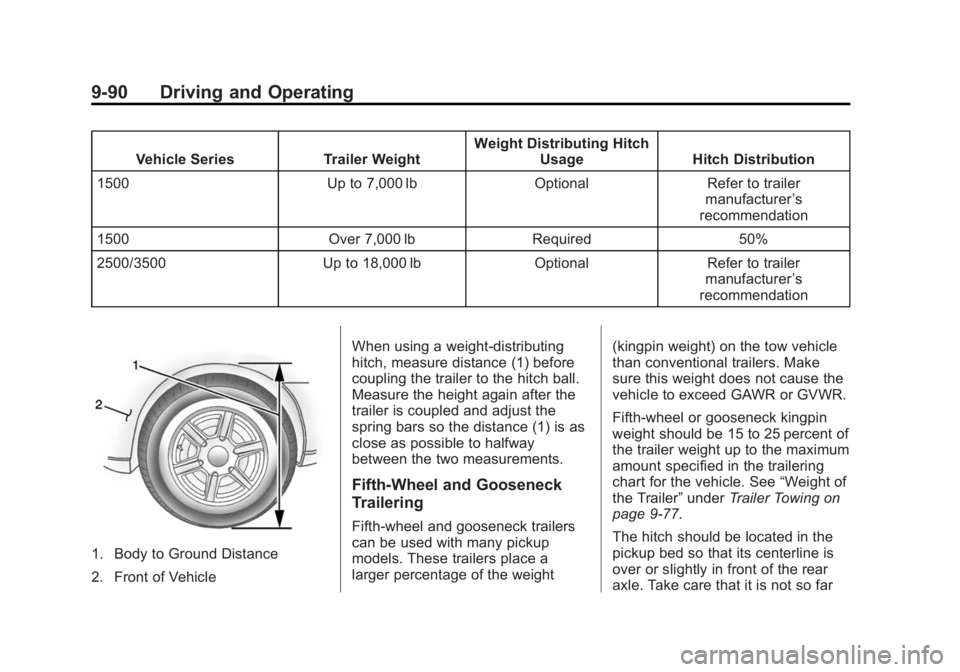
1. Body to Ground Distance
2. Front of Vehicle When using a weight-distributing
hitch, measure distance (1) before
coupling the trailer to the hitch ball.
Measure the height again after the
trailer is coupled and adjust the
spring bars so the distance (1) is as
close as possible to halfway
between the two measurements.
Fifth-Wheel and Gooseneck
Trailering
Fifth-wheel and gooseneck trailers
can be used with many pickup
models. These trailers place a
larger percentage of the weight
(kingpin weight) on the tow vehicle
than conventional trailers. Make
sure this weight does not cause the
vehicle to exceed GAWR or GVWR.
Fifth-wheel or gooseneck kingpin
weight should be 15 to 25 percent of
the trailer weight up to the maximum
amount specified in the trailering
chart for the vehicle. See
“Weight of
the Trailer” underTrailer Towing on
page 9-77.
The hitch should be located in the
pickup bed so that its centerline is
over or slightly in front of the rear
axle. Take care that it is not so far
Page 360 of 542
Black plate (92,1)GMC Sierra Owner Manual (GMNA-Localizing-U.S./Canada/Mexico-
5853626) - 2014 - 3rd crc - 8/15/13
9-92 Driving and Operating
Basic Trailer Wiring
All regular, double cab, and crew
cab pickups have a seven-wire
trailer towing harness.
For vehicles not equipped with
heavy duty trailering, the harness is
secured to the vehicle's frame
behind the spare tire mount. The
harness requires the installation of a
trailer connector, which is available
through your dealer.
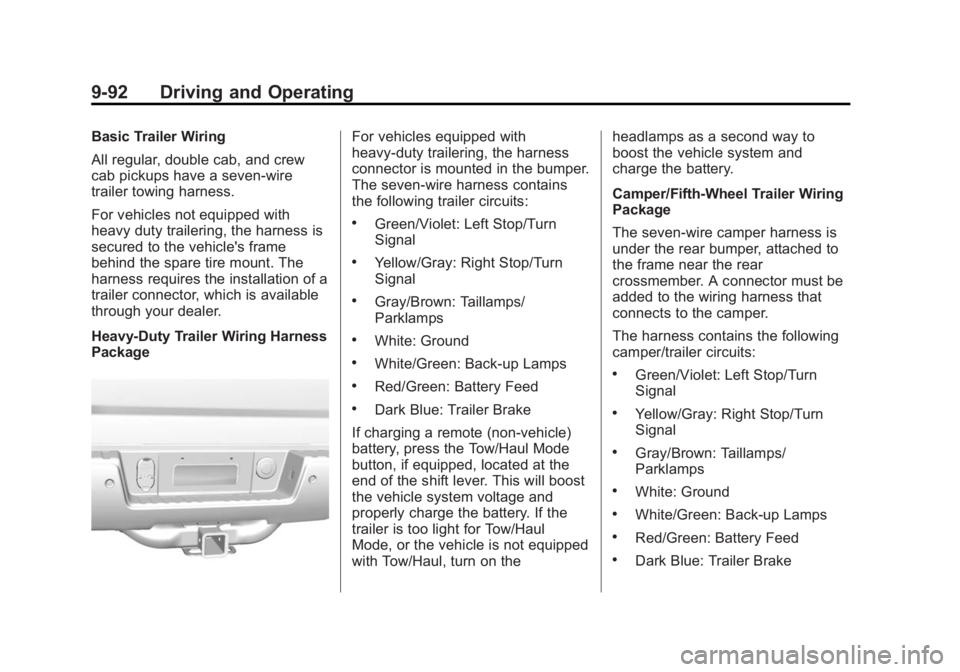
Heavy-Duty Trailer Wiring Harness
PackageFor vehicles equipped with
heavy-duty trailering, the harness
connector is mounted in the bumper.
The seven-wire harness contains
the following trailer circuits:
.Green/Violet: Left Stop/Turn
Signal
.Yellow/Gray: Right Stop/Turn
Signal
.Gray/Brown: Taillamps/
Parklamps
.White: Ground
.White/Green: Back-up Lamps
.Red/Green: Battery Feed
.Dark Blue: Trailer Brake
If charging a remote (non-vehicle)
battery, press the Tow/Haul Mode
button, if equipped, located at the
end of the shift lever. This will boost
the vehicle system voltage and
properly charge the battery. If the
trailer is too light for Tow/Haul
Mode, or the vehicle is not equipped
with Tow/Haul, turn on the headlamps as a second way to
boost the vehicle system and
charge the battery.
Camper/Fifth-Wheel Trailer Wiring
Package
The seven-wire camper harness is
under the rear bumper, attached to
the frame near the rear
crossmember. A connector must be
added to the wiring harness that
connects to the camper.
The harness contains the following
camper/trailer circuits:
.Green/Violet: Left Stop/Turn
Signal
.Yellow/Gray: Right Stop/Turn
Signal
.Gray/Brown: Taillamps/
Parklamps
.White: Ground
.White/Green: Back-up Lamps
.Red/Green: Battery Feed
.Dark Blue: Trailer Brake
Page 389 of 542
Black plate (17,1)GMC Sierra Owner Manual (GMNA-Localizing-U.S./Canada/Mexico-
5853626) - 2014 - 3rd crc - 8/15/13
Vehicle Care 10-17
1. Locate the transmission dipstickat the rear of the engine
compartment, on the passenger
side of the vehicle.
See Engine Compartment
Overview on page 10-5.
2. Flip the handle up, then pull out the dipstick and wipe it with a
clean rag or paper towel.
3. Install the dipstick by pushing it back in all the way; wait
three seconds, and then pull it
back out again.
4. Check both sides of the dipstick and read the lower level. Repeat
the check procedure to verify the
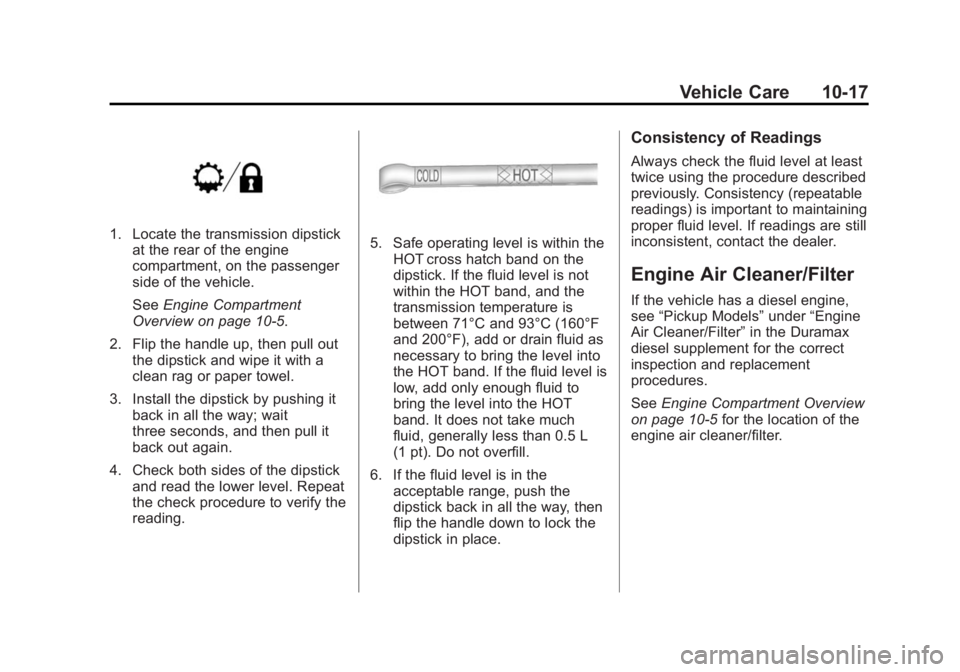
reading.5. Safe operating level is within theHOT cross hatch band on the
dipstick. If the fluid level is not
within the HOT band, and the
transmission temperature is
between 71°C and 93°C (160°F
and 200°F), add or drain fluid as
necessary to bring the level into
the HOT band. If the fluid level is
low, add only enough fluid to
bring the level into the HOT
band. It does not take much
fluid, generally less than 0.5 L
(1 pt). Do not overfill.
6. If the fluid level is in the acceptable range, push the
dipstick back in all the way, then
flip the handle down to lock the
dipstick in place.
Consistency of Readings
Always check the fluid level at least
twice using the procedure described
previously. Consistency (repeatable
readings) is important to maintaining
proper fluid level. If readings are still
inconsistent, contact the dealer.
Engine Air Cleaner/Filter
If the vehicle has a diesel engine,
see “Pickup Models” under“Engine
Air Cleaner/Filter” in the Duramax
diesel supplement for the correct
inspection and replacement
procedures.
See Engine Compartment Overview
on page 10-5 for the location of the
engine air cleaner/filter.
Page 398 of 542
Black plate (26,1)GMC Sierra Owner Manual (GMNA-Localizing-U.S./Canada/Mexico-
5853626) - 2014 - 3rd crc - 8/15/13
10-26 Vehicle Care
{Caution
After driving in the overheated
engine protection operating
mode, the engine oil will be
severely degraded. Any repairs
performed before the engine is
cool may cause engine damage.
Allow the engine to cool before
attempting any repair. Repair the
cause of coolant loss, change the
oil, and reset the oil life system.
SeeEngine Oil on page 10-10.
Engine Fan
If the vehicle has a clutched engine
cooling fan, when the clutch is
engaged, the fan spins faster to
provide more air to cool the engine.
In most everyday driving conditions,
the fan is spinning slower and the
clutch is not fully engaged. This
improves fuel economy and reduces
fan noise. Under heavy vehicle
loading, trailer towing, and/or high
outside temperatures, the fan speed increases as the clutch more fully
engages, so an increase in fan
noise may be heard. This is normal
and should not be mistaken as the
transmission slipping or making
extra shifts. It is merely the cooling
system functioning properly. The fan
will slow down when additional
cooling is not required and the
clutch disengages.
This fan noise may also be heard
when starting the engine. It will go
away as the fan clutch partially
disengages.
If the vehicle has electric cooling
fans, the fans may be heard
spinning at low speed during most
everyday driving. The fans may turn
off if no cooling is required. Under
heavy vehicle loading, trailer towing,
high outside temperatures,
or operation of the air conditioning
system, the fans may change to
high speed and an increase in fan
noise may be heard. This is normal
and indicates that the cooling
system is functioning properly. The
fans will change to low speed when
additional cooling is no longer
required.
The electric engine cooling fans
may run after the engine has been
turned. off. This is normal and no
service is required.
Power Steering Fluid
(1500 Series)
The vehicle has electric power
steering and does not use power
steering fluid.
Power Steering Fluid
(2500/3500 Series)
See
Engine Compartment Overview
on page 10-5 for reservoir location.
Page 431 of 542
Black plate (59,1)GMC Sierra Owner Manual (GMNA-Localizing-U.S./Canada/Mexico-
5853626) - 2014 - 3rd crc - 8/15/13
Vehicle Care 10-59
GAWR RR:Gross Axle Weight
Rating for the rear axle. See
Vehicle Load Limits on
page 9-16.
Intended Outboard Sidewall
:
The side of an asymmetrical tire
that must always face outward
when mounted on a vehicle.
Kilopascal (kPa)
:The metric
unit for air pressure.
Light Truck (LT-Metric) Tire
:A
tire used on light duty trucks and
some multipurpose passenger
vehicles.
Load Index
:An assigned
number ranging from 1 to 279
that corresponds to the load
carrying capacity of a tire.
Maximum Inflation Pressure
:
The maximum air pressure to
which a cold tire can be inflated.
The maximum air pressure is
molded onto the sidewall. Maximum Load Rating
:The
load rating for a tire at the
maximum permissible inflation
pressure for that tire.
Maximum Loaded Vehicle
Weight
:The sum of curb
weight, accessory weight,
vehicle capacity weight, and
production options weight.
Normal Occupant Weight
:The
number of occupants a vehicle
is designed to seat multiplied by
68 kg (150 lb). See Vehicle Load
Limits on page 9-16.
Occupant Distribution
:
Designated seating positions.
Outward Facing Sidewall
:The
side of an asymmetrical tire that
has a particular side that faces
outward when mounted on a
vehicle. The side of the tire that
contains a whitewall, bears
white lettering, or bears
manufacturer, brand, and/or model name molding that is
higher or deeper than the same
moldings on the other sidewall
of the tire.
Passenger (P-Metric) Tire
:A
tire used on passenger cars and
some light duty trucks and
multipurpose vehicles.
Recommended Inflation
Pressure
:Vehicle
manufacturer's recommended
tire inflation pressure as shown
on the tire placard. See Tire
Pressure on page 10-61 and
Vehicle Load Limits on
page 9-16.
Radial Ply Tire
:A pneumatic
tire in which the ply cords that
extend to the beads are laid at
90 degrees to the centerline of
the tread.
Rim
:A metal support for a tire
and upon which the tire beads
are seated.