2014 GMC SIERRA 1500 change wheel
[x] Cancel search: change wheelPage 198 of 542
Black plate (6,1)GMC Sierra Owner Manual (GMNA-Localizing-U.S./Canada/Mexico-
5853626) - 2014 - 3rd crc - 8/15/13
6-6 Lighting
When the headlamps are changed
to high beam, the fog lamps go off.
When the high-beam headlamps are
turned off, the fog lamps will come
on again.
Some localities have laws that
require the headlamps to be on with
the fog lamps.
Auxiliary
Roof-Mounted Lamp
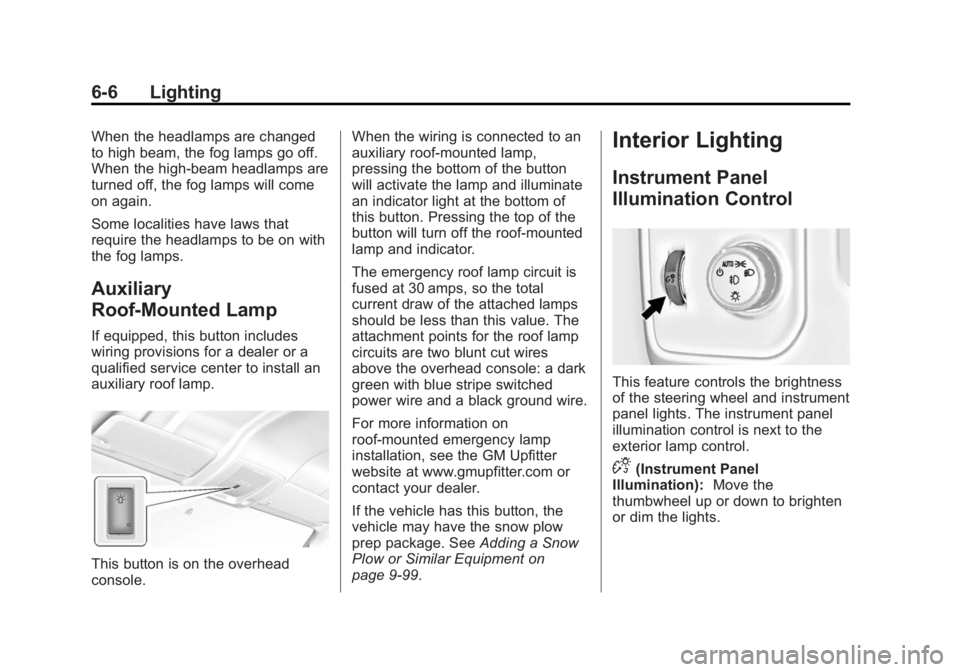
If equipped, this button includes
wiring provisions for a dealer or a
qualified service center to install an
auxiliary roof lamp.
This button is on the overhead
console.When the wiring is connected to an
auxiliary roof-mounted lamp,
pressing the bottom of the button
will activate the lamp and illuminate
an indicator light at the bottom of
this button. Pressing the top of the
button will turn off the roof-mounted
lamp and indicator.
The emergency roof lamp circuit is
fused at 30 amps, so the total
current draw of the attached lamps
should be less than this value. The
attachment points for the roof lamp
circuits are two blunt cut wires
above the overhead console: a dark
green with blue stripe switched
power wire and a black ground wire.
For more information on
roof-mounted emergency lamp
installation, see the GM Upfitter
website at www.gmupfitter.com or
contact your dealer.
If the vehicle has this button, the
vehicle may have the snow plow
prep package. See
Adding a Snow
Plow or Similar Equipment on
page 9-99.
Interior Lighting
Instrument Panel
Illumination Control
This feature controls the brightness
of the steering wheel and instrument
panel lights. The instrument panel
illumination control is next to the
exterior lamp control.
D(Instrument Panel
Illumination): Move the
thumbwheel up or down to brighten
or dim the lights.
Page 211 of 542
Black plate (9,1)GMC Sierra Owner Manual (GMNA-Localizing-U.S./Canada/Mexico-
5853626) - 2014 - 3rd crc - 8/15/13
Infotainment System 7-9
Radio
AM-FM Radio
Playing the Radio
While on the audio main page,
press the RADIO button repeatedly
to cycle through the available
sources AM, FM, and SiriusXM
®
(if equipped) or press the MEDIA
button repeatedly to cycle through
the available sources Bluetooth
®
Audio (if equipped), CD, USB, SD,
and AUX.
The steering wheel controls can
also be used to adjust the volume.
SeeSteering Wheel Controls on
page 5-3.
AM, FM, or SiriusXM (If Equipped)
To select AM, FM, or SiriusXM (if
equipped), press the RADIO button
to toggle to the desired broadcast
source. Press the RADIO faceplate button
to change the active radio source or
change to the radio from another
source. Press the MENU knob and
the following radio settings may
display:
Tone Settings:
.Bass, Midrange, and Treble:
Turn the MENU knob and
highlight. Press the MENU knob
to select. Turn the MENU knob
to adjust.
.Balance:
Turn the MENU knob
to highlight. Press the MENU
knob to select. Turn the MENU
knob left for more sound from
the left speakers or right for
more sound from the right
speakers. The middle position
balances the sound between the
left and right speakers.
.Fade: Turn the MENU knob to
highlight. Press the MENU knob
to select. Turn the MENU knob
to the left for more sound from
the front speakers and to the
right for more sound from the rear speakers. The middle
position balances the sound
between the front and rear
speakers.
.DSP: If equipped with a Bose
Surround®sound system, it will
have three DSP modes
including:
‐ Normal: Adjusts the audio to
provide the best sound for all
seating positions.
‐ Driver: Adjusts the audio to
provide the best sound for the
driver.
‐ Centerpoint: Creates a
surround sound from nearly
any audio source.
.EQ (Equalizer): If equipped with
a Bose Sound System, turn the
MENU knob to highlight. Turn
the MENU knob to scroll through
the options. Press the MENU
knob to select. Press the
o
BACK button to go to the
previous menu.
Page 274 of 542
Black plate (6,1)GMC Sierra Owner Manual (GMNA-Localizing-U.S./Canada/Mexico-
5853626) - 2014 - 3rd crc - 8/15/13
9-6 Driving and Operating
If the vehicle starts to slide, follow
these suggestions:
.Ease your foot off the
accelerator pedal and steer the
way you want the vehicle to go.
The vehicle may straighten out.
Be ready for a second skid if it
occurs.
.Slow down and adjust your
driving according to weather
conditions. Stopping distance
can be longer and vehicle
control can be affected when
traction is reduced by water,
snow, ice, gravel, or other
material on the road. Learn to
recognize warning clues—such
as enough water, ice, or packed
snow on the road to make a
mirrored surface —and slow
down when you have any doubt.
.Try to avoid sudden steering,
acceleration, or braking,
including reducing vehicle speed
by shifting to a lower gear. Any
sudden changes could cause
the tires to slide. Remember: Antilock brakes help
avoid only the braking skid.
Off-Road Driving
Four-wheel-drive vehicles can be
used for off-road driving. Vehicles
without four-wheel drive and
vehicles not equipped with All
Terrain (AT) or On-Off Road (OOR)
tires must not be driven off-road
except on a level, solid surface. For
more contact information about the
original equipment tires, see the
Limited Warranty and Owner
Assistance Information manual.
One of the best ways for successful
off-road driving is to control the
speed.
{Warning
When driving off-road, bouncing
and quick changes in direction
can easily throw you out of
position. This could cause you to
(Continued)
Warning (Continued)
lose control and crash. You and
your passengers should always
wear safety belts.
Before Driving Off-Road
.Have all necessary maintenance
and service work completed.
.Fuel the vehicle, fill fluid levels,
and check inflation pressure in
all tires, including the spare,
if equipped.
.Read all the information about
four-wheel-drive vehicles in this
manual.
.Remove any underbody air
deflector, if equipped. Re-attach
the air deflector after off-road
driving.
.Know the local laws that apply to
off-road driving.
Page 278 of 542
Black plate (10,1)GMC Sierra Owner Manual (GMNA-Localizing-U.S./Canada/Mexico-
5853626) - 2014 - 3rd crc - 8/15/13
9-10 Driving and Operating
.If an incline must be driven
across, and the vehicle starts to
slide, turn downhill. This should
help straighten out the vehicle
and prevent the side slipping.
{Warning
Getting out of the vehicle on the
downhill side when stopped
across an incline is dangerous.
If the vehicle rolls over, you could
be crushed or killed. Always get
out on the uphill side of the
vehicle and stay well clear of the
rollover path.
Driving in Mud, Sand, Snow,
or Ice
Use a low gear when driving in
mud—the deeper the mud, the
lower the gear. Keep the vehicle
moving to avoid getting stuck.
Traction changes when driving on
sand. On loose sand, such as on
beaches or sand dunes, the tires
tend to sink into the sand. This affects steering, accelerating, and
braking. Drive at a reduced speed
and avoid sharp turns or abrupt
maneuvers.
Traction is reduced on hard packed
snow and ice and it is easy to lose
control. Reduce vehicle speed when
driving on hard packed snow
and ice.
{Warning
Driving on frozen lakes, ponds,
or rivers can be dangerous. Ice
conditions vary greatly and the
vehicle could fall through the ice;
you and your passengers could
drown. Drive your vehicle on safe
surfaces only.
Driving in Water
{Warning
Driving through rushing water can
be dangerous. Deep water can
sweep your vehicle downstream
and you and your passengers
could drown. If it is only shallow
water, it can still wash away the
ground from under your tires.
Traction could be lost, and the
vehicle could roll over. Do not
drive through rushing water.
{Caution
Do not drive through standing
water if it is deep enough to cover
the wheel hubs, axles, or exhaust
pipe. Deep water can damage the
axle and other vehicle parts.
Page 307 of 542
Black plate (39,1)GMC Sierra Owner Manual (GMNA-Localizing-U.S./Canada/Mexico-
5853626) - 2014 - 3rd crc - 8/15/13
Driving and Operating 9-39
Also see“Tow/Haul Mode” under
Towing Equipment on page 9-89.
Tow/Haul Mode Grade Braking
Tow/Haul Mode Grade Braking is
only enabled while the Tow/Haul
Mode is selected and the vehicle is
not in the Range Selection Mode.
See “Tow/Haul Mode” listed
previously and Manual Mode on
page 9-37. Tow/Haul Mode Grade
Braking assists in maintaining
desired vehicle speeds when driving
on downhill grades by using the
engine and transmission to slow the
vehicle.
On vehicles with a gasoline engine,
to disable or enable Tow/Haul
Grade Braking within the current
ignition key cycle, press and hold
the Tow/Haul button for
five seconds. When the button is
released, the requested mode
change is made. A DIC message is
displayed. See Transmission
Messages on page 5-42. On vehicles with a diesel engine,
Tow/Haul Mode Grade Braking can
be enabled or disabled by pressing
the Tow/Haul Mode button. Use the
exhaust brake and Tow/Haul Mode
for maximum grade braking.
See
Towing Equipment on
page 9-89.
For other forms of grade braking,
see Automatic Transmission on
page 9-34 andCruise Control on
page 9-57.
Drive Systems
Four-Wheel Drive
If equipped, you can send the
engine's driving power to all four
wheels for extra traction. To get the
most satisfaction out of four-wheel
drive, you must be familiar with its
operation. Read the following before
using four-wheel drive. See the
appropriate text for the transfer case
in the vehicle.
{Caution
Driving on clean, dry pavement in
Four-Wheel Drive High or
Four-Wheel Drive Low for an
extended period of time may
cause premature wear on the
vehicle's powertrain. Do not drive
on clean, dry pavement in
Four-Wheel Drive High or
Four-Wheel Drive Low for
extended periods of time.
Page 320 of 542
Black plate (52,1)GMC Sierra Owner Manual (GMNA-Localizing-U.S./Canada/Mexico-
5853626) - 2014 - 3rd crc - 8/15/13
9-52 Driving and Operating
Brakes
Antilock Brake
System (ABS)
This vehicle has ABS, an advanced
electronic braking system that helps
prevent a braking skid.
When the vehicle begins to drive
away, ABS checks itself.
A momentary motor or clicking noise
might be heard while this test is
going on, and it might even be
noticed that the brake pedal moves
a little. This is normal.
If there is a problem with ABS, this
warning light stays on. SeeAntilock
Brake System (ABS) Warning Light
on page 5-25. If driving safely on a wet road and it
becomes necessary to slam on the
brakes and continue braking to
avoid a sudden obstacle, a
computer senses that the wheels
are slowing down. If one of the
wheels is about to stop rolling, the
computer will separately work the
brakes at each wheel.
ABS can change the brake pressure
to each wheel, as required, faster
than any driver could. This can help
you steer around the obstacle while
braking hard.
As the brakes are applied, the
computer keeps receiving updates
on wheel speed and controls
braking pressure accordingly.
Remember: ABS does not change
the time needed to get a foot up to
the brake pedal or always decrease
stopping distance. If you get too
close to the vehicle in front of you,
there will not be enough time to
apply the brakes if that vehicle
suddenly slows or stops. Always
leave enough room up ahead to
stop, even with ABS.
Using ABS
Do not pump the brakes. Just hold
the brake pedal down firmly and let
ABS work. You might hear the ABS
pump or motor operating and feel
the brake pedal pulsate, but this is
normal.
Braking in Emergencies
ABS allows you to steer and brake
at the same time. In many
emergencies, steering can help
more than even the very best
braking.
Page 325 of 542
Black plate (57,1)GMC Sierra Owner Manual (GMNA-Localizing-U.S./Canada/Mexico-
5853626) - 2014 - 3rd crc - 8/15/13
Driving and Operating 9-57
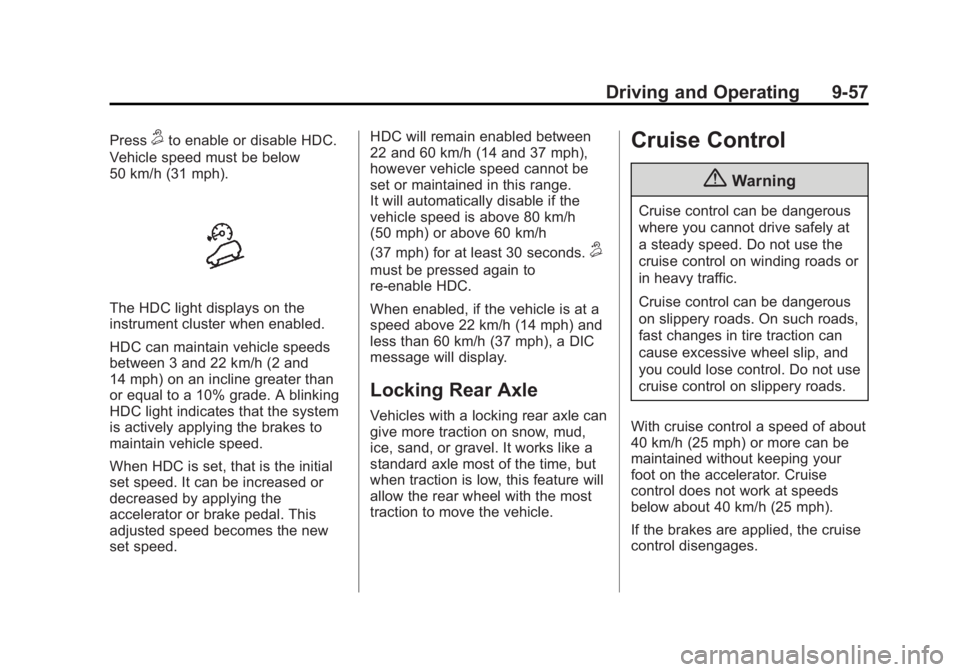
Press5to enable or disable HDC.
Vehicle speed must be below
50 km/h (31 mph).
The HDC light displays on the
instrument cluster when enabled.
HDC can maintain vehicle speeds
between 3 and 22 km/h (2 and
14 mph) on an incline greater than
or equal to a 10% grade. A blinking
HDC light indicates that the system
is actively applying the brakes to
maintain vehicle speed.
When HDC is set, that is the initial
set speed. It can be increased or
decreased by applying the
accelerator or brake pedal. This
adjusted speed becomes the new
set speed. HDC will remain enabled between
22 and 60 km/h (14 and 37 mph),
however vehicle speed cannot be
set or maintained in this range.
It will automatically disable if the
vehicle speed is above 80 km/h
(50 mph) or above 60 km/h
(37 mph) for at least 30 seconds.
5
must be pressed again to
re-enable HDC.
When enabled, if the vehicle is at a
speed above 22 km/h (14 mph) and
less than 60 km/h (37 mph), a DIC
message will display.
Locking Rear Axle
Vehicles with a locking rear axle can
give more traction on snow, mud,
ice, sand, or gravel. It works like a
standard axle most of the time, but
when traction is low, this feature will
allow the rear wheel with the most
traction to move the vehicle.
Cruise Control
{Warning
Cruise control can be dangerous
where you cannot drive safely at
a steady speed. Do not use the
cruise control on winding roads or
in heavy traffic.
Cruise control can be dangerous
on slippery roads. On such roads,
fast changes in tire traction can
cause excessive wheel slip, and
you could lose control. Do not use
cruise control on slippery roads.
With cruise control a speed of about
40 km/h (25 mph) or more can be
maintained without keeping your
foot on the accelerator. Cruise
control does not work at speeds
below about 40 km/h (25 mph).
If the brakes are applied, the cruise
control disengages.
Page 334 of 542
Black plate (66,1)GMC Sierra Owner Manual (GMNA-Localizing-U.S./Canada/Mexico-
5853626) - 2014 - 3rd crc - 8/15/13
9-66 Driving and Operating
Selecting the Alert Timing
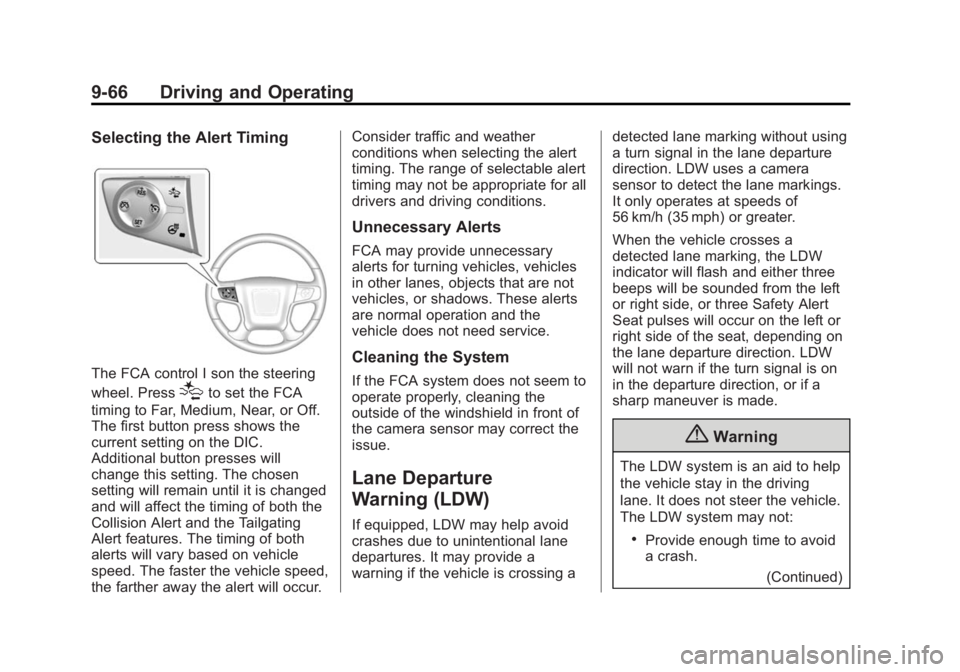
The FCA control I son the steering
wheel. Press
[to set the FCA
timing to Far, Medium, Near, or Off.
The first button press shows the
current setting on the DIC.
Additional button presses will
change this setting. The chosen
setting will remain until it is changed
and will affect the timing of both the
Collision Alert and the Tailgating
Alert features. The timing of both
alerts will vary based on vehicle
speed. The faster the vehicle speed,
the farther away the alert will occur. Consider traffic and weather
conditions when selecting the alert
timing. The range of selectable alert
timing may not be appropriate for all
drivers and driving conditions.
Unnecessary Alerts
FCA may provide unnecessary
alerts for turning vehicles, vehicles
in other lanes, objects that are not
vehicles, or shadows. These alerts
are normal operation and the
vehicle does not need service.
Cleaning the System
If the FCA system does not seem to
operate properly, cleaning the
outside of the windshield in front of
the camera sensor may correct the
issue.
Lane Departure
Warning (LDW)
If equipped, LDW may help avoid
crashes due to unintentional lane
departures. It may provide a
warning if the vehicle is crossing a
detected lane marking without using
a turn signal in the lane departure
direction. LDW uses a camera
sensor to detect the lane markings.
It only operates at speeds of
56 km/h (35 mph) or greater.
When the vehicle crosses a
detected lane marking, the LDW
indicator will flash and either three
beeps will be sounded from the left
or right side, or three Safety Alert
Seat pulses will occur on the left or
right side of the seat, depending on
the lane departure direction. LDW
will not warn if the turn signal is on
in the departure direction, or if a
sharp maneuver is made.
{Warning
The LDW system is an aid to help
the vehicle stay in the driving
lane. It does not steer the vehicle.
The LDW system may not:
.Provide enough time to avoid
a crash.
(Continued)