Page 174 of 408

Black plate (18,1)GMC Savana Owner Manual (GMNA-Localizing-U.S./Canada-6014682) -
2014 - CRC 2nd Edition - 8/26/13
7-18 Infotainment System
This input jack is not an audio
output; do not plug headphones into
the front auxiliary input jack.
Drivers are encouraged to set up
any auxiliary device while the
vehicle is in P (Park). See
Defensive Driving on page 9-3for
more information on driver
distraction.
To use a portable audio player,
connect a 3.5 mm (1/8 in) cable to
the radio's front auxiliary input jack.
When a device is connected, press
the radio CD/AUX button to begin
playing audio from the device over
the vehicle speakers.
For optimal sound quality, increase
the portable audio device's volume
to the loudest level.
It is always best to power the
portable audio device through its
own battery while playing.
O(Power/Volume): Turn clockwise
or counterclockwise to increase or
decrease the volume of the portable
player. Additional volume adjustments might have to be made
from the portable device if the
volume is not loud or soft enough.
BAND:
Press to listen to the radio
when a portable audio device is
playing. The portable audio device
continues playing.
CD/AUX (CD/Auxiliary): Press to
play a CD when a portable audio
device is playing. Press again and
the system begins playing audio
from the connected portable audio
player. If a portable audio player is
not connected, “No Input Device
Found” displays.
Using the USB Port
Radios with a USB port can control
a USB storage device or an iPod®
using the radio buttons and knobs.
See“Playing an MP3” inCD Player
on page 7-12 for information about
how to connect and control a USB
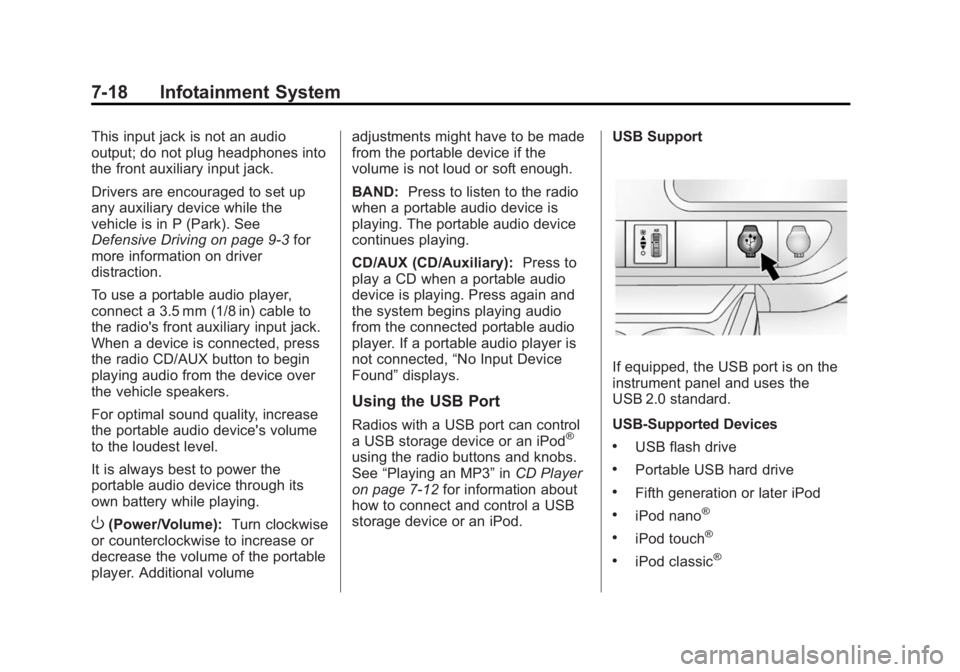
storage device or an iPod. USB Support
If equipped, the USB port is on the
instrument panel and uses the
USB 2.0 standard.
USB-Supported Devices
.USB flash drive
.Portable USB hard drive
.Fifth generation or later iPod
.iPod nano®
.iPod touch®
.iPod classic®
Page 192 of 408

Black plate (6,1)GMC Savana Owner Manual (GMNA-Localizing-U.S./Canada-6014682) -
2014 - CRC 2nd Edition - 8/26/13
8-6 Climate Controls
Rear Climate Control Panel
1. Fan Control
2. Air Delivery Mode Control
3. Temperature Control
For vehicles with a rear climate
control panel, it is located overhead
behind the driver and front
passenger, centered in front of the
second row. To adjust the rear
climate control panel settings by a
rear seat passenger, the front
climate control panel fan knob must be in the AUX position. The fan
speed, air delivery mode, and
temperature can then be adjusted.
AUX (Auxiliary):
Turn the fan knob
on the front climate control panel to
AUX to let rear seat passengers use
the control panel in the rear seating
area. This disables the front control
panel. To return control to the front
panel, move the fan knob out
of AUX.
9(Off): Turns the system off.
9(Fan Control): Turn clockwise
or counterclockwise to increase or
decrease the fan speed in the rear
seating area.
Temperature Control: Turn
clockwise or counterclockwise to
increase or decrease the
temperature in the rear
seating area.
The air conditioning system on the
main climate control panel must be
turned on to direct cooled air to the
rear of the vehicle. If it is not on,
then the temperature in the rear of
the vehicle remains at cabin
temperature.
Air Delivery Mode Control: Turn
clockwise or counterclockwise to
change the direction of the airflow in
the rear seating area.
To change the current mode, select
one of the following:
H(Vent): Air is directed to the
upper outlets, with some directed to
the floor outlets.
Page 287 of 408

Black plate (35,1)GMC Savana Owner Manual (GMNA-Localizing-U.S./Canada-6014682) -
2014 - CRC 2nd Edition - 8/26/13
Vehicle Care 10-35
5. Disconnect the electricalconnector.
6. Turn the bulb counterclockwise one-quarter turn to remove it
from the headlamp assembly.
7. Install the new bulb into the headlamp assembly and connect
the electrical connector. 8. Reverse the steps to reinstall the
headlamp assembly.
To prevent headlamp vibration
and shortened bulb life, be sure
to insert the headlamp assembly
tabs in the slots at the lower
portion of the housing.
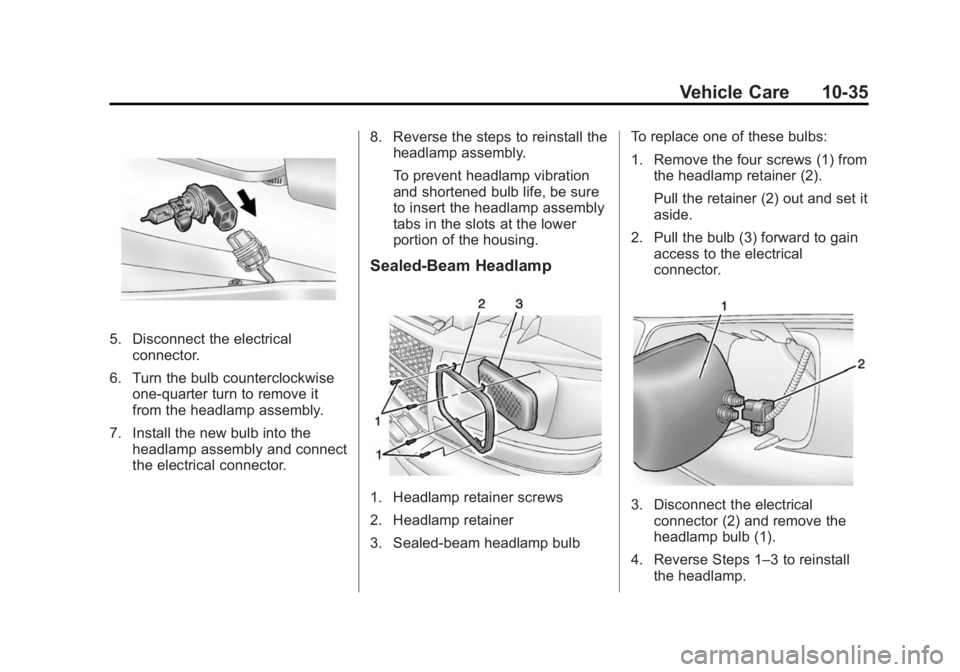
Sealed-Beam Headlamp
1. Headlamp retainer screws
2. Headlamp retainer
3. Sealed-beam headlamp bulb To replace one of these bulbs:
1. Remove the four screws (1) from
the headlamp retainer (2).
Pull the retainer (2) out and set it
aside.
2. Pull the bulb (3) forward to gain access to the electrical
connector.3. Disconnect the electricalconnector (2) and remove the
headlamp bulb (1).
4. Reverse Steps 1–3 to reinstall the headlamp.