2014 GMC ACADIA buttons
[x] Cancel search: buttonsPage 137 of 414

Black plate (23,1)GMC Acadia/Acadia Denali Owner Manual (GMNA-Localizing-U.S./Canada/
Mexico-6014315) - 2014 - crc - 8/15/13
Instruments and Controls 5-23
The light goes out when the fog
lamps are turned off. SeeFog
Lamps on page 6-4 for more
information.
Cruise Control Light
This light comes on when the cruise
control is set.
This light goes out when the cruise
control is canceled. See Cruise
Control on page 9-30.
Information Displays
Driver Information
Center (DIC)
The DIC displays information about
your vehicle. It also displays
warning messages if a system
problem is detected.
All messages will appear in the DIC
display located at the top of the
instrument cluster.
The DIC comes on when the ignition
is on. After a short delay, the DIC
will display the information that was
last displayed before the engine
was turned off.
The DIC also displays a shift lever
position indicator on the bottom line
of the display. See Automatic
Transmission on page 9-22 for more
information.
The outside air temperature and
compass, if equipped, also display
on the DIC when viewing the trip
and fuel information. The outside air temperature automatically appears
in the top right corner of the DIC
display. If there is a problem with
the system that controls the
temperature display, the numbers
will be replaced with dashes. If this
occurs, have the vehicle serviced.
The compass will be shown in the
bottom right corner of the DIC
display. See
Compass on page 5-4
for more information.
The DIC has different displays
which can be accessed by pressing
the DIC buttons located on the
instrument panel.
The DIC also allows some features
to be customized. See Vehicle
Personalization on page 5-42 for
more information.
DIC Buttons
Page 138 of 414

Black plate (24,1)GMC Acadia/Acadia Denali Owner Manual (GMNA-Localizing-U.S./Canada/
Mexico-6014315) - 2014 - crc - 8/15/13
5-24 Instruments and Controls
The buttons are the set/reset,
customization, vehicle information,
and trip/fuel buttons. The button
functions are detailed in the
following pages.
V(Set/Reset):Press this button to
set or reset certain functions and to
turn off or acknowledge messages
on the DIC.
U(Customization): Press this
button to customize the feature
settings on your vehicle. See
Vehicle Personalization on
page 5-42 for more information.
T(Vehicle Information): Press
this button to display the oil life,
park assist on vehicles with this
feature, units, tire pressure readings
on vehicles with this feature, and
compass calibration and zone
setting on vehicles with this feature.
3(Trip/Fuel): Press this button
to display the odometer, trip
odometers, fuel range, average
economy, timer, fuel used, and
average speed.
Vehicle Information Menu
Items
T(Vehicle Information): Press
this button to scroll through the
following menu items:
OIL LIFE
Press the vehicle information button
until OIL LIFE REMAINING
displays. This display shows an
estimate of the oil's remaining useful
life. If you see 99% OIL LIFE
REMAINING on the display, that
means 99% of the current oil life
remains. The engine oil life system
will alert you to change the oil on a
schedule consistent with your
driving conditions.
When the remaining oil life is low,
the CHANGE ENGINE OIL SOON
message will appear on the display.
See “CHANGE ENGINE OIL SOON”
under Engine Oil Messages on
page 5-35. You should change the
oil as soon as you can. See Engine
Oil on page 10-7. In addition to the
engine oil life system monitoring the
oil life, additional maintenance is recommended in the Maintenance
Schedule in this manual. See
Maintenance Schedule on
page 11-2
for more information.
Remember, you must reset the OIL
LIFE display yourself after each oil
change. It will not reset itself. Also,
be careful not to reset the OIL LIFE
display accidentally at any time
other than when the oil has just
been changed. It cannot be reset
accurately until the next oil change.
To reset the engine oil life system,
see Engine Oil Life System on
page 10-9.
SIDE BLIND ZONE ALERT
If the vehicle has the Side Blind
Zone Alert (SBZA) system, this
display allows the system to be
turned on or off. Once in this
display, press the set/reset button to
select between ON or OFF. If you
choose ON, the system will be
turned on. If you choose OFF, the
system will be turned off. When the
SBZA system is turned off, the DIC
will display the SIDE BLIND ZONE
Page 146 of 414

Black plate (32,1)GMC Acadia/Acadia Denali Owner Manual (GMNA-Localizing-U.S./Canada/
Mexico-6014315) - 2014 - crc - 8/15/13
5-32 Instruments and Controls
HUD Troubleshooting
Check that:
.Nothing is covering the
HUD lens.
.HUD brightness setting is not
too dim or too bright.
.HUD is adjusted to the proper
height.
.Polarized sunglasses are
not worn.
.Windshield and HUD lens are
clean.
If the HUD image is not correct,
contact your dealer.
The windshield is part of the HUD
system. See Windshield
Replacement on page 10-25.
Vehicle Messages
Messages are displayed on the DIC
to notify the driver that the status of
the vehicle has changed and that
some action may be needed by the
driver to correct the condition.
Multiple messages may appear one
after another.
Some messages may not require
immediate action, but you can press
any of the DIC buttons on the
instrument panel to acknowledge
that you received the messages and
to clear them from the display.
Some messages cannot be cleared
from the DIC display because they
are more urgent. These messages
require action before they can be
cleared. You should take any
messages that appear on the
display seriously and remember that
clearing the messages will only
make the messages disappear, not
correct the problem. The following are the possible
messages that can be displayed
and some information about them.
Battery Voltage and
Charging Messages
BATTERY LOW START
VEHICLE
This message displays when the
system detects that the battery
voltage has dropped to a critical
level and the engine must be started
to avoid a dead battery situation.
BATTERY SAVER ACTIVE
This message displays when the
system detects that the battery
voltage is dropping below expected
levels. The battery saver system
starts reducing certain features of
the vehicle that you may be able to
notice. At the point that the features
are disabled, this message is
displayed. It means that the vehicle
is trying to save the charge in the
battery.
Page 162 of 414
Black plate (48,1)GMC Acadia/Acadia Denali Owner Manual (GMNA-Localizing-U.S./Canada/
Mexico-6014315) - 2014 - crc - 8/15/13
5-48 Instruments and Controls
Remote Keyless Entry (RKE)
transmitter. SeeRemote Vehicle
Start on page 2-4.
Press the customization button until
REMOTE START appears on the
DIC display. Press the set/reset
button once to access the settings
for this feature. Then press the
customization button to scroll
through the following settings:
OFF: The remote start feature will
be disabled.
ON (default): The remote start
feature will be enabled.
NO CHANGE: No change will be
made to this feature. The current
setting will remain.
To select a setting, press the set/
reset button while the desired
setting is displayed on the DIC.
FACTORY SETTINGS
This feature allows you to set all of
the customization features back to
their factory default settings. Press the customization button until
FACTORY SETTINGS appears on
the DIC display. Press the set/reset
button once to access the settings
for this feature. Then press the
customization button to scroll
through the following settings:
RESTORE ALL (default):
The
customization features will be set to
their factory default settings.
DO NOT RESTORE: The
customization features will not be
set to their factory default settings.
To select a setting, press the set/
reset button while the desired
setting is displayed on the DIC.
EXIT FEATURE SETTINGS
This feature allows you to exit the
feature settings menu.
Press the customization button until
FEATURE SETTINGS PRESS
V
TO EXIT appears in the DIC display.
Press the set/reset button once to
exit the menu. If you do not exit, pressing the
customization button again will
return you to the beginning of the
feature settings menu.
Exiting the Feature
Settings Menu
The feature settings menu will be
exited when any of the following
occurs:
.The vehicle is shifted out of
P (Park).
.The vehicle is no longer in
ON/RUN.
.The trip/fuel or vehicle
information DIC buttons are
pressed.
.The end of the feature settings
menu is reached and exited.
.A 40-second time period has
elapsed with no selection made.
Page 163 of 414
Black plate (49,1)GMC Acadia/Acadia Denali Owner Manual (GMNA-Localizing-U.S./Canada/
Mexico-6014315) - 2014 - crc - 8/15/13
Instruments and Controls 5-49
Universal Remote
System
SeeRadio Frequency Statement on
page 13-15.
Universal Remote System
Programming
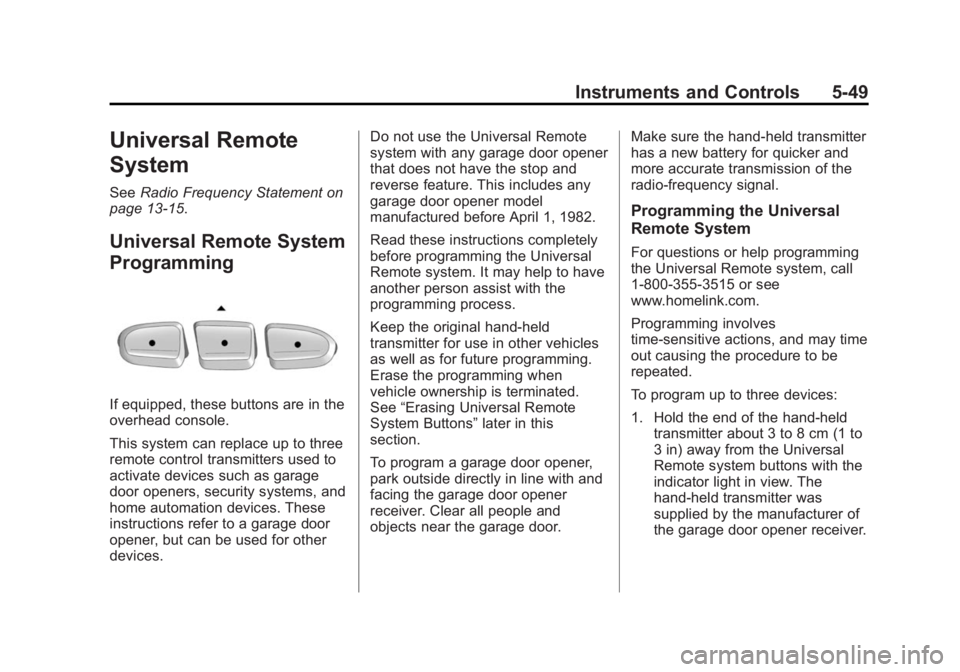
If equipped, these buttons are in the
overhead console.
This system can replace up to three
remote control transmitters used to
activate devices such as garage
door openers, security systems, and
home automation devices. These
instructions refer to a garage door
opener, but can be used for other
devices. Do not use the Universal Remote
system with any garage door opener
that does not have the stop and
reverse feature. This includes any
garage door opener model
manufactured before April 1, 1982.
Read these instructions completely
before programming the Universal
Remote system. It may help to have
another person assist with the
programming process.
Keep the original hand-held
transmitter for use in other vehicles
as well as for future programming.
Erase the programming when
vehicle ownership is terminated.
See
“Erasing Universal Remote
System Buttons” later in this
section.
To program a garage door opener,
park outside directly in line with and
facing the garage door opener
receiver. Clear all people and
objects near the garage door. Make sure the hand-held transmitter
has a new battery for quicker and
more accurate transmission of the
radio-frequency signal.
Programming the Universal
Remote System
For questions or help programming
the Universal Remote system, call
1-800-355-3515 or see
www.homelink.com.
Programming involves
time-sensitive actions, and may time
out causing the procedure to be
repeated.
To program up to three devices:
1. Hold the end of the hand-held
transmitter about 3 to 8 cm (1 to
3 in) away from the Universal
Remote system buttons with the
indicator light in view. The
hand-held transmitter was
supplied by the manufacturer of
the garage door opener receiver.
Page 164 of 414
Black plate (50,1)GMC Acadia/Acadia Denali Owner Manual (GMNA-Localizing-U.S./Canada/
Mexico-6014315) - 2014 - crc - 8/15/13
5-50 Instruments and Controls
2. At the same time, press andhold both the hand-held
transmitter button and one of the
three Universal Remote system
buttons to be used to operate
the garage door. Do not release
either button until the indicator
light changes from a slow to a
rapid flash. Then release both
buttons.
Some garage door openers may
require substitution of Step 2
with the procedure under “Radio
Signals for Canada and Some
Gate Operators” later in this
section.
3. Press and hold the newly programmed Universal Remote
system button for five seconds
while watching the indicator light
and garage door activation..If the indicator light stays on
continuously or the garage
door moves when the
button is pressed, then
programming is complete.
There is no need to
complete Steps 4–6.
.If the indicator light does
not come on or the garage
door does not move, a
second button press may
be required. For a second
time, press and hold the
newly programmed button
for five seconds. If the light
stays on or the garage door
moves, programming is
complete.
.If the indicator light blinks
rapidly for two seconds,
then changes to a solid light
and the garage door does
not move, continue with
programming Steps 4–6.
Learn or Smart Button
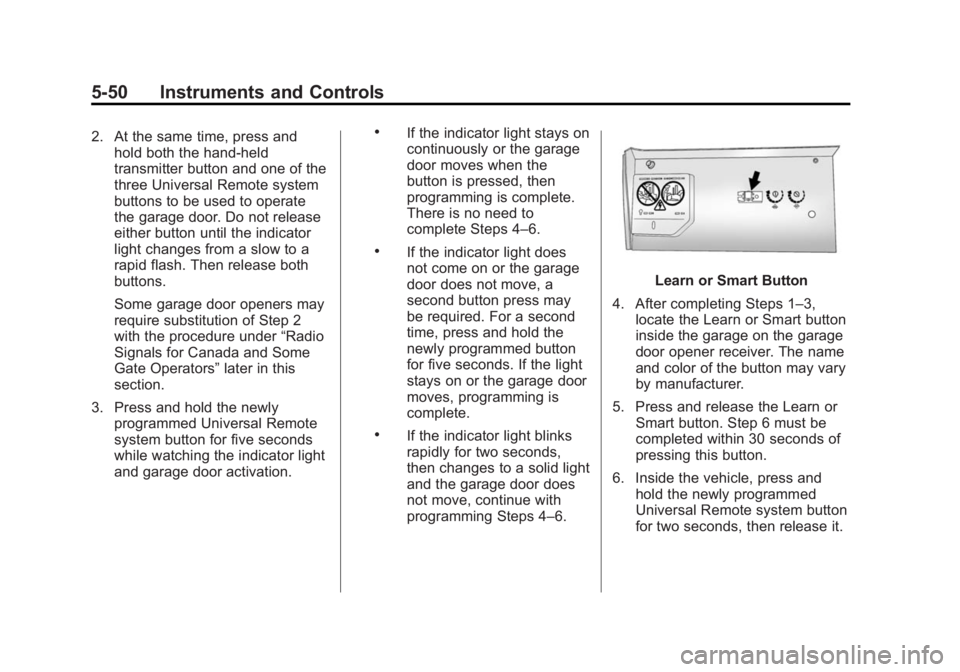
4. After completing Steps 1–3, locate the Learn or Smart button
inside the garage on the garage
door opener receiver. The name
and color of the button may vary
by manufacturer.
5. Press and release the Learn or Smart button. Step 6 must be
completed within 30 seconds of
pressing this button.
6. Inside the vehicle, press and hold the newly programmed
Universal Remote system button
for two seconds, then release it.
Page 165 of 414
Black plate (51,1)GMC Acadia/Acadia Denali Owner Manual (GMNA-Localizing-U.S./Canada/
Mexico-6014315) - 2014 - crc - 8/15/13
Instruments and Controls 5-51
If the garage door does not
move or the lamp on the garage
door opener receiver does not
flash, press and hold the same
button a second time for
two seconds, then release it.
Again, if the door does not move
or the garage door lamp does
not flash, press and hold the
same button a third time for
two seconds, then release it.
The Universal Remote system
should now activate the
garage door.
Repeat the process for
programming the two remaining
buttons.
Radio Signals for Canada and
Some Gate Operators
For questions or programming help,
call 1-800-355-3515 or see
www.homelink.com. Canadian radio-frequency laws and
some U.S. gate operators require
transmitter signals to time out or quit
after several seconds of
transmission. This may not be long
enough for the Universal Remote
system to pick up the signal during
programming.
If the programming did not work,
replace Step 2 under
“Programming
the Universal Remote System” with
the following:
Press and hold the Universal
Remote system button while
pressing and releasing the
hand-held transmitter button every
two seconds until the signal has
been successfully accepted by the
Universal Remote system. The
Universal Remote system indicator
light will flash slowly at first and then
rapidly. Proceed with Step 3 under
“Programming the Universal Remote
System” to complete.
Universal Remote System
Operation
Using the Universal Remote
System
Press and hold the appropriate
Universal Remote system button for
at least one-half second. The
indicator light will come on while the
signal is being transmitted.
Erasing Universal Remote
System Buttons
Erase all programmed buttons when
vehicle ownership is terminated.
To erase:
1. Press and hold the two outside
buttons until the indicator light
begins to flash. This should take
about 10 seconds.
2. Release both buttons.
Page 166 of 414
Black plate (52,1)GMC Acadia/Acadia Denali Owner Manual (GMNA-Localizing-U.S./Canada/
Mexico-6014315) - 2014 - crc - 8/15/13
5-52 Instruments and Controls
Reprogramming a Single
Universal Remote System
Button
To reprogram any of the system
buttons:
1. Press and hold any one of thebuttons. Do not release the
button.
2. The indicator light will begin to flash after 20 seconds. Without
releasing the button, proceed
with Step 1 under “Programming
the Universal Remote System.”