2014 FORD SUPER DUTY warning
[x] Cancel search: warningPage 52 of 458
PRINCIPLE OF OPERATION
MyKey allows you to program keys with
restricted driving modes to promote good
driving habits. All but one of the keys
programmed to the vehicle can be
activated with these restricted modes.
Any keys that have not been programmed
are referred to as administrator keys or
admin keys. They can be used to:
•
create a MyKey
• program configurable MyKey settings
• clear all MyKey features.
When you have programmed a MyKey, you
can access the following information using
the information display:
• How many admin keys and MyKeys are
programmed to your vehicle.
• The total distance your vehicle has
traveled using a MyKey.
Note: All MyKeys are programmed to the
same settings. You cannot program them
individually.
Non-configurable Settings
The following settings cannot be changed
by an admin key user:
• Belt-Minder. You cannot disable this
feature. The audio system will mute
when the front seat occupants’ safety
belts are not fastened. Note: If your
vehicle is equipped with AM/FM radio
only, then the radio will not mute.
• Early low fuel. The low fuel warning is
activated earlier, giving the MyKey user
more time to refuel.
• Driver assist features, if equipped on
your vehicle, are forced on: parking aid,
blind spot information system (BLIS)
with cross traffic alert, lane departure
warning and forward collision warning
system. Configurable Settings
With an admin key, you can configure
certain MyKey settings when you first
create a MyKey and before you recycle the
key or restart the vehicle. You can also
change the settings afterward with an
admin key:
•
A vehicle speed limit can be set.
Warnings will be shown in the display
followed by an audible tone when your
vehicle reaches the set speed. You
cannot override the set speed by fully
depressing the accelerator pedal or by
setting cruise control.
• Vehicle speed minders of 45, 55 or 65
mph (75, 90 or 105 km/h). Once you
select a speed, it will be shown in the
display, followed by an audible tone
when the preselected vehicle speed is
exceeded.
• Audio system maximum volume of
45%. A message will be shown in the
display when you attempt to exceed
the limited volume. Also, the
speed-sensitive or compensated
automatic volume control will be
disabled. Note:
If your vehicle is
equipped with AM/FM radio only, then
the radio volume will not be limited.
• Always on setting. When this is
selected, you will not be able to turn
off AdvanceTrac (if your vehicle is
equipped with this feature).
CREATING A MYKEY
Use the information display to create a
MyKey. There are two types of information
displays, and their controls and messaging
vary. To determine which type of display
you have, you will need to reference
another chapter. See
General
Information (page 80).
If You Have a Type 1 Information
Display:
49
Super Duty (TFA) MyKey
™
Page 59 of 458
2.
Switch the ignition off and remove the
key.
3. Insert the second key into the ignition and switch the ignition on.
The factory-set code will display for a few
seconds.
Note: The code may not display until after
any other warning messages first display.
56
Super Duty (TFA) Locks
Page 62 of 458
ADJUSTING THE STEERING
WHEEL
WARNING
Do not adjust the steering wheel
when your vehicle is moving.
Note:
Make sure that you are sitting in the
correct position. See Sitting in the Correct
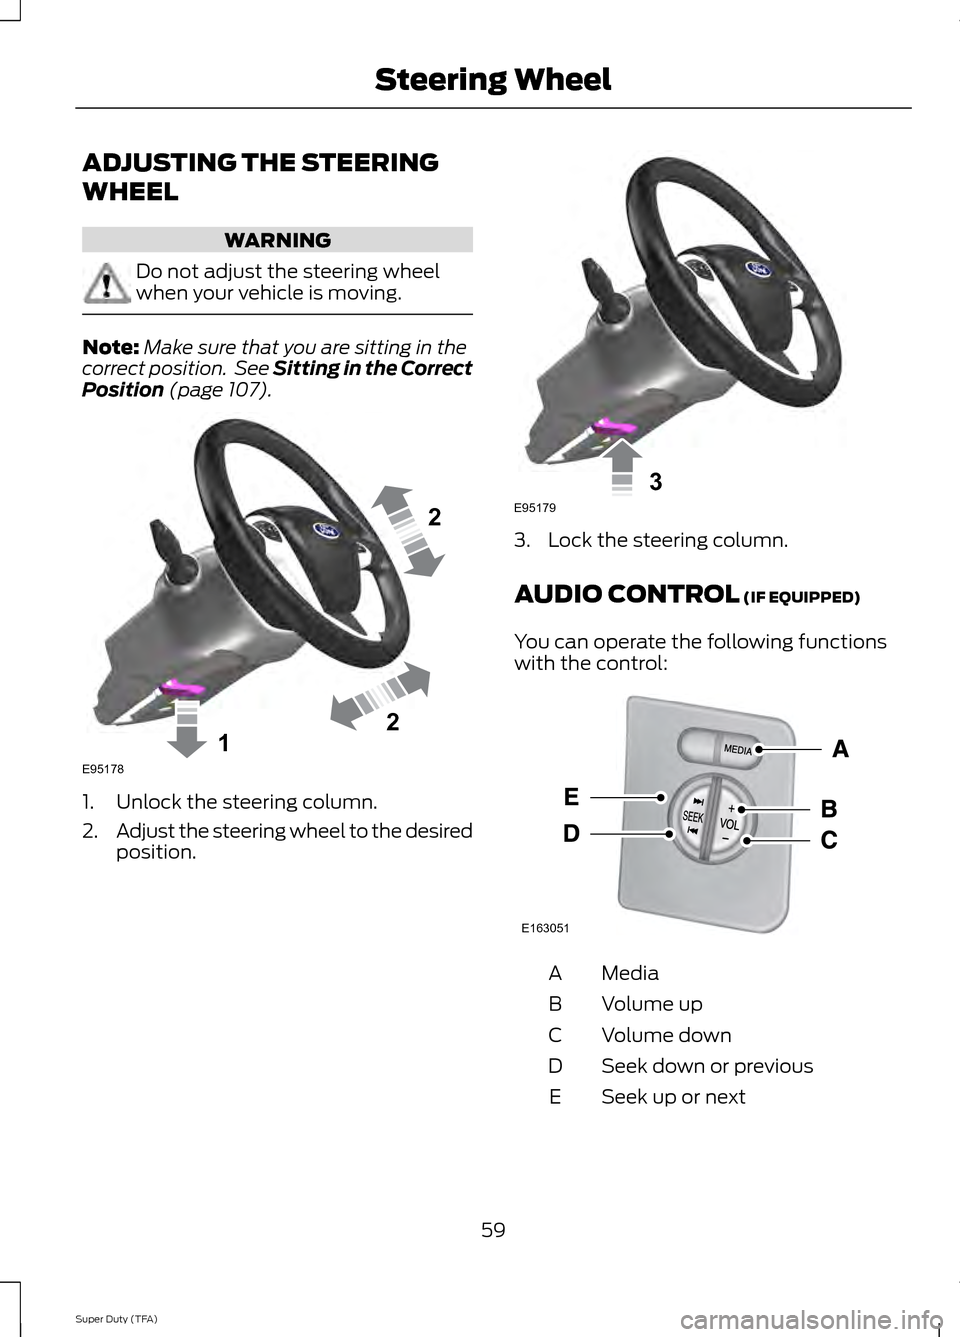
Position (page 107). 1. Unlock the steering column.
2.
Adjust the steering wheel to the desired
position. 3. Lock the steering column.
AUDIO CONTROL
(IF EQUIPPED)
You can operate the following functions
with the control: Media
A
Volume up
B
Volume down
C
Seek down or previous
D
Seek up or next
E
59
Super Duty (TFA) Steering Wheel122E95178 3E95179 E163051
Page 68 of 458
Note:
If the vehicle is equipped with
autolamps, it will have the headlamps on
with windshield wipers feature. If the
windshield wipers are turned on, the exterior
lamps will turn on with the headlamp
control in the autolamp position.
The autolamp system also keeps the lights
on for a predetermined amount of time after
the ignition switch is turned to off. You can
change the amount of time the lamps stay
on by using the programming procedure that
follows:
Autolamps - Programmable Exit
Delay
Programmable exit delay allows the length
of the autolamp exit delay to be changed.
To program the auto lamp exit time delay:
1. Start with the ignition in the off position
and the headlamp control in the
autolamp position.
2. Turn the headlamp control to off.
3. Turn the ignition switch to on and then
back to off.
4. Turn the headlamp control to the autolamp position. The headlamps will
turn on.
5. Wait the desired amount of time for the exit delay you want (up to three
minutes), then turn the headlamps off. INSTRUMENT LIGHTING
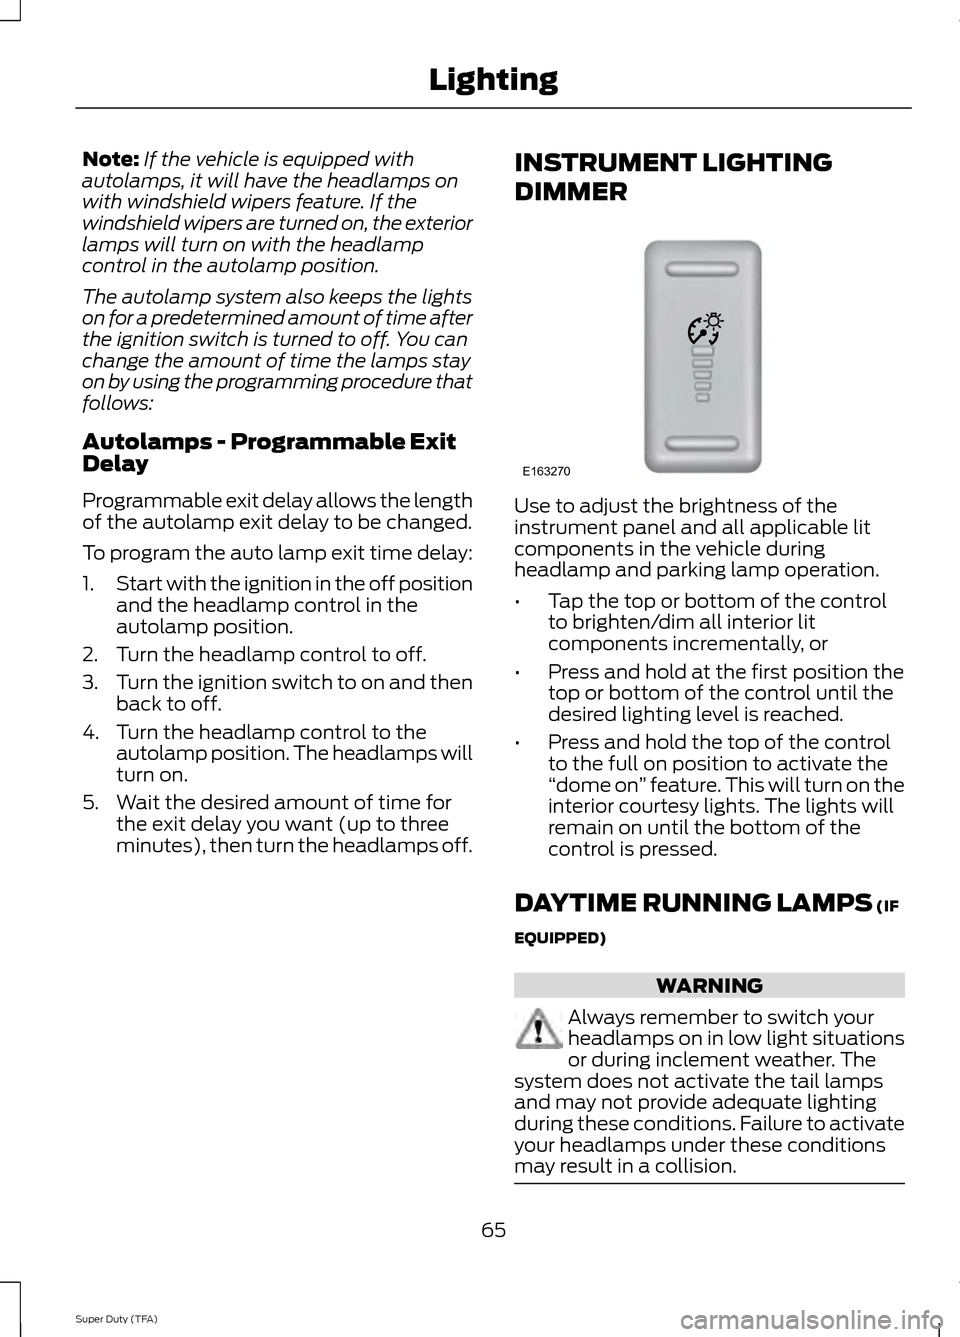
DIMMER Use to adjust the brightness of the
instrument panel and all applicable lit
components in the vehicle during
headlamp and parking lamp operation.
•
Tap the top or bottom of the control
to brighten/dim all interior lit
components incrementally, or
• Press and hold at the first position the
top or bottom of the control until the
desired lighting level is reached.
• Press and hold the top of the control
to the full on position to activate the
“dome on ” feature. This will turn on the
interior courtesy lights. The lights will
remain on until the bottom of the
control is pressed.
DAYTIME RUNNING LAMPS (IF
EQUIPPED) WARNING
Always remember to switch your
headlamps on in low light situations
or during inclement weather. The
system does not activate the tail lamps
and may not provide adequate lighting
during these conditions. Failure to activate
your headlamps under these conditions
may result in a collision. 65
Super Duty (TFA) LightingE163270
Page 71 of 458
POWER WINDOWS (IF EQUIPPED)
WARNINGS
Do not leave children unattended in
your vehicle and do not let them play
with the power windows. They may
seriously injure themselves. When closing the power windows,
you should verify they are free of
obstructions and make sure that
children and pets are not in the proximity
of the window openings. Note:
You may hear a pulsing noise when
just one of the windows is open. Lower the
opposite window slightly to reduce this
noise.
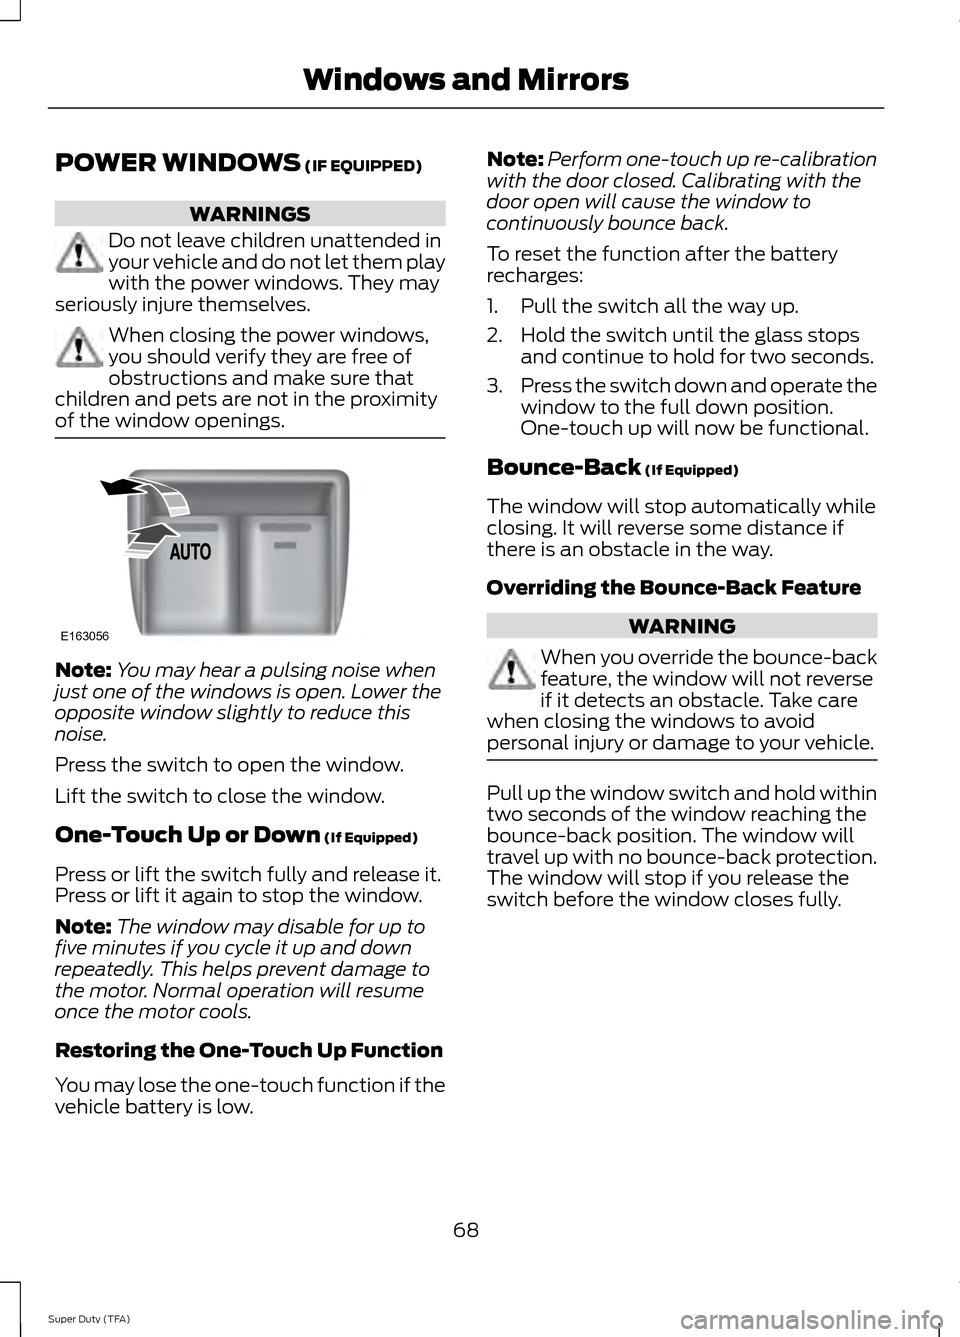
Press the switch to open the window.
Lift the switch to close the window.
One-Touch Up or Down
(If Equipped)
Press or lift the switch fully and release it.
Press or lift it again to stop the window.
Note: The window may disable for up to
five minutes if you cycle it up and down
repeatedly. This helps prevent damage to
the motor. Normal operation will resume
once the motor cools.
Restoring the One-Touch Up Function
You may lose the one-touch function if the
vehicle battery is low. Note:
Perform one-touch up re-calibration
with the door closed. Calibrating with the
door open will cause the window to
continuously bounce back.
To reset the function after the battery
recharges:
1. Pull the switch all the way up.
2. Hold the switch until the glass stops and continue to hold for two seconds.
3. Press the switch down and operate the
window to the full down position.
One-touch up will now be functional.
Bounce-Back
(If Equipped)
The window will stop automatically while
closing. It will reverse some distance if
there is an obstacle in the way.
Overriding the Bounce-Back Feature WARNING
When you override the bounce-back
feature, the window will not reverse
if it detects an obstacle. Take care
when closing the windows to avoid
personal injury or damage to your vehicle. Pull up the window switch and hold within
two seconds of the window reaching the
bounce-back position. The window will
travel up with no bounce-back protection.
The window will stop if you release the
switch before the window closes fully.
68
Super Duty (TFA) Windows and MirrorsE163056
Page 72 of 458

Window Lock (If Equipped)
Unlock
A
Lock
B
Press the control to lock or unlock the rear
window controls.
Power Sliding Back Window
(If
Equipped) WARNINGS
When operating the power sliding
back window, you must make sure
all rear seat occupants and cargo are
not in the proximity of the back window. Do not leave children unattended in
your vehicle and do not let them play
with the power sliding back window.
They may seriously injure themselves. The control is on the overhead console. Press and hold the control to open the
window. Pull and hold the control to close
the window.
Accessory Delay
(If Equipped)
You can use the window switches for
several minutes after you switch the
ignition off or until you open either front
door.
GLOBAL OPENING
(IF EQUIPPED)
You can use the remote control to operate
the windows with the ignition off.
Note: To operate this feature, accessory
delay must not be active.
Opening the Windows
You can only open the windows for a short
time after you unlock your vehicle with the
remote control. After you unlock your
vehicle, press and hold the remote control
unlock button to open the windows.
Release the button once movement starts.
Press the lock or unlock button to stop
movement.
EXTERIOR MIRRORS
Power Exterior Mirrors WARNING
Do not adjust the mirrors when your
vehicle is moving.
69
Super Duty (TFA) Windows and MirrorsE163057AB E163058
Page 74 of 458

Telescoping Mirrors (If Equipped)
This feature lets you extend the mirror
about 3 inches (75 millimeters). It is useful
when towing a trailer. You can manually
pull out or push in the mirrors to the desired
position.
PowerScope
™ Power Telescoping
Mirrors (If Equipped)
This feature lets you position both mirrors
at the same time. The switch is on the door
trim panel. Telescope Out
A
Telescope In
B
Press and hold the switch to move the
mirrors.
When you fully extend the mirrors, you will
hear the motors running as long as you
hold the switch. INTERIOR MIRROR WARNING
Do not adjust the mirror when your
vehicle is moving.
Note:
Do not clean the housing or glass of
any mirror with harsh abrasives, fuel or other
petroleum or ammonia-based cleaning
products.
You can adjust the interior mirror to your
preference. Some mirrors also have a
second pivot point. This lets you move the
mirror head up or down and from side to
side.
Pull the tab below the mirror toward you
to reduce glare at night.
Auto-Dimming Mirror
(If Equipped)
Note: Do not block the sensors on the front
and back of the mirror. Mirror performance
may be affected. A rear center passenger or
raised rear center head restraint may also
block light from reaching the sensor.
The mirror will dim automatically to reduce
glare when bright lights are detected from
behind your vehicle. It will automatically
return to normal reflection when you select
reverse gear to make sure you have a clear
view when backing up.
71
Super Duty (TFA) Windows and MirrorsE163061 E163062BA
Page 75 of 458
SUN VISORS
Slide-on-rod (If Equipped)
Rotate the sun visor toward the side
window and extend it rearward for extra
shade.
Illuminated Vanity Mirror
(If Equipped)
Lift the cover to switch the lamp on.
MOONROOF
(IF EQUIPPED)
WARNINGS
Do not let children play with the
moonroof or leave them unattended
in the vehicle. They may seriously
hurt themselves. WARNINGS
When closing the moonroof, you
should verify that it is free of
obstructions and make sure that
children and pets are not in the proximity
of the roof opening. You can manually open or close the sliding
shade when the moonroof is closed. Pull
the shade toward the front of your vehicle
to close it.
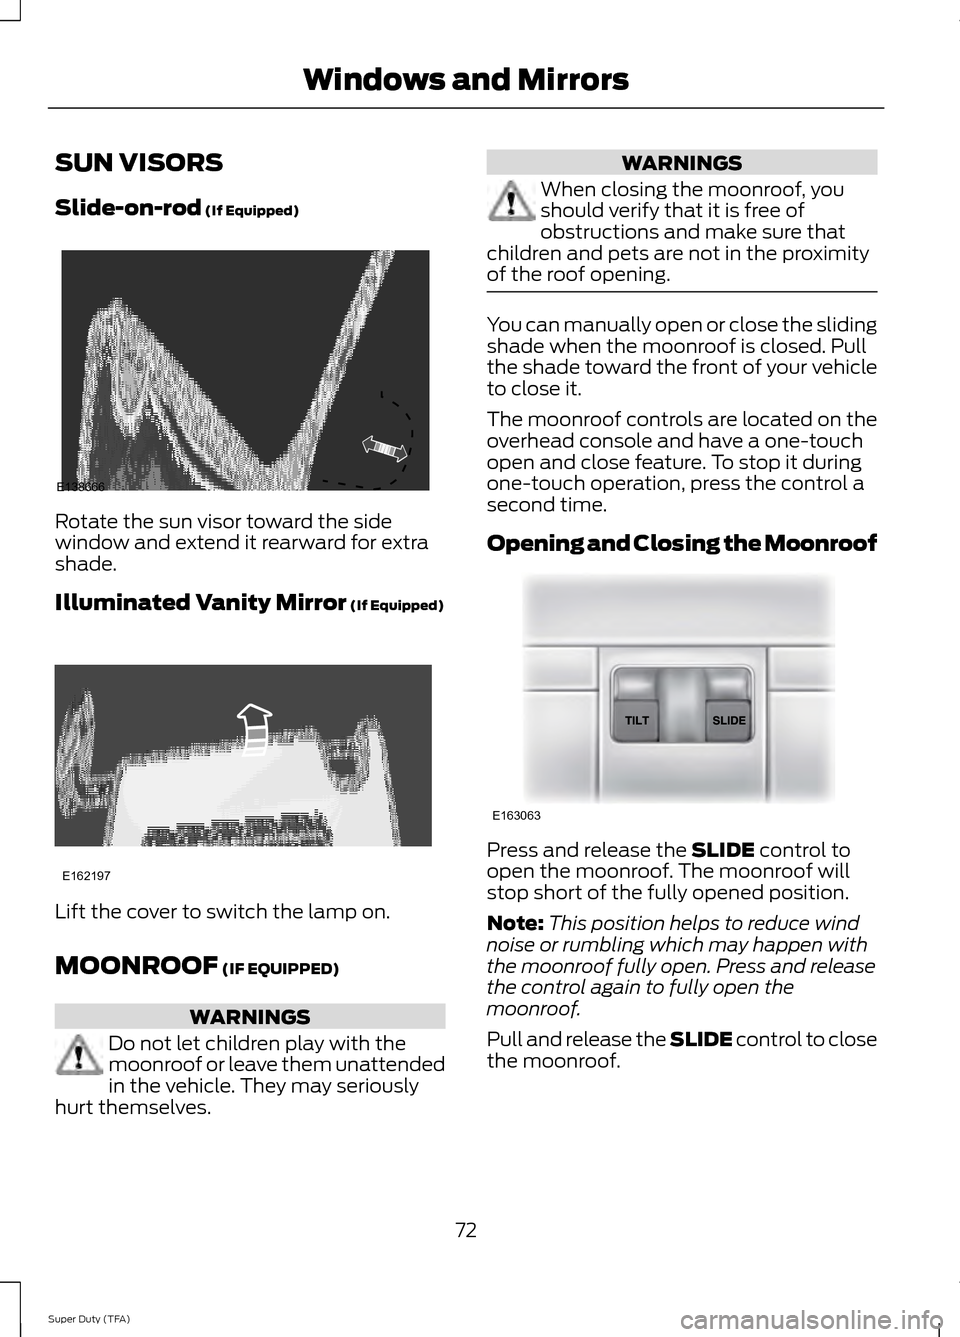
The moonroof controls are located on the
overhead console and have a one-touch
open and close feature. To stop it during
one-touch operation, press the control a
second time.
Opening and Closing the Moonroof
Press and release the
SLIDE control to
open the moonroof. The moonroof will
stop short of the fully opened position.
Note: This position helps to reduce wind
noise or rumbling which may happen with
the moonroof fully open. Press and release
the control again to fully open the
moonroof.
Pull and release the SLIDE control to close
the moonroof.
72
Super Duty (TFA) Windows and MirrorsE138666 E162197 E163063