Page 154 of 461
CENTER CONSOLE
Stow items in the cupholder carefully as items may become loose during
hard braking, acceleration or collisions, including hot drinks which may
spill.
Available console features include:
•Cupholders in the front of the
console (Pull the door open to
access.) Remove the spacer from
the cupholder to hold deeper
cups.
•Lockable storage bin (Use the
ignition key to lock or unlock the
console bin and press the latch to
open the console.)
•Auxiliary power point
•Coin holder slots
•Audio input jack
•USB port
Storage Compartments153
2014 05+ Mustang(197)
Owners Guide gf, 1st Printing, November 2012
USA(fus)
Page 158 of 461

Guarding Against Exhaust Fumes
WARNING:If you smell exhaust fumes inside your vehicle, have
this checked immediately. Do not drive your vehicle if you smell
exhaust fumes. Carbon monoxide is present in exhaust fumes. Take
precautions to avoid its dangerous effects.
Important Ventilating Information
If you stop your vehicle and leave the engine idling for long periods of
time, we recommend that you do one of the following:
•Open the windows at least 1 inch (2.5 centimeters).
•Set your climate control to outside air.
ENGINE BLOCK HEATER (IF EQUIPPED)
WARNING:Failure to follow engine block heater instructions
could result in property damage or physical injury.
WARNING:Do not use your heater with ungrounded electrical
systems or two-pronged (cheater) adapters. There is a risk of
electrical shock.
Note:The heater is most effective when outdoor temperatures are below
0°F (-18°C).
The heater acts as a starting aid by warming the engine coolant. This
allows the climate control system to respond quickly. The equipment
includes a heater element (installed in the engine block) and a wire
harness. You can connect the system to a grounded 120 volt A/C
electrical source.
We recommend that you do the following for safe and correct operation:
•
Use a 16-gauge outdoor extension cord that is product certified by
Underwriter’s Laboratory or Canadian Standards Association. This
extension cord must be able to be used outdoors, in cold temperatures,
and be clearly markedSuitable for Use with Outdoor Appliances.
Never use an indoor extension cord outdoors; it could result in an
electric shock or become a fire hazard.
•Use as short an extension cord as possible.
•Do not use multiple extension cords.
Starting and Stopping the Engine157
2014 05+ Mustang(197)
Owners Guide gf, 1st Printing, November 2012
USA(fus)
Page 236 of 461
Passenger Compartment Fuse Panel
The fuse panel is located in the lower passenger side area behind the
kick panel. Open the trim panel door and remove the fuse cover to
access the fuses.
Use the provided fuse puller tool to remove a fuse. It is located inside
the fuse cover.
The fuses are coded as follows:
Fuse or relay
numberFuse amp
ratingProtected components
1 30A Driver rear window
(convertible only)
2 15A Not used (spare)
3 15A SYNC
4 30A Passenger rear window
(convertible only)
5 10A Brake transmission shift interlock
Fuses235
2014 05+ Mustang(197)
Owners Guide gf, 1st Printing, November 2012
USA(fus)
Page 237 of 461
Fuse or relay
numberFuse amp
ratingProtected components
6 20A Turn signals, Hazard flashers
7 10A Left low beam headlamp
8 10A Right low beam headlamp
9 15A Courtesy lamps
10 15A Switch illumination, Pony
projection lights
11 10A Security module
12 7.5A Power mirrors
13 5A Not used (spare)
14 10A Center information display,
Electronic finish panel, Global
position system
15 10A Climate control
16 15A Not used (spare)
17 20A Power door locks, Trunk release
18 20A Not used (spare)
19 25A Not used (spare)
20 15A Diagnostic connector
21 15A Fog lamps
22 15A Park lamps, License lamps
23 15A High beam headlamps
24 20A Horn
25 10A Demand lighting (battery saver),
Visor vanity lamps
26 10A Cluster (battery)
27 20A Ignition switch feed
28 5A Audio mute (start)
29 5A Camera (run/start)
30 5A Temperature sensor motor
31 10A Restraints control module
236Fuses
2014 05+ Mustang(197)
Owners Guide gf, 1st Printing, November 2012
USA(fus)
Page 263 of 461

Convertible Top and Padded Molding
For vinyl tops, wash with Motorcraft® Detail Wash.
For cloth tops, wash with a high quality convertible top cleaner and
protectant.
•Do not use stiff bristle brushes or abrasive materials or cleaners.
•Hot waxes applied by commercial car washes can affect the
cleanability of vinyl material.
•Using high water pressure or wand-type car washes against the
convertible top and windows may cause water leaks and possible seal
damage.
WAXING
•Wash the vehicle first.
•Use a quality wax that does not contain abrasives.
•Do not allow paint sealant to come in contact with any non-body
(low-gloss black) colored trim, such as grained door handles, roof
racks, bumpers, side moldings, mirror housings or the windshield cowl
area. The paint sealant will grey or stain the parts over time.
REPAIRING MINOR PAINT DAMAGE
Your authorized dealer has touch-up paint to match your vehicle’s color.
Take your color code (printed on a sticker in the driver’s door jamb) to
your authorized dealer to make sure you get the correct color.
•Remove particles, such as bird droppings, tree sap, insect deposits, tar
spots, road salt and industrial fallout, before repairing paint chips.
•Always read the instructions before using the products.
CLEANING THE ENGINE
Engines are more efficient when they are clean because grease and dirt
buildup keep the engine warmer than normal.
When washing:
•Take care when using a power washer to clean the engine. The
high-pressure fluid could penetrate the sealed parts and cause
damage.
•Do not spray a hot engine with cold water to avoid cracking the
engine block or other engine components.
•Spray Motorcraft® Engine Shampoo and Degreaser on all parts that
require cleaning and pressure rinse clean. In Canada, use Motorcraft®
Engine Shampoo.
262Vehicle Care
2014 05+ Mustang(197)
Owners Guide gf, 1st Printing, November 2012
USA(fus)
Page 299 of 461

First Stage: Reinflating the Tire with Sealing Compound and Air
WARNING:Do not stand directly over the temporary mobility
kit while inflating the tire. If you notice any unusual bulges or
deformations in the tire’s sidewall during inflation, stop and call
roadside assistance.
WARNING:If the tire does not inflate to the recommended tire
pressure within 15 minutes, stop and call roadside assistance.
Preparation
Park the vehicle in a safe, level and secure area, away from moving
traffic. Turn the hazard lights on. Apply the parking brake and turn the
engine off. Inspect the flat tire for visible damage.
Sealant compound contains latex. To avoid any allergic reactions, use the
non-latex gloves located in the accessory box on the underside of the
temporary mobility kit housing.
Do not remove any foreign object that has pierced the tire. If a puncture
is located in the tire sidewall, stop and call roadside assistance.
1. Remove the valve cap from the tire valve.
2. Unwrap the clear tube from the compressor housing.
3. Remove the tube cap and fasten the metal connector of the tube to
the tire valve, turning clockwise. Make sure the connection is tightly
fastened.
4. Plug the power cable into the
12-volt power point in the vehicle.
5. Remove the warning sticker found on the canister and place it on the
top of the instrument panel or the center of the dash.
6.Note:Start the engine only if the vehicle is outdoors or in a
well-ventilated area.
298Wheels and Tires
2014 05+ Mustang(197)
Owners Guide gf, 1st Printing, November 2012
USA(fus)
Page 300 of 461

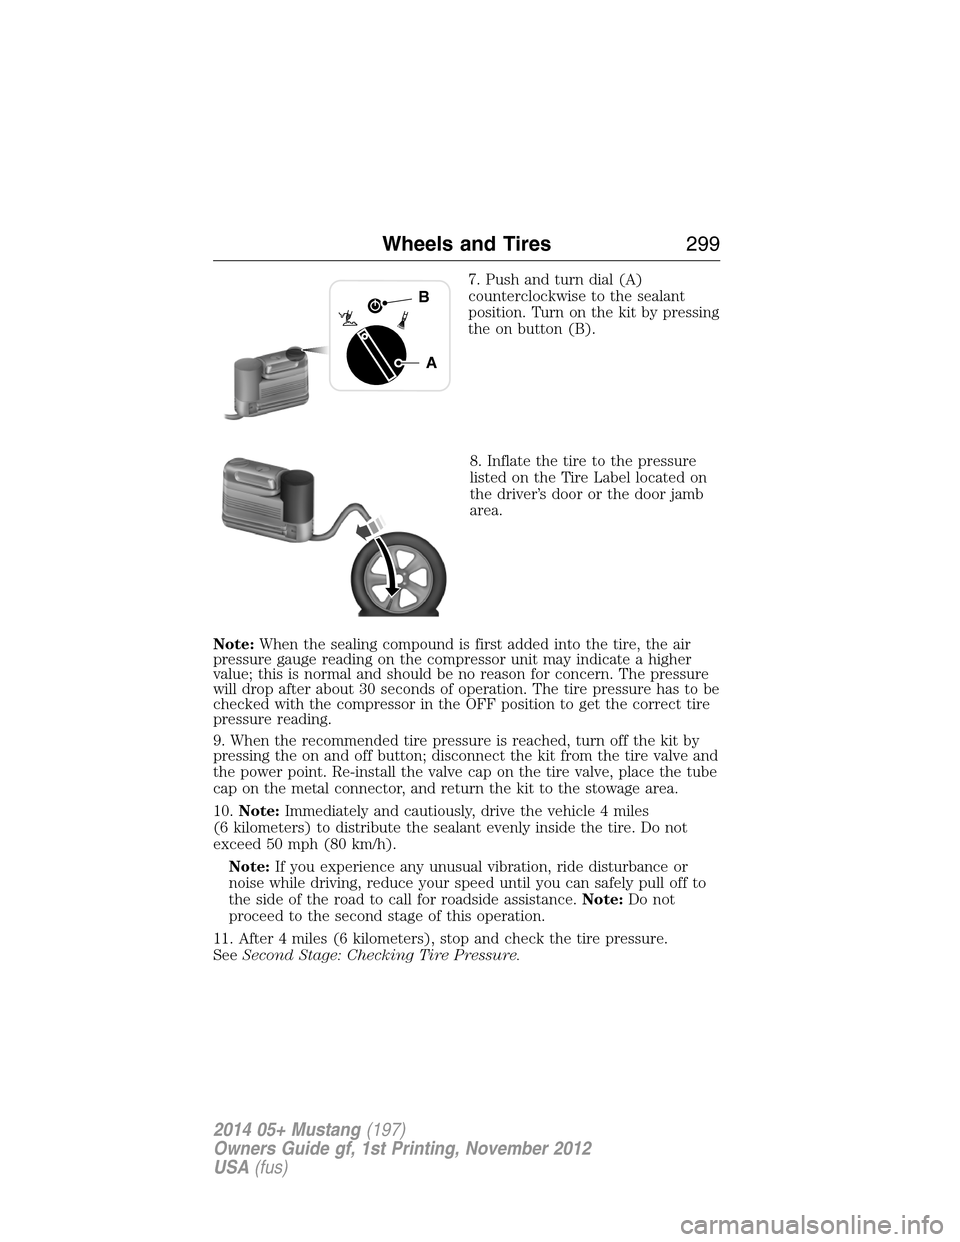
7. Push and turn dial (A)
counterclockwise to the sealant
position. Turn on the kit by pressing
the on button (B).
8. Inflate the tire to the pressure
listed on the Tire Label located on
the driver’s door or the door jamb
area.
Note:When the sealing compound is first added into the tire, the air
pressure gauge reading on the compressor unit may indicate a higher
value; this is normal and should be no reason for concern. The pressure
will drop after about 30 seconds of operation. The tire pressure has to be
checked with the compressor in the OFF position to get the correct tire
pressure reading.
9. When the recommended tire pressure is reached, turn off the kit by
pressing the on and off button; disconnect the kit from the tire valve and
the power point. Re-install the valve cap on the tire valve, place the tube
cap on the metal connector, and return the kit to the stowage area.
10.Note:Immediately and cautiously, drive the vehicle 4 miles
(6 kilometers) to distribute the sealant evenly inside the tire. Do not
exceed 50 mph (80 km/h).
Note:If you experience any unusual vibration, ride disturbance or
noise while driving, reduce your speed until you can safely pull off to
the side of the road to call for roadside assistance.Note:Do not
proceed to the second stage of this operation.
11. After 4 miles (6 kilometers), stop and check the tire pressure.
SeeSecond Stage: Checking Tire Pressure.
A
B
Wheels and Tires299
2014 05+ Mustang(197)
Owners Guide gf, 1st Printing, November 2012
USA(fus)
Page 301 of 461

Second Stage: Checking Tire Pressure
WARNING:If you are proceeding from theFirst Stage:
Reinflating the Tire with Sealing Compound and Airsection
and have injected sealant in the tire and the pressure is below 20 psi
(1.4 bar), stop and call roadside assistance. If tire pressure is above
20 psi (1.4 bar), continue to the next step.
WARNING:The power plug may get hot after use and should be
handled carefully while unplugging.
Check the air pressure of your tires as follows:
1. Remove the valve cap from the tire valve.
2. Unhook the black hose from the side of the compressor and fasten
firmly on the valve stem by turning clockwise.
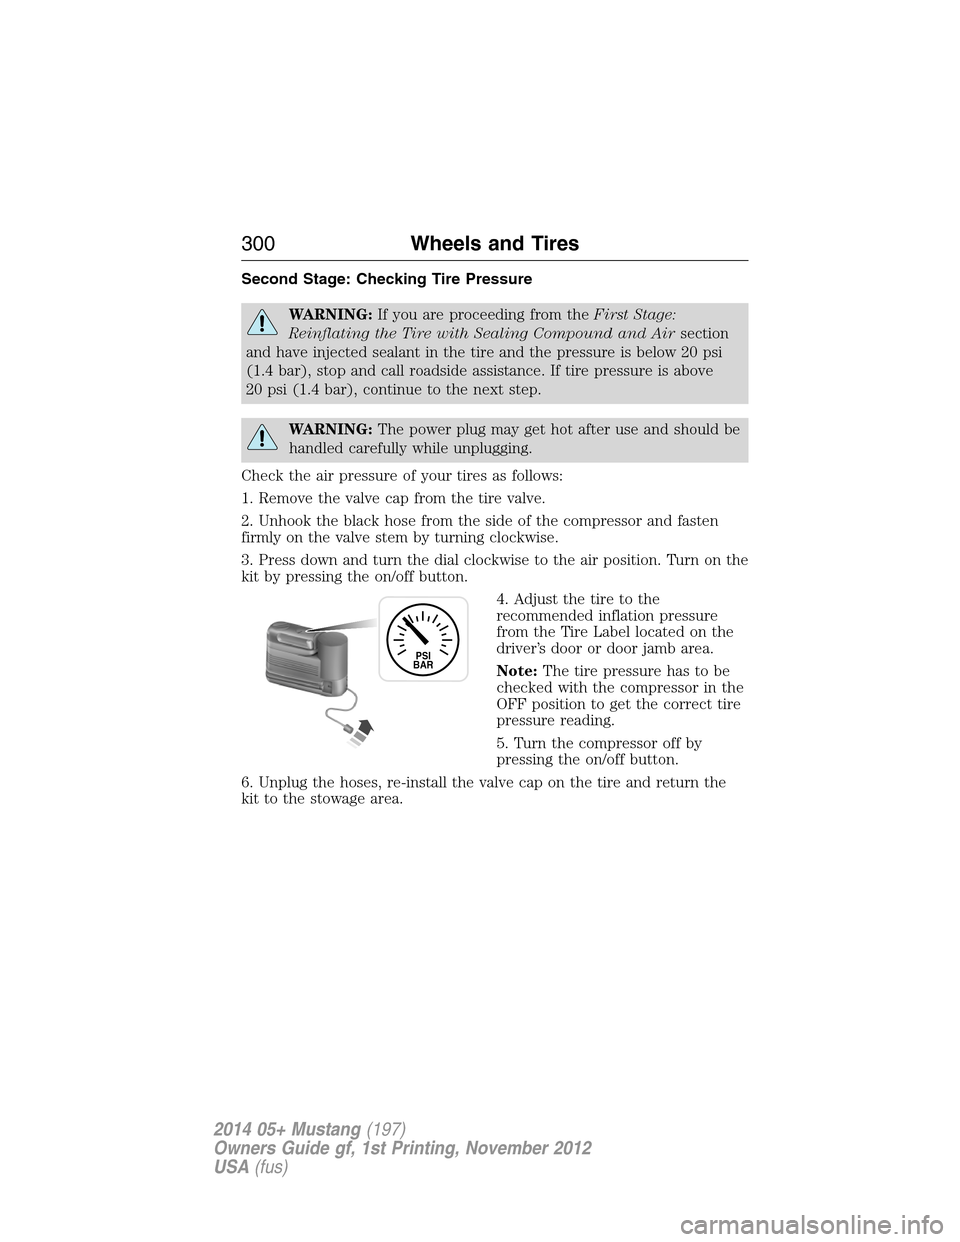
3. Press down and turn the dial clockwise to the air position. Turn on the
kit by pressing the on/off button.
4. Adjust the tire to the
recommended inflation pressure
from the Tire Label located on the
driver’s door or door jamb area.
Note:The tire pressure has to be
checked with the compressor in the
OFF position to get the correct tire
pressure reading.
5. Turn the compressor off by
pressing the on/off button.
6. Unplug the hoses, re-install the valve cap on the tire and return the
kit to the stowage area.
PSI
BAR
300Wheels and Tires
2014 05+ Mustang(197)
Owners Guide gf, 1st Printing, November 2012
USA(fus)