2014 FORD FIESTA headlamp
[x] Cancel search: headlampPage 87 of 396
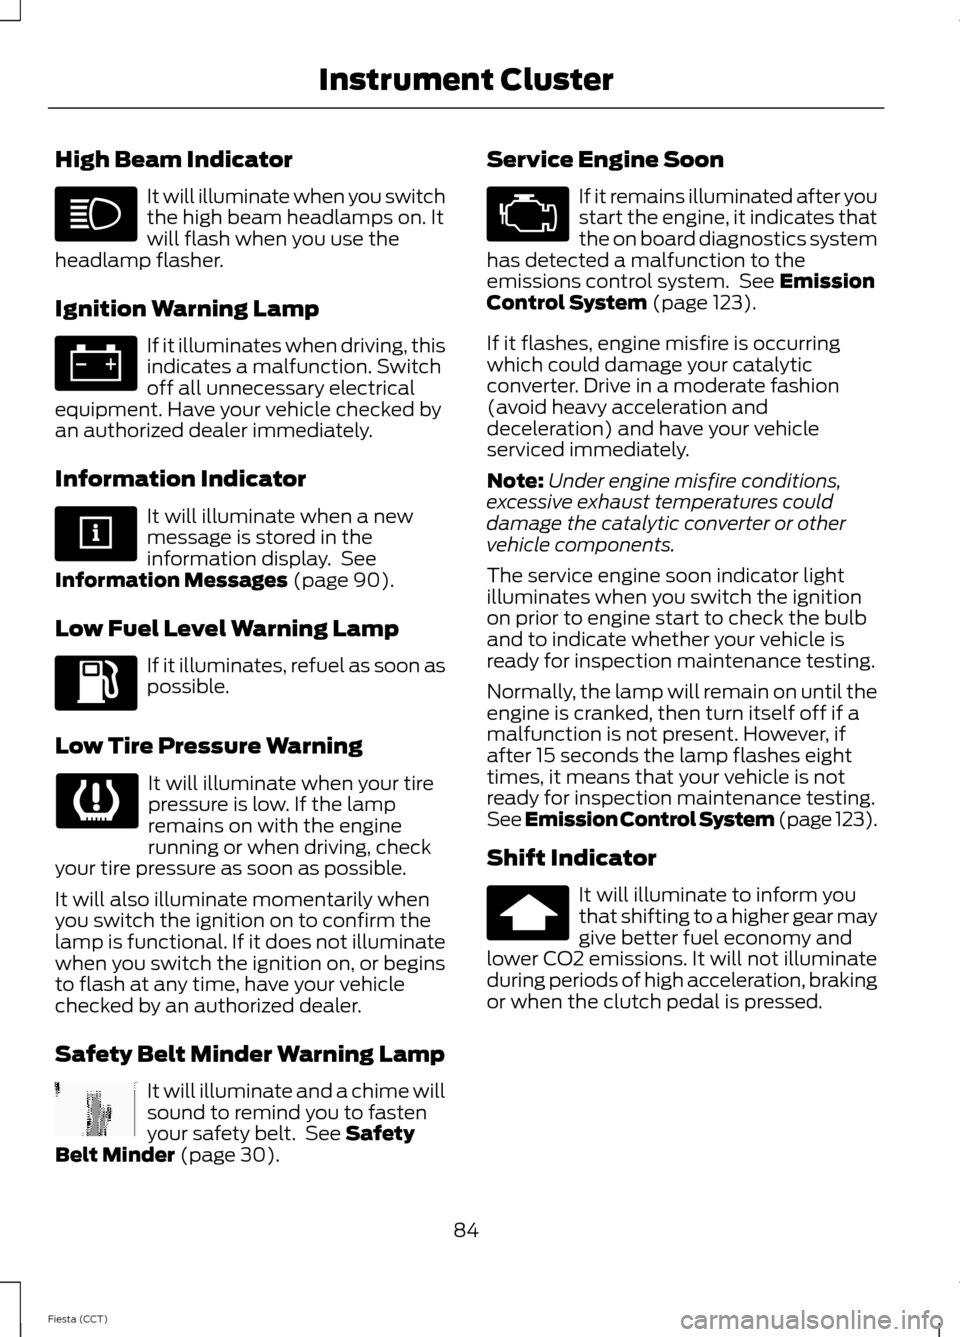
High Beam Indicator
It will illuminate when you switch
the high beam headlamps on. It
will flash when you use the
headlamp flasher.
Ignition Warning Lamp If it illuminates when driving, this
indicates a malfunction. Switch
off all unnecessary electrical
equipment. Have your vehicle checked by
an authorized dealer immediately.
Information Indicator It will illuminate when a new
message is stored in the
information display. See
Information Messages (page 90).
Low Fuel Level Warning Lamp If it illuminates, refuel as soon as
possible.
Low Tire Pressure Warning It will illuminate when your tire
pressure is low. If the lamp
remains on with the engine
running or when driving, check
your tire pressure as soon as possible.
It will also illuminate momentarily when
you switch the ignition on to confirm the
lamp is functional. If it does not illuminate
when you switch the ignition on, or begins
to flash at any time, have your vehicle
checked by an authorized dealer.
Safety Belt Minder Warning Lamp It will illuminate and a chime will
sound to remind you to fasten
your safety belt. See
Safety
Belt Minder (page 30). Service Engine Soon If it remains illuminated after you
start the engine, it indicates that
the on board diagnostics system
has detected a malfunction to the
emissions control system. See
Emission
Control System (page 123).
If it flashes, engine misfire is occurring
which could damage your catalytic
converter. Drive in a moderate fashion
(avoid heavy acceleration and
deceleration) and have your vehicle
serviced immediately.
Note: Under engine misfire conditions,
excessive exhaust temperatures could
damage the catalytic converter or other
vehicle components.
The service engine soon indicator light
illuminates when you switch the ignition
on prior to engine start to check the bulb
and to indicate whether your vehicle is
ready for inspection maintenance testing.
Normally, the lamp will remain on until the
engine is cranked, then turn itself off if a
malfunction is not present. However, if
after 15 seconds the lamp flashes eight
times, it means that your vehicle is not
ready for inspection maintenance testing.
See Emission Control System (page 123).
Shift Indicator It will illuminate to inform you
that shifting to a higher gear may
give better fuel economy and
lower CO2 emissions. It will not illuminate
during periods of high acceleration, braking
or when the clutch pedal is pressed.
84
Fiesta (CCT) Instrument Cluster
Page 88 of 396
AUDIBLE WARNINGS AND
INDICATORS
Automatic Transmission
Sounds when you open the driver's door
and do not move the transmission selector
lever to position P.
Key Outside Car
Vehicles With Keyless System
Sounds when you close the door, the
engine is running and the system does not
detect a passive key inside your vehicle.
Headlamps On
Sounds when you remove the key from the
ignition and open the driver's door and you
have left the headlamps or parking lamps
on.
Low Fuel
A warning chime will sound when the
remaining fuel is less than approximately
1.3 gallons (6 liters). The distance to empty
displayed may vary depending on driving
style and road conditions.
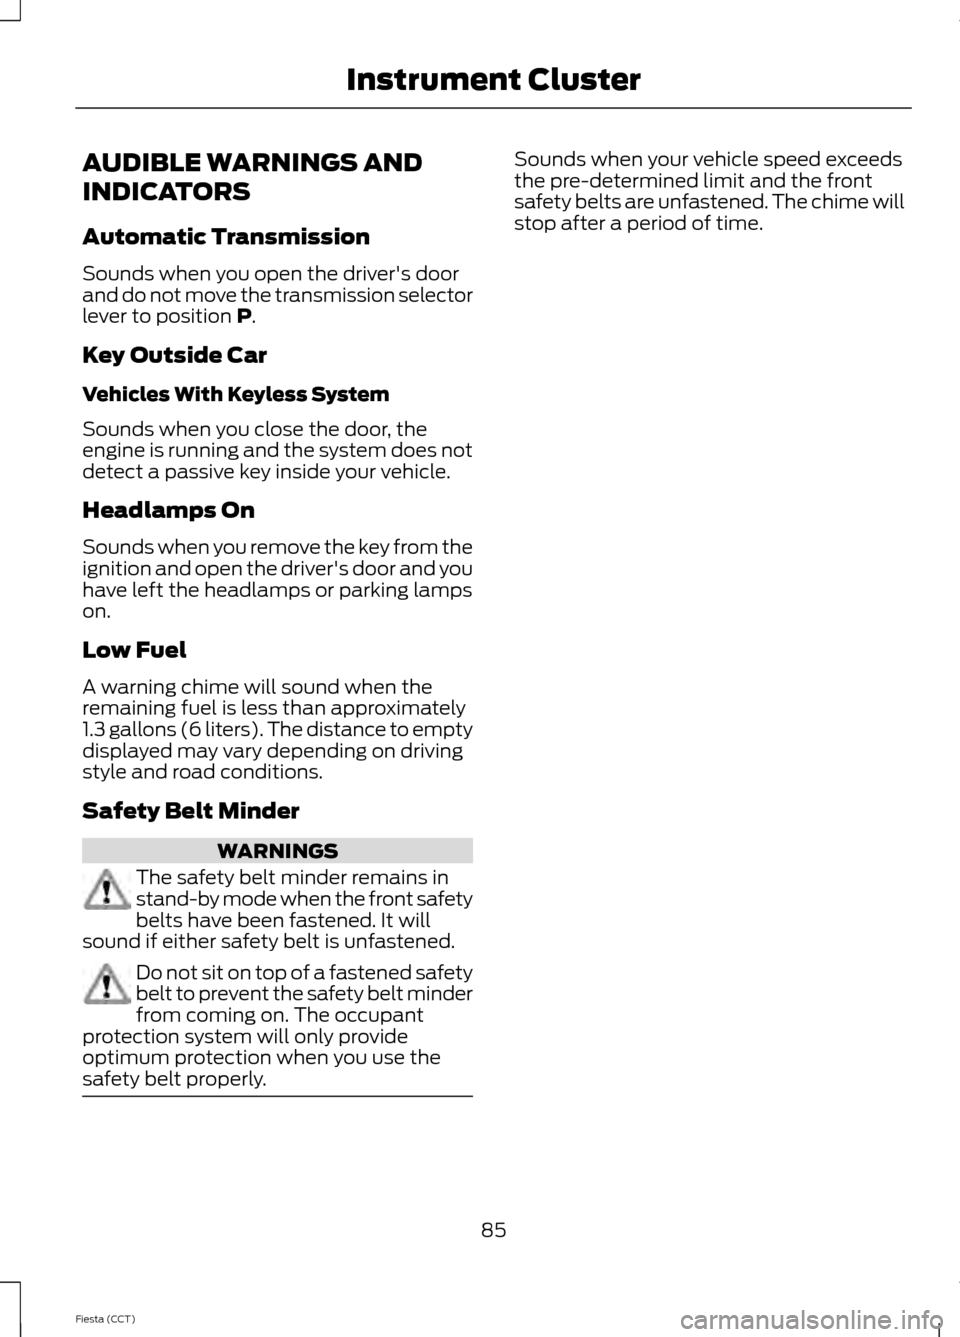
Safety Belt Minder WARNINGS
The safety belt minder remains in
stand-by mode when the front safety
belts have been fastened. It will
sound if either safety belt is unfastened. Do not sit on top of a fastened safety
belt to prevent the safety belt minder
from coming on. The occupant
protection system will only provide
optimum protection when you use the
safety belt properly. Sounds when your vehicle speed exceeds
the pre-determined limit and the front
safety belts are unfastened. The chime will
stop after a period of time.
85
Fiesta (CCT) Instrument Cluster
Page 119 of 396
Stopping the Engine with Your
Vehicle Stationary
Note:
The ignition, all electrical circuits
warning lamps and indicators will be
switched off.
Manual Transmission
Briefly press the button.
Automatic Transmission
1. Move the transmission selector lever to position P.
2. Press the button.
Stopping the Engine When Your
Vehicle is Moving WARNING
Switching off the engine when the
vehicle is still moving will result in a
loss of brake and steering assistance.
The steering will not lock, but higher effort
will be required. With the ignition switched
off some electrical circuits, warning lamps
and indicators may also be off. 1. Press and hold the button for at least
one second or press it three times
within two seconds.
2. Move the transmission selector lever to position N and use the brakes to
bring your vehicle to a safe stop.
3. When your vehicle has stopped, move the transmission selector lever to
position P or N and switch the ignition
off. STARTING A GASOLINE
ENGINE
Note:
You can only operate the starter for
a limited period of time, for example 10
seconds. The number of start attempts is
limited to approximately six. If you exceed
this limit, the system will not allow you to
try again until a period of time has elapsed,
for example 30 minutes.
When you start the engine, the idle speed
increases, this helps to warm up the
engine. If the engine idle speed does not
slow down automatically, have your
vehicle checked by an authorized dealer.
Before starting the engine check the
following:
• Make sure all occupants have fastened
their safety belts.
• Make sure the headlamps and
electrical accessories are off.
• Make sure the parking brake is on.
• Move the transmission selector lever
to position P (automatic transmission)
or neutral (manual transmission).
• Turn the ignition key to position II. If
your vehicle is equipped with a keyless
ignition, see the following instructions.
Cold or Hot Engine
Vehicles with Manual Transmission
Note: Do not touch the accelerator pedal.
Note: Releasing the clutch pedal while the
engine is starting will stop the engine
cranking and return to ignition on.
1. Fully depress the clutch pedal.
2. Start the engine.
Vehicles with Automatic Transmission
Note: Do not touch the accelerator pedal.
116
Fiesta (CCT) Starting and Stopping the Engine
Page 171 of 396
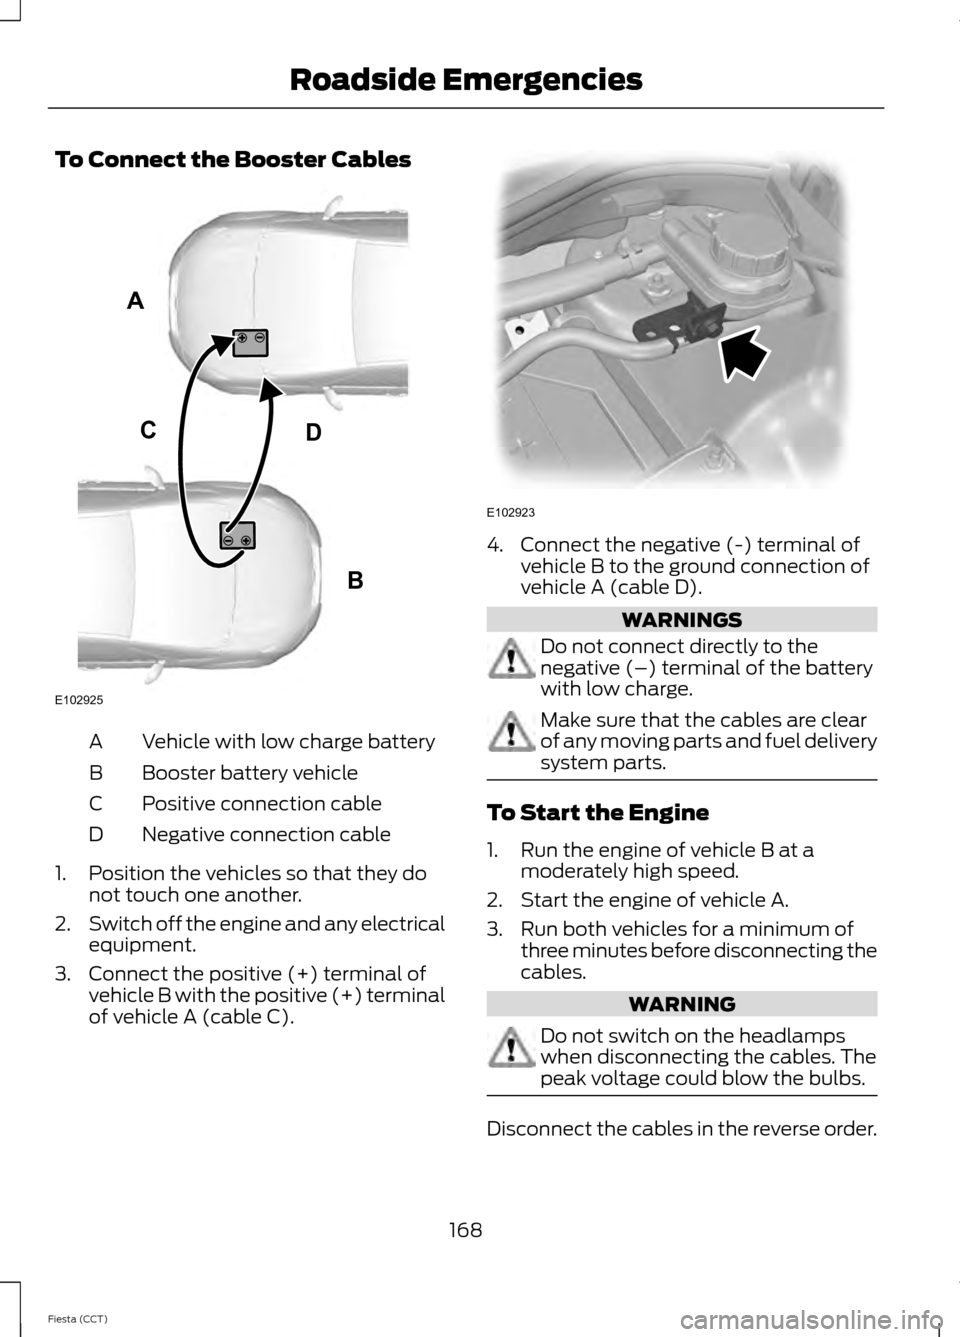
To Connect the Booster Cables
Vehicle with low charge battery
A
Booster battery vehicle
B
Positive connection cable
C
Negative connection cable
D
1. Position the vehicles so that they do not touch one another.
2. Switch off the engine and any electrical
equipment.
3. Connect the positive (+) terminal of vehicle B with the positive (+) terminal
of vehicle A (cable C). 4. Connect the negative (-) terminal of
vehicle B to the ground connection of
vehicle A (cable D). WARNINGS
Do not connect directly to the
negative (–) terminal of the battery
with low charge.
Make sure that the cables are clear
of any moving parts and fuel delivery
system parts.
To Start the Engine
1. Run the engine of vehicle B at a
moderately high speed.
2. Start the engine of vehicle A.
3. Run both vehicles for a minimum of three minutes before disconnecting the
cables. WARNING
Do not switch on the headlamps
when disconnecting the cables. The
peak voltage could blow the bulbs.
Disconnect the cables in the reverse order.
168
Fiesta (CCT) Roadside EmergenciesA
B
CD
E102925 E102923
Page 191 of 396
3.
Remove the air filter element from the
air filter housing.
4. Wipe any dirt or debris from the air filter
housing and cover to make sure no dirt
gets in the engine and to make sure you
have a good seal.
5. Install a new air filter element. Be careful not to crimp the filter element
edges between the air filter housing
and cover. This could cause filter
damage and allow unfiltered air to
enter the engine if not correctly seated.
6. Install the air filter housing cover.
7. Install the retaining screws to secure the air filter housing cover to the air
filter housing.
ADJUSTING THE HEADLAMPS
Vertical Aim Adjustment
If your vehicle has been involved in an
accident, have the alignment of your
headlamps checked by an authorized
dealer.
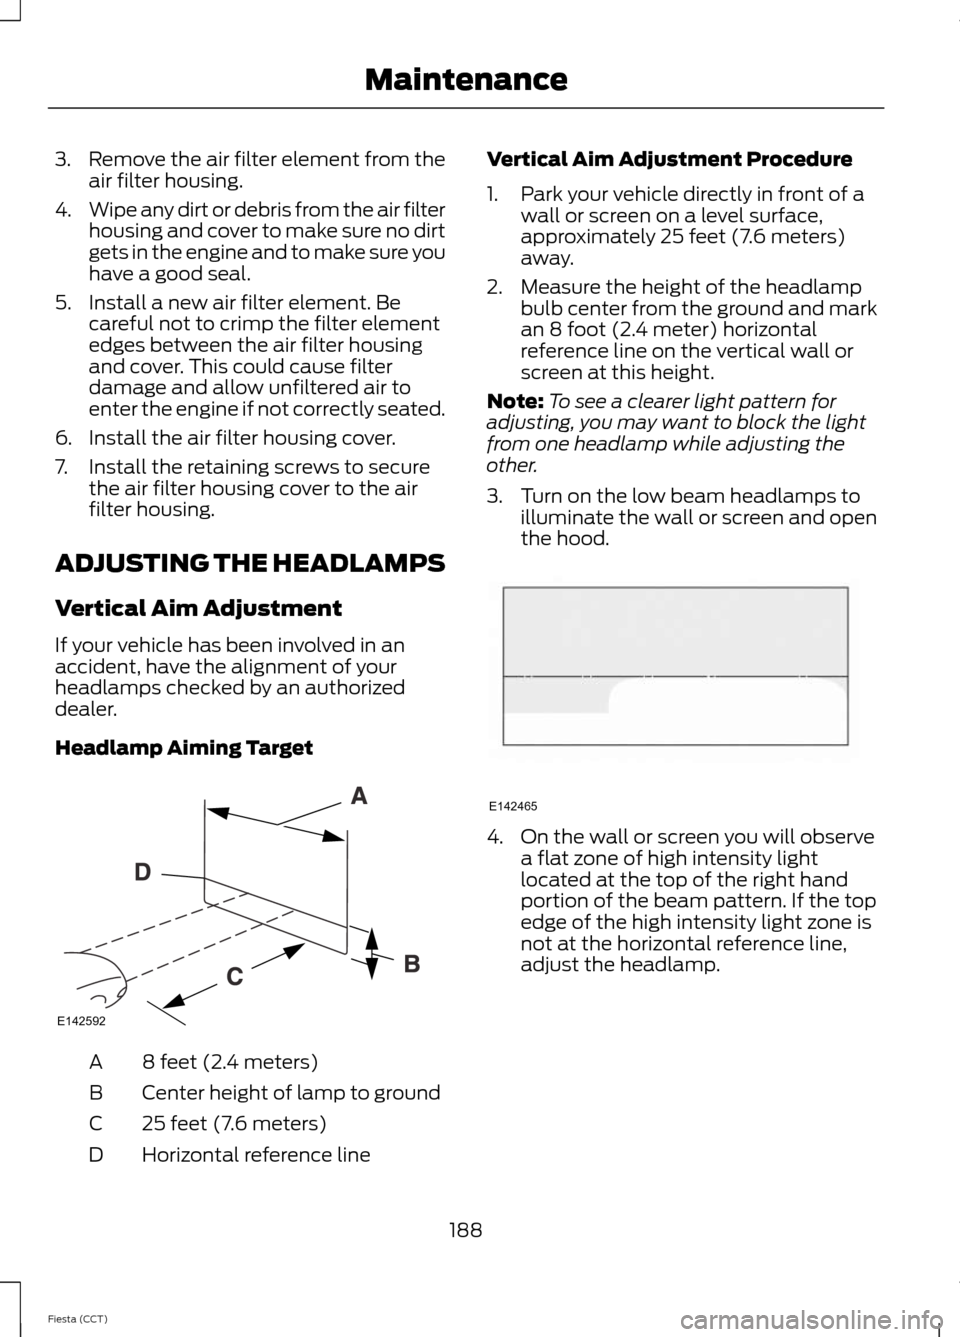
Headlamp Aiming Target 8 feet (2.4 meters)
A
Center height of lamp to ground
B
25 feet (7.6 meters)
C
Horizontal reference line
D Vertical Aim Adjustment Procedure
1. Park your vehicle directly in front of a
wall or screen on a level surface,
approximately 25 feet (7.6 meters)
away.
2. Measure the height of the headlamp bulb center from the ground and mark
an 8 foot (2.4 meter) horizontal
reference line on the vertical wall or
screen at this height.
Note: To see a clearer light pattern for
adjusting, you may want to block the light
from one headlamp while adjusting the
other.
3. Turn on the low beam headlamps to illuminate the wall or screen and open
the hood. 4. On the wall or screen you will observe
a flat zone of high intensity light
located at the top of the right hand
portion of the beam pattern. If the top
edge of the high intensity light zone is
not at the horizontal reference line,
adjust the headlamp.
188
Fiesta (CCT) MaintenanceE142592 E142465
Page 192 of 396
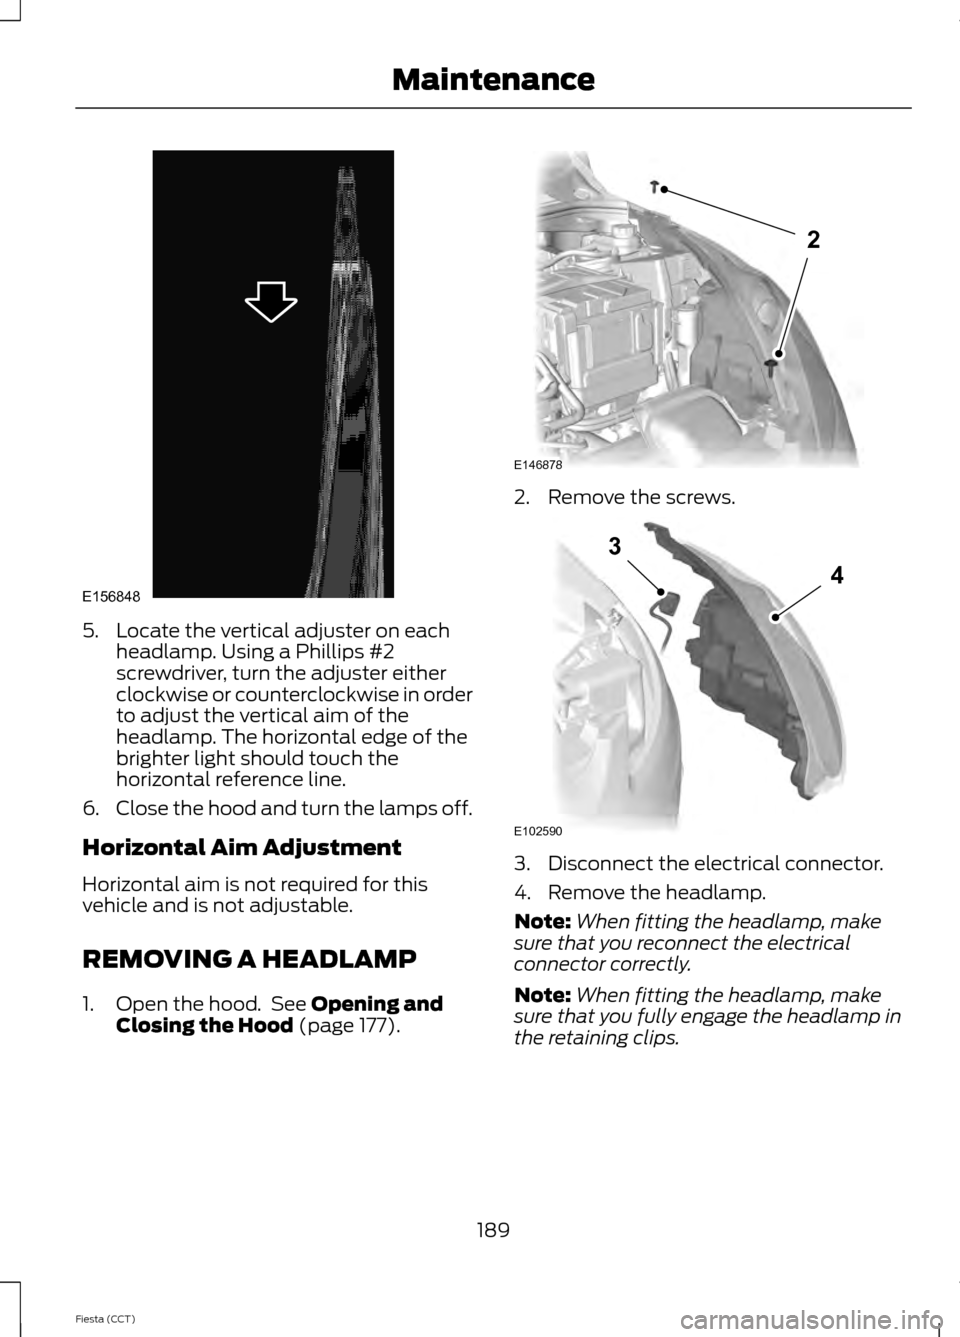
5. Locate the vertical adjuster on each
headlamp. Using a Phillips #2
screwdriver, turn the adjuster either
clockwise or counterclockwise in order
to adjust the vertical aim of the
headlamp. The horizontal edge of the
brighter light should touch the
horizontal reference line.
6. Close the hood and turn the lamps off.
Horizontal Aim Adjustment
Horizontal aim is not required for this
vehicle and is not adjustable.
REMOVING A HEADLAMP
1. Open the hood. See Opening and
Closing the Hood (page 177). 2. Remove the screws.
3. Disconnect the electrical connector.
4. Remove the headlamp.
Note:
When fitting the headlamp, make
sure that you reconnect the electrical
connector correctly.
Note: When fitting the headlamp, make
sure that you fully engage the headlamp in
the retaining clips.
189
Fiesta (CCT) MaintenanceE156848 E146878
2 E102590
3
4
Page 193 of 396
CHANGING A BULB - VEHICLES
WITH: 4-DOOR
WARNINGS
Switch the lamps and the ignition off.
Let the bulb cool down before
removing it.
Do not touch the glass of the bulb.
Note:
Only fit bulbs of the correct
specification.
Note: The following instructions describe
how to remove the bulbs. Fit replacements
in the reverse order unless otherwise stated.
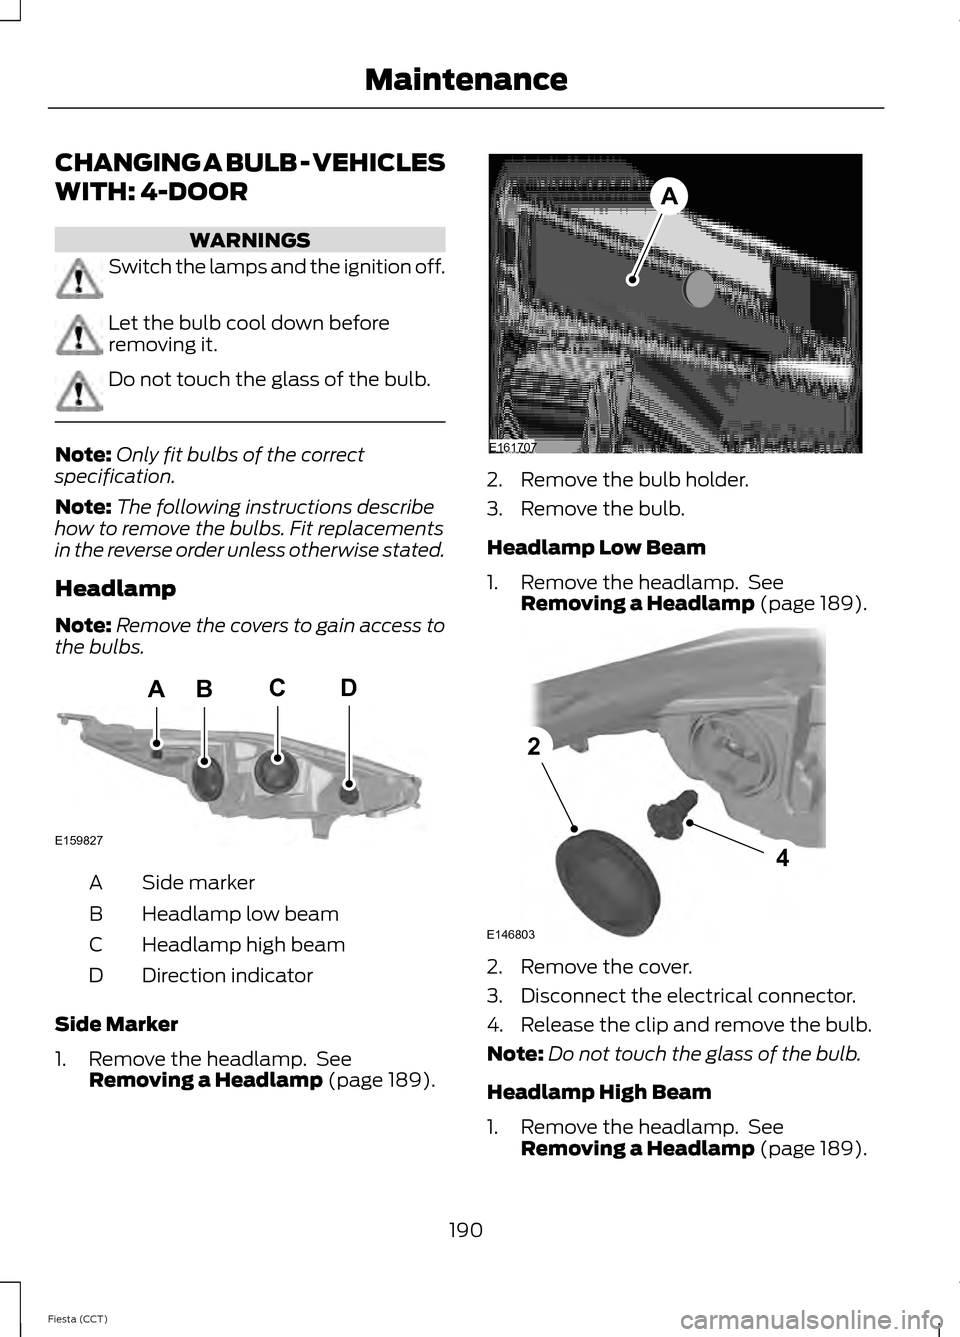
Headlamp
Note: Remove the covers to gain access to
the bulbs. Side marker
A
Headlamp low beam
B
Headlamp high beam
C
Direction indicator
D
Side Marker
1. Remove the headlamp. See Removing a Headlamp (page 189). 2. Remove the bulb holder.
3. Remove the bulb.
Headlamp Low Beam
1. Remove the headlamp. See
Removing a Headlamp
(page 189). 2. Remove the cover.
3. Disconnect the electrical connector.
4. Release the clip and remove the bulb.
Note:
Do not touch the glass of the bulb.
Headlamp High Beam
1. Remove the headlamp. See Removing a Headlamp
(page 189).
190
Fiesta (CCT) MaintenanceBACD
E159827 E161707
A E146803
4
2
Page 194 of 396
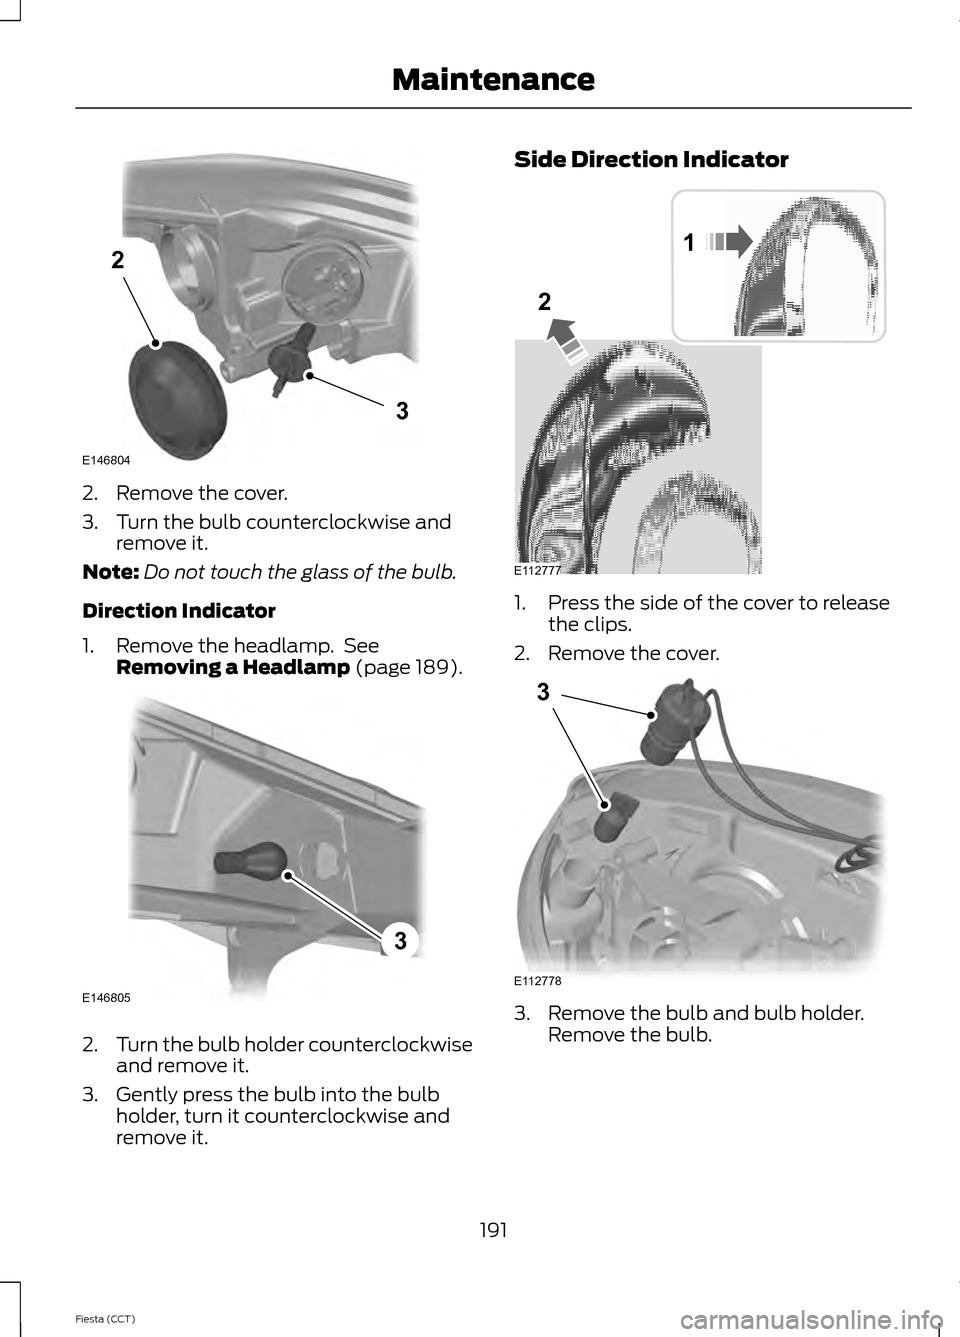
2. Remove the cover.
3. Turn the bulb counterclockwise and
remove it.
Note: Do not touch the glass of the bulb.
Direction Indicator
1. Remove the headlamp. See Removing a Headlamp (page 189). 2.
Turn the bulb holder counterclockwise
and remove it.
3. Gently press the bulb into the bulb holder, turn it counterclockwise and
remove it. Side Direction Indicator
1. Press the side of the cover to release
the clips.
2. Remove the cover. 3. Remove the bulb and bulb holder.
Remove the bulb.
191
Fiesta (CCT) MaintenanceE146804
2
3 E146805
3 1
2
E112777 3
E112778