2014 FORD FIESTA warning
[x] Cancel search: warningPage 171 of 396
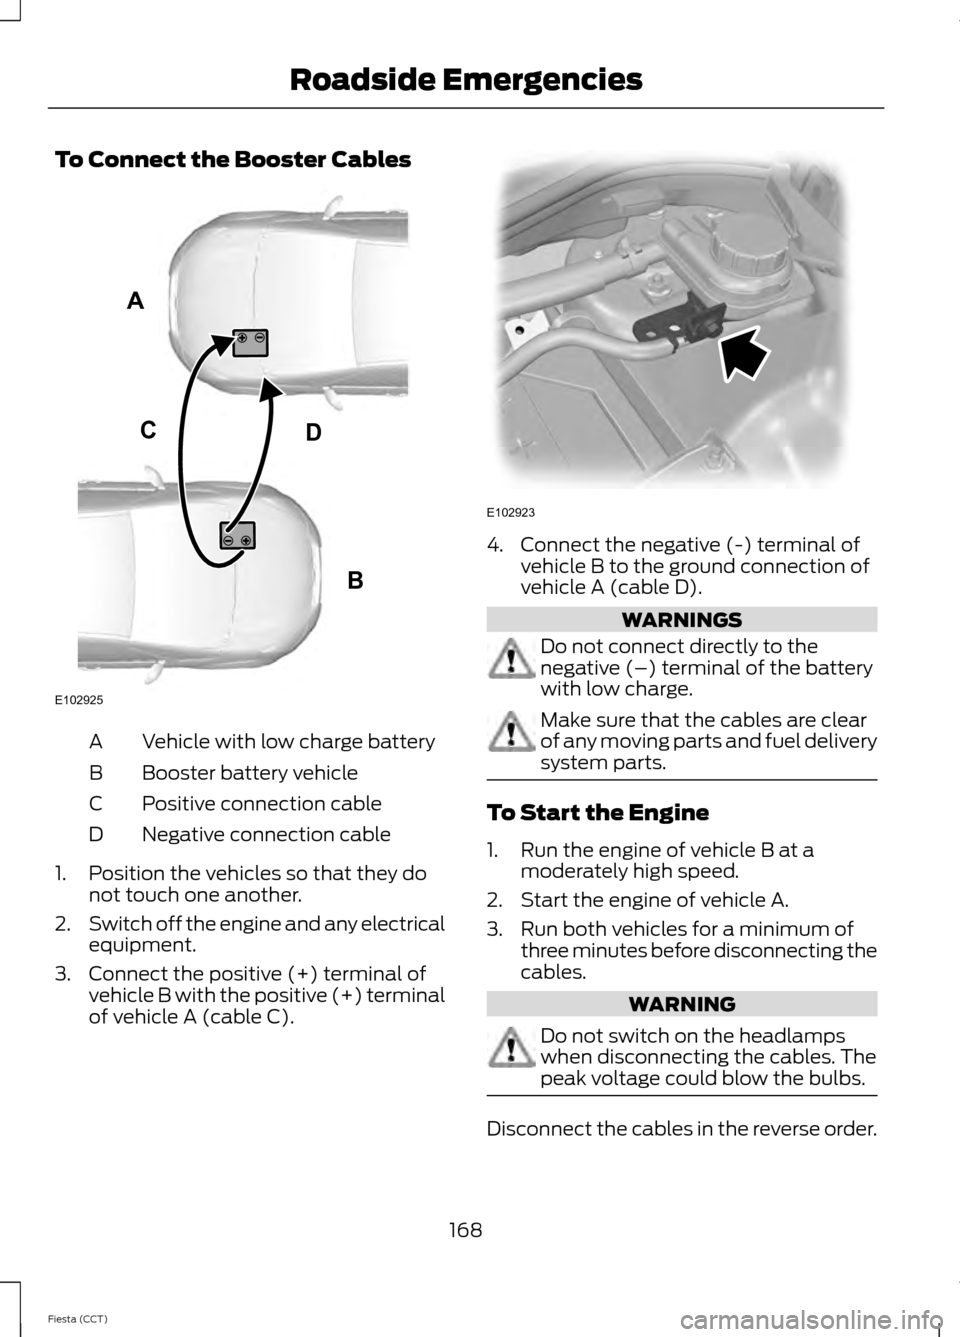
To Connect the Booster Cables
Vehicle with low charge battery
A
Booster battery vehicle
B
Positive connection cable
C
Negative connection cable
D
1. Position the vehicles so that they do not touch one another.
2. Switch off the engine and any electrical
equipment.
3. Connect the positive (+) terminal of vehicle B with the positive (+) terminal
of vehicle A (cable C). 4. Connect the negative (-) terminal of
vehicle B to the ground connection of
vehicle A (cable D). WARNINGS
Do not connect directly to the
negative (–) terminal of the battery
with low charge.
Make sure that the cables are clear
of any moving parts and fuel delivery
system parts.
To Start the Engine
1. Run the engine of vehicle B at a
moderately high speed.
2. Start the engine of vehicle A.
3. Run both vehicles for a minimum of three minutes before disconnecting the
cables. WARNING
Do not switch on the headlamps
when disconnecting the cables. The
peak voltage could blow the bulbs.
Disconnect the cables in the reverse order.
168
Fiesta (CCT) Roadside EmergenciesA
B
CD
E102925 E102923
Page 178 of 396
Circuits protected
Fuse rating
Fuse
Battery back-up sounder
20 A
32
Auxilliary power points
20 A
33
Power windows
30 A
34
Moonroof
20 A
35
Not used
-
36 Circuits switched
Relay
Ignition relay
R1
Not used
R2
Not used
R3
Driver heated seat
R4
Passenger heated seat
R5
Keyless starting
R6
Keyless starting
R7
Battery back-up sounder
R8
Accessory delay
R9
CHANGING A FUSE
Fuses WARNING
Always replace a fuse with one that
has the specified amperage rating.
Using a fuse with a higher amperage
rating can cause severe wire damage and
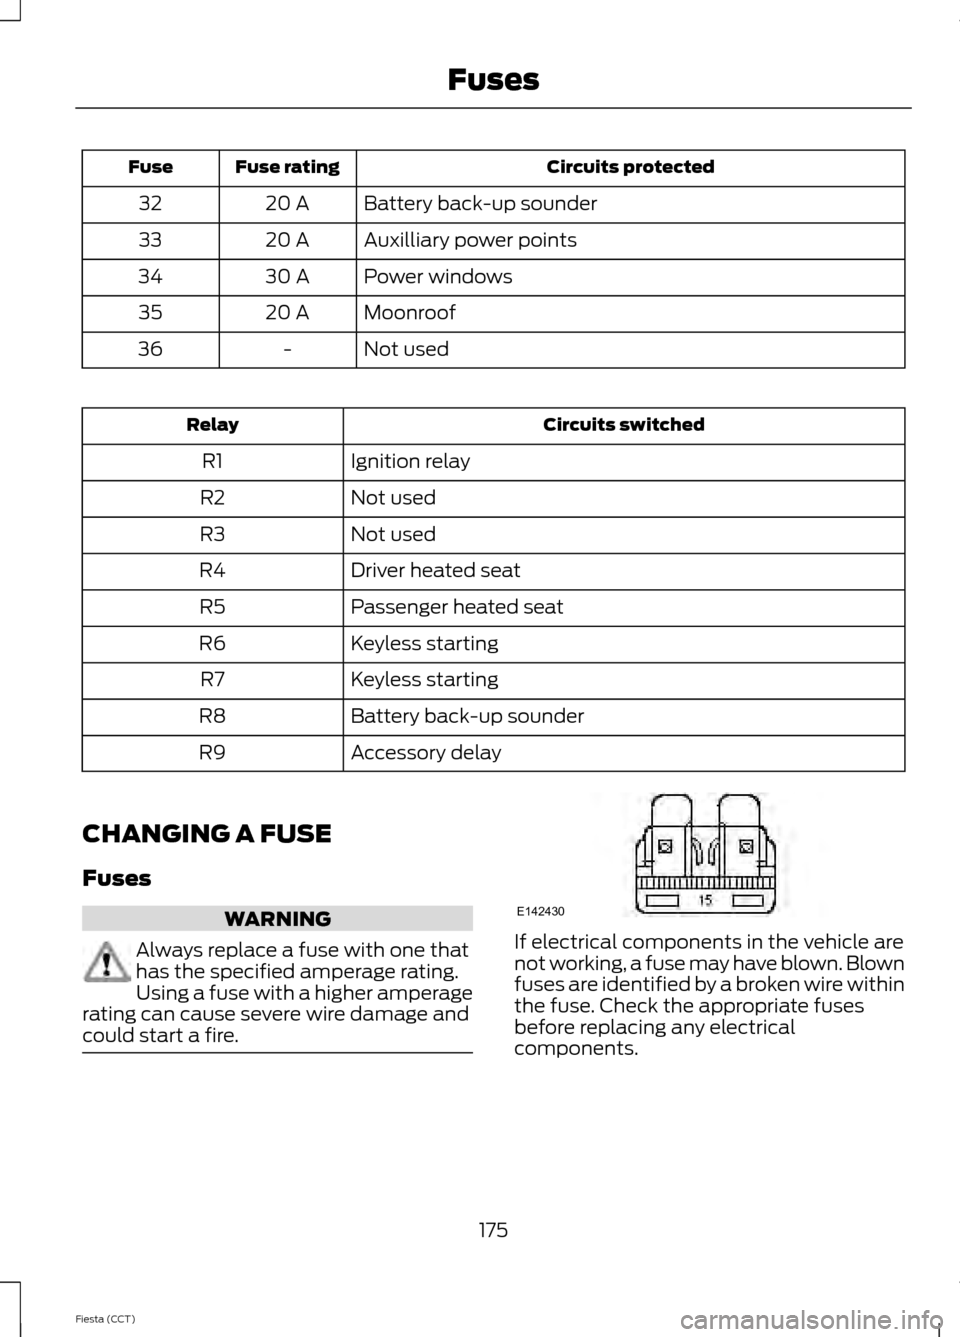
could start a fire. If electrical components in the vehicle are
not working, a fuse may have blown. Blown
fuses are identified by a broken wire within
the fuse. Check the appropriate fuses
before replacing any electrical
components.
175
Fiesta (CCT) FusesE142430
Page 180 of 396

GENERAL INFORMATION
Have your vehicle serviced regularly to help
maintain its roadworthiness and resale
value. There is a large network of Ford
authorized dealers that are there to help
you with their professional servicing
expertise. We believe that their specially
trained technicians are best qualified to
service your vehicle properly and expertly.
They are supported by a wide range of
highly specialized tools developed
specifically for servicing your vehicle.
To help you service your vehicle, we
provide scheduled maintenance
information which makes tracking routine
service easy. See Scheduled
Maintenance (page 368).
If your vehicle requires professional service,
your authorized dealer can provide the
necessary parts and service. Check your
warranty information to find out which
parts and services are covered.
Use only recommended fuels, lubricants,
fluids and service parts conforming to
specifications. Motorcraft® parts are
designed and built to provide the best
performance in your vehicle.
Precautions
• Do not work on a hot engine.
• Make sure that nothing gets caught in
moving parts.
• Do not work on a vehicle with the
engine running in an enclosed space,
unless you are sure you have enough
ventilation.
• Keep all open flames and other burning
material (such as cigarettes) away
from the battery and all fuel related
parts. Working with the Engine Off
1. Set the parking brake and shift to
P
(Park).
2. Turn off the engine and remove the key
(if equipped).
3. Block the wheels.
Working with the Engine On WARNING
To reduce the risk of vehicle damage
and/or personal burn injuries, do not
start your engine with the air cleaner
removed and do not remove it while the
engine is running. 1. Set the parking brake and shift to
P
(Park).
2. Block the wheels
OPENING AND CLOSING THE
HOOD
Opening the Hood 1. Pull the hood release handle.
177
Fiesta (CCT) MaintenanceE102165
Page 187 of 396

Note:
Automotive fluids are not
interchangeable. Do not use engine coolant
or antifreeze or windshield washer fluid
outside of its specified function and vehicle
location.
Adding Engine Coolant WARNINGS
Do not add engine coolant when the
engine is hot. Steam and scalding
liquids released from a hot cooling
system can burn you badly. Also, you can
be burned if you spill coolant on hot engine
parts. Do not put engine coolant in the
windshield washer fluid container. If
sprayed on the windshield, engine
coolant could make it difficult to see
through the windshield. To reduce the risk of personal injury,
make sure the engine is cool before
unscrewing the coolant pressure
relief cap. The cooling system is under
pressure; steam and hot liquid can come
out forcefully when the cap is loosened
slightly. Do not add coolant further than the
MAX mark.
Note:
Do not use stop leak pellets, cooling
system sealants, or additives as they can
cause damage to the engine cooling or
heating systems. This damage would not
be covered under your vehicle ’s warranty.
Note: During normal vehicle operation, the
engine coolant may change color from
orange to pink or light red. As long as the
engine coolant is clear and uncontaminated,
this color change does not indicate the
engine coolant has degraded nor does it
require the engine coolant to be drained, the
system to be flushed, or the engine coolant
to be replaced. •
Do not mix different colors or types of
coolant in your vehicle. Make sure the
correct coolant is used. Mixing of
engine coolants may harm your
engine ’s cooling system. The use of an
improper coolant may harm engine and
cooling system components and may
void the warranty. Use prediluted
engine coolant meeting the Ford
specification. See Maintenance (page
177).
• In case of emergency, a large amount
of water without engine coolant may
be added in order to reach a vehicle
service location. In this instance, the
cooling system must be drained,
chemically cleaned with Motorcraft®
Premium Cooling System Flush, and
refilled with engine coolant as soon as
possible. Water alone (without engine
coolant) can cause engine damage
from corrosion, overheating or freezing.
• Do not use alcohol, methanol, brine or
any engine coolants mixed with alcohol
or methanol antifreeze (coolant).
Alcohol and other liquids can cause
engine damage from overheating or
freezing.
• Do not add extra inhibitors or additives
to the coolant. These can be harmful
and compromise the corrosion
protection of the engine coolant.
Unscrew the cap slowly. Any pressure will
escape as you unscrew the cap.
Add prediluted engine coolant meeting the
Ford specification. See
Maintenance
(page 177).
Whenever coolant has been added, the
coolant level in the coolant reservoir
should be checked the next few times you
drive the vehicle. If necessary, add enough
prediluted engine coolant to bring the
coolant level to the proper level.
184
Fiesta (CCT) Maintenance
Page 189 of 396

FUEL FILTER
Your vehicle is equipped with a lifetime
fuel filter that is integrated with the fuel
tank. Regular maintenance or replacement
is not needed.
WASHER FLUID CHECK
Note:
The reservoir supplies the front and
rear washer systems.
When adding fluid, use a mixture of washer
fluid and water to help prevent freezing in
cold weather and improve the cleaning
capability. We recommend that you use
only high quality washer fluid.
For information on fluid dilution, refer to
the product instructions.
CHANGING THE 12V BATTERY WARNING
For vehicles with start-stop the
battery requirement is different. You
must replace the battery with one of
exactly the same specification. Note:
Where applicable you must
reprogram the audio system using the
keycode.
The battery is located in the engine
compartment. See Maintenance (page
177). CHECKING THE WIPER
BLADES Run the tip of your fingers over the edge of
the blade to check for roughness.
Clean the wiper blades with washer fluid
or water applied with a soft sponge or
cloth.
CHANGING THE WIPER
BLADES
Windshield Wiper Blades
Changing the Windshield Wiper Blades
1. Press the locking button.
2. Remove the wiper blade.
3. Install in the reverse order.
Note:
Make sure that the wiper blade locks
into place.
Rear Window Wiper Blade
1. Lift the wiper arm.
186
Fiesta (CCT) MaintenanceE142463 E72899
1
2
Page 190 of 396
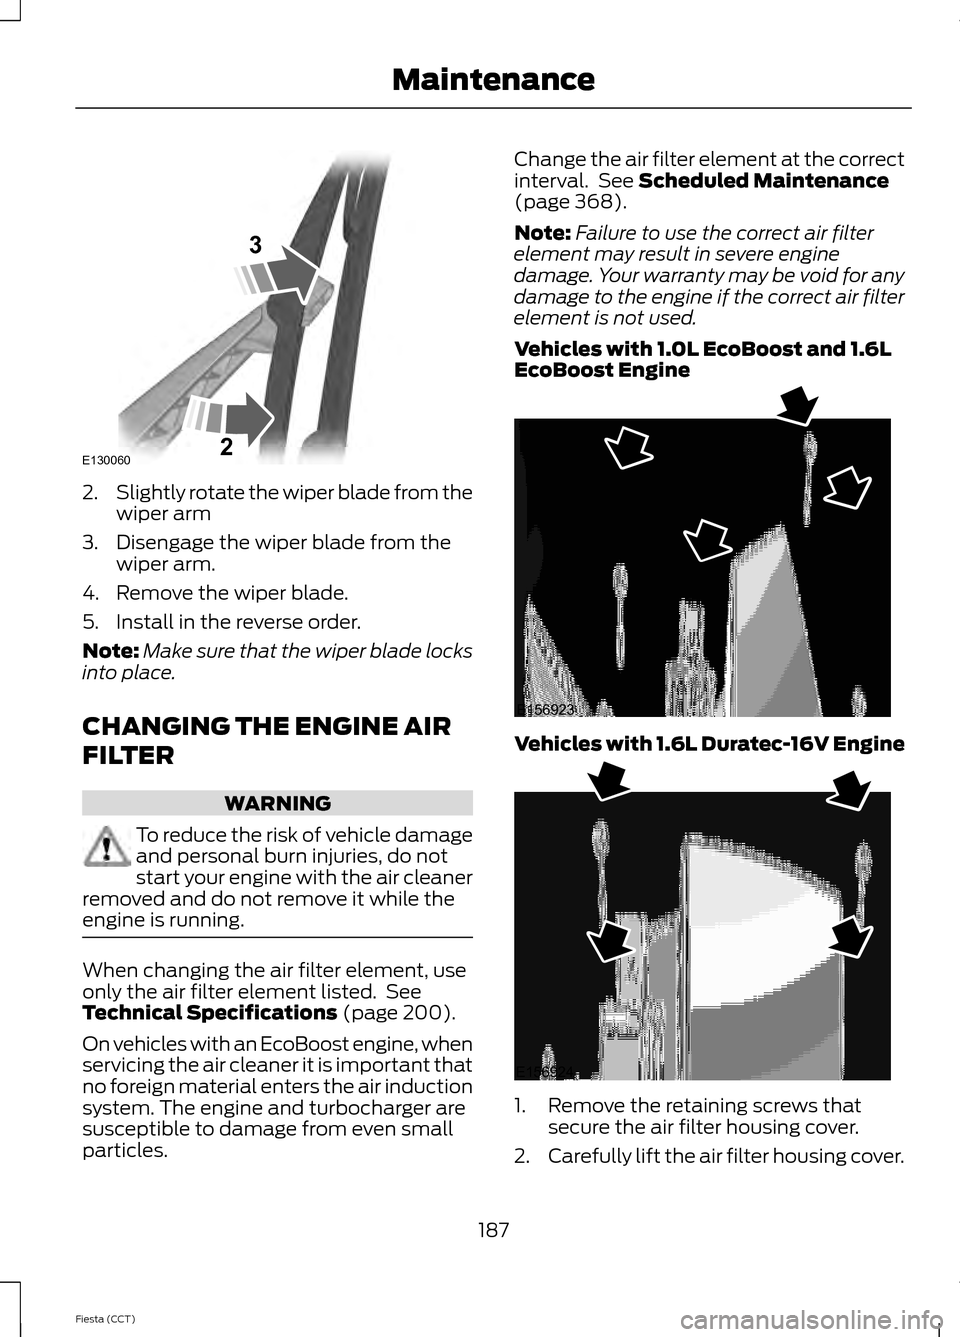
2.
Slightly rotate the wiper blade from the
wiper arm
3. Disengage the wiper blade from the wiper arm.
4. Remove the wiper blade.
5. Install in the reverse order.
Note: Make sure that the wiper blade locks
into place.
CHANGING THE ENGINE AIR
FILTER WARNING
To reduce the risk of vehicle damage
and personal burn injuries, do not
start your engine with the air cleaner
removed and do not remove it while the
engine is running. When changing the air filter element, use
only the air filter element listed. See
Technical Specifications (page 200).
On vehicles with an EcoBoost engine, when
servicing the air cleaner it is important that
no foreign material enters the air induction
system. The engine and turbocharger are
susceptible to damage from even small
particles. Change the air filter element at the correct
interval. See
Scheduled Maintenance
(page 368).
Note: Failure to use the correct air filter
element may result in severe engine
damage. Your warranty may be void for any
damage to the engine if the correct air filter
element is not used.
Vehicles with 1.0L EcoBoost and 1.6L
EcoBoost Engine Vehicles with 1.6L Duratec-16V Engine
1. Remove the retaining screws that
secure the air filter housing cover.
2. Carefully lift the air filter housing cover.
187
Fiesta (CCT) MaintenanceE130060
3
2 E156923 E156924
Page 193 of 396
CHANGING A BULB - VEHICLES
WITH: 4-DOOR
WARNINGS
Switch the lamps and the ignition off.
Let the bulb cool down before
removing it.
Do not touch the glass of the bulb.
Note:
Only fit bulbs of the correct
specification.
Note: The following instructions describe
how to remove the bulbs. Fit replacements
in the reverse order unless otherwise stated.
Headlamp
Note: Remove the covers to gain access to
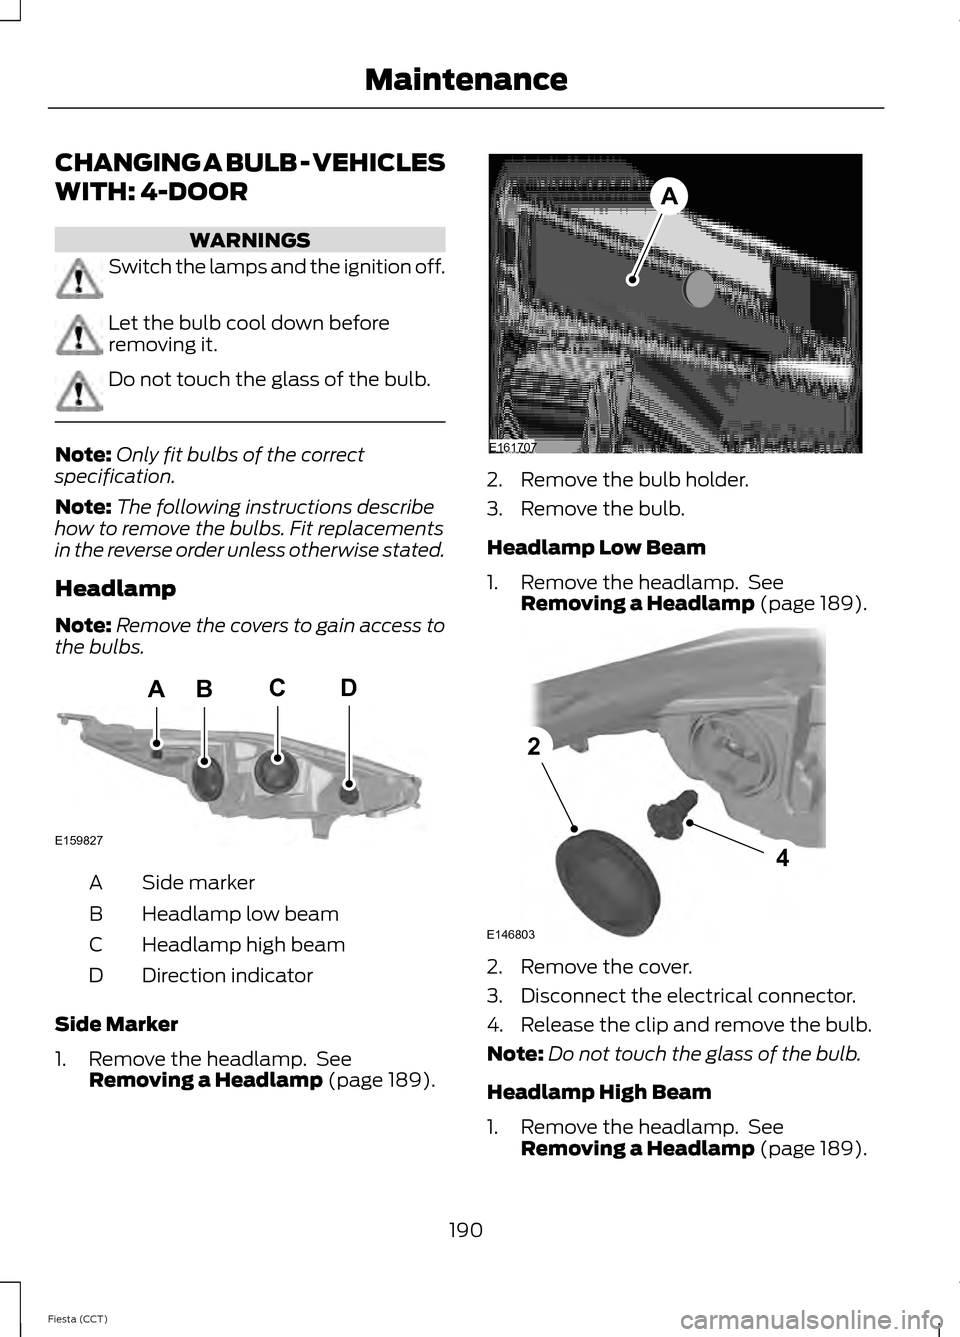
the bulbs. Side marker
A
Headlamp low beam
B
Headlamp high beam
C
Direction indicator
D
Side Marker
1. Remove the headlamp. See Removing a Headlamp (page 189). 2. Remove the bulb holder.
3. Remove the bulb.
Headlamp Low Beam
1. Remove the headlamp. See
Removing a Headlamp
(page 189). 2. Remove the cover.
3. Disconnect the electrical connector.
4. Release the clip and remove the bulb.
Note:
Do not touch the glass of the bulb.
Headlamp High Beam
1. Remove the headlamp. See Removing a Headlamp
(page 189).
190
Fiesta (CCT) MaintenanceBACD
E159827 E161707
A E146803
4
2
Page 198 of 396
CHANGING A BULB - VEHICLES
WITH: 5-DOOR
WARNINGS
Switch the lamps and the ignition off.
Let the bulb cool down before
removing it.
Do not touch the glass of the bulb.
Note:
Only fit bulbs of the correct
specification.
Note: The following instructions describe
how to remove the bulbs. Fit replacements
in the reverse order unless otherwise stated.
Headlamp
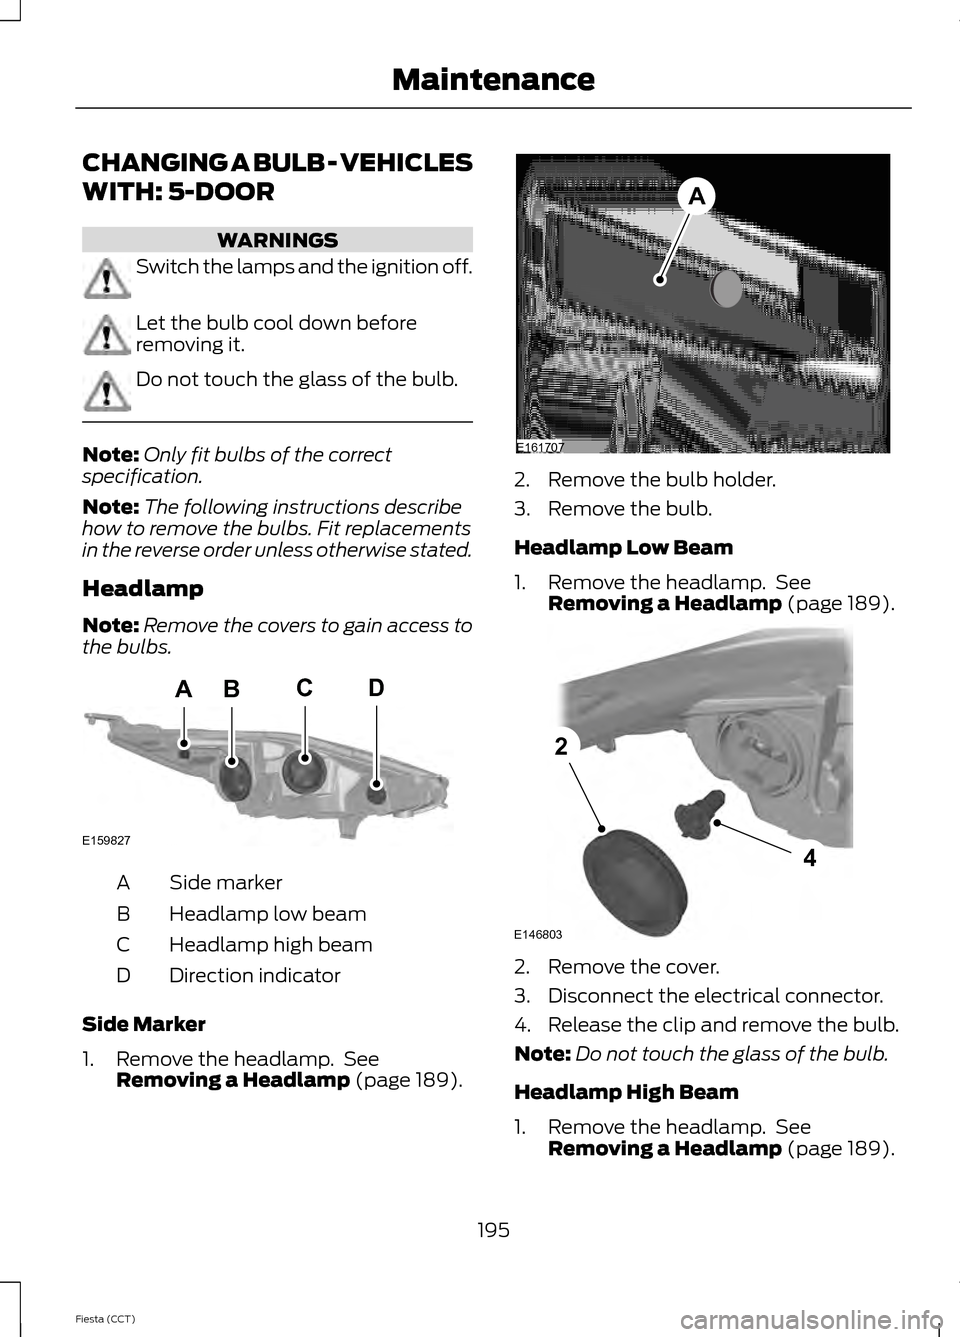
Note: Remove the covers to gain access to
the bulbs. Side marker
A
Headlamp low beam
B
Headlamp high beam
C
Direction indicator
D
Side Marker
1. Remove the headlamp. See Removing a Headlamp (page 189). 2. Remove the bulb holder.
3. Remove the bulb.
Headlamp Low Beam
1. Remove the headlamp. See
Removing a Headlamp
(page 189). 2. Remove the cover.
3. Disconnect the electrical connector.
4. Release the clip and remove the bulb.
Note:
Do not touch the glass of the bulb.
Headlamp High Beam
1. Remove the headlamp. See Removing a Headlamp
(page 189).
195
Fiesta (CCT) MaintenanceBACD
E159827 E161707
A E146803
4
2