2014 FORD F250 light
[x] Cancel search: lightPage 127 of 460

3.
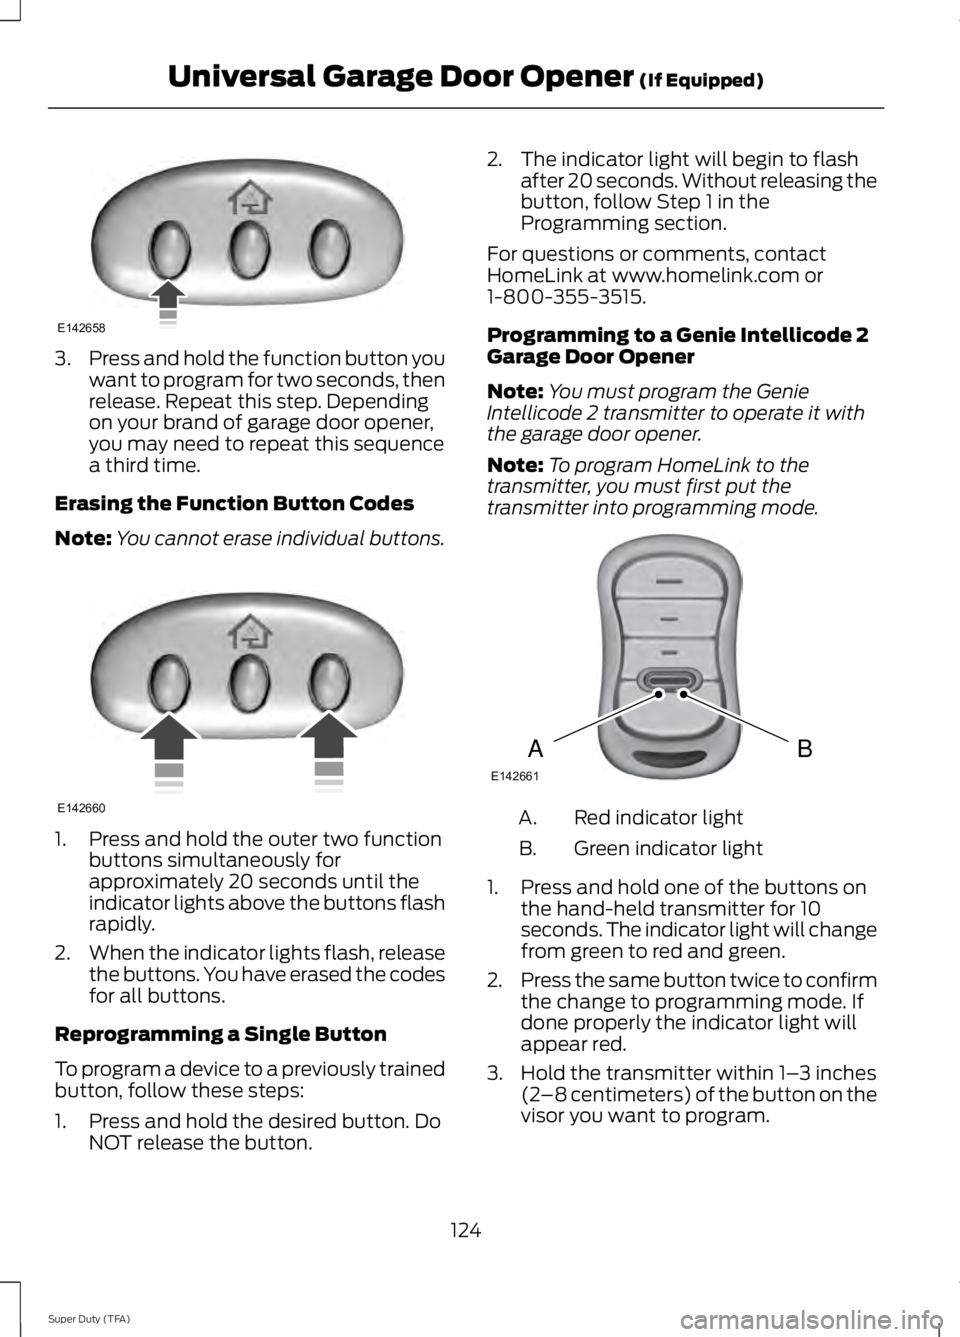
Press and hold the function button you
want to program for two seconds, then
release. Repeat this step. Depending
on your brand of garage door opener,
you may need to repeat this sequence
a third time.
Erasing the Function Button Codes
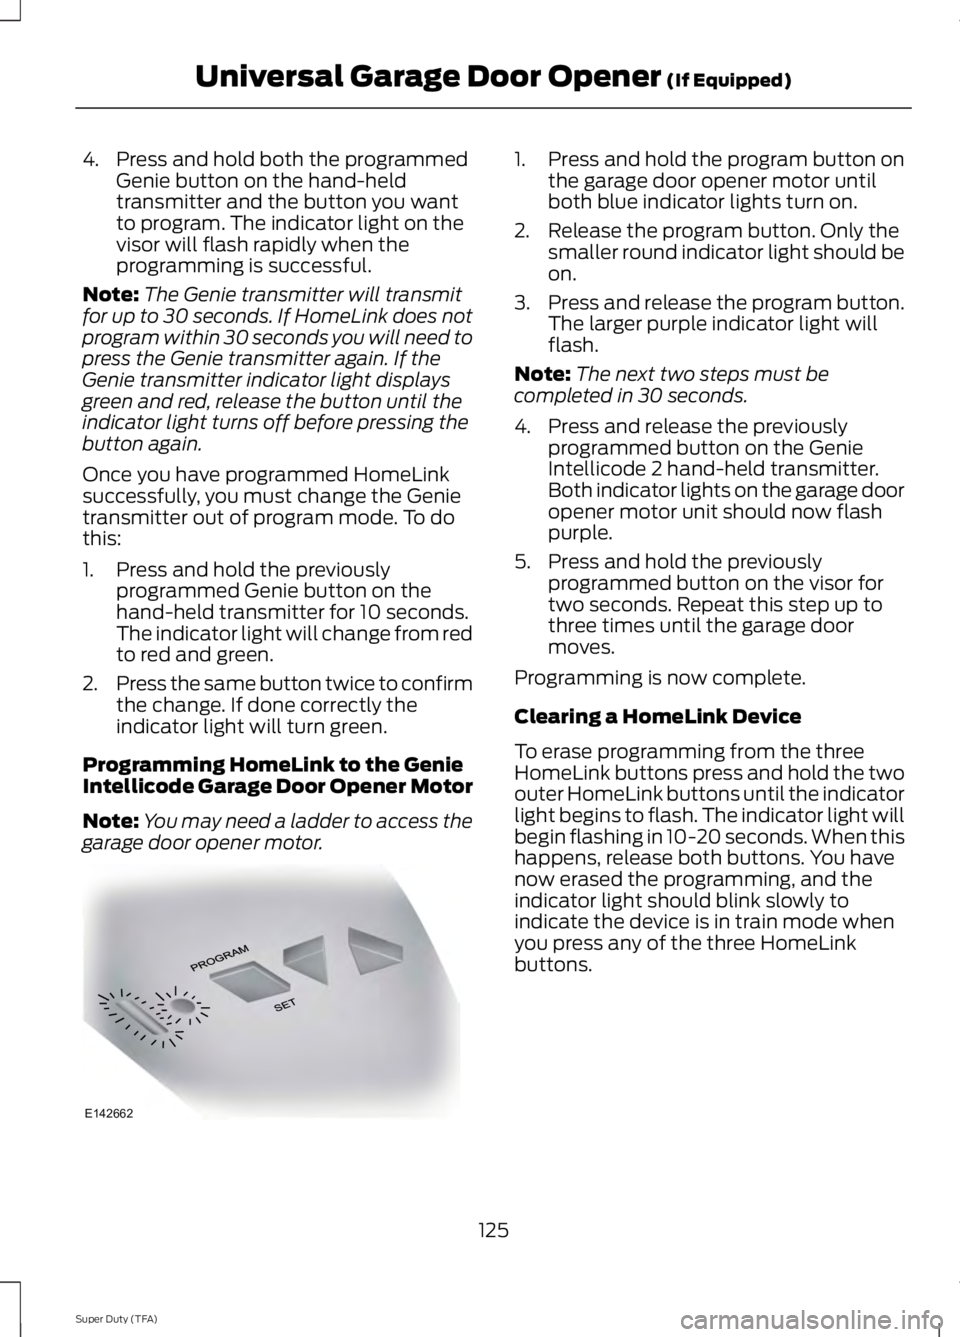
Note: You cannot erase individual buttons.1. Press and hold the outer two function
buttons simultaneously for
approximately 20 seconds until the
indicator lights above the buttons flash
rapidly.
2. When the indicator lights flash, release
the buttons. You have erased the codes
for all buttons.
Reprogramming a Single Button
To program a device to a previously trained
button, follow these steps:
1. Press and hold the desired button. Do NOT release the button. 2. The indicator light will begin to flash
after 20 seconds. Without releasing the
button, follow Step 1 in the
Programming section.
For questions or comments, contact
HomeLink at www.homelink.com or
1-800-355-3515.
Programming to a Genie Intellicode 2
Garage Door Opener
Note: You must program the Genie
Intellicode 2 transmitter to operate it with
the garage door opener.
Note: To program HomeLink to the
transmitter, you must first put the
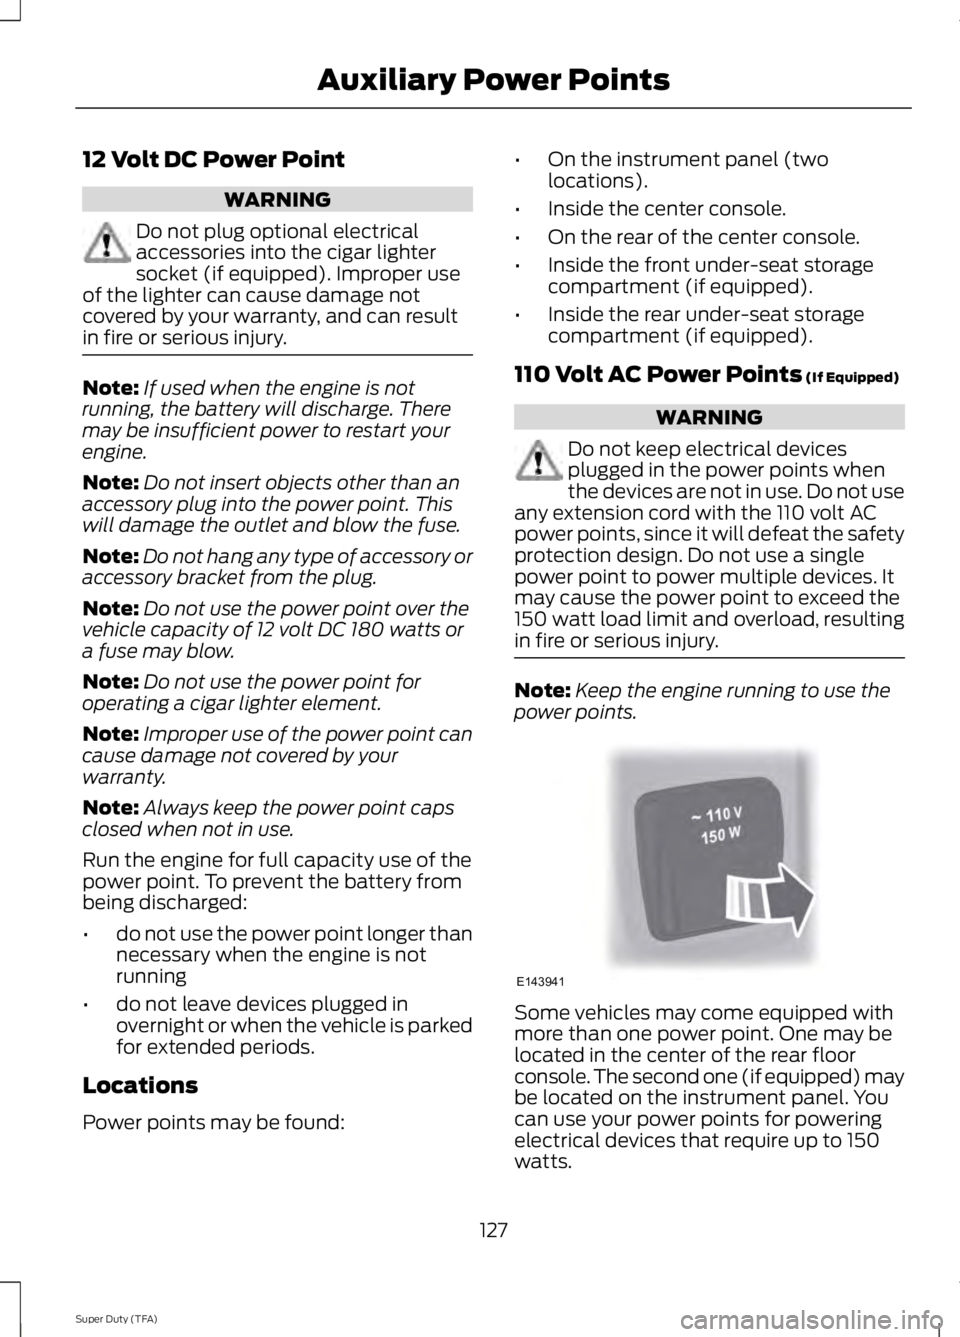
transmitter into programming mode. Red indicator light
A.
Green indicator light
B.
1. Press and hold one of the buttons on the hand-held transmitter for 10
seconds. The indicator light will change
from green to red and green.
2. Press the same button twice to confirm
the change to programming mode. If
done properly the indicator light will
appear red.
3. Hold the transmitter within 1– 3 inches
(2 –8 centimeters) of the button on the
visor you want to program.
124
Super Duty (TFA) Universal Garage Door Opener (If Equipped)E142658 E142660 BAE142661
Page 128 of 460

4. Press and hold both the programmed
Genie button on the hand-held
transmitter and the button you want
to program. The indicator light on the
visor will flash rapidly when the
programming is successful.
Note: The Genie transmitter will transmit
for up to 30 seconds. If HomeLink does not
program within 30 seconds you will need to
press the Genie transmitter again. If the
Genie transmitter indicator light displays
green and red, release the button until the
indicator light turns off before pressing the
button again.
Once you have programmed HomeLink
successfully, you must change the Genie
transmitter out of program mode. To do
this:
1. Press and hold the previously programmed Genie button on the
hand-held transmitter for 10 seconds.
The indicator light will change from red
to red and green.
2. Press the same button twice to confirm
the change. If done correctly the
indicator light will turn green.
Programming HomeLink to the Genie
Intellicode Garage Door Opener Motor
Note: You may need a ladder to access the
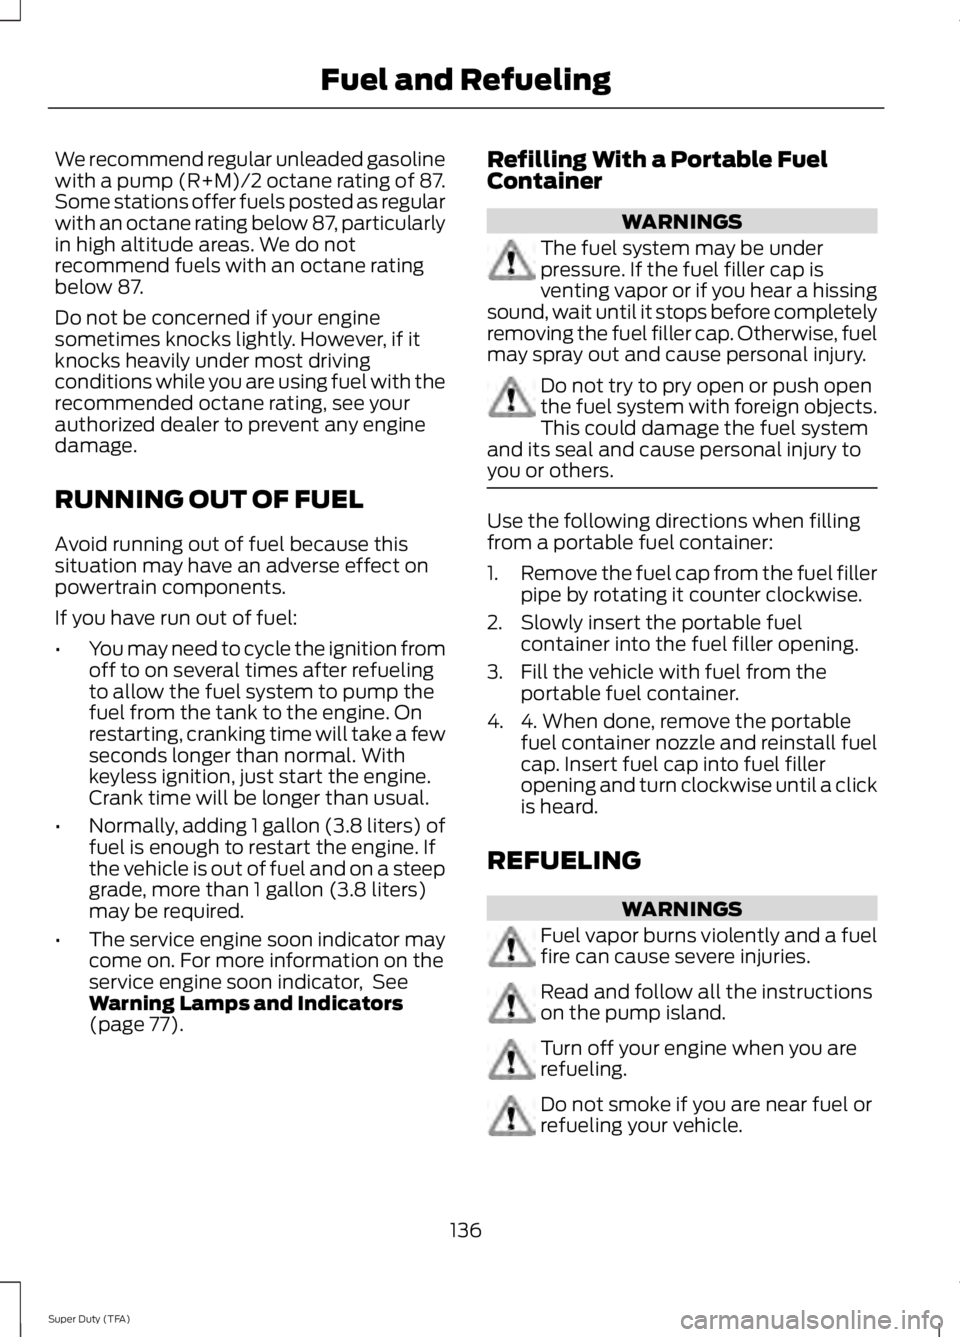
garage door opener motor. 1. Press and hold the program button on
the garage door opener motor until
both blue indicator lights turn on.
2. Release the program button. Only the smaller round indicator light should be
on.
3. Press and release the program button.
The larger purple indicator light will
flash.
Note: The next two steps must be
completed in 30 seconds.
4. Press and release the previously programmed button on the Genie
Intellicode 2 hand-held transmitter.
Both indicator lights on the garage door
opener motor unit should now flash
purple.
5. Press and hold the previously programmed button on the visor for
two seconds. Repeat this step up to
three times until the garage door
moves.
Programming is now complete.
Clearing a HomeLink Device
To erase programming from the three
HomeLink buttons press and hold the two
outer HomeLink buttons until the indicator
light begins to flash. The indicator light will
begin flashing in 10-20 seconds. When this
happens, release both buttons. You have
now erased the programming, and the
indicator light should blink slowly to
indicate the device is in train mode when
you press any of the three HomeLink
buttons.
125
Super Duty (TFA) Universal Garage Door Opener (If Equipped)E142662
Page 130 of 460

12 Volt DC Power Point
WARNING
Do not plug optional electrical
accessories into the cigar lighter
socket (if equipped). Improper use
of the lighter can cause damage not
covered by your warranty, and can result
in fire or serious injury. Note:
If used when the engine is not
running, the battery will discharge. There
may be insufficient power to restart your
engine.
Note: Do not insert objects other than an
accessory plug into the power point. This
will damage the outlet and blow the fuse.
Note: Do not hang any type of accessory or
accessory bracket from the plug.
Note: Do not use the power point over the
vehicle capacity of 12 volt DC 180 watts or
a fuse may blow.
Note: Do not use the power point for
operating a cigar lighter element.
Note: Improper use of the power point can
cause damage not covered by your
warranty.
Note: Always keep the power point caps
closed when not in use.
Run the engine for full capacity use of the
power point. To prevent the battery from
being discharged:
• do not use the power point longer than
necessary when the engine is not
running
• do not leave devices plugged in
overnight or when the vehicle is parked
for extended periods.
Locations
Power points may be found: •
On the instrument panel (two
locations).
• Inside the center console.
• On the rear of the center console.
• Inside the front under-seat storage
compartment (if equipped).
• Inside the rear under-seat storage
compartment (if equipped).
110 Volt AC Power Points (If Equipped) WARNING
Do not keep electrical devices
plugged in the power points when
the devices are not in use. Do not use
any extension cord with the 110 volt AC
power points, since it will defeat the safety
protection design. Do not use a single
power point to power multiple devices. It
may cause the power point to exceed the
150 watt load limit and overload, resulting
in fire or serious injury. Note:
Keep the engine running to use the
power points. Some vehicles may come equipped with
more than one power point. One may be
located in the center of the rear floor
console. The second one (if equipped) may
be located on the instrument panel. You
can use your power points for powering
electrical devices that require up to 150
watts.
127
Super Duty (TFA) Auxiliary Power PointsE143941
Page 131 of 460

When the indicator light, located on the
power point, is:
•
on — the power point is ready to supply
power.
• off — the power point power supply is
off; ignition is not on.
• flashing — the power point is in fault
mode.
The power point temporarily turns off
power if the 150 watt limit is exceeded. It
can also switch to a fault mode when it is
overloaded, overheated, or shorted. Unplug
your device and switch the ignition off, and
then switch the ignition back on for
overloading and shorting conditions. Let
the system cool off, and then turn the
ignition off, and then switch the ignition
back on for an overheating condition.
The power points are not designed for
electric devices such as:
• cathode ray tube type televisions
• motor loads, for example vacuum
cleaners, electric saws and other
electric power tools, or
compressor-driven refrigerators
• measuring devices which process
precise data, for example medical
equipment or measuring equipment
• other appliances requiring an extremely
stable power supply, for example
microcomputer-controlled electric
blankets or touch sensor lamps.
128
Super Duty (TFA) Auxiliary Power Points
Page 139 of 460

We recommend regular unleaded gasoline
with a pump (R+M)/2 octane rating of 87.
Some stations offer fuels posted as regular
with an octane rating below 87, particularly
in high altitude areas. We do not
recommend fuels with an octane rating
below 87.
Do not be concerned if your engine
sometimes knocks lightly. However, if it
knocks heavily under most driving
conditions while you are using fuel with the
recommended octane rating, see your
authorized dealer to prevent any engine
damage.
RUNNING OUT OF FUEL
Avoid running out of fuel because this
situation may have an adverse effect on
powertrain components.
If you have run out of fuel:
•
You may need to cycle the ignition from
off to on several times after refueling
to allow the fuel system to pump the
fuel from the tank to the engine. On
restarting, cranking time will take a few
seconds longer than normal. With
keyless ignition, just start the engine.
Crank time will be longer than usual.
• Normally, adding 1 gallon (3.8 liters) of
fuel is enough to restart the engine. If
the vehicle is out of fuel and on a steep
grade, more than 1 gallon (3.8 liters)
may be required.
• The service engine soon indicator may
come on. For more information on the
service engine soon indicator, See
Warning Lamps and Indicators
(page 77). Refilling With a Portable Fuel
Container WARNINGS
The fuel system may be under
pressure. If the fuel filler cap is
venting vapor or if you hear a hissing
sound, wait until it stops before completely
removing the fuel filler cap. Otherwise, fuel
may spray out and cause personal injury. Do not try to pry open or push open
the fuel system with foreign objects.
This could damage the fuel system
and its seal and cause personal injury to
you or others. Use the following directions when filling
from a portable fuel container:
1.
Remove the fuel cap from the fuel filler
pipe by rotating it counter clockwise.
2. Slowly insert the portable fuel container into the fuel filler opening.
3. Fill the vehicle with fuel from the portable fuel container.
4. 4. When done, remove the portable fuel container nozzle and reinstall fuel
cap. Insert fuel cap into fuel filler
opening and turn clockwise until a click
is heard.
REFUELING WARNINGS
Fuel vapor burns violently and a fuel
fire can cause severe injuries.
Read and follow all the instructions
on the pump island.
Turn off your engine when you are
refueling.
Do not smoke if you are near fuel or
refueling your vehicle.
136
Super Duty (TFA) Fuel and Refueling
Page 140 of 460

WARNINGS
Keep sparks, flames and smoking
materials away from fuel.
Stay outside your vehicle and do not
leave the fuel pump unattended
when refueling your vehicle. This is
against the law in some places. Keep children away from the fuel
pump; never let children pump fuel.
Do not use personal electronic
devices while refueling.
Use the following guidelines to avoid
electrostatic charge build-up when filling
an ungrounded fuel container:
•
Place approved fuel container on the
ground.
• Do not fill a fuel container while it is in
the vehicle (including the cargo area).
• Keep the fuel pump nozzle in contact
with the fuel container while filling.
• Do not use a device that would hold
the fuel pump handle in the fill position.
Fuel Filler Cap WARNINGS
The fuel system may be under
pressure. If you hear a hissing sound
near the fuel filler door, do not refuel
until the sound stops. Otherwise, fuel may
spray out, which could cause serious
personal injury. If you do not use the proper fuel filler
cap, excessive pressure or vacuum
in the fuel tank may damage the fuel
system or cause the fuel cap to disengage
in a collision, which may result in possible
personal injury. Note:
If you must replace the fuel filler cap,
replace it with a fuel filler cap that is
designed for your vehicle. The customer
warranty may be void for any damage to the
fuel tank or fuel system if the correct
genuine Ford, Motorcraft® or other certified
fuel filler cap is not used.
Your fuel tank filler cap has an indexed
design with a 1/4th turn on and off feature.
When fueling your vehicle:
1. Put the vehicle in P (Park).
2. Turn the engine off.
3. Carefully turn the filler cap counterclockwise until it spins off.
4. Pull to remove the cap from the fuel filler pipe.
5. To install the cap, align the tabs on the
cap with the notches on the filler pipe.
6. Turn the filler cap clockwise 1/4 of a turn clockwise until it clicks at least
once.
If the Check Fuel Cap light or a Check Fuel
Cap message appears in the instrument
cluster and stays on after you start the
engine, the fuel filler cap may not be
properly installed.
If the fuel cap light remains on, at the next
opportunity, safely pull off of the road,
remove the fuel filler cap, align the cap
properly and reinstall it. The check fuel cap
light or Check fuel cap message may not
reset immediately; it may take several
driving cycles for the indicators to turn off.
A driving cycle consists of an engine
start-up (after four or more hours with the
engine off) followed by normal city and
highway driving.
137
Super Duty (TFA) Fuel and Refueling
Page 142 of 460

•
Adding certain accessories to your
vehicle (for example bug deflectors,
rollbars/light bars, running boards, ski
racks) may reduce fuel economy.
• Using fuel blended with alcohol may
lower fuel economy.
• Fuel economy may decrease with lower
temperatures during the first 8– 10
miles (12 –16 kilometers) of driving.
• Driving on flat terrain offers improved
fuel economy as compared to driving
on hilly terrain.
• Transmissions give their best fuel
economy when operated in the top
cruise gear and with steady pressure
on the gas pedal.
• Close windows for high speed driving.
EMISSION CONTROL SYSTEM WARNINGS
Do not park, idle, or drive your vehicle
in dry grass or other dry ground cover.
The emission system heats up the
engine compartment and exhaust system,
which can start a fire. Exhaust leaks may result in entry of
harmful and potentially lethal fumes
into the passenger compartment. If
you smell exhaust fumes inside your
vehicle, have your dealer inspect your
vehicle immediately. Do not drive if you
smell exhaust fumes. Your vehicle is equipped with various
emission control components and a
catalytic converter that will enable your
vehicle to comply with applicable exhaust
emission standards. To make sure that the
catalytic converter and other emission
control components continue to work
properly:
•
Use only the specified fuel listed.
• Avoid running out of fuel. •
Do not turn off the ignition while your
vehicle is moving, especially at high
speeds.
• Have the items listed in scheduled
maintenance information performed
according to the specified schedule.
The scheduled maintenance items listed
in scheduled maintenance information are
essential to the life and performance of
your vehicle and to its emissions system.
If you use parts other than Ford, Motorcraft
or Ford-authorized parts for maintenance
replacements, or for service of
components affecting emission control,
such non-Ford parts should be the
equivalent to genuine Ford Motor Company
parts in performance and durability.
Illumination of the service engine soon
indicator, charging system warning light or
the temperature warning light, fluid leaks,
strange odors, smoke or loss of engine
power could indicate that the emission
control system is not working properly.
An improperly operating or damaged
exhaust system may allow exhaust to
enter the vehicle. Have a damaged or
improperly operating exhaust system
inspected and repaired immediately.
Do not make any unauthorized changes to
your vehicle or engine. By law, vehicle
owners and anyone who manufactures,
repairs, services, sells, leases, trades
vehicles, or supervises a fleet of vehicles
are not permitted to intentionally remove
an emission control device or prevent it
from working. Information about your
vehicle ’s emission system is on the Vehicle
Emission Control Information Decal
located on or near the engine. This decal
also lists engine displacement
Please consult your warranty information
for complete details.
139
Super Duty (TFA) Fuel and Refueling
Page 145 of 460

AUTOMATIC TRANSMISSION
WARNINGS
Always set the parking brake fully
and make sure the gearshift is
latched in P (Park). Turn the ignition
to the off position and remove the key
whenever you leave your vehicle. Do not use the tow/haul feature
when driving in icy or slippery
conditions as the increased engine
braking can cause the rear wheels to slide
and the vehicle to swing around with the
possible loss of vehicle control. Understanding the Shift Positions
of the 5–
Speed Automatic
Transmission (If Equipped) Putting your vehicle in or out of gear:
1. Fully press down the brake pedal.
2. Move the gearshift lever into the
desired gear.
3. Come to a complete stop.
4. Move the gearshift lever and securely latch it in P (Park)
P (Park)
This position locks the transmission and
prevents the rear wheels from turning. R (Reverse)
With the gearshift lever in R (Reverse), the
vehicle will move backward. Always come
to a complete stop before shifting into and
out of R (Reverse).
N (Neutral)
With the gearshift lever in N (Neutral), the
vehicle can be started and is free to roll.
Hold the brake pedal down while in this
position.
D (Overdrive) with tow/haul off
D (Overdrive) with tow/haul off is the
normal driving position for the best fuel
economy. The overdrive function allows
automatic upshifts and downshifts through
gears one through five.
D (Overdrive) with tow/haul on
The tow/haul feature improves
transmission operation when towing a
trailer or a heavy load. All transmission
gear ranges are available when using
tow/haul.
To activate tow/haul, press the
button on the end of the
gearshift lever. The TOW HAUL
indicator light will illuminate in the
instrument cluster.
142
Super Duty (TFA) TransmissionE161511
P R N D 3 2 1 E163182 E161509