2014 FORD F250 instrument cluster
[x] Cancel search: instrument clusterPage 83 of 460

Transmission Tow/Haul (If Equipped)
Illuminates when the tow/haul
feature has been activated. If the
light flashes steadily, have the
system serviced immediately, damage to
the transmission could occur.
4X2
(If Equipped) Illuminates momentarily when
two-wheel drive high is selected.
If the light fails to display when
the ignition is turned on, or remains on,
have the system serviced immediately by
your authorized dealer.
4X4 LOW
(If Equipped) Illuminates when four-wheel
drive low is engaged. If the light
fails to display when the ignition
is turned on, or remains on, have the
system serviced immediately by your
authorized dealer.
4X4 HIGH
(If Equipped) Illuminates when four-wheel
drive high is engaged. If the light
fails to display when the ignition
is turned on, or remains on, have the
system serviced immediately by your
authorized dealer.
Diesel Warning Lights
If your vehicle is equipped with a diesel
engine, it has some unique warning lights;
refer to your diesel supplement for detailed
information on their function.
Diesel exhaust fluid For more information see your
diesel supplement. Glow plug pre-heat For more information see your
diesel supplement.
Water in fuel For more information see your
diesel supplement.
AUDIBLE WARNINGS AND
INDICATORS
Headlamps On Warning Chime
Sounds when you remove the key from the
ignition and open the driver's door and you
have left the headlamps or parking lamps
on.
Key in Ignition Warning Chime
Sounds when you open the driver's door
and you have left the key in the ignition
with it in the off or accessory position.
Parking Brake On Warning Chime
Sounds when you have left the parking
brake on and drive your vehicle. If the
warning chime remains on after you have
released the parking brake, have the
system checked by your authorized dealer
immediately.
80
Super Duty (TFA) Instrument ClusterE161509 E163173 E163174 E163175 E163176
Page 95 of 460

Compass/Transmission indicator
display (if equipped)
The compass heading will display in the
upper right corner of the information
display; the transmission gear indicator
displays in the right side of the information
display when using the SelectShift
Automatic
™ transmission feature. These
displays will not be shown in all screen
modes. For example: when programming
certain vehicle features or in certain
information menus. INFORMATION MESSAGES
Note:
Depending on your vehicle options
and instrument cluster type, not all of the
messages will display or be available.
Additionally, the information display may
abbreviate or shorten certain messages.
Press the RESET button for Type 1 displays
or the OK button for Type 2 displays to
acknowledge and remove some messages
from the information display. The
information display will automatically
remove other messages after a short time.
You need to confirm certain messages
before you can access the menus.
AdvanceTrac ™ Action
Message
The system detects a condition that requires service. Havethe system checked by an authorized dealer.
SERVICE ADVAN-
CETRAC
The driver has disabled the stability control system. SeeUsing Stability Control (page 165).
ADVANCETRAC OFF
The driver has disabled the traction control system. See UsingTraction Control
(page 163).
TRACTION CONTROL
OFF
Alarm Action
Message
An unauthorized entry has triggered the alarm. See Anti-Theft Alarm
(page 59).
TO STOP ALARM
START VEHICLE
The security system has detected a fault. Have the systemchecked by an authorized dealer.
SECURITY SYSTEM
FAULT
92
Super Duty (TFA) Information Displays
Page 140 of 460

WARNINGS
Keep sparks, flames and smoking
materials away from fuel.
Stay outside your vehicle and do not
leave the fuel pump unattended
when refueling your vehicle. This is
against the law in some places. Keep children away from the fuel
pump; never let children pump fuel.
Do not use personal electronic
devices while refueling.
Use the following guidelines to avoid
electrostatic charge build-up when filling
an ungrounded fuel container:
•
Place approved fuel container on the
ground.
• Do not fill a fuel container while it is in
the vehicle (including the cargo area).
• Keep the fuel pump nozzle in contact
with the fuel container while filling.
• Do not use a device that would hold
the fuel pump handle in the fill position.
Fuel Filler Cap WARNINGS
The fuel system may be under
pressure. If you hear a hissing sound
near the fuel filler door, do not refuel
until the sound stops. Otherwise, fuel may
spray out, which could cause serious
personal injury. If you do not use the proper fuel filler
cap, excessive pressure or vacuum
in the fuel tank may damage the fuel
system or cause the fuel cap to disengage
in a collision, which may result in possible
personal injury. Note:
If you must replace the fuel filler cap,
replace it with a fuel filler cap that is
designed for your vehicle. The customer
warranty may be void for any damage to the
fuel tank or fuel system if the correct
genuine Ford, Motorcraft® or other certified
fuel filler cap is not used.
Your fuel tank filler cap has an indexed
design with a 1/4th turn on and off feature.
When fueling your vehicle:
1. Put the vehicle in P (Park).
2. Turn the engine off.
3. Carefully turn the filler cap counterclockwise until it spins off.
4. Pull to remove the cap from the fuel filler pipe.
5. To install the cap, align the tabs on the
cap with the notches on the filler pipe.
6. Turn the filler cap clockwise 1/4 of a turn clockwise until it clicks at least
once.
If the Check Fuel Cap light or a Check Fuel
Cap message appears in the instrument
cluster and stays on after you start the
engine, the fuel filler cap may not be
properly installed.
If the fuel cap light remains on, at the next
opportunity, safely pull off of the road,
remove the fuel filler cap, align the cap
properly and reinstall it. The check fuel cap
light or Check fuel cap message may not
reset immediately; it may take several
driving cycles for the indicators to turn off.
A driving cycle consists of an engine
start-up (after four or more hours with the
engine off) followed by normal city and
highway driving.
137
Super Duty (TFA) Fuel and Refueling
Page 145 of 460

AUTOMATIC TRANSMISSION
WARNINGS
Always set the parking brake fully
and make sure the gearshift is
latched in P (Park). Turn the ignition
to the off position and remove the key
whenever you leave your vehicle. Do not use the tow/haul feature
when driving in icy or slippery
conditions as the increased engine
braking can cause the rear wheels to slide
and the vehicle to swing around with the
possible loss of vehicle control. Understanding the Shift Positions
of the 5–
Speed Automatic
Transmission (If Equipped) Putting your vehicle in or out of gear:
1. Fully press down the brake pedal.
2. Move the gearshift lever into the
desired gear.
3. Come to a complete stop.
4. Move the gearshift lever and securely latch it in P (Park)
P (Park)
This position locks the transmission and
prevents the rear wheels from turning. R (Reverse)
With the gearshift lever in R (Reverse), the
vehicle will move backward. Always come
to a complete stop before shifting into and
out of R (Reverse).
N (Neutral)
With the gearshift lever in N (Neutral), the
vehicle can be started and is free to roll.
Hold the brake pedal down while in this
position.
D (Overdrive) with tow/haul off
D (Overdrive) with tow/haul off is the
normal driving position for the best fuel
economy. The overdrive function allows
automatic upshifts and downshifts through
gears one through five.
D (Overdrive) with tow/haul on
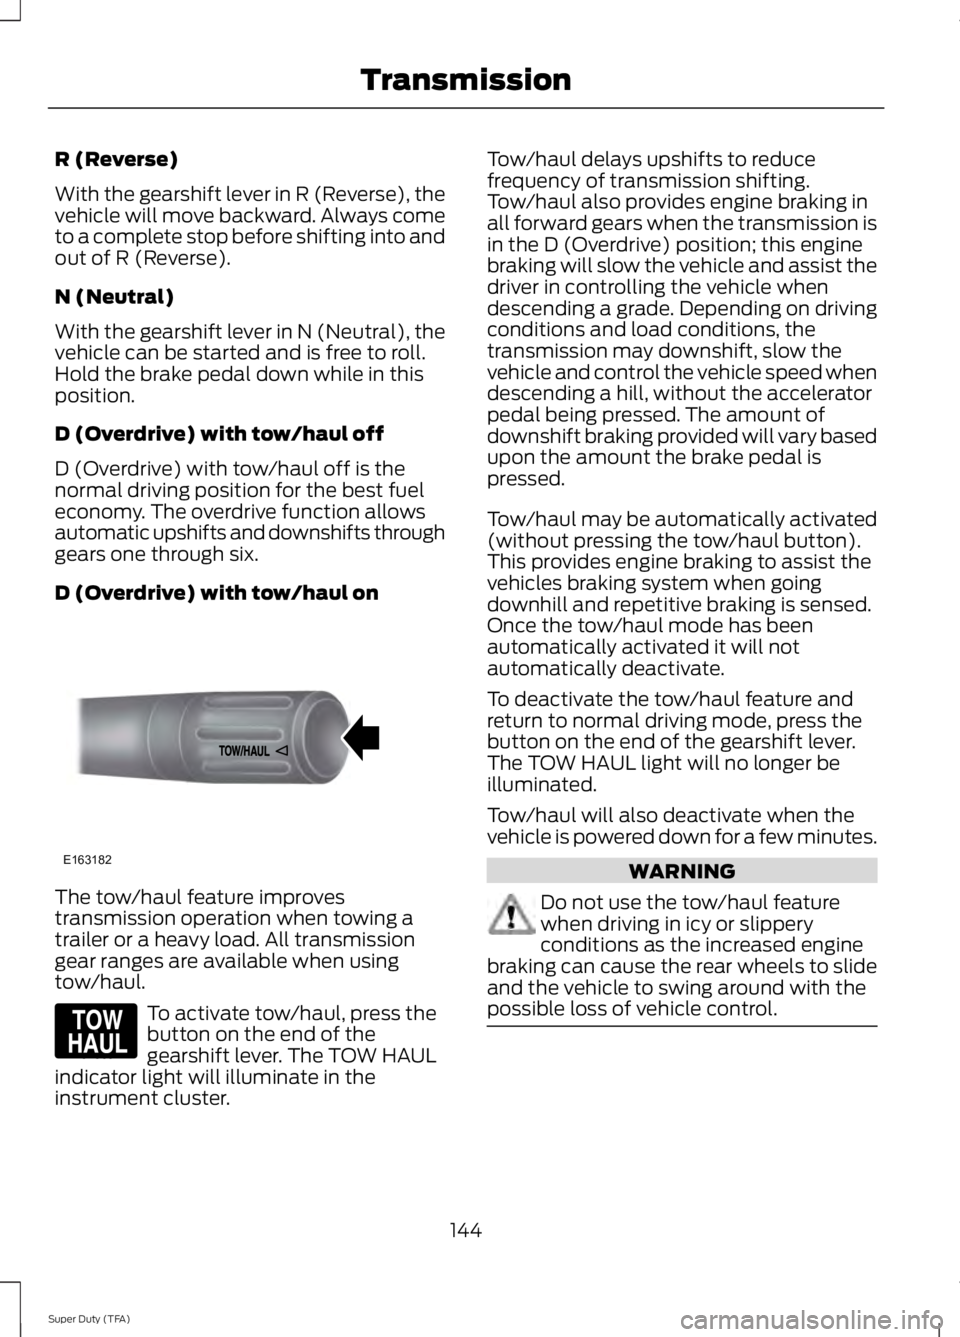
The tow/haul feature improves
transmission operation when towing a
trailer or a heavy load. All transmission
gear ranges are available when using
tow/haul.
To activate tow/haul, press the
button on the end of the
gearshift lever. The TOW HAUL
indicator light will illuminate in the
instrument cluster.
142
Super Duty (TFA) TransmissionE161511
P R N D 3 2 1 E163182 E161509
Page 147 of 460

R (Reverse)
With the gearshift lever in R (Reverse), the
vehicle will move backward. Always come
to a complete stop before shifting into and
out of R (Reverse).
N (Neutral)
With the gearshift lever in N (Neutral), the
vehicle can be started and is free to roll.
Hold the brake pedal down while in this
position.
D (Overdrive) with tow/haul off
D (Overdrive) with tow/haul off is the
normal driving position for the best fuel
economy. The overdrive function allows
automatic upshifts and downshifts through
gears one through six.
D (Overdrive) with tow/haul on
The tow/haul feature improves
transmission operation when towing a
trailer or a heavy load. All transmission
gear ranges are available when using
tow/haul.
To activate tow/haul, press the
button on the end of the
gearshift lever. The TOW HAUL
indicator light will illuminate in the
instrument cluster. Tow/haul delays upshifts to reduce
frequency of transmission shifting.
Tow/haul also provides engine braking in
all forward gears when the transmission is
in the D (Overdrive) position; this engine
braking will slow the vehicle and assist the
driver in controlling the vehicle when
descending a grade. Depending on driving
conditions and load conditions, the
transmission may downshift, slow the
vehicle and control the vehicle speed when
descending a hill, without the accelerator
pedal being pressed. The amount of
downshift braking provided will vary based
upon the amount the brake pedal is
pressed.
Tow/haul may be automatically activated
(without pressing the tow/haul button).
This provides engine braking to assist the
vehicles braking system when going
downhill and repetitive braking is sensed.
Once the tow/haul mode has been
automatically activated it will not
automatically deactivate.
To deactivate the tow/haul feature and
return to normal driving mode, press the
button on the end of the gearshift lever.
The TOW HAUL light will no longer be
illuminated.
Tow/haul will also deactivate when the
vehicle is powered down for a few minutes.
WARNING
Do not use the tow/haul feature
when driving in icy or slippery
conditions as the increased engine
braking can cause the rear wheels to slide
and the vehicle to swing around with the
possible loss of vehicle control. 144
Super Duty (TFA) TransmissionE163182 E161509
Page 148 of 460

M (Manual) without Overdrive
With the gearshift lever in M (Manual), the
driver can change gears up or down as
desired. This is called SelectShift
Automatic
™ transmission (SST) mode.
By moving the gearshift lever from drive
position D (Overdrive) to M (Manual) you
now have control of selecting the gear you
desire using buttons on the shift lever.
To return to normal D (Overdrive) position,
move the shift lever back from M to D.
The transmission will operate in gears one
through six.
2 (Second)
Use 2 (Second) to start-up on slippery
roads or to provide additional engine
braking on downgrades.
1 (First)
• Provides maximum engine braking
• Allows upshifts by moving gearshift
lever
• The transmission will not downshift
into 1 (First) at high speeds; it will
downshift to a lower gear and then
shift into 1 (First) when the vehicle
reaches slower speeds.
Forced downshifts
• Allowed in D (Overdrive) with the
tow/haul feature on or off
• Press the accelerator to the floor
• Allows transmission to select an
appropriate gear
Understanding your SelectShift
Automatic® transmission (If Equipped)
Your vehicle is equipped with a SelectShift
Automatic transmission gearshift lever.
SelectShift Automatic transmission gives
you the ability to change gears up or down
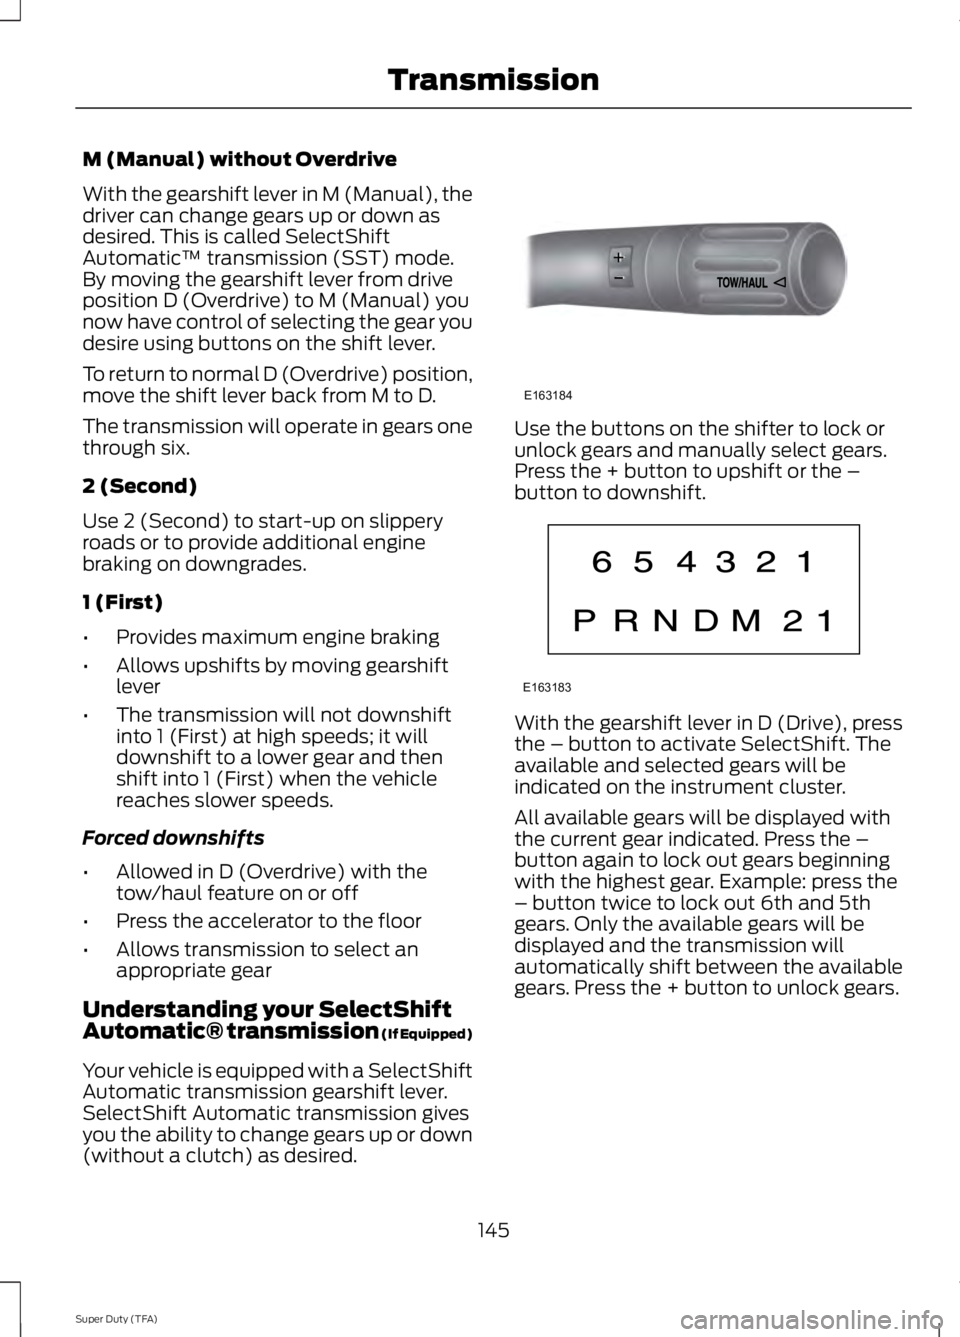
(without a clutch) as desired. Use the buttons on the shifter to lock or
unlock gears and manually select gears.
Press the + button to upshift or the –
button to downshift.
With the gearshift lever in D (Drive), press
the – button to activate SelectShift. The
available and selected gears will be
indicated on the instrument cluster.
All available gears will be displayed with
the current gear indicated. Press the –
button again to lock out gears beginning
with the highest gear. Example: press the
– button twice to lock out 6th and 5th
gears. Only the available gears will be
displayed and the transmission will
automatically shift between the available
gears. Press the + button to unlock gears.
145
Super Duty (TFA) TransmissionE163184 E163183
Page 164 of 460

PARKING BRAKE
WARNING
Always set the parking brake fully
and make sure the transmission
selector lever is placed in position P.
Failure to set the parking brake and engage
park could result in vehicle roll-away,
property damage or bodily injury. Turn the
ignition to the lock position and remove
the key whenever you leave your vehicle. Apply the parking brake whenever your
vehicle is parked. Press the pedal
downward to set the parking brake. The
brake warning lamp in the instrument
cluster will illuminate and remains
illuminated until the parking brake is
released.
To release, pull the brake release lever
located at the lower left side of the
instrument panel.
If you are parking your vehicle on a grade
or with a trailer, press and hold the brake
pedal down, then set the parking brake.
There may be a little vehicle movement as
the parking brake sets to hold the vehicle's
weight. This is normal and should be no
reason for concern. If needed, press and
hold the service brake pedal down, then
try reapplying the parking brake. Chock the
wheels if required. If the parking brake
cannot hold the weight of the vehicle, the
parking brake may need to be serviced or
the vehicle may be overloaded.
HILL START ASSIST
WARNINGS
The system does not replace the
parking brake. When you leave your
vehicle, always apply the parking
brake and put the transmission in park (P). WARNINGS
You must remain in your vehicle once
you have activated the system.
During all times, you are responsible
for controlling your vehicle,
supervising the system and
intervening, if required. If the engine is revved excessively, or
if a malfunction is detected, the
system will be deactivated.
The system makes it easier to pull away
when your vehicle is on a slope without the
need to use the parking brake.
When the system is active, your vehicle will
remain stationary on the slope for two to
three seconds after you release the brake
pedal. This allows you time to move your
foot from the brake to the accelerator
pedal. The brakes are released
automatically once the engine has
developed sufficient drive to prevent your
vehicle from rolling down the slope. This
is an advantage when pulling away on a
slope, (for example from a car park ramp,
traffic lights or when reversing uphill into
a parking space).
The system will activate automatically on
any slope that will cause significant vehicle
rollback.
Using Hill Start Assist
1. Press the brake pedal to bring your
vehicle to a complete standstill. Keep
the brake pedal pressed.
2. If the sensors detect that your vehicle is on a slope, the system will activate
automatically.
3. When you remove your foot from the brake pedal, your vehicle will remain
on the slope without rolling away for
about two or three seconds. This hold
time will automatically be extended if
you are in the process of driving off.
161
Super Duty (TFA) Brakes
Page 171 of 460

PRINCIPLE OF OPERATION
WARNINGS
Hill descent control cannot control
descent in all surface conditions and
circumstances, such as ice or
extremely steep grades. Hill descent
control is a driver assist system and cannot
substitute for good judgment by the driver.
Failure to do so may result in loss of vehicle
control, crash or serious injury. Hill descent control does not provide
hill hold at zero miles per hour (0
kilometers per hour). When stopped,
the parking brake must be applied or the
vehicle must be placed in P (Park) or it
may roll away. Hill descent control allows the driver to set
and maintain vehicle speed while
descending steep grades in various surface
conditions.
Hill descent control can maintain vehicle
speeds on downhill grades between 2 mph
(3 km/h) and 12 mph (20 km/h). Above 20
mph (32 km/h), the system remains
armed, but descent speed cannot be set
or maintained.
Hill descent control requires a cooling
down interval after a period of sustained
use. The amount of time that the feature
can remain active before cooling varies
with conditions. The system will provide a
warning in the message center and a chime
will sound when the system is about to
disengage for cooling. At this time,
manually apply the brakes as needed to
maintain descent speed. USING HILL DESCENT
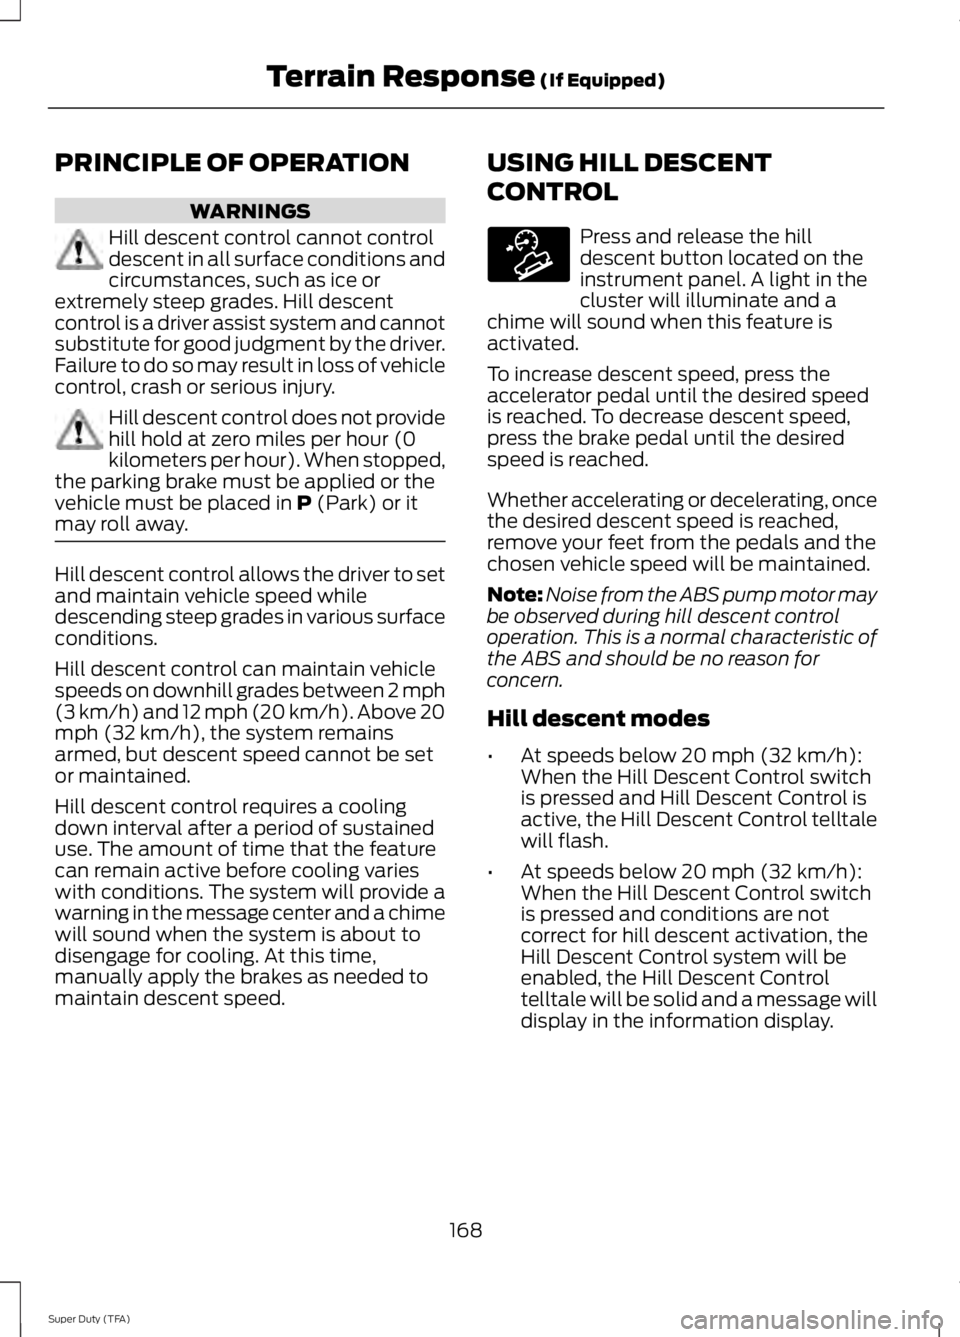
CONTROL Press and release the hill
descent button located on the
instrument panel. A light in the
cluster will illuminate and a
chime will sound when this feature is
activated.
To increase descent speed, press the
accelerator pedal until the desired speed
is reached. To decrease descent speed,
press the brake pedal until the desired
speed is reached.
Whether accelerating or decelerating, once
the desired descent speed is reached,
remove your feet from the pedals and the
chosen vehicle speed will be maintained.
Note: Noise from the ABS pump motor may
be observed during hill descent control
operation. This is a normal characteristic of
the ABS and should be no reason for
concern.
Hill descent modes
• At speeds below 20 mph (32 km/h):
When the Hill Descent Control switch
is pressed and Hill Descent Control is
active, the Hill Descent Control telltale
will flash.
• At speeds below 20 mph (32 km/h):
When the Hill Descent Control switch
is pressed and conditions are not
correct for hill descent activation, the
Hill Descent Control system will be
enabled, the Hill Descent Control
telltale will be solid and a message will
display in the information display.
168
Super Duty (TFA) Terrain Response
(If Equipped)E163957