2014 FORD EXPLORER reset
[x] Cancel search: resetPage 129 of 586

•Engine coolant temperature gauge: Indicates engine coolant
temperature. At normal operating temperature, the level indicator will
be in the normal range. If the engine coolant temperature exceeds the
normal range, stop the vehicle as soon as safely possible, switch off
the engine and let the engine cool.
•Intelligent 4WD (if equipped): displays power distribution between the
front and rear wheels. More power to either front or rear wheels will
be displayed by more area filled in. Also displays the currently
selected terrain management mode.
Trip1&2
Choose between the standard or enhanced trip display.
Trip1&2
Trip1&2Trip distance
Average fuel economy
Elapsed trip time
Hold OK to Reset
Estimated amount of fuel consumed
Total odometer (lower left corner)
Press and hold OK to reset the currently displayed trip information.
•Trip distance — shows the accumulated trip distance.
•Elapsed trip time— timer stops when the vehicle is turned off and
restarts when the vehicle is restarted.
•Average fuel economy — shows the average fuel economy for a given
trip.
128Information Displays
2014 Explorer(exp)
Owners Guide gf, 1st Printing, April 2013
USA(fus)
Page 130 of 586

Fuel Economy
Use the left/right arrow buttons to choose the desired fuel economy
display.
Fuel Economy
Fuel EconomyInst Fuel
EconomyXX. Min Fuel
History
Instantaneous fuel usage X
Fuel usage over a 30 minute time span X
Average fuel economy Always Present
XXX mi (km) to empty Always Present
Total odometer (lower left corner)
Press and hold OK to reset the currently displayed fuel usage
information.
•Inst. Fuel Economy: This display shows a visual graph of your
instantaneous fuel economy.
•XX. Min Fuel History: This display shows a bar chart of your fuel
history.
Driver Assist
In this mode, you can configure different driver assist setting choices.
Note:Some items are optional and may not appear.
Driver Assist
Traction Control — check enabled (default) / uncheck disabled
Blindspot — check enabled (default) / uncheck disabled
Collision Warning Sensitivity High / Normal / Low
Cross Traffic — check enabled (default) / uncheck disabled
Cruise Control Adaptive or Normal
Driver Alert — check enabled / uncheck disabled
Front Park Aid — check enabled (default) / uncheck disabled
Lane Keeping Mode Alert / Aid / Both
Intensity High / Normal / Low
Rear Park Aid — check enabled (default) / uncheck disabled
Trailer Sway — check enabled (default) / uncheck disabled
Information Displays129
2014 Explorer(exp)
Owners Guide gf, 1st Printing, April 2013
USA(fus)
Page 131 of 586

Settings
In this mode, you can configure different driver setting choices.
Note:Some items are optional and may not appear.
Settings
Vehicle DTE Calculation Normal / Towing
Easy Entry/Exit — check enabled / uncheck disabled
Lighting Auto highbeam On / Off
Autolamp Delay Off or number
of seconds
Locks Autolock On / Off
Autounlock On / Off
Remote Unlocking All doors /
Driver’s door
Oil Life ResetPercent Oil Life XXX %
Hold OK to Reset
Power Liftgate Enabled or Disabled
Remote StartClimate Control
(using this feature
allows you to select
different climate
control modes when
the vehicle is
started using the
remote start
feature)Auto / Last
Settings
Seats and Wheel or
SeatsAuto / Off
Duration5/10
/15 minutes
SystemEnable /
Disable
Windows Remote Open or Close
WipersCourtesy Wipe On / Off
Rain Sensing On / Off
130Information Displays
2014 Explorer(exp)
Owners Guide gf, 1st Printing, April 2013
USA(fus)
Page 158 of 586

Second-row center seat head
restraint (if equipped)
The head restraints consist of:
A. Energy absorbing head restraint
B. Steel stems
C. Guide sleeve adjust and release
button
D. Guide sleeve unlock and remove
button
•Raise: Pull up on the head restraint (A).
•Lower: Press and hold the guide sleeve adjust and release button (C)
and push down on the head restraint (A).
•Remove: Pull up the head restraint until it reaches the highest
adjustment position and then press and hold both the adjust and
release button (C) and the unlock and remove button (D), then pull
up on the head restraint.
•Reinstall: Align the steel stems into the guide sleeves and push the
head restraint down until it locks.
Second-row outboard seat head
restraints
The head restraints consist of:
A. Energy absorbing head restraint
B. Steel stems
C. Guide sleeve unlock and remove
buttons
D. Fold strap
•Fold: Pull the fold strap (D). Pull it back up to reset.
•Remove: Fold the head restraint. Press and hold both of the unlock
and remove buttons (C), then pull up on the head restraint.
•Reinstall: Align the steel stems into the guide sleeves and push the
head restraint down until it locks.
D
B
A
B
C
C
B
AD
Seats157
2014 Explorer(exp)
Owners Guide gf, 1st Printing, April 2013
USA(fus)
Page 159 of 586

Third-row head restraints
The head restraints consist of:
A. Energy absorbing head restraint
B. Steel stems
C. Fold strap
Fold: Pull the fold strap (C). Pull it back up to reset.
Note:Press the stow or fold button on the power folding seats to
automatically fold the head restraint.
Tilting Head Restraints (If Equipped)
The front head restraints may have a tilting feature for extra comfort.
To tilt the head restraint, do the following:
1. Adjust the seat back to an upright driving or
riding position.
2. Tilt the head restraint forward by gently pulling
the top of the head restraint.
Once it is in its forward-most position, tilt it forward once more to
release it to the upright position.
Note:Do not attempt to force the head restraint backward after it is
tilted. Instead, continue tilting it forward until the head restraint releases
to the upright position.
158Seats
2014 Explorer(exp)
Owners Guide gf, 1st Printing, April 2013
USA(fus)
Page 177 of 586

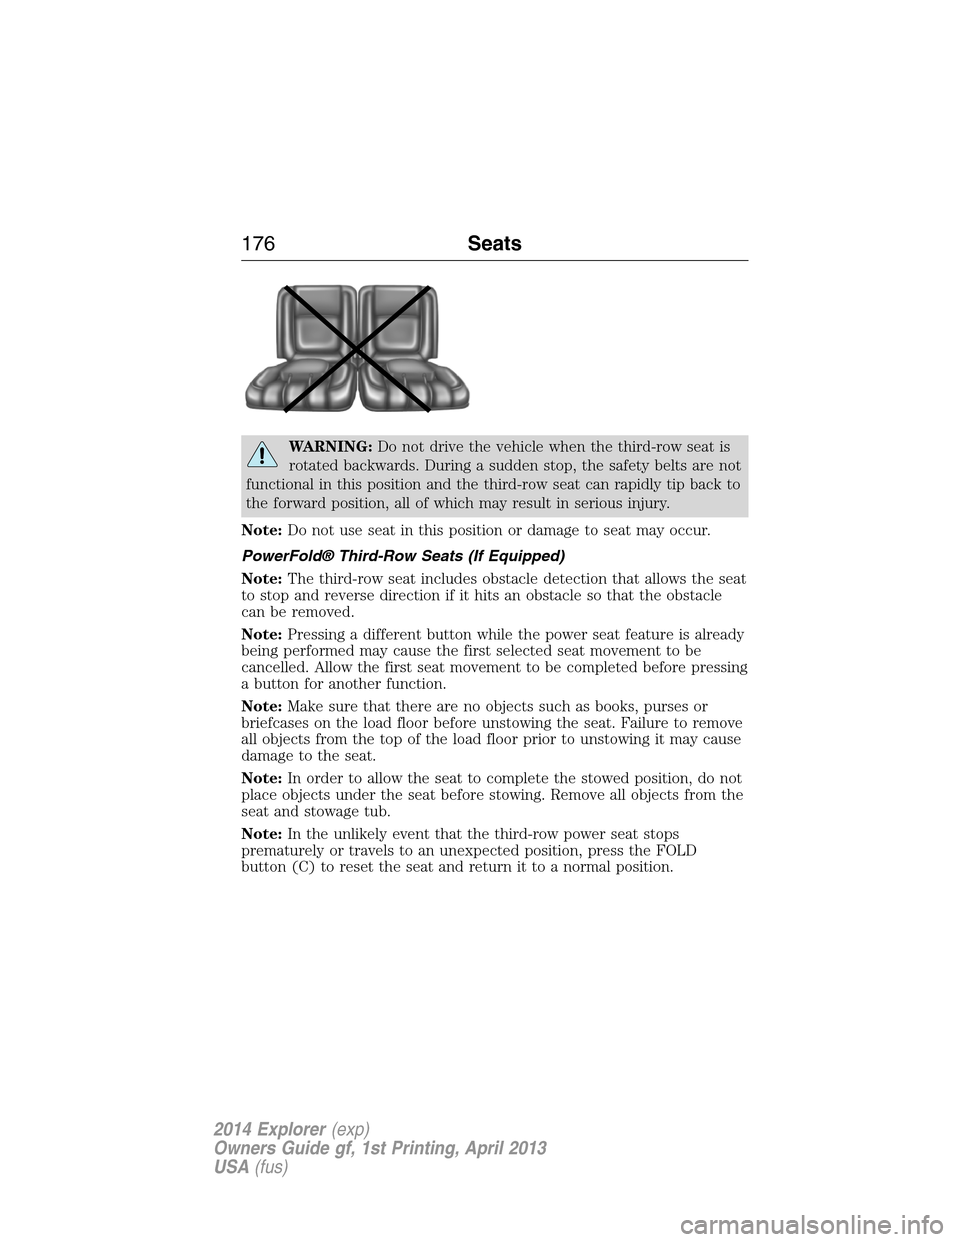
WARNING:Do not drive the vehicle when the third-row seat is
rotated backwards. During a sudden stop, the safety belts are not
functional in this position and the third-row seat can rapidly tip back to
the forward position, all of which may result in serious injury.
Note:Do not use seat in this position or damage to seat may occur.
PowerFold® Third-Row Seats (If Equipped)
Note:The third-row seat includes obstacle detection that allows the seat
to stop and reverse direction if it hits an obstacle so that the obstacle
can be removed.
Note:Pressing a different button while the power seat feature is already
being performed may cause the first selected seat movement to be
cancelled. Allow the first seat movement to be completed before pressing
a button for another function.
Note:Make sure that there are no objects such as books, purses or
briefcases on the load floor before unstowing the seat. Failure to remove
all objects from the top of the load floor prior to unstowing it may cause
damage to the seat.
Note:In order to allow the seat to complete the stowed position, do not
place objects under the seat before stowing. Remove all objects from the
seat and stowage tub.
Note:In the unlikely event that the third-row power seat stops
prematurely or travels to an unexpected position, press the FOLD
button (C) to reset the seat and return it to a normal position.
176Seats
2014 Explorer(exp)
Owners Guide gf, 1st Printing, April 2013
USA(fus)
Page 202 of 586

If this action corrects the problem, the message may not reset
immediately. It may take several driving cycles for the message to turn
off. A driving cycle consists of an engine start-up (after four or more
hours with the engine off) followed by city or highway driving.
Continuing to drive with the message on may cause the service engine
soon lamp to turn on as well.
FUEL CONSUMPTION
Filling the Tank
The advertised capacity is the indicated capacity and the empty reserve
combined. Indicated capacity is the difference in the amount of fuel in a
full tank and a tank when the fuel gauge indicates empty. Empty reserve
is the amount of fuel in the tank after the fuel gauge indicates empty.
Note:The amount of usable fuel in the empty reserve varies and should
not be relied upon to increase driving range. When refueling your vehicle
after the fuel gauge indicates empty, you might not be able to refuel the
full amount of the advertised capacity of the fuel tank due to the empty
reserve still present in the tank.
For consistent results when filling the fuel tank:
•Turn the ignition off before fueling; an inaccurate reading results if the
engine is left running.
•Use the same fill rate (low–medium–high) each time the tank is filled.
•Allow no more than two automatic click–offs when filling.
Results are most accurate when the filling method is consistent.
Calculating Fuel Economy
Do not measure fuel economy during the first 1000 miles
(1600 kilometers) of driving (this is your engine’s break-in period); a
more accurate measurement is obtained after 2000 miles–3000 miles
(3200 kilometers–4800 kilometers). Also, fuel expense, frequency of
fill-ups or fuel gauge readings are not accurate ways to measure fuel
economy.
1. Fill the fuel tank completely and record the initial odometer reading.
2. Each time you fill the tank, record the amount of fuel added.
3. After at least three to five tank fill-ups, fill the fuel tank and record
the current odometer reading.
4. Subtract your initial odometer reading from the current odometer
reading.
Fuel and Refueling201
2014 Explorer(exp)
Owners Guide gf, 1st Printing, April 2013
USA(fus)
Page 240 of 586

Visual Park Aid Alert
Note:Visual park alert is only available when the transmission is in R
(Reverse).
Note:The reverse sensing system is not effective at speeds above 3 mph
(5 km/h) and may not detect certain angular or moving objects.
The visual park aid alert allows the driver to view the area that is being
detected by the reverse sensing system. The system uses red, yellow and
green highlights which appear on top of the video image when an object
is detected by the reverse sensing system. The alert highlights the
closest object detected. The reverse sensing alert can be disabled and if
visual park aid alert is enabled, highlighted areas are still displayed.
Selectable settings for this feature are ON and OFF.
Manual Zoom
WARNING:When manual zoom is on, the full area behind the
vehicle is not shown. Be aware of your surroundings when using
the manual zoom feature.
Note:Manual zoom is only available when the transmission is in R
(Reverse).
Note:When manual zoom is enabled, only the centerline is shown.
Allows the driver to get a closer view of an object behind the vehicle.
The zoomed image keeps the bumper in the image to provide a
reference. The zoom is only active while the transmission is in R
(Reverse), When the transmission is shifted out of R (Reverse), the
feature automatically turns off and must be reset when it is used again.
Selectable settings for this feature are OFF, Level 1, Level 2 or Level 3.
Press the up and down arrows to change the view. The selection level
appears between the buttons (i.e. Level 1). The default setting for the
manual zoom is OFF.
Rear Camera Delay
When shifting the transmission out of R (Reverse) and into any gear
other than P (Park), the camera image remains in the display until the
vehicle speed reaches 6 mph (10 km/h). This occurs when the rear
camera delay feature is on, or until a radio button is selected.
Selectable settings for this feature are ON and OFF. The default setting
for the rear camera delay is OFF.
Parking Aids239
2014 Explorer(exp)
Owners Guide gf, 1st Printing, April 2013
USA(fus)