Page 267 of 586
CARGO NETS (IF EQUIPPED)
WARNING:This net is not designed to restrain objects during a
collision or heavy braking.
The cargo net secures lightweight
objects in the cargo area. Attach the
net to the loops and anchors
provided.
ROOF RACKS AND LOAD CARRIERS (IF EQUIPPED)
WARNING:When loading the roof racks, we recommend you
evenly distribute the load, as well as maintain a low center of
gravity. Loaded vehicles, with higher centers of gravity, may handle
differently than unloaded vehicles. Take extra precautions, such as
slower speeds and increased stopping distance, when driving a heavily
loaded vehicle.
Note:The maximum recommended load, evenly distributed on the
crossbars, is 100 pounds (45 kilograms).
Note:Never place loads directly on the roof panel. The roof panel is not
designed to directly carry a load.
266Load Carrying
2014 Explorer(exp)
Owners Guide gf, 1st Printing, April 2013
USA(fus)
Page 276 of 586

TOWING A TRAILER
WARNING:Do not exceed the GVWR or the GAWR specified on
the certification label.
WARNING:Towing trailers beyond the maximum recommended
gross trailer weight exceeds the limit of your vehicle and could
result in engine damage, transmission damage, structural damage, loss
of vehicle control, vehicle rollover and personal injury.
Note:For information on electrical items such as fuses or relays, see the
Fuseschapter.
Your vehicle’s load capacity designation is by weight, not by volume, so
you cannot necessarily use all available space when loading a vehicle.
Towing a trailer places an extra load on your vehicle’s engine,
transmission, axle, brakes, tires and suspension. Inspect these
components periodically during, and after, any towing operation.
Load Placement
To help minimize how trailer movement affects your vehicle when
driving:
•Load the heaviest items closest to the trailer floor.
•Load the heaviest items centered between the left and right side
trailer tires.
•Load the heaviest items above the trailer axles or just slightly forward
toward the trailer tongue. Do not allow the final trailer tongue weight
to go above or below 10–15% of the loaded trailer weight.
•Select a tow bar with the correct rise or drop. When both the loaded
vehicle and trailer are connected, the trailer frame should be level, or
slightly angled down toward your vehicle, when viewed from the side.
When driving with a trailer or payload, a slight takeoff vibration or
shudder may be present due to the increased payload weight. You can
find more information about proper trailer loading and setting your
vehicle up for towing underLoad limitin theLoad Carryingchapter
and in theRV & Trailer Towing Guide,available at an authorized
dealer.
Towing275
2014 Explorer(exp)
Owners Guide gf, 1st Printing, April 2013
USA(fus)
Page 277 of 586

TRAILER SWAY CONTROL (IF EQUIPPED)
WARNING:Turning off trailer sway control increases the risk of
loss of vehicle control, serious injury or death. Ford does not
recommend disabling this feature except in situations where speed
reduction may be detrimental (such as hill climbing), the driver has
significant trailer towing experience, and can control trailer sway and
maintain safe operation.
Note:This feature does not prevent trailer sway, but reduces it once it
begins.
Note:This feature cannot stop all trailers from swaying.
Note:In some cases, if vehicle speed is too high, the system may turn
on multiple times, gradually reducing vehicle speed.
This feature applies your vehicle brakes at individual wheels and, if
necessary, reduces engine power. If the trailer begins to sway, the
stability control light flashes. The first thing to do is slow your vehicle
down, then pull safely to the side of the road and check for proper
tongue load and trailer load distribution. See theLoad Carryingchapter
for specific loading information.
RECOMMENDED TOWING WEIGHTS
Note:Do not exceed the trailer weight for your vehicle configuration
listed in the chart below.
Note:Make sure to take into consideration trailer frontal area. Do not
exceed:
•20 feet
2(1.86 meters2) trailer frontal area if your vehicle can tow a
Class I trailer.
•40 feet
2(3.72 meters2) trailer frontal area if your vehicle can tow a
Class III trailer.
Note:For high altitude operation, reduce the gross combined weight by
2% per 1000 feet (300 meters) starting at the 1000 foot (300 meter)
elevation point.
Note:Certain states require electric trailer brakes for trailers over a
specified weight. Be sure to check state regulations for this specified
weight. The maximum trailer weights listed may be limited to this
specified weight, as your vehicle’s electrical system may not include the
wiring connector needed to activate electric trailer brakes.
Your vehicle may tow a Class I or III trailer provided the maximum trailer
weight is less than or equal to the maximum trailer weight listed for your
vehicle configuration on the following chart.
276Towing
2014 Explorer(exp)
Owners Guide gf, 1st Printing, April 2013
USA(fus)
Page 279 of 586

Trailer Towing Connector (Vehicles with a Trailer Towing Package
and 7–Pin Connector)
When attaching the trailer wiring connector to
your vehicle, only use a proper fitting connector
that works with the vehicle and trailer functions.
If your vehicle has a trailer towing package, it may
have a 7–pin connector. Some connectors may
have the SAE J2863 logo, which confirms that it is
the proper wiring connector and works correctly
with your vehicle.
Color Function
1. Yellow Left turn signal and stop lamp
2. White Ground (-)
3. Blue Electric brakes
4. Green Right turn signal and stop lamp
5. Orange Battery (+)
6. Brown Running lights
7. Grey Reverse lights
Trailer Hitch Cover
Your vehicle is equipped with a removable trailer hitch trim cover.
To remove the trim cover:
1. Loosen the two
1�4-turn fasteners
(A) in the bottom of the cover by
turning them counterclockwise. Pull
the cover rearward to remove it.
The fasteners remain attached to
the cover.
AA
278Towing
2014 Explorer(exp)
Owners Guide gf, 1st Printing, April 2013
USA(fus)
Page 281 of 586

Safety Chains
Note:Never attach safety chains to the bumper.
Always connect the safety chains to the hook retainers of your vehicle
hitch.
To connect the safety chains, cross them under the trailer tongue and
allow enough slack for turning tight corners. Do not allow the chains to
drag on the ground.
Trailer Brakes
WARNING:Do not connect a trailer’s hydraulic brake system
directly to your vehicle’s brake system. Your vehicle may not have
enough braking power and your chances of having a collision greatly
increase.
Electric brakes and manual, automatic or surge-type trailer brakes are
safe if you install them properly and adjust them to the manufacturer’s
specifications. The trailer brakes must meet local and federal regulations.
The rating for the tow vehicle’s braking system operation is at
the gross vehicle weight rating, not the gross combined weight
rating.
Separate functioning brake systems are required for safe control
of towed vehicles and trailers weighing more than 1500 pounds
(680 kilograms) when loaded.
Trailer Lamps
WARNING:Never connect any trailer lamp wiring to the
vehicle’s tail lamp wiring; this may damage the electrical system
resulting in a fire. Contact an authorized dealer as soon as possible for
assistance in proper trailer tow wiring installation. Additional electrical
equipment may be required.
Trailer lamps are required on most towed vehicles. Make sure all running
lights, brake lights, turn signals and hazard lights are working.
Before Towing a Trailer
Practice turning, stopping and backing up to get the feel of your
vehicle-trailer combination before starting on a trip. When turning, make
wider turns so the trailer wheels clear curbs and other obstacles.
280Towing
2014 Explorer(exp)
Owners Guide gf, 1st Printing, April 2013
USA(fus)
Page 287 of 586

•Add particular accessories to your vehicle (e.g.; bug deflectors,
rollbars or light bars, running boards, ski racks).
•Drive with the wheels out of alignment.
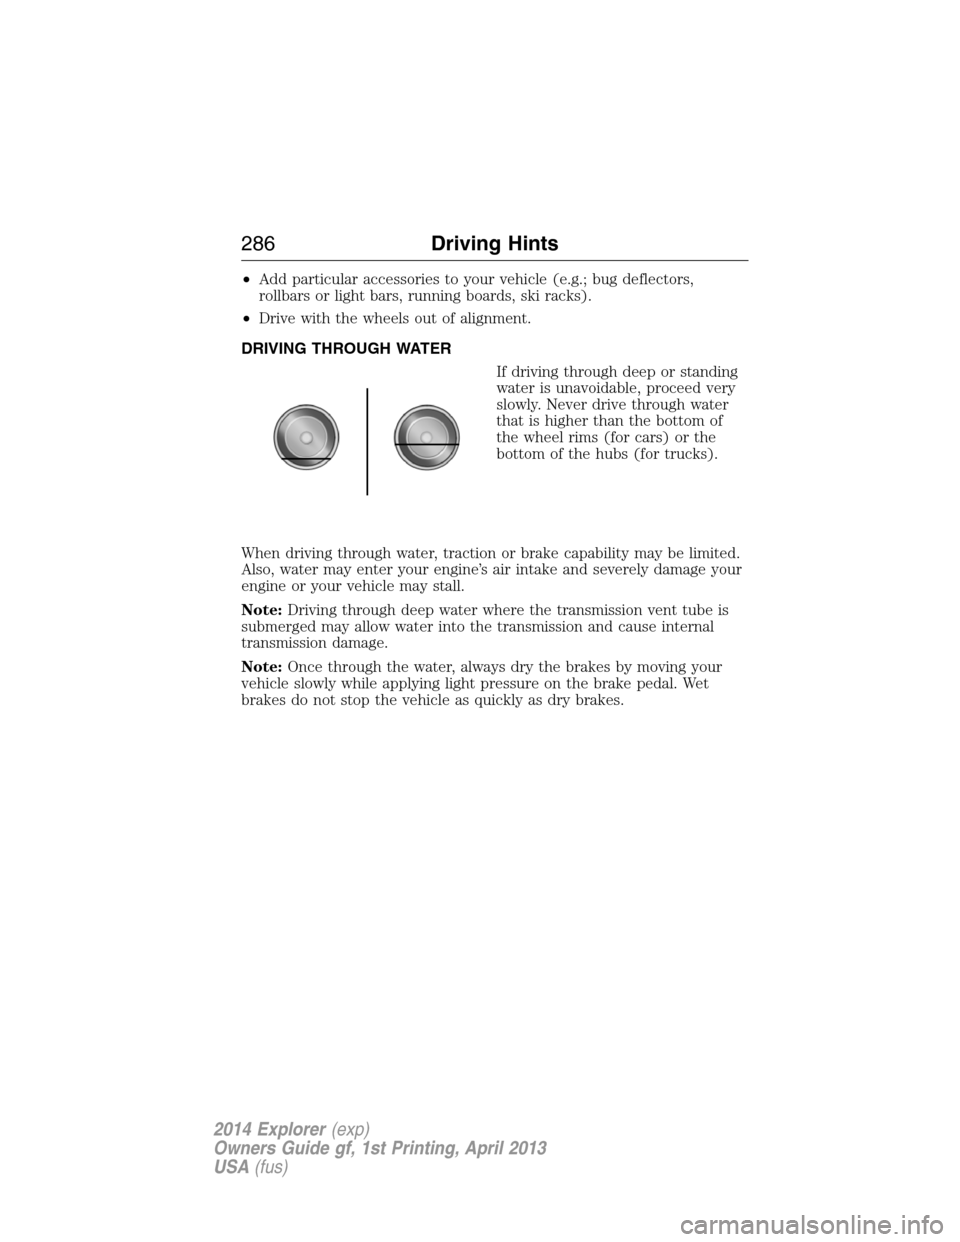
DRIVING THROUGH WATER
If driving through deep or standing
water is unavoidable, proceed very
slowly. Never drive through water
that is higher than the bottom of
the wheel rims (for cars) or the
bottom of the hubs (for trucks).
When driving through water, traction or brake capability may be limited.
Also, water may enter your engine’s air intake and severely damage your
engine or your vehicle may stall.
Note:Driving through deep water where the transmission vent tube is
submerged may allow water into the transmission and cause internal
transmission damage.
Note:Once through the water, always dry the brakes by moving your
vehicle slowly while applying light pressure on the brake pedal. Wet
brakes do not stop the vehicle as quickly as dry brakes.
286Driving Hints
2014 Explorer(exp)
Owners Guide gf, 1st Printing, April 2013
USA(fus)
Page 305 of 586

Fuse or relay
numberFuse amp
ratingProtected components
4 30A** Wipers, Front washer
5 50A** Anti-lock brake system pump
6 — Not used
7 30A** Power liftgate
8 20A** Moonroof
9 20A** Power point #2 (console rear)
10 — 3rd row rear seat release relay
11 — Rear window defroster relay
12 — Trailer tow battery charge relay
13 — Starter motor relay
14 — Engine cooling fan #2 high speed
relay
15 — Fuel pump relay
16 — Not used
17 40A** 110-volt AC power point
18 40A** Front blower motor
19 30A** Starter motor
20 20A** Power point #1, cigar lighter
21 20A** Power point #3 (cargo area)
22 30A** Third row seat module
23 30A** Driver power seat, Memory
module
24 30A** Trailer tow battery charge
25 — Not used
26 40A** Rear window defroster, Heated
mirrors
27 20A** Power point (console)
28 30A** Climate controlled seats
29 40A** Engine cooling fan #1 high speed
power, Engine cooling fan #1 and
#2 low speed primary fuse
304Fuses
2014 Explorer(exp)
Owners Guide gf, 1st Printing, April 2013
USA(fus)
Page 310 of 586

Fuse or relay
numberFuse amp
ratingProtected components
4 10A Interior demand lamps (overhead
console, second row, cargo),
Glove box lamp, Second and third
row seat release, Visor lamps
5 20A Amplifier
6 5A Not used (spare)
7 7.5A Memory seat module logic feed
8 10A Not used (spare)
9 10A 4-inch radio display, Power
liftgate logic, Electronic finish
panel, SYNC
10 10A Run/accessory relay (wipers, rear
washer), Rain sensor
11 10A Instrument cluster, Heads-up
display
12 15A Interior courtesy lamps (overhead
console, Second row, cargo),
Puddle lamps, Console bin LED,
Backlighting
13 15A Right turn lamps, Right trailer tow
turn/stop lamps
14 15A Left turn lamps, Left trailer tow
turn/stop lamps
15 15A Reverse lamps, Stop lamps,
High-mounted stop lamp
16 10A Low beam headlamps (right)
17 10A Low beam headlamps (left)
18 10A Keypad illumination, Brake shift
interlock, Start button run
indicator, Passive anti-theft
system, Powertrain control
module wake-up, Rear seat power
enable
Fuses309
2014 Explorer(exp)
Owners Guide gf, 1st Printing, April 2013
USA(fus)