2014 FORD EXPEDITION tow
[x] Cancel search: towPage 186 of 519
N (Neutral)
With the gearshift lever in N (Neutral), the vehicle can be started and is
free to roll. Hold the brake pedal down while in this position.
D (Overdrive) with Tow/Haul Off
The normal driving position for the best fuel economy. Transmission
operates in gears one through six.
D (Overdrive) with Tow/Haul On
The Tow/Haul feature improves transmission operation when towing a
trailer or a heavy load. All transmission gear ranges are available when
using Tow/Haul.
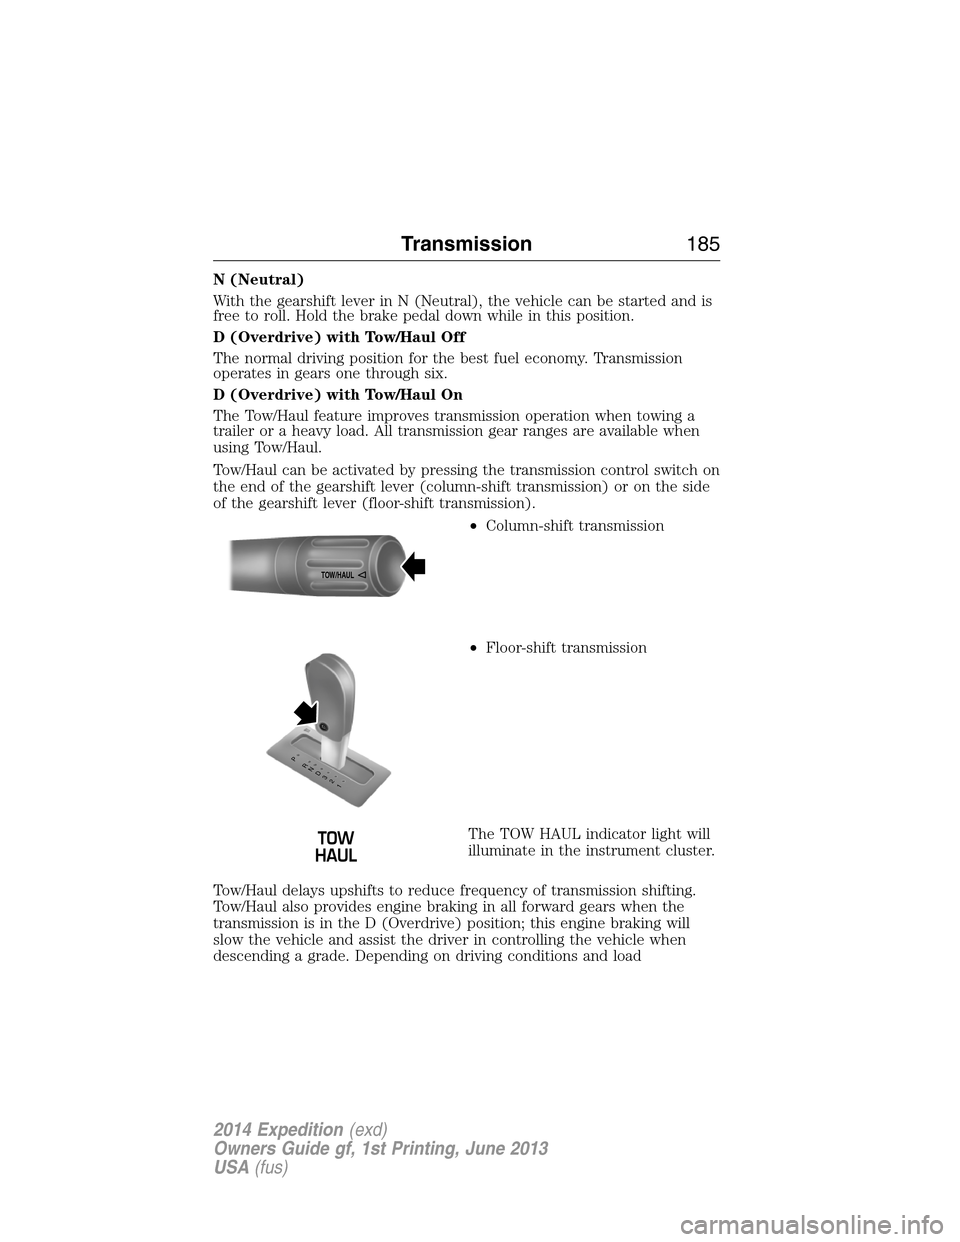
Tow/Haul can be activated by pressing the transmission control switch on
the end of the gearshift lever (column-shift transmission) or on the side
of the gearshift lever (floor-shift transmission).
•Column-shift transmission
•Floor-shift transmission
The TOW HAUL indicator light will
illuminate in the instrument cluster.
Tow/Haul delays upshifts to reduce frequency of transmission shifting.
Tow/Haul also provides engine braking in all forward gears when the
transmission is in the D (Overdrive) position; this engine braking will
slow the vehicle and assist the driver in controlling the vehicle when
descending a grade. Depending on driving conditions and load
TOW/H
AUL
T/H T/H
PR
N
D
3
2
1
Transmission185
2014 Expedition(exd)
Owners Guide gf, 1st Printing, June 2013
USA(fus)
Page 187 of 519
conditions, the transmission may downshift, slow the vehicle and control
the vehicle speed when descending a hill, without the accelerator pedal
being pressed. The amount of downshift braking provided will vary based
upon the amount the brake pedal is depressed.
To deactivate the Tow/Haul feature and return to normal driving mode,
press the button on the end of the gearshift lever. The TOW HAUL light
will no longer be illuminated.
When you shut-off and restart the engine, the transmission will
automatically return to normal D (Overdrive) mode (Tow/Haul OFF).
3 (Third) (column-shift only)
Transmission operates in third gear only.
Used for improved traction on slippery roads.
2 (Second)
Transmission operates in 2nd gear only.
Use 2 (Second) to start-up on slippery roads.
1 (First)
•Transmission operates in 1st gear only.
•Provides maximum engine braking.
•Allows upshifts by moving gearshift lever.
•Will not downshift into 1 (First) at high speeds; allows for 1 (First)
when vehicle reaches slower speeds.
Forced downshifts
•Allowed in D (Drive) only.
•Press the accelerator to the floor.
•Allows transmission to select an appropriate gear.
Automatic Transmission Adaptive Learning
This feature is designed to increase durability and provide consistent
shift feel over the life of the vehicle. A new vehicle or transmission may
have firm shifts, soft shifts or both. This operation is considered normal
and will not affect function or durability of the transmission. Over time,
the adaptive learning process will fully update transmission operation.
Additionally, whenever the battery is disconnected or a new battery
installed, the strategy must be relearned.
186Transmission
2014 Expedition(exd)
Owners Guide gf, 1st Printing, June 2013
USA(fus)
Page 190 of 519
If the fuse is not blown, perform the following procedure:
1. Apply the parking brake.
2. Turn the key to the off position.
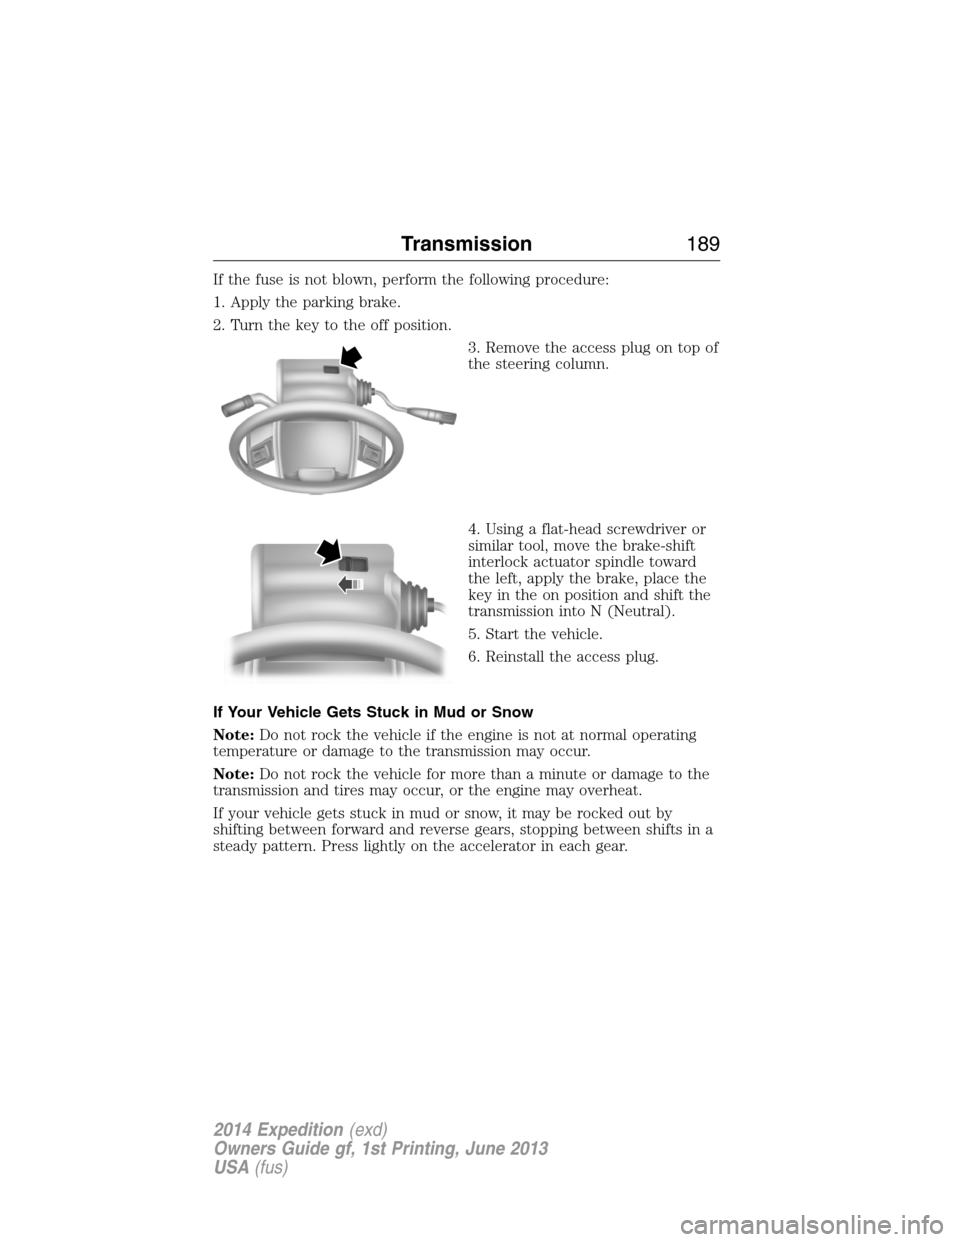
3. Remove the access plug on top of
the steering column.
4. Using a flat-head screwdriver or
similar tool, move the brake-shift
interlock actuator spindle toward
the left, apply the brake, place the
key in the on position and shift the
transmission into N (Neutral).
5. Start the vehicle.
6. Reinstall the access plug.
If Your Vehicle Gets Stuck in Mud or Snow
Note:Do not rock the vehicle if the engine is not at normal operating
temperature or damage to the transmission may occur.
Note:Do not rock the vehicle for more than a minute or damage to the
transmission and tires may occur, or the engine may overheat.
If your vehicle gets stuck in mud or snow, it may be rocked out by
shifting between forward and reverse gears, stopping between shifts in a
steady pattern. Press lightly on the accelerator in each gear.
Transmission189
2014 Expedition(exd)
Owners Guide gf, 1st Printing, June 2013
USA(fus)
Page 191 of 519
USING FOUR-WHEEL DRIVE (4WD) (IF EQUIPPED )
WARNING:For important information regarding safe operation
of this type of vehicle, seeGeneral Informationin theWheels
and Tireschapter.
Note:Do not use 4X4 mode on dry, hard surfaced roads. Doing so will
produce excessive noise, increase tire wear and may damage drive
components. 4X4 mode is only intended for consistently slippery or loose
surfaces.
Note:If 4X4 low is selected while the vehicle is moving above 3 mph
(5 km/h), the 4WD system will not perform a shift. This is normal and
should be no reason for concern. Refer toShifting to/from 4L
(4X4 Low)for proper operation.
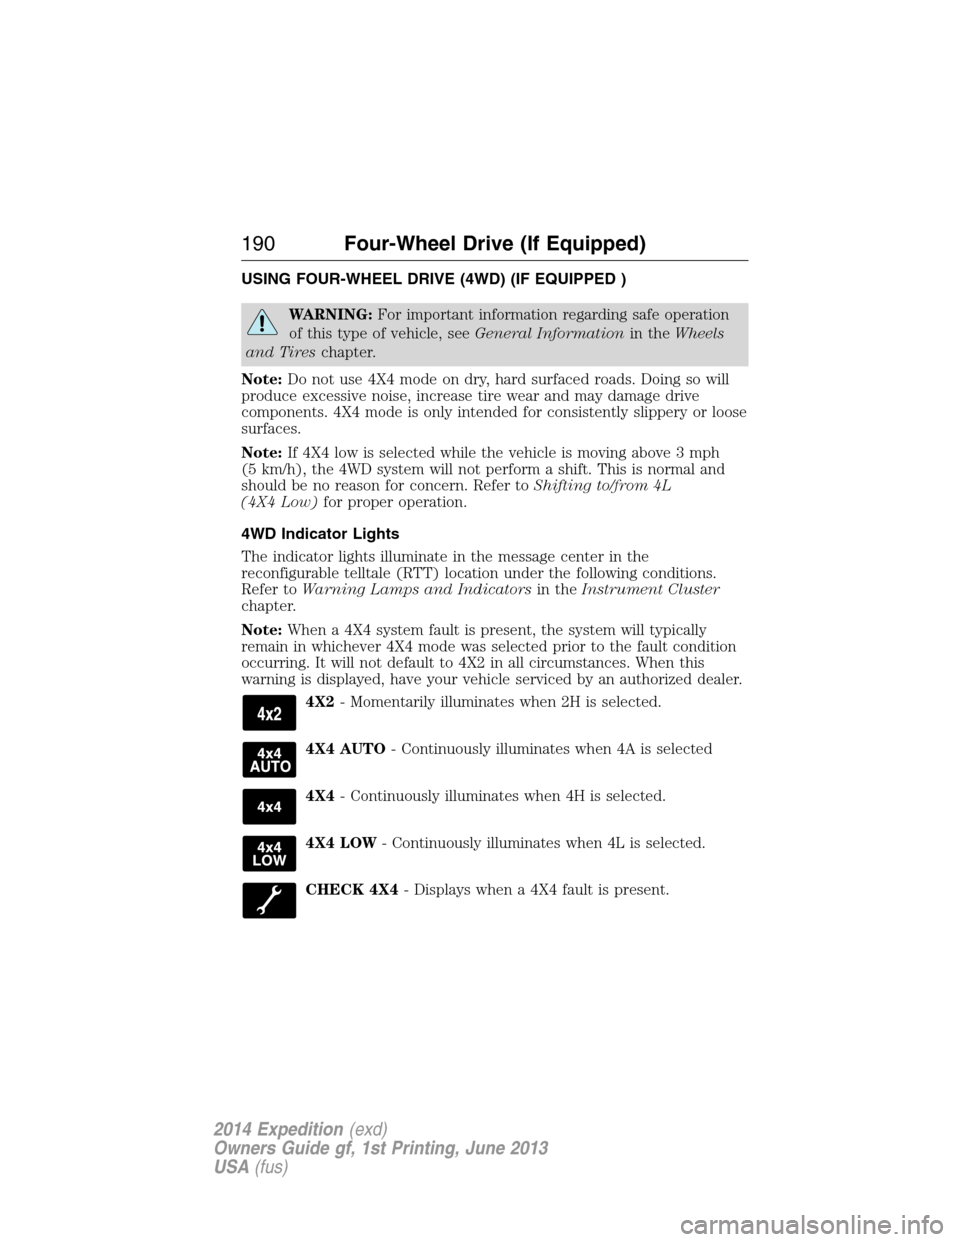
4WD Indicator Lights
The indicator lights illuminate in the message center in the
reconfigurable telltale (RTT) location under the following conditions.
Refer toWarning Lamps and Indicatorsin theInstrument Cluster
chapter.
Note:When a 4X4 system fault is present, the system will typically
remain in whichever 4X4 mode was selected prior to the fault condition
occurring. It will not default to 4X2 in all circumstances. When this
warning is displayed, have your vehicle serviced by an authorized dealer.
4X2- Momentarily illuminates when 2H is selected.
4X4 AUTO- Continuously illuminates when 4A is selected
4X4- Continuously illuminates when 4H is selected.
4X4 LOW- Continuously illuminates when 4L is selected.
CHECK 4X4- Displays when a 4X4 fault is present.
190Four-Wheel Drive (If Equipped)
2014 Expedition(exd)
Owners Guide gf, 1st Printing, June 2013
USA(fus)
Page 201 of 519
GENERAL INFORMATION
Note:Occasional brake noise is normal. If a metal-to-metal, continuous
grinding or continuous squeal sound is present, the brake linings may be
worn out. Have them inspected by an authorized dealer. If your vehicle
has continuous vibration or shudder in the steering wheel while braking,
have your vehicle inspected by an authorized dealer.
Note:Brake dust may accumulate on the wheels, even under normal
driving conditions. Some dust is inevitable as the brakes wear and does
not contribute to brake noise. See theVehicle Carechapter for wheel
cleaning instructions.
See theInstrument Clusterchapter for information on the
brake system warning light.
Wet brakes result in reduced braking efficiency. Gently press the brake
pedal a few times when driving from a car wash or standing water to dry
the brakes.
Brake Over Accelerator
In the event the accelerator pedal becomes stuck or entrapped, apply
steady and firm pressure to the brake pedal to slow your vehicle and
reduce engine power. If you experience this condition, apply the brakes
and bring your vehicle to a safe stop. Turn the engine off, shift to
positionPand apply the parking brake, then inspect the accelerator
pedal for any interferences. If none are found and the condition persists,
have your vehicle towed to the nearest authorized dealer.
Anti-Lock Brake System
This system helps you maintain steering control during emergency stops
by keeping the brakes from locking.
This lamp momentarily illuminates when you turn the ignition
on. If the light does not illuminate during start-up, remains on
or flashes, the anti-lock brake system may be disabled and may
need to be serviced.
If the anti-lock brake system is disabled, normal braking is still
effective. If the brake warning lamp illuminates with the parking
brake released, have your brake system serviced immediately.
200Brakes
2014 Expedition(exd)
Owners Guide gf, 1st Printing, June 2013
USA(fus)
Page 207 of 519

Using the Front and Rear Sensing System
Rear Sensing System
The rear sensors are only active when the transmission is in R (Reverse).
As the vehicle moves closer to the obstacle, the rate of the audible
warning increases. When the obstacle is fewer than 10 inches
(25 centimeters) away, the warning sounds continuously. If a stationary
or receding object is detected farther than 10 inches (25 centimeters)
from the side of the vehicle, the tone sounds for only three seconds.
Once the system detects an object approaching, the warning sounds
again.
A. Coverage area of up to 6 feet
(2 meters) from the rear bumper
(with a decreased coverage area at
the outer corners of the bumper).
The system detects certain objects while the transmission is in R
(Reverse):
•and moving toward a stationary object at a speed of 3 mph (5 km/h)
or less.
•but not moving, and a moving object is approaching the rear of the
vehicle at a speed of 3 mph (5 km/h) or less.
•and moving at a speed of less than 3 mph (5 km/h) and a moving
object is approaching the rear of the vehicle at a speed of less than
3 mph (5 km/h).
A
206Parking Aids
2014 Expedition(exd)
Owners Guide gf, 1st Printing, June 2013
USA(fus)
Page 210 of 519
Using the Rear View Camera System
The rear view camera system displays what is behind your vehicle when
you place the transmission in R (Reverse). The system uses two types of
guides to help you see what is behind your vehicle:
1. Fixed guidelines: Show the actual path the vehicle is moving in while
reversing in a straight line, which can be helpful when backing into a
parking space or aligning the vehicle with another object behind the
vehicle.
2. Centerline: Helps align the center of the vehicle with an object (i.e. a
trailer).
Note:If the image comes on while the transmission is not in R
(Reverse), have the system inspected by your authorized dealer.
Note:When towing, the camera only sees what is being towed behind
the vehicle. This might not provide adequate coverage as it usually
provides in normal operation and some objects might not be seen.
In some vehicles, the guidelines may disappear once the trailer tow
connector is engaged.
Note:The default setting for the camera delay is off. Press the Settings
button found on the navigation screen (if equipped) to set the camera
delay feature to on or off.
Note:The camera may not operate correctly under the following
conditions:
•Nighttime or dark areas if one or both reverse lamps are not
operating.
•The camera’s view is obstructed by mud, water or debris. Clean the
lens with a soft, lint-free cloth and non-abrasive cleaner.
•The rear of the vehicle is hit or damaged, causing the camera to
become misaligned.
Parking Aids209
2014 Expedition(exd)
Owners Guide gf, 1st Printing, June 2013
USA(fus)
Page 215 of 519
AUTO LEVELING SUSPENSION SYSTEM (if equipped)
The automatic leveling suspension system is designed to improve ride,
handling and general vehicle performance during:
•Certain road conditions
•Steering maneuvers
•Braking
•Acceleration
•Towing
This system keeps the rear of your vehicle at a constant level through a
hydraulic pump inside each rear shock. Depending on the payload or
road surface conditions it will take approximately 2 miles (3.2 km) for
the leveling to complete.
If the loaded vehicle is not moved for approximately 12 hours, the
leveling system may bleed down to a lower height. This can be especially
apparent if a trailer is left attached to the parked vehicle for long periods
of time. You must drive your vehicle in order to re-level the suspension.
If a self-equalizing hitch is being used, your vehicle should be drive
approximately 2 miles (3.2 km) with the trailer prior to adjusting
(leveling) the hitch.
214Driving Aids
2014 Expedition(exd)
Owners Guide gf, 1st Printing, June 2013
USA(fus)