Page 171 of 519

IGNITION SWITCH
Note:Do not store the key in the ignition after the vehicle is turned off
and you have left the vehicle. This could cause a drain on the battery.
A.Off:The ignition is off.
B.Accessory:Allows the electrical accessories, such as the radio, to
operate while the engine is not running.
C.On:All the electrical circuits are operational. Warning lights are
illuminated. This is the key position when driving.
D.Start:Cranks the engine. Release the key as soon as the engine starts.
STARTING A GASOLINE ENGINE
When you start the engine, the idle speed increases, this helps to warm
up the engine. If the engine idle speed does not slow down automatically,
have your vehicle checked by an authorized dealer.
Before starting the engine:
•Make sure all occupants have fastened their safety belts.
•Make sure the headlamps and electrical accessories are off.
•Make sure the parking brake is on.
•Move the transmission selector lever to positionP.
•Turn the ignition key to the on position.
Some warning lights briefly illuminate.
Note:Do not touch the accelerator pedal.
1. Fully press the brake pedal.
2. Turn the key to the start position to start the engine. Release the key
when the engine starts.
Note:The engine may continue cranking for up to 15 seconds or until it
starts.
Note:If you cannot start the engine on the first try, wait for a short
period and try again.
If you have difficulty starting the engine when the temperature is below
-13°F (-25°C), press the accelerator pedal slightly and try again.
C
D
B
A
170Starting and Stopping the Engine
2014 Expedition(exd)
Owners Guide gf, 1st Printing, June 2013
USA(fus)
Page 206 of 519

SENSING SYSTEM (IF EQUIPPED)
WARNING:To help avoid personal injury, please read and
understand the limitations of the system as contained in this
section. Sensing is only an aid for some (generally large and fixed)
objects when moving in reverse on a flat surface at parking speeds.
Traffic control systems, inclement weather, air brakes, and external
motors and fans may also affect the function of the sensing system; this
may include reduced performance or a false activation.
WARNING:To help avoid personal injury, always use caution
when in R (Reverse) and when using the sensing system.
WARNING:This system is not designed to prevent contact with
small or moving objects. The system is designed to provide a
warning to assist the driver in detecting large stationary objects to
avoid damaging the vehicle. The system may not detect smaller objects,
particularly those close to the ground.
WARNING:Certain add-on devices such as large trailer hitches,
bike or surfboard racks and any device that may block the normal
detection zone of the system, may create false beeps.
Note:Keep the sensors (located on the bumper/fascia) free from snow,
ice and large accumulations of dirt. If the sensors are covered, the
system’s accuracy can be affected. Do not clean the sensors with sharp
objects.
Note:If your vehicle sustains damage to the bumper/fascia, leaving it
misaligned or bent, the sensing zone may be altered causing inaccurate
measurement of obstacles or false alarms.
Note:If your vehicle is equipped with MyKey®, it is possible to prevent
turning the sensing system off. Refer to theMyKey®chapter.
The sensing system warns the driver of obstacles within a certain range
of the bumper area. The system turns on automatically whenever the
ignition is switched on.
When receiving a detection warning, the radio volume is reduced to a
predetermined level. After the warning goes away, the radio volume
returns to the previous level.
Parking Aids205
2014 Expedition(exd)
Owners Guide gf, 1st Printing, June 2013
USA(fus)
Page 211 of 519

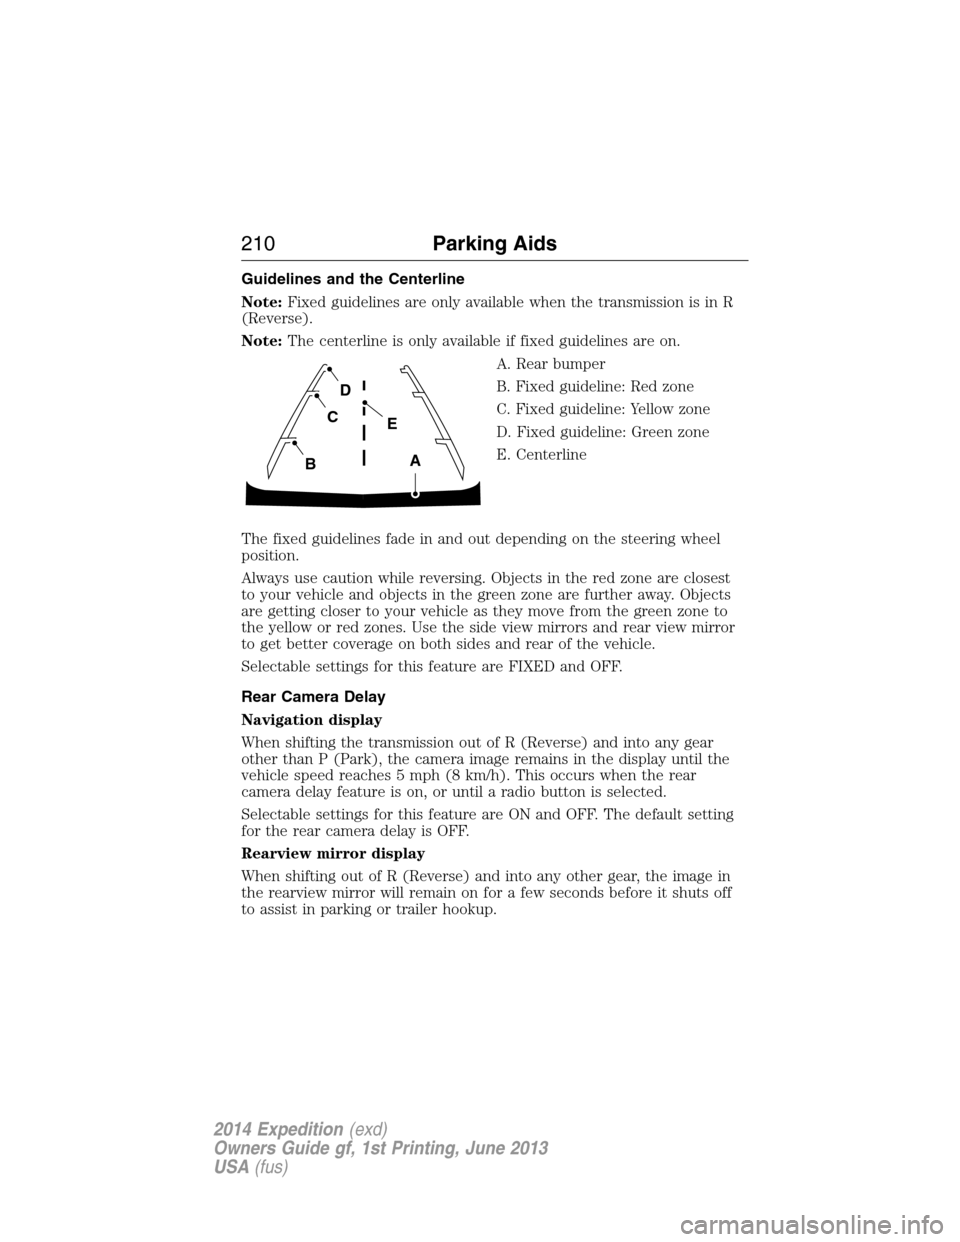
Guidelines and the Centerline
Note:Fixed guidelines are only available when the transmission is in R
(Reverse).
Note:The centerline is only available if fixed guidelines are on.
A. Rear bumper
B. Fixed guideline: Red zone
C. Fixed guideline: Yellow zone
D. Fixed guideline: Green zone
E. Centerline
The fixed guidelines fade in and out depending on the steering wheel
position.
Always use caution while reversing. Objects in the red zone are closest
to your vehicle and objects in the green zone are further away. Objects
are getting closer to your vehicle as they move from the green zone to
the yellow or red zones. Use the side view mirrors and rear view mirror
to get better coverage on both sides and rear of the vehicle.
Selectable settings for this feature are FIXED and OFF.
Rear Camera Delay
Navigation display
When shifting the transmission out of R (Reverse) and into any gear
other than P (Park), the camera image remains in the display until the
vehicle speed reaches 5 mph (8 km/h). This occurs when the rear
camera delay feature is on, or until a radio button is selected.
Selectable settings for this feature are ON and OFF. The default setting
for the rear camera delay is OFF.
Rearview mirror display
When shifting out of R (Reverse) and into any other gear, the image in
the rearview mirror will remain on for a few seconds before it shuts off
to assist in parking or trailer hookup.
A
E
D
C
B
210Parking Aids
2014 Expedition(exd)
Owners Guide gf, 1st Printing, June 2013
USA(fus)
Page 248 of 519

Vehicles Sold in the U.S.: Using Roadside Assistance
Complete the roadside assistance identification card and place it in your
wallet for quick reference. This card is found in the owner’s manual
portfolio in the glove compartment.
U.S. Ford vehicle customers who require Roadside Assistance, call
1-800-241-3673.
If you need to arrange roadside assistance for yourself, Ford Motor
Company will reimburse a reasonable amount for towing to the nearest
dealership within 35 miles (56 kilometers). To obtain reimbursement
information, U.S. Ford vehicle customers call 1-800-241-3673. Customers
will be asked to submit their original receipts.
Vehicles Sold in Canada: Getting Roadside Assistance
Canadian customers who require roadside assistance, call
1–800–665–2006.
Vehicles Sold in Canada: Using Roadside Assistance
For your convenience, you may complete the roadside assistance
identification card found in the centerfold of this warranty guide and
retain for future reference.
Canadian roadside coverage and benefits may differ from the U.S.
coverage. If you require more information, please refer to the coverage
section of your warranty guide, call us in Canada at 1-800-665-2006, or
visit our website at www.ford.ca.
HAZARD WARNING FLASHERS
The hazard flasher control is located on the instrument panel
by the radio. Use it when your vehicle is disabled and is
creating a safety hazard for other motorists.
•Press the flasher control and all front and rear direction signals will
flash.
•Press the flasher control again to turn them off.
Note:With extended use, the flashers may run down your 12–volt
battery.
Roadside Emergencies247
2014 Expedition(exd)
Owners Guide gf, 1st Printing, June 2013
USA(fus)
Page 267 of 519
The fuses are coded as follows:
Fuse or relay
locationFuse amp
ratingProtected circuits
1 30A Driver window
2 15A Driver side memory module
3 15A Audio rear seat controls, Satellite
radio, SYNC
4 30A Not used (spare)
5 10A Keypad illumination, 3rd row seat
enable, Brake shift interlock,
Smart fuse panel logic power
6 20A Turn signals
7 10A Low beam headlamps (left)
8 10A Low beam headlamps (right)
9 15A Interior lights
10 15A Switch backlighting, Puddle lamps
266Fuses
2014 Expedition(exd)
Owners Guide gf, 1st Printing, June 2013
USA(fus)
Page 268 of 519
Fuse or relay
locationFuse amp
ratingProtected circuits
11 10A Not used (spare)
12 7.5A Power mirrors, Driver seat
memory switch
13 5A Not used (spare)
14 10A Power liftgate module – keep-alive
power
15 10A Climate control, Global positioning
satellite module
16 15A Not used (spare)
17 20A Door locks, Liftgate release,
Liftglass release
18 20A Second row heated seats
19 25A Rear wiper
20 15A Adjustable pedals, Datalink
21 15A Fog lamps
22 15A Park lamps
23 15A High beam headlamps
24 20A Horn
25 10A Demand lamps, Glove box, Visor
26 10A Instrument panel cluster
27 20A Ignition switch
28 5A Radio
29 5A Instrument panel cluster
30 5A Not used (spare)
31 10A Not used (spare)
32 10A Airbag module
33 10A Trailer brake logic
34 5A Not used (spare)
35 10A Rear park assist, 4x4, rear video
camera, 2nd row heated seats
36 5A Passive anti-theft system
37 10A Climate control
Fuses267
2014 Expedition(exd)
Owners Guide gf, 1st Printing, June 2013
USA(fus)
Page 269 of 519
Fuse or relay
locationFuse amp
ratingProtected circuits
38 20A Subwoofer
39 20A Radio
40 20A Navigation amplifier
41 15A Power windows, Power vents,
Power moonroof, Auto dimming
rear view mirror, 110 volt AC
power point
42 10A Not used (spare)
43 10A Rear wiper logic, Rain sensor
44 10A Trailer tow battery charge relay
coil
45 5A Front wiper logic
46 7.5A Climate control, Auxiliary relay
control
47 30A Circuit
BreakerPower windows, Moonroof
48 — Delayed accessory relay
268Fuses
2014 Expedition(exd)
Owners Guide gf, 1st Printing, June 2013
USA(fus)
Page 282 of 519

Because your vehicle’s engine is electronically controlled by a computer,
some control conditions are maintained by power from the battery. When
the battery is disconnected or a new battery is installed, the engine must
relearn its idle and fuel trim strategy for optimum driveability and
performance. To begin this process:
1. With the vehicle at a complete stop, set the parking brake.
2. Put the gearshift in P (Park), turn off all accessories and start the
engine.
3. Run the engine until it reaches normal operating temperature.
4. Allow the engine to idle for at least one minute.
5. Turn the A/C on and allow the engine to idle for at least one minute.
6. Drive the vehicle to complete the relearning process.
•The vehicle may need to be driven 10 miles (16 km) or more to
relearn the idle and fuel trim strategy.
•Note:If you do not allow the engine to relearn its idle trim, the idle
quality of your vehicle may be adversely affected until the idle trim is
eventually relearned.
If the battery has been disconnected or a new battery has been installed,
the clock and radio settings must be reset once the battery is
reconnected.
CHECKING THE WIPER BLADES
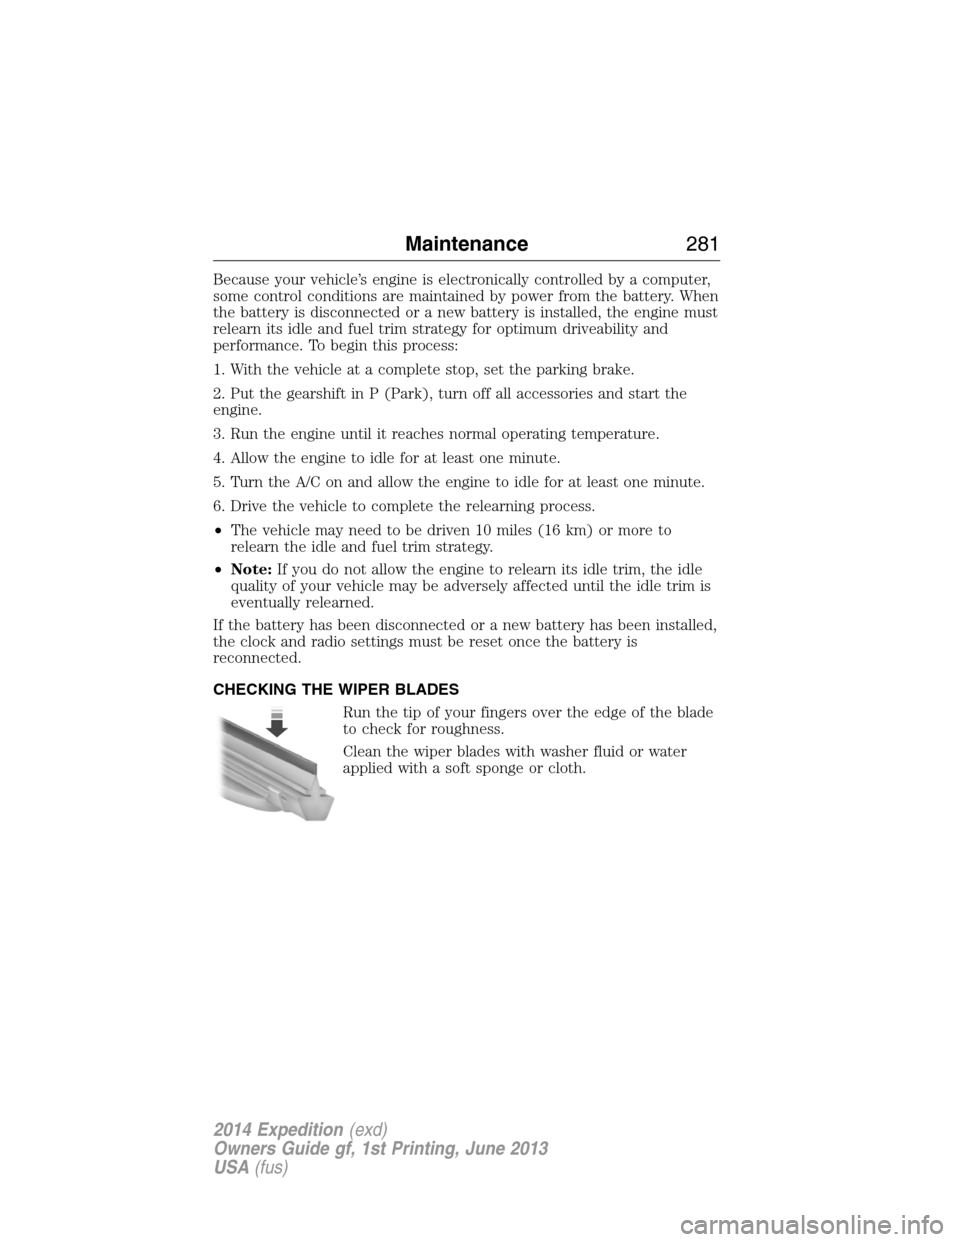
Run the tip of your fingers over the edge of the blade
to check for roughness.
Clean the wiper blades with washer fluid or water
applied with a soft sponge or cloth.
Maintenance281
2014 Expedition(exd)
Owners Guide gf, 1st Printing, June 2013
USA(fus)