2014 FIAT DUCATO BASE CAMPER ad blue
[x] Cancel search: ad bluePage 32 of 367

DIFFUSERSADJUSTABLE SIDE AND
CENTRAL DIFFUSERSAFixed diffusers for side windows.BAdjustable side diffusers.CFixed diffusers.DAdjustable centre diffusers.EAir flow adjustment control.
Vents A and C cannot be adjusted.
HEATING AND
VENTILATION
CONTROLSCONTROLS
Air temperature
adjustment rotating
knob A (mixing hot and
cold air)
Red section = hot air
Blue section = cold air
Fan activation/
adjustment knob B
0 = fan off
1-2-3 = fan speed
4
= maximum fan speedAir distribution ring nut
C
to convey air to the central and
side vents;to warm the feet and convey
slightly cooler air to the dashboard
vents, in intermediate temperature
conditions;for heating when the outside
temperature is very low: to direct
as much air as possible to the
feet;to warm the feet and demist the
windscreen at the same time;for quick windscreen demisting.
Air recirculation on/off
knob D
When knob D is turned to
the
internal air recirculation is activated.
When knob D is turned tothe
internal air recirculation is deactivated.
PASSENGER
COMPARTMENT
VENTILATION
To ventilate the passenger
compartment well, proceed as follows:
❒turn ring nut A to the blue section;
❒stop internal air recirculation by
placing knob D on
;
44
F1A0046
45
F1A0047
46
F1A0048
28
KNOW YOUR VEHICLE
Page 34 of 367

INTERNAL AIR
RECIRCULATION
ACTIVATION
Turn D knob fig. 46 to
.
It is advisable to switch the internal air
recirculation on whilst queuing or in
tunnels to prevent the introduction of
polluted air. Do not use the function for
a long time, particularly if there are
many passengers on board, to prevent
the windows from misting up.
IMPORTANT Internal air recirculation
makes it possible to reach the required
heating or cooling conditions more
quickly depending on the mode
selected.
Do not use the air recirculation function
on rainy/cold days as it would
considerably increase the possibility of
the windows misting inside.
MANUAL CLIMATE
CONTROL SYSTEM(for versions/markets, where provided)
CONTROLS
Air temperature
adjustment rotating
knob A (mixing hot and
cold air)
Red section = hot air
Blue section = cold air
Fan activation/
adjustment knob B
0 = fan off
1-2-3 = fan speed
4
= maximum fan speedAir distribution ring nut
C
to convey air to the central and
side vents;to warm the feet and convey
slightly cooler air to the dashboard
vents, in intermediate temperature
conditions;for heating when the outside
temperature is very low: to direct
as much air as possible to the
feet;to warm the feet and demist the
windscreen at the same time;for quick windscreen demisting.
Air recirculation on/off
knob D
Press the button (button LED on) to
turn the internal air recirculation on.
Press the button again (button LED off)
to turn the internal air recirculation off.
Climate control system
on/off button E
Press the button (button LED on) to
turn the climate control system on.
Press the button again (button LED off)
to turn the climate control system off.
48
F1A0330
49
F1A0051
30
KNOW YOUR VEHICLE
Page 35 of 367

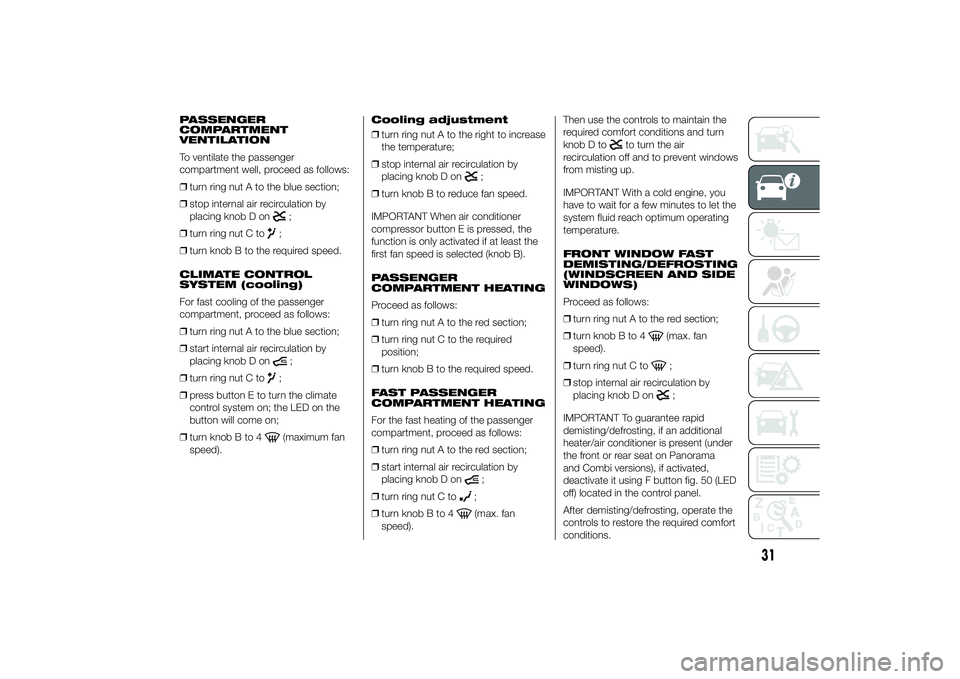
PASSENGER
COMPARTMENT
VENTILATION
To ventilate the passenger
compartment well, proceed as follows:
❒turn ring nut A to the blue section;
❒stop internal air recirculation by
placing knob D on
;
❒turn ring nut C to;
❒turn knob B to the required speed.
CLIMATE CONTROL
SYSTEM (cooling)
For fast cooling of the passenger
compartment, proceed as follows:
❒turn ring nut A to the blue section;
❒start internal air recirculation by
placing knob D on;
❒turn ring nut C to;
❒press button E to turn the climate
control system on; the LED on the
button will come on;
❒turn knob B to 4(maximum fan
speed).Cooling adjustment
❒turn ring nut A to the right to increase
the temperature;
❒stop internal air recirculation by
placing knob D on
;
❒turn knob B to reduce fan speed.
IMPORTANT When air conditioner
compressor button E is pressed, the
function is only activated if at least the
first fan speed is selected (knob B).
PASSENGER
COMPARTMENT HEATING
Proceed as follows:
❒turn ring nut A to the red section;
❒turn ring nut C to the required
position;
❒turn knob B to the required speed.
FAST PASSENGER
COMPARTMENT HEATING
For the fast heating of the passenger
compartment, proceed as follows:
❒turn ring nut A to the red section;
❒start internal air recirculation by
placing knob D on;
❒turn ring nut C to;
❒turn knob B to 4(max. fan
speed).Then use the controls to maintain the
required comfort conditions and turn
knob D to
to turn the air
recirculation off and to prevent windows
from misting up.
IMPORTANT With a cold engine, you
have to wait for a few minutes to let the
system fluid reach optimum operating
temperature.
FRONT WINDOW FAST
DEMISTING/DEFROSTING
(WINDSCREEN AND SIDE
WINDOWS)
Proceed as follows:
❒turn ring nut A to the red section;
❒turn knob B to 4
(max. fan
speed).
❒turn ring nut C to;
❒stop internal air recirculation by
placing knob D on;
IMPORTANT To guarantee rapid
demisting/defrosting, if an additional
heater/air conditioner is present (under
the front or rear seat on Panorama
and Combi versions), if activated,
deactivate it using F button fig. 50 (LED
off) located in the control panel.
After demisting/defrosting, operate the
controls to restore the required comfort
conditions.
31
Page 47 of 367

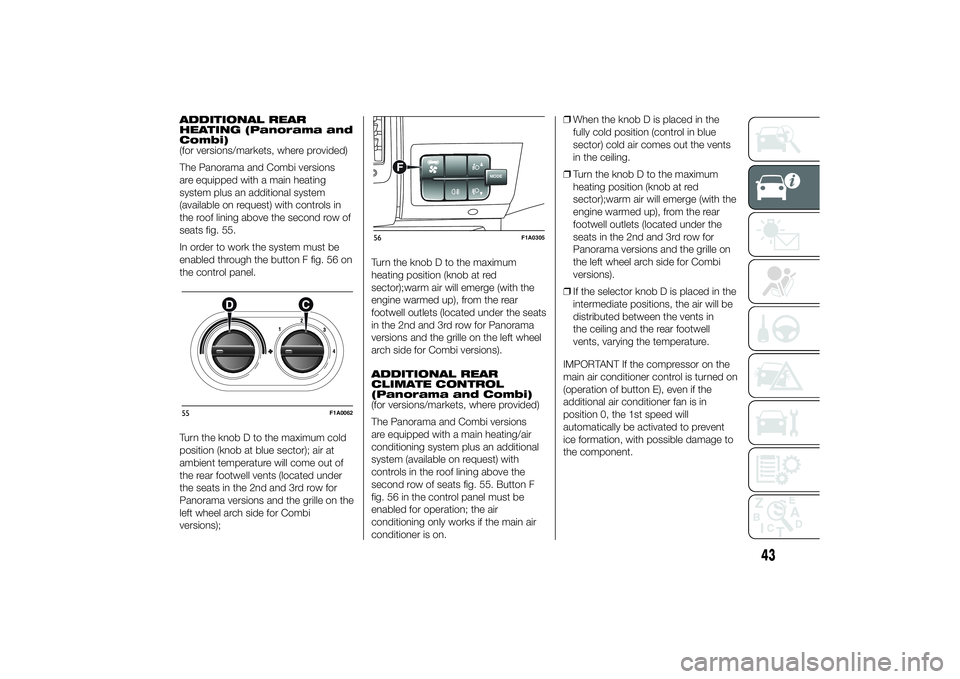
ADDITIONAL REAR
HEATING (Panorama and
Combi)
(for versions/markets, where provided)
The Panorama and Combi versions
are equipped with a main heating
system plus an additional system
(available on request) with controls in
the roof lining above the second row of
seats fig. 55.
In order to work the system must be
enabled through the button F fig. 56 on
the control panel.
Turn the knob D to the maximum cold
position (knob at blue sector); air at
ambient temperature will come out of
the rear footwell vents (located under
the seats in the 2nd and 3rd row for
Panorama versions and the grille on the
left wheel arch side for Combi
versions);Turn the knob D to the maximum
heating position (knob at red
sector);warm air will emerge (with the
engine warmed up), from the rear
footwell outlets (located under the seats
in the 2nd and 3rd row for Panorama
versions and the grille on the left wheel
arch side for Combi versions).
ADDITIONAL REAR
CLIMATE CONTROL
(Panorama and Combi)
(for versions/markets, where provided)
The Panorama and Combi versions
are equipped with a main heating/air
conditioning system plus an additional
system (available on request) with
controls in the roof lining above the
second row of seats fig. 55. Button F
fig. 56 in the control panel must be
enabled for operation; the air
conditioning only works if the main air
conditioner is on.❒When the knob D is placed in the
fully cold position (control in blue
sector) cold air comes out the vents
in the ceiling.
❒Turn the knob D to the maximum
heating position (knob at red
sector);warm air will emerge (with the
engine warmed up), from the rear
footwell outlets (located under the
seats in the 2nd and 3rd row for
Panorama versions and the grille on
the left wheel arch side for Combi
versions).
❒If the selector knob D is placed in the
intermediate positions, the air will be
distributed between the vents in
the ceiling and the rear footwell
vents, varying the temperature.
IMPORTANT If the compressor on the
main air conditioner control is turned on
(operation of button E), even if the
additional air conditioner fan is in
position 0, the 1st speed will
automatically be activated to prevent
ice formation, with possible damage to
the component.55
F1A0062
MODE
F
56
F1A0305
43
Page 49 of 367

When the ignition key is turned to
STOP or removed and the ring nut is
turned fromOto
, all the side lights
and the number plate lights come on.
The
warning light will come on
in the instrument panel.
MAIN BEAM HEADLIGHTS
When the ring nut is in position
,
pull the stalk towards the steering
wheel (2nd unstable position) fig. 59.
The
warning light switches on in the
instrument panel.
To turn the main beams off, pull the
stalk towards the steering wheel again
(dipped beams will come back on).FLASHING
Pull the stalk towards the steering
wheel (1st unstable position) fig. 60
regardless of the position of the ring
nut. The
warning light switches on
in the instrument panel.AUTOMATIC MAIN BEAM
HEADLIGHTS
The system is activated with the menu
item and by rotating the light selector to
the AUTO position.
When the main beam headlights are
activated for the first time, pulling the
stalk to turn them on activates the
function and the icon
is displayed;
if the main beam headlights are actually
on, the relevant blue warning light
is displayed as well.
If the driving speed is over 40 km/h and
the function is activated, pulling the
stalk again to the main beam headlight
position deactivates the function.
If the driving speed is below 15 km/h
and the function is activated, the
function switches the main beam
headlights off. Pulling the stalk again to
the main beam headlight position is
interpreted as a request for main beam
headlights constantly on, therefore
the blue warning light
on the panel
switches on and the main beam
headlights are constantly on until the
speed exceeds 40 km/h again. The
function is activated again automatically
when 40 km/h is exceeded
.
58
F1A0065
59
F1A0066
60
F1A0067
45
Page 143 of 367

Warning lights on
panelWhat it means What to do
blueAUTOMATIC MAIN BEAM HEADLIGHTS
This warning light comes on when the automatic
main beam headlights are activated.
Warning lights on
panelWhat it means What to do
blueMAIN BEAM HEADLIGHTS
The warning light switches on when the main
beam headlights are turned on.
139