2014 FIAT 500L lights
[x] Cancel search: lightsPage 3 of 116

INTRODUCTION/WELCOME
WELCOME FROM FIAT...............2
CONTROLS AT A GLANCE
DRIVER COCKPIT..................4
INSTRUMENT CLUSTER...............6
GETTING STARTED
KEY FOB.......................8
VEHICLE SECURITY ALARM............8
POWER DOOR LOCKS...............9
SEAT BELT......................10
SUPPLEMENTAL RESTRAINT SYSTEM (SRS) —
AIR BAGS......................11
CHILD RESTRAINTS................12
FRONT SEATS....................16
REAR SEATS.....................17
HEATED SEATS...................18
TILT/TELESCOPING STEERING COLUMN...18
OPERATING YOUR VEHICLE
ENGINE BREAK-IN RECOMMENDATIONS...19
TURN SIGNAL/LIGHTS/HIGH BEAM LEVER...19
WIPER/WASHER LEVER..............21
SPEED CONTROL..................22
MANUAL CLIMATE CONTROLS.........24
AUTOMATIC TEMPERATURE CONTROLS
(ATC).........................25
REAR PARK ASSIST.................26
POWER SUNROOF.................26
WIND BUFFETING.................27
EURO TWIN CLUTCH SIX-SPEED
TRANSMISSION...................27
ADDING FUEL...................30
ELECTRONIC STABILITY CONTROL (ESC)...31
ELECTRONICSYOUR VEHICLE'S SOUND SYSTEM.......32
IDENTIFYING YOUR RADIO............34
Uconnect® 5.0...................35
Uconnect® 6.5N..................45
STEERING WHEEL AUDIO CONTROLS.....62
ELECTRONIC VEHICLE INFORMATION
CENTER (EVIC)...................62
PROGRAMMABLE FEATURES...........63UNIVERSAL GARAGE DOOR OPENER
(HomeLink®)....................64
POWER INVERTER.................66
POWER OUTLETS.................67
UTILITYTRAILER TOWING.................68
RECREATIONAL TOWING (BEHIND
MOTORHOME, ETC.)...............68
WHAT TO DO IN EMERGENCIES24-HOUR ROADSIDE ASSISTANCE........69
INSTRUMENT CLUSTER WARNING LIGHTS..69
IF YOUR ENGINE OVERHEATS..........74
JACKING AND TIRE CHANGING.........75
TIREFIT KIT......................81
JUMP-STARTING PROCEDURE..........86
SHIFT LEVER OVERRIDE..............89
TOWING A DISABLED VEHICLE.........90
FREEING A STUCK VEHICLE............91
EVENT DATA RECORDER (EDR).........92
CAP-LESS FUEL FILL FUNNEL...........92
MAINTAINING YOUR VEHICLEOPENING THE HOOD..............93
ENGINE COMPARTMENT.............94
FLUIDS AND CAPACITIES.............95
MAINTENANCE SCHEDULE...........96
FUSES........................100
TIRE PRESSURES.................103
WHEEL AND WHEEL TRIM CARE.......104
EXTERIOR BULBS.................104
CONSUMER ASSISTANCEFIAT CUSTOMER CENTER............105
FIAT CANADA CUSTOMER CENTER......105
ASSISTANCE FOR THE HEARING IMPAIRED...105
PUBLICATIONS ORDERING...........105
REPORTING SAFETY DEFECTS IN THE
UNITED STATES..................106
MOPAR ACCESSORIESAUTHENTIC ACCESSORIES BY MOPAR®...107
FAQ ’sFREQUENTLY ASKED QUESTIONS.......108
INDEX......................109
TABLE OF CONTENTS
1
Page 6 of 116

DRIVER COCKPIT
1.Power Mirrors
2.Uconnect® Phone (Bluetooth® Hands Free Calling) pg.32
3.Turn Signals/Lights/High Beam Lever pg.19
4.Instrument Cluster pg.6
5.Electronic Vehicle Information Center (EVIC) Display pg.62
6.Speed Control pg.22
7.Wiper/Washer Lever (behind steering wheel) pg.21
8.Ignition Switch
9.Audio System pg.32
10.Switch Panel
•Hazard Switch
•Fog Lights pg.20
•Electronic Vehicle Information Center (EVIC) Controls pg.63
CONTROLS AT A GLANCE
4
Page 8 of 116

INSTRUMENT CLUSTER
Warning Lights
- Low Fuel Warning Light
- Charging System Light
- Oil Pressure Warning Light
- Anti-Lock Brake (ABS) Light
- Air Bag Warning Light
- Engine Temperature Warning Light
- Seat Belt Reminder Light
- Malfunction Indicator Light (MIL)
- Power Steering System Warning Light
- Generic Warning Light
BRAKE- Brake Warning Light
- Tire Pressure Monitoring System (TPMS) Light
- Electronic Throttle Control (ETC) Light
- EURO Twin Clutch Transmission Light
CONTROLS AT A GLANCE
6
Page 10 of 116

KEY FOB
Locking And Unlocking The Doors
And Liftgate
•Press the LOCK button on the Remote
Keyless Entry (RKE) transmitter once to
lock all the doors and the liftgate.
•Press the UNLOCK button on the
Remote Keyless Entry (RKE) transmitter
once to unlock the driver’s door only
and twice within five seconds to unlock
all the doors and liftgate.
All doors can be programmed to unlock on
the first press of the UNLOCK button.
Refer to Programmable Features in this
guide.
Opening The Liftgate
•To open the liftgate, press the LIFTGATE
release handle located on the underside
of the license plate bar and pull the lift-
gate open with one fluid motion.
•Press the LIFGATE button located on the key fob.
WARNING!
Never leave children alone in a vehicle, or with access to an unlocked vehicle.Allowing
children to be in a vehicle unattended is dangerous for a number of reasons.A child or
others could be severely injured or killed.Children should be warned not to touch the
parking brake, brake pedal, or the shift lever.Do not leave the Key Fob in the vehicle,
or in a location accessible to children.A child could operate power windows, other con-
trols, or move the vehicle.
VEHICLE SECURITY ALARM
This Vehicle Security Alarm monitors the doors, liftgate, and ignition switch for unauthor-
ized operation.
When the alarm is activated, the interior switches for door locks are disabled.The Vehicle
Security Alarm provides both audio and visual signals repeatedly for three minutes.If the
disturbance is still present (driver's door, passenger door, other doors, ignition) after three
minutes, the parking lights and tail lights will flash for an additional 15 minutes.
Key Fo b
1 — Unlock
2 — Key Release
3 — Lock
4 — Liftgate
GETTING STARTED
8
Page 11 of 116

To Arm:
•Press the Key Fob LOCK button.
To Disarm The System:
•Push the Key Fob UNLOCK button or cycle the ignition to the ON/RUN position.
The Vehicle Security Alarm is designed to protect your vehicle; however, you can create
conditions where the Vehicle Security Alarm will give you a false alarm.If one of the pre-
viously described arming sequences has occurred, the Vehicle Security Alarm will arm re-
gardless of whether you are in the vehicle or not.If you remain in the vehicle and open
a door, the alarm will sound.If this occurs, disarm the Vehicle Security Alarm.
If the Vehicle Security Alarm is armed and the battery becomes disconnected the Vehicle
Security Alarm will remain armed when the battery is reconnected.The exterior lights
will flash, and the horn will sound.If this occurs, disarm the Vehicle Security Alarm.
POWER DOOR LOCKS
•Press the central LOCK/UNLOCK button located on the instrument panel, in the
switch bank below the radio.The button has an LED that indicates whether the doors
are locked or unlocked.
•LED ON:doors locked.Pressing the central LOCK/UNLOCK button once will unlock
all doors.The LED will switch off once the doors are unlocked.
•LED OFF:doors unlocked.Pressing the central LOCK/UNLOCK button once will lock
all doors.The LED will switch on once the doors are locked.
•Once the doors have been locked with the RKE transmitter, it will no longer be pos-
sible to unlock them by pressing central LOCK/UNLOCK button.
NOTE:
With central locking active (LED ON), opening one of the front doors, it is possible to
perform a central unlocking (LED OFF).With central locking active (LED ON), in order
to open one of the rear passenger doors, it is necessary pulling the internal door handle
twice.With one of the rear door open (LED OFF), the unlocking is performed only for
that door, not for all the vehicle.
•To unlock the front doors, pull the inside door handle to the first detent.If the rear
doors are locked, you must pull the door handle once to unlock the door and pull the
door handle a second time to open the door.
CAUTION!
An unlocked vehicle is an invitation to thieves.Always remove the key from the ignition
and lock all of the doors when leaving the vehicle unattended.
GETTING STARTED
9
Page 21 of 116

ENGINE BREAK-IN RECOMMENDATIONS
A long break-in period is not required for the engine and drivetrain (transmission and
axle) in your vehicle.
Drive moderately during the first 300 miles (500 km).After the initial 60 miles (100 km),
speeds up to 50 or 55 mph (80 or 90 km/h) are desirable.
While cruising, brief full-throttle acceleration within the limits of local traffic laws contrib-
utes to a good break-in.Wide-open throttle acceleration in low gear can be detrimental
and should be avoided.
The engine oil installed in the engine at the factory is a high-quality energy conserving
type lubricant.Oil changes should be consistent with anticipated climate conditions under
which vehicle operations will occur.For the recommended viscosity and quality grades,
refer to “Maintaining Your Vehicle.”
NOTE:
A new engine may consume some oil during its first few thousand miles (kilometers) of
operation.This should be considered a normal part of the break-in and not interpreted
as an indication of an engine problem or malfunction.
CAUTION!
Never use Non-Detergent Oil or Straight Mineral Oil in the engine or damage may result.
TURN SIGNAL/LIGHTS/HIGH BEAM LEVER
Turn Signal/Lane Change Assist
•Tap the lever up or down once and the
turn signal (right or left) will flash three
times to indicate a lane change and auto-
matically turn off.
Headlights/Parking Lights
•Rotate the end of the lever to the first
detent for parking lights and headlight
operation.
NOTE:
The ignition switch must be in the ON/RUN position for the headlights to operate.
OPERATING YOUR VEHICLE
19
Page 22 of 116

High Beams
•Pull the lever rearward to activate the high beams.
•A high beam symbol will illuminate in the cluster to indicate the high beams are on.
NOTE:
For safe driving, turn off the high beams when oncoming traffic is present to prevent
headlight glare and as a courtesy to other motorists.
Flash To Pass
•Pull the lever toward you to activate the high beams.The high beams will remain on
until the lever is released.
Headlight Delay (Follow Me Home)
•Within two minutes of the ignition switch being turned to the OFF/LOCK position or
the ignition key being removed from the ignition, pull the turn signal lever toward the
steering wheel.
•Each movement of the lever toward the steering wheel will increase the illumination
period by 30 seconds, up to a maximum of 210 seconds.
•To deactivate, pull the multifunction lever toward the steering wheel and hold it for
more than two seconds.
NOTE:
Activation of Follow Me Home is only enabled once per key cycle and the steps outlined
above must be repeated each time you want to activate it.
Fog Lights
•Push the fog light button, located on the center stack of the instrument panel just be-
low the radio, once to turn on the fog lights.
•Push the button a second time to turn the fog lights off.
OPERATING YOUR VEHICLE
20
Page 65 of 116

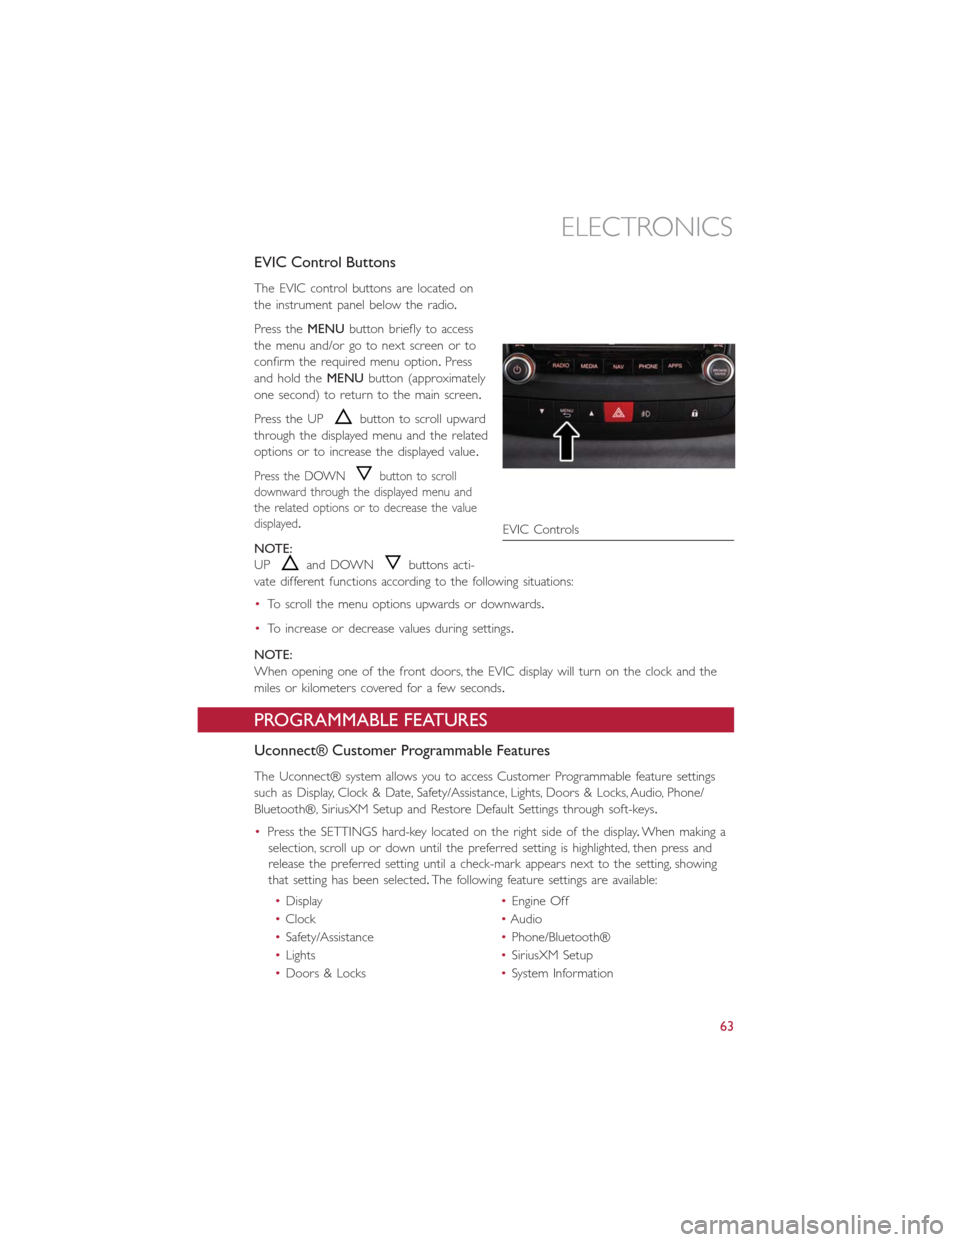
EVIC Control Buttons
The EVIC control buttons are located on
the instrument panel below the radio.
Press theMENUbutton briefly to access
the menu and/or go to next screen or to
confirm the required menu option.Press
and hold theMENUbutton (approximately
one second) to return to the main screen.
Press the UP
button to scroll upward
through the displayed menu and the related
options or to increase the displayed value.
Press the DOWNbutton to scroll
downward through the displayed menu and
the related options or to decrease the value
displayed.
NOTE:
UP
and DOWNbuttons acti-
vate different functions according to the following situations:
•To scroll the menu options upwards or downwards.
•To increase or decrease values during settings.
NOTE:
When opening one of the front doors, the EVIC display will turn on the clock and the
miles or kilometers covered for a few seconds.
PROGRAMMABLE FEATURES
Uconnect® Customer Programmable Features
The Uconnect® system allows you to access Customer Programmable feature settings
such as Display, Clock & Date, Safety/Assistance, Lights, Doors & Locks, Audio, Phone/
Bluetooth®, SiriusXM Setup and Restore Default Settings through soft-keys.
•Press the SETTINGS hard-key located on the right side of the display.When making a
selection, scroll up or down until the preferred setting is highlighted, then press and
release the preferred setting until a check-mark appears next to the setting, showing
that setting has been selected.The following feature settings are available:
•Display•Engine Off
•Clock•Audio
•Safety/Assistance•Phone/Bluetooth®
•Lights•SiriusXM Setup
•Doors & Locks•System Information
EVIC Controls
ELECTRONICS
63