2014 FIAT 500E ad blue
[x] Cancel search: ad bluePage 51 of 92

•On your mobile phone, search for devices equipped with Bluetooth® wireless technol-
ogy (the setting on your mobile phone might be called Discover or New Device).In
this list you will find BLUE&ME™ (name identifying the BLUE&ME™ system on your
car) select it.
•When prompted by the mobile phone, enter the PIN number shown on the instru-
ment panel display using your mobile phone keypad.If pairing is successful, the system
will say “Connecting” and at the end the display will show as confirmation message, the
ID of the paired mobile phone.
•It is essential to wait until you see this confirmation message on the display.Pressing
PHONE/MENU button on the steering wheel or MUTE/ESC button before the mes-
sage is displayed may cancel the pairing process.If the pairing process fails, an error
message will be displayed: in this event repeat the pairing procedure.
•At first pairing, BLUE&ME™ will say “Welcome” immediately after connecting.This
message will no longer be heard when your phone automatically connects to the
BLUE&ME™ system on future ignition cycles.
•BLUE&ME™ will ask if you would like to copy your paired phone phonebook to
BLUE&ME™.It is recommended to copy it.To start copying the phonebook say “Yes,”
otherwise say “No.”
•For certain mobile phones the phonebook is not copied automatically, in this case you
must transfer the phonebook contacts using your mobile phone keypad.If
BLUE&ME™ asks you to do this, then perform this procedure following the instruc-
tions specific to your mobile phone and press the PHONE/MENU button on the
steering wheel when you have finished.Certain mobile phones may require you to
indicate that you do not want to be asked every time to copy the phonebook.If this is
the case, this could be indicated by checking a box on the phone during the pairing
process.If applicable, this option will only be presented on the phone during the pair-
ing process.
Making A Phone Call
•Assume that “John Smith” is one of the contacts stored in your phonebook.To call
John Smith, proceed as follows:
1.Press the VR steering wheel button and pronounce “Call John Smith.” If the name is
recognized, the system will display the recognized contact’s information on the display
screen.
2.If there is just one phone number for John Smith in your phonebook, the system will
ask if you would like to call John Smith.To start the call say “Yes,” otherwise say “No.”
If John Smith has several phone numbers, the system will ask which phone number
you would like to call (e.g.: “Call John Smith (at) Work or (at) Home?”).Answer with
the type of required phone number (e.g.: “(at) Home”).
ELECTRONICS
49
Page 52 of 92

3.If John Smith has several phone numbers but the “location” (e.g.: the type of phone
number like work, home, etc.) is missing, the system will display the selected contact
and a list of related phone numbers on the instrument cluster display.The hands-free
phone system will ask if you would like to call the phone number displayed.To r e -
spond with “Yes,” pronounce “Yes,” otherwise say “No.” If this is the correct contact
but the wrong number, say “Forward” or “Backward” to navigate to the phone num-
ber you’d like to call.To call the displayed phone number, pronounce “Call.” You can
also scroll through the phone number list manually by pressing the buttons on the
back of the steering wheel until you find the required number.Then, press PRESET
UP/OK button on the rear of the steering wheel to start the call.
4.To end the phone call, press the PHONE HANG UP button on the steering wheel.
Media Player
•With the BLUE&ME™ media player you can play, via the car sound system, the digital
audio files stored on a USB device by simply connecting it to the USB port located in
the glove compartment of the car.
•The MEDIA PLAYER menu enables the following:
– Display tracks stored on your USB stick/iPod®.
– Play audio files stored on your USB stick/iPod® (BLUE&ME™ recognizes.wma,.mp3
and.wav,.aac formats for audio files and.wpl and.m3u for playlists).
How To Connect The USB Stick/iPod® To BLUE&ME™
•To connect your USB stick/iPod® to BLUE&ME™, proceed as follows:
•USB devices without USB wire: just connect the USB stick/iPod® (directly or by an
extension lead) to the USB port on the car.
•USB stick/iPod® with USB wire: use the wire to connect the USB stick/iPod® to
the USB port on the car.
•Turn the ignition key to ON.BLUE&ME™ will start automatically to play your digital
tracks selecting them from the library built at the moment the USB stick/iPod® is
connected.
•If AUTOPLAY is set to “ON,” BLUE&ME™ will start playback automatically.
•Refer to the iPod®/USB/MP3 CONTROL section in this manual and the BLUE&ME™
User's Manual on the DVD for more details.
WARNING!
Driving while distracted can result in loss of vehicle control, accident and injury.It is
strongly recommended that you use extreme caution when using any device or feature
that may take your focus off the road or your hands off the steering wheel.Your pri-
mary responsibility is the safe operation of your vehicle.
ELECTRONICS
50
Page 53 of 92

iPod®/USB/MP3 CONTROL
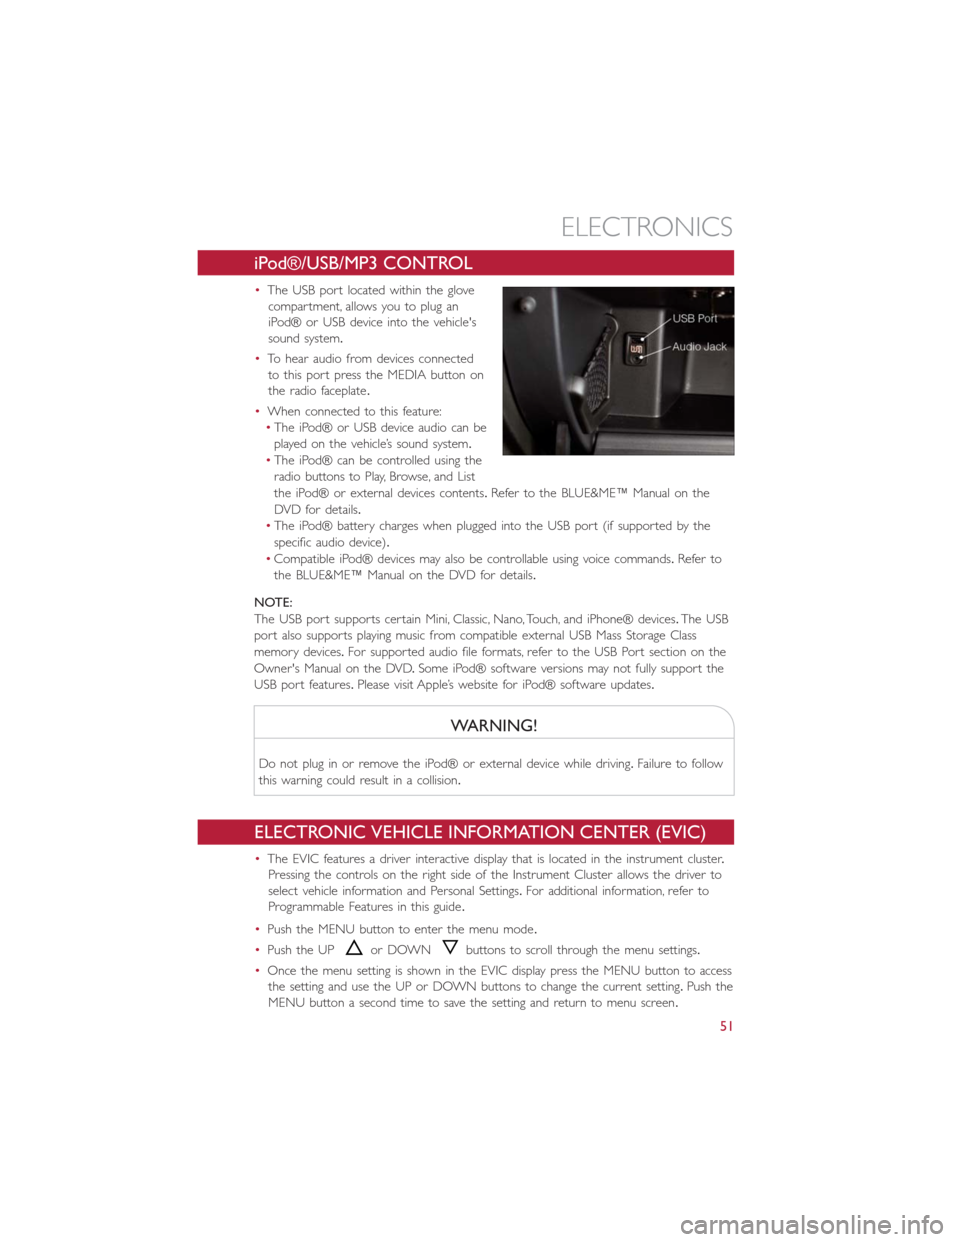
•The USB port located within the glove
compartment, allows you to plug an
iPod® or USB device into the vehicle's
sound system.
•To hear audio from devices connected
to this port press the MEDIA button on
the radio faceplate.
•When connected to this feature:
•The iPod® or USB device audio can be
played on the vehicle’s sound system.
•The iPod® can be controlled using the
radio buttons to Play, Browse, and List
the iPod® or external devices contents.Refer to the BLUE&ME™ Manual on the
DVD for details.
•The iPod® battery charges when plugged into the USB port (if supported by the
specific audio device).
•Compatible iPod® devices may also be controllable using voice commands.Refer to
the BLUE&ME™ Manual on the DVD for details.
NOTE:
The USB port supports certain Mini, Classic, Nano, Touch, and iPhone® devices.The USB
port also supports playing music from compatible external USB Mass Storage Class
memory devices.For supported audio file formats, refer to the USB Port section on the
Owner's Manual on the DVD.Some iPod® software versions may not fully support the
USB port features.Please visit Apple’s website for iPod® software updates.
WARNING!
Do not plug in or remove the iPod® or external device while driving.Failure to follow
this warning could result in a collision.
ELECTRONIC VEHICLE INFORMATION CENTER (EVIC)
•The EVIC features a driver interactive display that is located in the instrument cluster.
Pressing the controls on the right side of the Instrument Cluster allows the driver to
select vehicle information and Personal Settings.For additional information, refer to
Programmable Features in this guide.
•Push the MENU button to enter the menu mode.
•Push the UP
or DOWNbuttons to scroll through the menu settings.
•Once the menu setting is shown in the EVIC display press the MENU button to access
the setting and use the UP or DOWN buttons to change the current setting.Push the
MENU button a second time to save the setting and return to menu screen.
ELECTRONICS
51
Page 80 of 92

Power Distribution Center #1
•The Power Distribution Center #1 is located on the right side of the underhood com-
partment.To access the fuses, remove locking screw and slide cover off.
•The ID number of the electrical component corresponding to each fuse can be found
on the back of the cover.
Cavity Maxi Fuse Mini Fuse Description
F01 60 Amp Blue Body Control Module (BCM)
F02 20 Amp Yellow HiFi Amplifier
F03 20 Amp Yellow Ignition Switch
F04 40 Amp Orange Brake System Module Pump
F05 70 Amp Tan Electric Power Steering (EPS)
F06 60 Amp Blue Radiator Fan
F07 40 Amp Orange Regen Brake Module
F08 40 Amp Orange HVAC
F09 5 Amp TanAir Electric Heater
Charge Indicator
F10 10 Amp Red Horn
F11 10 Amp RedElectronic Vehicle Control Unit
(EVCU)
F14 5 Amp Tan High beam (Shutter)
F15 15 Amp Blue Cigar Lighter
F16 10 Amp RedHumidity Sensor
VPAM
AC Compressor
F18 5 Amp TanElectronic Vehicle Control Unit
(EVCU)
F19 10 Amp Red HVAC
F20 15 Amp Blue Heated Seats – If Equipped
F23 25 Amp Clear Anti-Lock Brake Valves
F24 7.5 Amp BrownEPS
YAW Sensor
F30 15 Amp Blue Fog Lamps
F81 30 Amp Green Electronic Shifter (ESM)
F82 30 Amp Green Sunroof
F84 25 Amp Clear Regen Brake Module
F85
30 Amp GreenRear Window Heater
F87 5 Amp Tan Electronic Shifter (ESM)
MAINTAINING YOUR VEHICLE
78
Page 81 of 92

Power Distribution Center (PDC) #2
•The Power Distribution Center #2 is located next to the battery in the underhood
compartment.To access the fuses, pull the release tabs and remove the cover.
Cavity Maxi Fuse Mini Fuse Description
FPT9 15 Amp Blue Battery Pack Control Module
(BPCM)
Power Inverter Module (PIM)
FPT13 10 Amp Red EAC (AC Compressor)
On Board Charging Module
(OBCM)
FPT16 5 Amp Tan Intelligent Battery Sensor (IBS)
FPT17 10 Amp Red EAC (AC Compressor)
Radiator Fan
FPT20 10 Amp Red Electronic Vehicle Control Unit
(EVCU)
Cavity Cartridge Fuse Description
FPT3 20 Amp Clear Battery Coolant Pump
FPT5 20 Amp Yellow Inverter Coolant Pump
TIRE PRESSURES
•Check the inflation pressure of each tire, including the spare tire, at least monthly and
inflate to the recommended pressure for your vehicle.
•The tire pressures recommended for your vehicle are found on the “Tire and Loading
Information” label located on the driver’s side door opening.
NOTE:
Refer to the Owner's Manual on the DVD
for more information regarding tire warn-
ings and instructions.
MAINTAINING YOUR VEHICLE
79
Page 87 of 92

FAQ’s
GETTING STARTED
•How do I charge my vehicle? pg.16
•How do I install my LATCH Equipped Child Seat? pg.24
•How do I fold down my rear seat? pg.30
ELECTRONICS
•What Sound System do I have? pg.42
•How do I set the general settings? pg.51
•How do I set the presets on my radio? pg.45
•How do I connect my portable media player/iPod/MP3? pg.51
•How do I pair my cell phone via Bluetooth® with the BLUE&ME™ Hands-Free
Communication System? pg.48
WHAT TO DO IN EMERGENCIES
•What do I do if my TPMS warning light is blinking? pg.57
•How do I Jump-Start my vehicle? pg.65
MAINTAINING YOUR VEHICLE
•Where is my underhood fuse block located? pg.77
•Where is my interior fuse block located? pg.77
•What should my tire pressure be set at? pg.79
FREQUENTLY ASKED QUESTIONS
85
Page 88 of 92

Airbag....................22
Air Bag
Advance Front Air Bag.........22
Driver Knee Air Bag...........22
Front Air Bag..............22
Front Passenger Knee Air bag......22
Knee Impact Bolsters..........22
Side Air Bags...............22
Airbag Light...............22, 59
Alarm
Disarm The System...........21
Vehicle Security Alarm.........21
Alarm (Security Alarm)...........21
Anti-Lock Warning Light...........59
Automatic Temperature Control (ATC)...39
Auxiliary Electrical Outlet
(Power Outlet)..............54
Battery....................65
Brake Fluid..................74
Bulb Replacement..............81
Bulbs, Light..................81
Charging...................16
Child Restraint................23
Child Restraints
Child Seat Installation..........25
Installing Child Restraints Using The
Vehicle Seat Belt.............25
Lower Anchors And Tethers For
Children.................25
Using The Top Tether Anchorage....25
Child Seat..................25
Climate Control
Automatic................39
Cluster Warning/Indicator Lights
Anti-Lock Brake (ABS) Light......59
Cooling System
Coolant Capacity............74
Cruise Control (Speed Control)......37
Customer Assistance............82
Defects, Reporting..............83
Disarming, Security System
.........21
Door Locks.................20
Electrical Outlet, Auxiliary
(Power Outlet)..............54Electronics
Your Vehicle's Sound System......42
Electronic Speed Control
(Cruise Control).............37
Electronic Vehicle Information Center
(EVIC)................51, 52
Emergency, In Case of
Brake Warning Light..........59
Towing.................69
Engine
Compartment..............73
Enhanced Accident Response Feature....70
Event Data Recorder............71
Extending Driving Range..........33
Exterior Lights................81
FAQ.....................85
Flash-To-Pass.................34
Freeing A Stuck Vehicle...........70
Front Heated Seats.............31
Fuse.....................77
Fuses.....................77
Hands-Free Communication —
BLUE&ME™...............45
Heated Mirrors...............40
Heated Seats................31
High Voltage Battery.............16
Hood Release................72
Instrument Cluster
Indicators.................8
Instrument Cluster Warning Lights....8, 56
Interior and Instrument Lights.......6, 7
iPod®/USB/MP3 Control..........51
Jump Starting................65
Key Fo b...................20
Disarm The Alarm............21
Lane Change Assist
.............34
LATCH (Lower Anchors and Tether for
CHildren).............23, 24, 26
Level 1 Charging...............13
Level 2 Charging...............13
Liftgate....................20
Light Bulbs..................81
INDEX
86