2014 DODGE JOURNEY recommended oil
[x] Cancel search: recommended oilPage 108 of 651

Transporting Pets
Air Bags deploying in the front seat could harm your pet.
An unrestrained pet will be thrown about and possibly
injured, or injure a passenger during panic braking or in
a collision.
Pets should be restrained in the rear seat in pet harnesses
or pet carriers that are secured by seat belts.
ENGINE BREAK-IN RECOMMENDATIONS
A long break-in period is not required for the engine and
drivetrain (transmission and axle) in your vehicle.
Drive moderately during the first 300 mi (500 km). After
the initial 60 mi (100 km), speeds up to 50 or 55 mph (80
or 90 km/h) are desirable.While cruising, brief full-throttle acceleration, within the
limits of local traffic laws contributes to a good break-in.
Wide-open throttle acceleration in low gear can be detri-
mental and should be avoided.
The engine oil installed in the engine at the factory is a
high-quality energy-conserving type lubricant. Oil
changes should be consistent with anticipated climate
conditions under which vehicle operations will occur. For
the recommended viscosity and quality grades, refer to
“Maintenance Procedures” in “Maintaining Your Ve-
hicle”. NON-DETERGENT OR STRAIGHT MINERAL
OILS MUST NEVER BE USED.
A new engine may consume some oil during its first few
thousand miles (kilometers) of operation. This should be
considered a normal part of the break-in and not inter-
preted as an indication of difficulty.
106 THINGS TO KNOW BEFORE STARTING YOUR VEHICLE
Page 471 of 651

These indicators are molded into the bottom of the tread
grooves. They will appear as bands when the tread depth
becomes 1/16 in (2 mm). When the tread is worn to the
tread wear indicators, the tire should be replaced. Refer
to “Replacement Tires” in this section for further infor-
mation.
Life Of Tire
The service life of a tire is dependent upon varying
factors including, but not limited to:
•Driving style
• Tire pressure
• Distance driven
• Performance tires, tires with a speed rating of V or
higher, and summer tires typically have a reduced
tread life. Rotation of these tires per the vehicle main-
tenance schedule is highly recommended.
WARNING!
Tires and the spare tire should be replaced after six
years, regardless of the remaining tread. Failure to
follow this warning can result in sudden tire failure.
You could lose control and have a collision resulting
in serious injury or death.
Keep dismounted tires in a cool, dry place with as little
exposure to light as possible. Protect tires from contact
with oil, grease, and gasoline.
Replacement Tires
The tires on your new vehicle provide a balance of many
characteristics. They should be inspected regularly for
wear and correct cold tire inflation pressure. The manu-
facturer strongly recommends that you use tires equiva-
lent to the originals in size, quality and performance
when replacement is needed. Refer to the paragraph on
5
STARTING AND OPERATING 469
Page 519 of 651

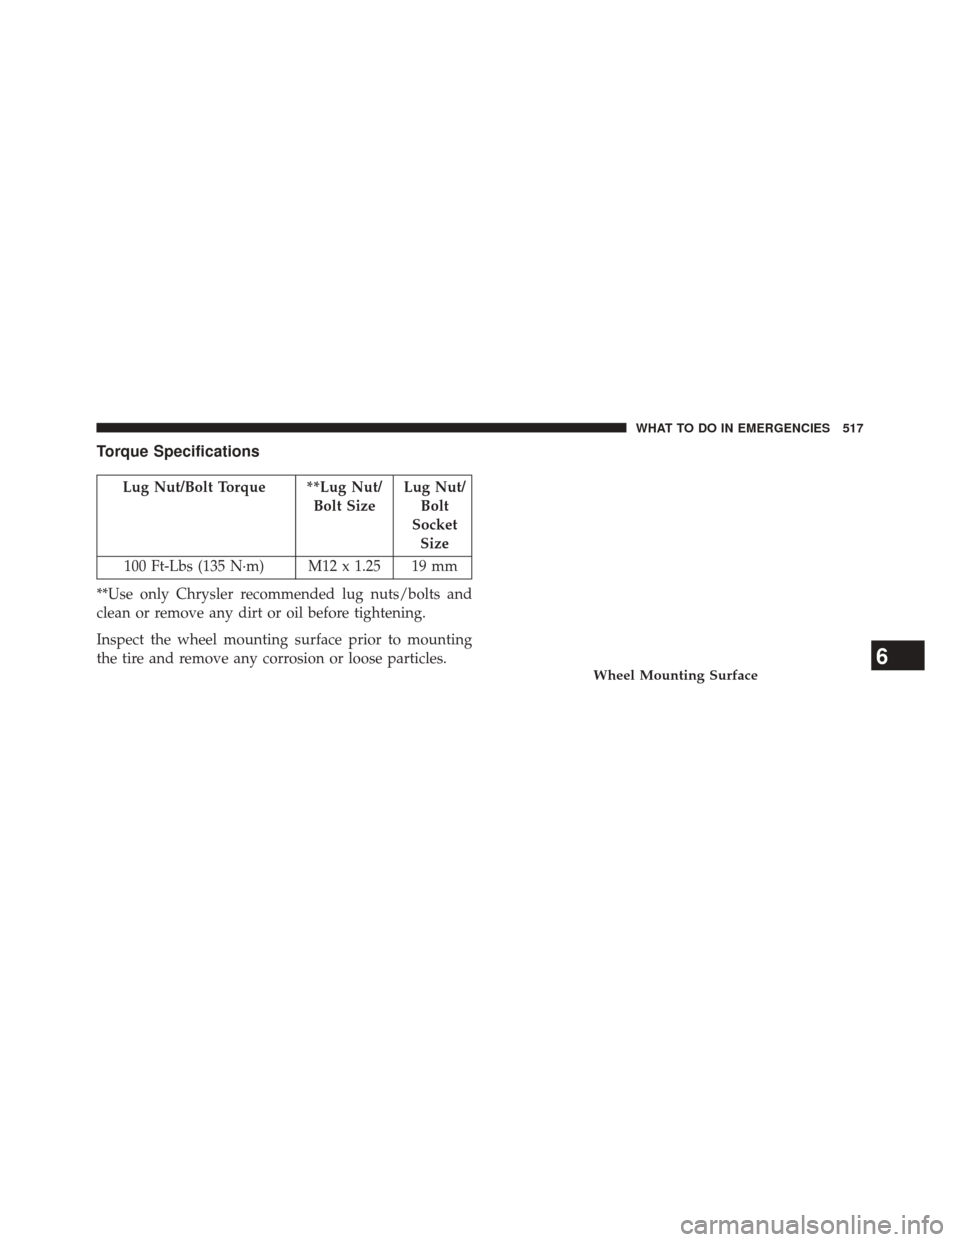
Torque Specifications
Lug Nut/Bolt Torque **Lug Nut/Bolt SizeLug Nut/
Bolt
Socket Size
100 Ft-Lbs (135 N·m) M12 x 1.25 19 mm
**Use only Chrysler recommended lug nuts/bolts and
clean or remove any dirt or oil before tightening.
Inspect the wheel mounting surface prior to mounting
the tire and remove any corrosion or loose particles.
Wheel Mounting Surface6
WHAT TO DO IN EMERGENCIES 517
Page 555 of 651

CAUTION!
Do not use chemical flushes in your engine oil as the
chemicals can damage your engine. Such damage is
not covered by the New Vehicle Limited Warranty.
Engine Oil Viscosity — 2.4L Engine
MOPAR® SAE 5W-20 engine oil or equivalent Pennzoil®
or Shell Helix® is recommended for all operating tem-
peratures. This engine oil improves low temperature
starting and vehicle fuel economy.
The engine oil filler cap also shows the recommended
engine oil viscosity for your engine. For information on
the engine oil filler cap location, refer to “Engine Com-
partment” in “Maintaining Your Vehicle” for further
information.Lubricants that do not have both, the engine oil certifi-
cation mark and the correct SAE viscosity grade number
should not be used.
Engine Oil Viscosity — 3.6L Engine
MOPAR® SAE 5W-20 engine oil approved to Chrysler
Material Standard MS-6395 such as Pennzoil®, Shell
Helix® or equivalent is recommended for all operating
temperatures. This engine oil improves low temperature
starting and vehicle fuel economy.
The engine oil filler cap also shows the recommended
engine oil viscosity for your engine. For information on
engine oil filler cap location, refer to the “Engine Com-
partment” illustration in this section.
NOTE:
MOPAR® SAE 5W-30 engine oil approved to
Chrysler Material Standard MS-6395 such as Pennzoil®,
Shell Helix® or equivalent may be used when SAE 5W-20
engine oil meeting MS-6395 is not available.
7
MAINTAINING YOUR VEHICLE 553
Page 556 of 651

Synthetic Engine Oils
You may use synthetic engine oils provided the recom-
mended oil quality requirements are met, and the recom-
mended maintenance intervals for oil and filter changes
are followed.
Materials Added To Engine Oil
The manufacturer strongly recommends against the addi-
tion of any additives (other than leak detection dyes) to the
engine oil. Engine oil is an engineered product and its
performance may be impaired by supplemental additives.
Disposing Of Used Engine Oil And Oil Filters
Care should be taken in disposing of used engine oil and
oil filters from your vehicle. Used oil and oil filters,
indiscriminately discarded, can present a problem to the
environment. Contact your authorized dealer, service sta-
tion or governmental agency for advice on how and where
used oil and oil filters can be safely discarded in your area.
Engine Oil Filter
The engine oil filter should be replaced with a new filter
at every engine oil change.
Engine Oil Filter Selection
This manufacturer’s engines have a full-flow type oil
filter. Use a filter of this type for replacement. The quality
of replacement filters varies considerably. Only high
quality filters should be used to assure most efficient
service. MOPAR® engine oil filters are a high quality oil
filter and are recommended.
Engine Air Cleaner Filter
Refer to the “Maintenance Schedule” for the proper
maintenance intervals.
554 MAINTAINING YOUR VEHICLE
Page 576 of 651

Use only manufacturer’s recommended brake fluid. Re-
fer to “Fluids, Lubricants, and Genuine Parts” in “Main-
taining Your Vehicle” for further information.
WARNING!
•Use only manufacturer’s recommended brake
fluid. Refer to “Fluids, Lubricants, and Genuine
Parts” in “Maintaining Your Vehicle” for further
information. Using the wrong type of brake fluid
can severely damage your brake system and/or
impair its performance. The proper type of brake
fluid for your vehicle is also identified on the
original factory installed hydraulic master cylinder
reservoir.
(Continued)
WARNING! (Continued)
•To avoid contamination from foreign matter or
moisture, use only new brake fluid or fluid that has
been in a tightly closed container. Keep the master
cylinder reservoir cap secured at all times. Brake
fluid in a open container absorbs moisture from the
air resulting in a lower boiling point. This may
cause it to boil unexpectedly during hard or pro-
longed braking, resulting in sudden brake failure.
This could result in a collision.
• Overfilling the brake fluid reservoir can result in
spilling brake fluid on hot engine parts, causing
the brake fluid to catch fire. Brake fluid can also
damage painted and vinyl surfaces, care should be
taken to avoid its contact with these surfaces.
(Continued)
574 MAINTAINING YOUR VEHICLE
Page 579 of 651

7. Wipe the dipstick clean and reinsert it until seated.Then, remove the dipstick and note the fluid level on
both sides. The fluid level reading is only valid if there
is a solid coating of oil on both sides of the dipstick.
Note that the holes in the dipstick will be full of fluid
if the actual level is at or above the hole.
• If the fluid is hot, the fluid level should be in the
crosshatched area marked “HOT” (between the up-
per two holes in the dipstick).
• If the fluid is cold, the fluid level should be between
the lower two holes in the area marked “COLD.”
If the fluid level is low, add fluid through the dipstick
tube to bring it to the proper level. Do not overfill. After
adding any quantity of oil through the dipstick tube, wait
at least two minutes for the oil to fully drain into the
transmission before rechecking the fluid level. NOTE:
If it is necessary to check the transmission below
the operating temperature, the fluid level should be
between the two COLD (lower) holes on the dipstick
with the fluid at approximately 80°F (27°C). If the fluid
level is correctly established at 80°F (27°C), it should be
between the HOT (upper) reference holes when the
transmission reaches 180°F (82°C). Remember it is best to
check the level at the normal operating temperature.
8. Check for leaks. Release the parking brake.
CAUTION!
•Using a transmission fluid other than the manufactur-
er’s recommended fluid may cause deterioration in
transmission shift quality and/or torque converter
shudder, and will require more frequent fluid and
filter changes. Refer to “Fluids, Lubricants, and Genu-
ine Parts” in this section for fluid specifications.
(Continued)
7
MAINTAINING YOUR VEHICLE 577
Page 581 of 651

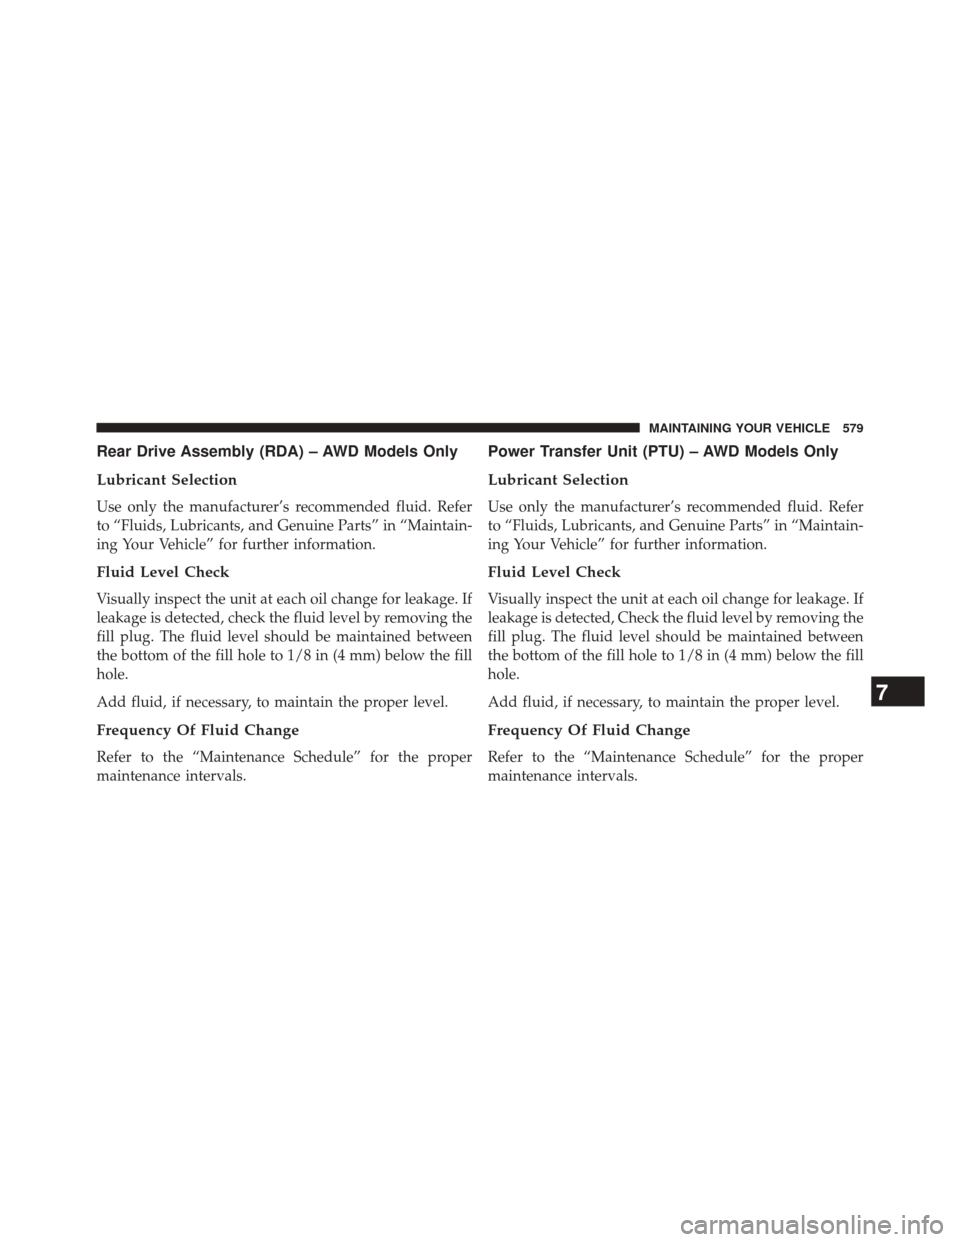
Rear Drive Assembly (RDA) – AWD Models Only
Lubricant Selection
Use only the manufacturer’s recommended fluid. Refer
to “Fluids, Lubricants, and Genuine Parts” in “Maintain-
ing Your Vehicle” for further information.
Fluid Level Check
Visually inspect the unit at each oil change for leakage. If
leakage is detected, check the fluid level by removing the
fill plug. The fluid level should be maintained between
the bottom of the fill hole to 1/8 in (4 mm) below the fill
hole.
Add fluid, if necessary, to maintain the proper level.
Frequency Of Fluid Change
Refer to the “Maintenance Schedule” for the proper
maintenance intervals.
Power Transfer Unit (PTU) – AWD Models Only
Lubricant Selection
Use only the manufacturer’s recommended fluid. Refer
to “Fluids, Lubricants, and Genuine Parts” in “Maintain-
ing Your Vehicle” for further information.
Fluid Level Check
Visually inspect the unit at each oil change for leakage. If
leakage is detected, Check the fluid level by removing the
fill plug. The fluid level should be maintained between
the bottom of the fill hole to 1/8 in (4 mm) below the fill
hole.
Add fluid, if necessary, to maintain the proper level.
Frequency Of Fluid Change
Refer to the “Maintenance Schedule” for the proper
maintenance intervals.
7
MAINTAINING YOUR VEHICLE 579