2014 DODGE CHARGER manual radio set
[x] Cancel search: manual radio setPage 34 of 148

Instrument Panel Dimmer
• Rotate the dimmer control to the extreme bottom position to fully dim the instrumentpanel lights and prevent the interior lights from illuminating when a door is opened.
• Rotate the dimmer control up to increase the brightness of the instrument panel and cupholders when the parking lights or headlights are on.
• Rotate the dimmer control up to the next detent position to fully brighten the odometer and radio when the parking lights or headlights are on.
• Rotate the dimmer control up to the last detent position to turn on the interior lighting.
• If your vehicle is equipped with a touchscreen, the dimming is programmable through the Uconnect® system. Refer to “Uconnect® Settings ” in “Understanding Your Instrument
Panel” in the Owner's Manual on the DVD for further details.
Ambient Light Dimmer
• Rotate the ambient light control up or down to increase or decrease the brightness of therelease handle, map pocket (if equipped), overhead and floor lighting when the parking
lights or headlights are on.
• Rotate to extreme bottom position to turn off.
SPEED CONTROL
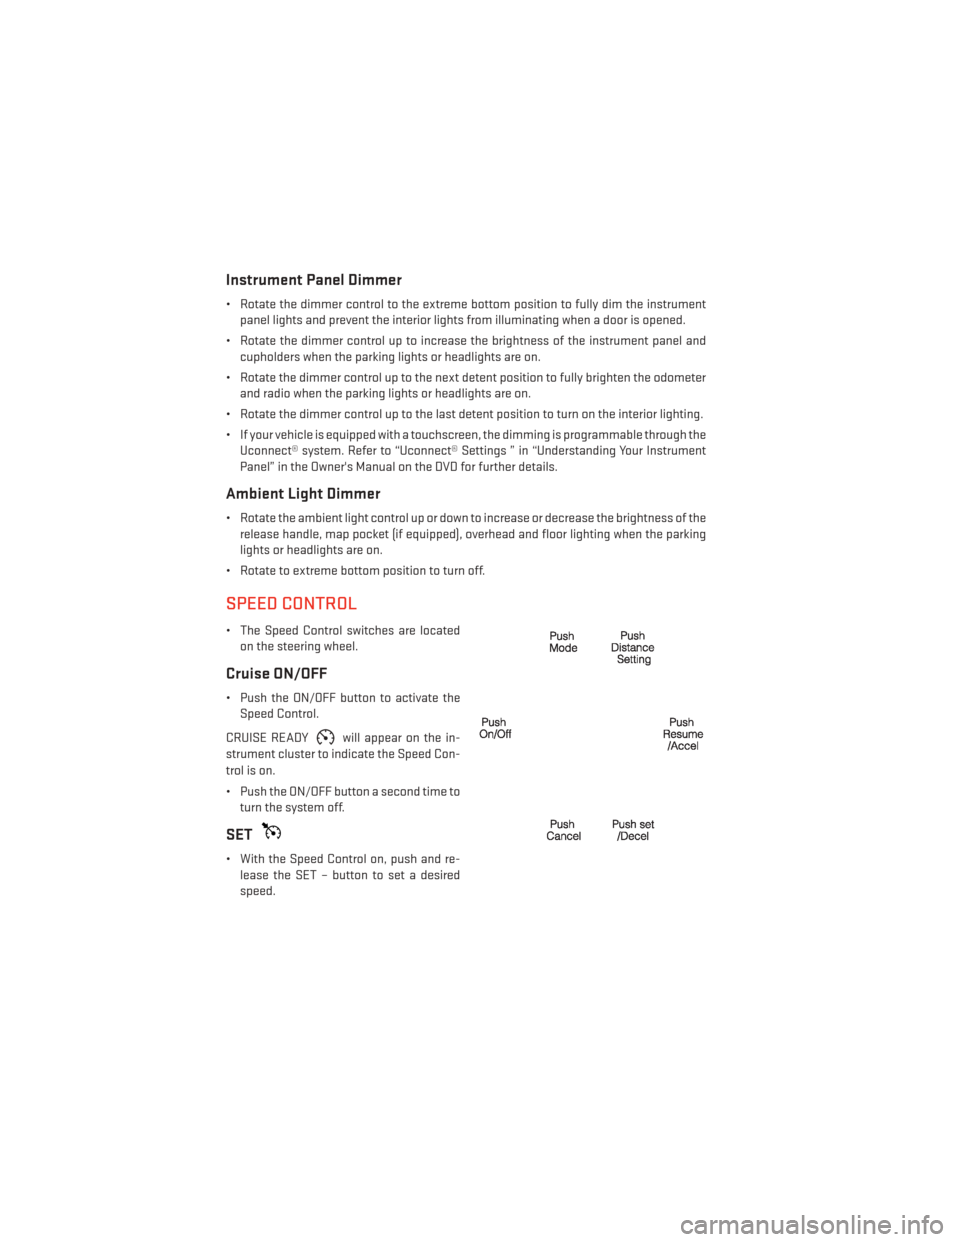
• The Speed Control switches are located on the steering wheel.
Cruise ON/OFF
• Push the ON/OFF button to activate theSpeed Control.
CRUISE READY
will appear on the in-
strument cluster to indicate the Speed Con-
trol is on.
• Push the ON/OFF button a second time to turn the system off.
SET
• With the Speed Control on, push and re-lease the SET – button to set a desired
speed.
OPERATING YOUR VEHICLE
32
Page 51 of 148

Setting The Time
• Model 8.4N synchronizes time automatically via GPS, so should not require any timeadjustment. If you do need to set the time manually, follow the instructions below for
Model 8.4.
• For Model 8.4, turn the unit on, then touch the “Time Display” at the top of the screen. Touch “Yes”.
• If the time is not displayed at the top of the screen, touch “More” soft-key and then “Settings” soft-key. In the Settings screen, touch the “Clock” soft-key, then check or
uncheck this option.
• Touch “+” or “–” next to Set Time Hours and Set Time Minutes to adjust the time.
• If these features are not available, uncheck the “Sync” with GPS box.
• Touch “X” to save your settings and exit out of the Clock Setting screen.
Audio Settings
• Touch the “Audio” soft-key to activate the Audio settings screen to adjust Balance\Fade, Equalizer and Speed Adjusted Volume.
• You can return to the Radio screen by touching the “X” located at the top right.
Balance/Fade
• Touch the “Balance/Fade” soft-key to Balance audio between the front speakers or fade the audio between the rear and front speakers.
• Touching the “Front,” “Rear,” ”Left” or “Right” soft-keys or touch and drag the red Speaker Icon to adjust the Balance/Fade.
Equalizer
• Touch the “Equalizer” soft-key to activate the Equalizer screen.
• Touch the “+” or “ –” soft-keys, or by touching and dragging over the level bar for each of the equalizer bands. The level value, which spans between ±9, is displayed at the bottom
of each of the Bands.
Speed Adjusted Volume
• Touch the “Speed Adjusted Volume” soft-key to activate the Speed Adjusted Volume screen. The Speed Adjusted Volume is adjusted by touching the “+” and “–” buttons or by
touching and dragging over the level bar. This alters the automatic adjustment of the
audio volume with variation to vehicle speed.
ELECTRONICS
49
Page 68 of 148

Making A Phone Call
• Press the Uconnect® Phone button.
• After the BEEP, say “dial” then the number (or “call” then the name as listed in your phone; see Phonebook).
NOTE:
You can also initiate a call by using the touchscreen on the Phone main screen.
Receiving A Call — Accept (And End)
• When an incoming call rings/is announced on Uconnect®, press the Phone button.
• To end a call, press the Phone button
.
Mute (Or Unmute) Microphone During Call
• During a call, touch the “mute” soft-key on the Phone main screen to mute and unmute the call.
Transfer Ongoing Call Between Handset And Vehicle
• During an on-going call, touch the “Transfer” soft-key on the Phone main screen totransfer an on-going call between handset and vehicle.
Common Phone Commands (Examples)
• “Call John Smith”
• “Call John Smith mobile”
• “Dial 1 248 555 1212”
• “Call Emergency”
• “Call Towing Assistance”
• “Redial”
Phonebook
• Uconnect® radios will automatically download your phonebook from your paired phone,if this feature is supported by your phone. Entries are updated each time that the phone
is connected. If your phone book entries do not appear, check the settings on your phone.
Some phones require you to enable this feature manually.
• Your phonebook can be browsed on your radio screen, but editing can only be done on your phone. To browse, touch the “Phone” soft-key, then the “Phonebook” soft-key.
• Favorite phonebook entries can be saved as Favorites for quicker access. Favorites are shown at the top of your main phone screen.
ELECTRONICS
66
Page 70 of 148

Uconnect® VOICE COMMAND
Uconnect® Voice Command (8.4 & 8.4N Only)
• If the Uconnect® Voice Commandbutton exists on your steering wheel, then you
have the Voice Command feature.
• The Voice Command feature lets you keep your hands on the steering wheel, and your eyes on the road.
• When you press the Voice Command button
located on the radio faceplate or
steering wheel, you will hear a beep. The beep is your signal to give a command. If you do
not know what commands to say, you can say "help" and the system will provide options
to you. If you ever wish to interrupt the system while it lists options, press the Voice
Command button
, listen for the BEEP, and say your command.
• You can “chain” commands together for faster results. Say “Play the artist Scott Joplin”, for example.
Changing The Volume
• Start a dialogue by pressing the Voice Command button, then say a command
(for example, “help”).
• Use the radio ON/OFF VOLUME rotary knob to adjust the volume to a comfortable level while the Voice Command system is speaking. The volume setting for Voice Command is
different than the audio system.
• Refer to the “Understand The Features Of Your Vehicle” section of your vehicle's Owner's Manual on the DVD for further details.
Common Voice Commands (Examples)
Switch Modes “FM”
“Satellite” “AM”
“Change Source to iPod”
“Change Source to SD Card”
Radio (FM, AM) “95.5”
“95.5 FM”
“Go to preset 5”
Player “Play Album 'Greatest Hits”
“Play Artist 'Scott Joplin” “Play Genre 'Rock”
“Play Song 'Maple Leaf Rag”
SiriusXM Satellite Radio “39”
“Foxxhole”
ELECTRONICS
68
Page 139 of 148

Event Data Recorder...........108
Exterior Lights ..............131
FlatTireChanging ............89
Fluid Capacities .............114
Fluids.................. .114
Fog Lights .................31
Freeing A Stuck Vehicle .........107
Frequently Asked Questions .......135
Fuel Filler Door Emergency Release . . .110
Filler Door (Gas Cap) ........109
Specifications ............114
Fuse...................125
Fuses ..................125
Garage Door Opener (HomeLink®) ....73
GPS Navigation (Uconnect® gps) .....56
Headlights Automatic ..............31
Dimmer Switch ............32
HighBeam ..............31
HeatedMirrors ..............41
HeatedSeats...............24
HeatedSteeringWheel..........26
High Beam/Low Beam Select (Dimmer) Switch .................31
HomeLink® (Garage Door Opener) ....73
Hood Release ..............109
IdentifyingYourRadio ..........46
Instrument Cluster .............7
Indicators ...............7
Instrument Cluster Warning Lights ....84
Interior and Instrument Lights .......5
Intermittent Wipers (Delay Wipers) ....30
Introduction ................2
iPod®/USB/MP3 Control .......54,60
Bluetooth® Streaming Audio .....61
Jacking Instructions ...........91
Jack Location ..............89
Jack Operation ..............91
JumpStarting..............101
KeyFob...................8 LockTheDoors ............8 Unlock The Doors
...........8
Keyless Enter-N-Go ............10
Lock/Unlock .............10
Starting/Stopping ..........12
Keyless Enter-N-Go™ Lock The Vehicle’s Doors .......8
Lane Change Assist ...........30
LATCH (Lower Anchors and Tether for CHildren) ................18
Lights Tire Pressure Monitoring (TPMS) . . .84
Locks Door ..................8
Lower Anchors and Tether for CHildren (LATCH) ................18
Maintenance Record ........120, 124
Maintenance Schedule .....116, 121, 123
Malfunction Indicator Light (Check Engine) ............86
Manual Tilt/Telescoping Steering Column . .28
MemorySeat...............21
Mirrors Heated ................41
MOPAR® Accessories ..........134
Navigation Voice Commands .......
69
Navigation Voice Prompt Volume ....68
New Vehicle Break-In Period .......29
Oil Change Indicator ...........87
Oil Change Indicator, Reset ........87
Oil, Engine Capacity ...............114
Change Interval ...........87
Oil Pressure Light .............86
Outlet Power .................75
Overheating, Engine ...........88
Panic Alarm ................8
Pedals, Adjustable ............27
Phone (Uconnect®) ............62
Placard, Tire and Loading Information. .130
Power Deck Lid Release ...........14
INDEX
137
Page 140 of 148

Glass Sunroof............42
Outlet (Auxiliary Electrical Outlet) . .75
Seats .................21
Steering ...............114
Tilt/Telescoping Steering Column . .28
Preparation for Jacking ..........91
Programmable Electronic Features . .71, 80
Radio Operation .............50
Radio (Sound Systems) ........47, 48
Rain Sensitive Wiper System .......30
Rear Heated Seats ............25
Recreational Towing ............77
Remote Control TrunkRelease .............8
Remote Keyless Entry (RKE) LockTheDoors ............8
Unlock The Doors ...........8
Remote Starting Enter Remote Start Mode .......10
ExitRemoteStartMode .......10
HowToUseRemoteStart.......10
KeyFob ................10
Remote Starting System .......10
Remote Starting System .........10
Remote Trunk Release ..........14
ReplacementBulbs .......... .131
Reporting Safety Defects ........133
Resetting Oil Change Indicator ......87
Satellite Radio (Uconnect® studios) . . .51
Schedule,Maintenance.......116, 121
Seat Belt Automatic Locking Retractor (ALR) . .15
Child Restraints ..........15,17
Energy Management Feature .....15
Engage The Automatic Locking
Mode .................19
Lap/Shoulder Belts ..........15
Seat Belt Pretensioner ........15
SeatBeltReminder ..........15
Seats ...................21
Heated ................24
Memory ................21
Power .................21
Ventilated ..............24 Security Alarm
Security Alarm ............14
Shift Lever Override ...........103
Signals, Turn ...............30
SIRIUSTravelLink ............59
SpareTire.................89
SparkPlugs................114
Speed Control Accel/Decel .............33
Mode Setting (ACC Only) .......34
Resume .............33,34
Set ..................32
Speed Control (Cruise Control) ......32
SportMode................87
Sport Suspension Indicator ........87
SRTPerformanceFeatures........80
Starting Remote ................10
Steering Tilt Column ..............28
Wheel, Heated ............26
Steering Wheel Audio Controls ......60
SunRoof.................42
Supplemental Restraint System - Airbag .................16
Tether Anchor, Child Restraint ......20
Tilt Steering Column ...........28
Tilt/Telescoping Steering Column Manual ................28
T
IREFIT..................95
Tires Air Pressure .............130
Changing .............89,91
Flat Changing ............89
Jacking ................91
SpareTire ..............89
Towing...................77 Disabled Vehicle ...........106
Recreational .............77
Towing Vehicle Behind a Motorhome . . .77
Trailer Towing Trailer and Tongue Weight ......77
Trailer Weight ...............77
Transmission Fluid .................114
TrunkLid(DeckLid)............14
INDEX
138