2014 DODGE CHALLENGER door
[x] Cancel search: doorPage 86 of 148

ROADSIDE ASSISTANCE
Dial toll-free 1-800-521-2779 for U.S. Residents or 1-800-363-4869 for Canadian Resi-
dents.
• Provide your name, vehicle identification number, license plate number, and your loca-tion, including the telephone number from which you are calling.
• Briefly describe the nature of the problem and answer a few simple questions.
• You will be given the name of the service provider and an estimated time of arrival. If you feel you are in an “unsafe situation”, please let us know. With your consent, we will
contact local police or safety authorities.
INSTRUMENT CLUSTER WARNING LIGHTS
- Electronic Stability Control (ESC) Activation/Malfunction
Indicator Light
The “ESC Activation/Malfunction Indicator Light” in the instrument cluster will come on
when the ignition switch is turned to the ON/RUN position. It should go out with the engine
running. If the “ESC Activation/Malfunction Indicator Light” comes on continuously with
the engine running, a malfunction has been detected in the ESC system.
If this light remains on after several ignition cycles, and the vehicle has been driven several
miles (kilometers) at speeds greater than 30 mph (48 km/h), we recommend you drive to the
nearest service center and have the vehicle serviced immediately.
- Tire Pressure Monitoring System (TPMS) Light
Each tire, including the spare (if provided), should be checked monthly when cold and
inflated to the inflation pressure recommended by the vehicle manufacturer on the vehicle
placard or tire inflation pressure label. (If your vehicle has tires of a different size than the
size indicated on the vehicle placard or tire inflation pressure label, you should determine
the proper tire inflation pressure for those tires.)
As an added safety feature, your vehicle has been equipped with a tire pressure monitoring
system (TPMS) that illuminates a low tire pressure telltale when one or more of your tires is
significantly under-inflated. Accordingly, when the low tire pressure telltale illuminates, you
should stop and check your tires as soon as possible, and inflate them to the proper
pressure. Driving on a significantly under-inflated tire causes the tire to overheat and can
lead to tire failure. Under-inflation also reduces fuel efficiency and tire tread life, and may
affect the vehicle’s handling and stopping ability.
IF THE LIGHT STARTS FLASHING INDICATING A LOW TIRE PRESSURE, ADJUST THE AIR
PRESSURE IN THE LOW TIRE TO THE AIR PRESSURE SHOWN ON THE VEHICLE PLACARD
OR TIRE INFLATION PRESSURE LABEL LOCATED ON THE DRIVER'S DOOR.
WHAT TO DO IN EMERGENCIES
84
Page 101 of 148

If the tire inflates to the recommended pressure or is at least 26 psi (1.8 Bar) pressure
within 15 minutes:
1. Press the Power Button (4) to turn off the TIREFIT kit.
2. Remove the Speed Limit sticker from the top of the Sealant Bottle (1) and place thesticker on the instrument panel.
3. Immediately disconnect the Sealant Hose (6) from the valve stem, reinstall the cap on the fitting at the end of the hose, and place the TIREFIT kit in the vehicle storage
location. Quickly proceed to (D) “Drive Vehicle.”
(D) Drive Vehicle:
Immediately after injecting sealant and inflating the tire, drive the vehicle 5 miles (8 km) or
10 minutes to ensure distribution of the TIREFIT Sealant within the tire. Do not exceed
55 mph (88 km/h).
(E) After Driving:
Pull over to a safe location. Refer to “Whenever You Stop to Use TIREFIT” before continuing.
1. Turn the Mode Select Knob (5) to the Air Mode position.
2. Uncoil the Air Pump Hose (7) (black in color) and screw the fitting at the end of hose (7)onto the valve stem.
3. Uncoil the power plug and insert the plug into the vehicles 12 Volt power outlet.
4. Check the pressure in the tire by reading the Pressure Gauge (3).
If tire pressure is less than 19 psi (1.3 Bar), the tire is too badly damaged. Do not attempt
to drive the vehicle further. Call for assistance.
If the tire pressure is 19 psi (1.3 Bar) or higher:
1. Press the Power Button (4) to turn on TIREFIT and inflate the tire to the pressure indicated on the tire and loading information label on the driver-side door opening.
2. Disconnect the TIREFIT kit from the valve stem, reinstall the cap on the valve stem and unplug from 12 Volt outlet.
3. Place the TIREFIT kit in its proper storage area in the vehicle.
4. Have the tire inspected and repaired or replaced at the earliest opportunity at an authorized dealer or tire service center.
5. Replace the Sealant Bottle (1) and Sealant Hose (6) assembly at your authorized dealer as soon as possible. Refer to “(F) Sealant Bottle and Hose Replacement.”
NOTE:
• If the tire becomes over-inflated, press the Deflation Button to reduce the tire pressure to the recommended inflation pressure before continuing.
• When having the tire serviced, advise the authorized dealer or service center that the tire has been sealed using the TIREFIT service kit.
WHAT TO DO IN EMERGENCIES
99
Page 117 of 148

ComponentFluid, Lubricant, or Genuine
Part Capacities
Automatic Transmission – If
Equipped We recommend you
onlyuse
MOPAR® ATF+4® Automatic Transmission Fluid.
Failure to use ATF+4® fluid may affect the function or
performance of your trans- mission. –
Brake Master Cylinder We recommend you use
MOPAR® DOT 3, SAE J1703. If DOT 3, SAE J1703 brake fluid
is not available, then DOT 4 is acceptable. –
CAUTION!
• Mixing of engine coolant (antifreeze) other than specified Organic Additive Technol-
ogy (OAT) engine coolant (antifreeze), may result in engine damage and may de-
crease corrosion protection. Organic Additive Technology (OAT) engine coolant is
different and should not be mixed with Hybrid Organic Additive Technology (HOAT)
engine coolant (antifreeze) or any “globally compatible” coolant (antifreeze). If a
non-OAT engine coolant (antifreeze) is introduced into the cooling system in an
emergency, the cooling system will need to be drained, flushed, and refilled with
fresh OAT coolant (conforming to MS-12106), by an authorized dealer as soon as
possible.
• Do not use water alone or alcohol-based engine coolant (antifreeze) products. Do not
use additional rust inhibitors or antirust products, as they may not be compatible
with the radiator engine coolant and may plug the radiator.
• This vehicle has not been designed for use with propylene glycol-based engine
coolant (antifreeze). Use of propylene glycol-based engine coolant (antifreeze) is not
recommended.
E-85 FLEXIBLE FUEL — (3.6L ENGINE ONLY)
Refer to your Owner's Manual on the DVD for further details.
CAUTION!
Only vehicles with the E-85 fuel filler door label or a yellow gas cap can operate on E-85.
MAINTAINING YOUR VEHICLE
115
Page 130 of 148

Cavity Cartridge Fuse Mini-Fuse Description
27 —10 Amp Red Occupant Restraint Controller (ORC)
28 — 10 Amp Red Ignition Run, AC Heater Control/Occupant
Restraint Controller (ORC)
29 — 5 Amp Orange Cluster/Electronic Stability Control (ESC)/
Powertrain Control Module (PCM)/STOP
LIGHT Switch
30 — 10 Amp Red Door Modules/Power Mirrors/Steering Con-
trol Module (SCM)
35 — 5 Amp Orange Antenna Module – If Equipped/Power Mirrors
36 — 25 Amp Natural Hands-Free Phone – If Equipped/Radio/
Amplifier Feed
37 — 15 Amp Blue Transmission
38 — 10 Amp Red Cargo Light/Vehicle Information Module – If
Equipped
39 — 10 Amp Red Heated Mirrors – If Equipped
40 — 5 Amp Orange Auto Inside Rearview Mirror/Heated Seats –
If Equipped/Switch Bank
42 30 Amp Pink — Front Blower Motor
43 30 Amp Pink — Rear Window Defroster
44 20 Amp Blue — Amplifier/Sunroof – If Equipped
SUMMER/THREE-SEASON TIRES
• This vehicle may be equipped with wheels and tires to enhance traction in both wet and
dry conditions.
• Summer tires are not intended to be driven in snow or on ice.
• Summer tires have significantly reduced grip in temperatures below 50°F (10°C)
• Use summer tires only in sets of four.
NOTE:
Summer tires will not contain the all season designation or mountain/snowflake symbol on
the sidewall of the tire.
WARNING!
Do not use summer tires in snow/ice conditions. You could lose control, resulting in
severe injury or death. Driving too fast for conditions also creates the possibility of loss
of vehicle control.
MAINTAINING YOUR VEHICLE
128
Page 131 of 148

TIRE PRESSURES
Check the inflation pressure of each tire, including the spare tire, at least monthly and
inflate to the recommended pressure for your vehicle.
The tire pressures recommended for your vehicle are found on the “Tire and Loading
Information” label located on the driver’s side door opening.
NOTE:
Refer to the Owner's Manual on the DVD for
more information regarding tire warnings
and instructions.
WARNING!
• Overloading of your tires is dangerous. Overloading can cause tire failure, affectvehicle handling, and increase your stopping distance. Use tires of the recom-
mended load capacity for your vehicle. Never overload them.
• Improperly inflated tires are dangerous and can cause collisions. Under-inflation is
the leading cause of tire failure and may result in severe cracking, component
separation, or “blow out”. Over-inflation reduces a tire’s ability to cushion shock.
Objects on the road and chuck holes can cause damage that results in tire failure.
Unequal tire pressures can cause steering problems. You could lose control of your
vehicle. Over-inflated or under-inflated tires can affect vehicle handling and can fail
suddenly, resulting in loss of vehicle control.
Tire And Loading Information Location (Ex- ample)
MAINTAINING YOUR VEHICLE
129
Page 135 of 148

AUTHENTIC ACCESSORIES BY MOPAR®
• The following highlights just some of the many Authentic Dodge Accessories by MOPAR®featuring a fit, finish, and functionality specifically for your Dodge Challenger.
• In choosing Authentic Accessories you gain far more than expressive style, premium protection, or extreme entertainment, you also benefit from enhancing your vehicle with
accessories that have been thoroughly tested and factory-approved.
• For the full line of Authentic Dodge Accessories by MOPAR®, visit your local Dodge dealership or online at mopar.com for U.S. residents or mopar.ca for Canadian residents.
EXTERIOR:
• Rear Go-Wing Spoiler • Engine Cover • T/A Hood
• Molded Splash Guards • Full Vehicle Cover • Fuel Filler Doors
• Custom Wheels • Graphics Packages • Quad Exhaust Tips
INTERIOR:
• Premium Carpet Floor Mats • Katzkin Leather Interiors • Bright Pedal Kit
• Door Sill Guards • Cargo Mat• Shifters
• Slush Mats
ELECTRONICS:
• Ambient Lighting • MOPAR® Web (WiFi) • Remote Start
• Kicker® Double SubWoofer • Electronic Vehicle Tracking System• Rear Park Assist
PERFORMANCE:
• Cold Air Intake • Cat Back Exhaust • Strut Tower Brace
• Anti Sway Bars • Performance Suspension
• Kicker® is a registered trademark of Stillwater Designs and Audio, Inc.
MOPAR® ACCESSORIES
133
Page 136 of 148

FAQ’s
GETTING STARTED
• How do I install my LATCH Equipped Child Seat? pg. 16
OPERATION YOUR VEHICLE
• What is my engine break-in recommendation?• Non SRT Version pg. 23
• SRT Version pg. 23
ELECTRONICS
• Which radio is in my vehicle? • Uconnect® 130 pg. 36
• Uconnect® 130 WITH SiriusXM pg. 38
• Uconnect® 430/430N pg. 41
• Uconnect® 730N pg. 50
• How do I activate the Audio Jack?
• Uconnect® 130 pg. 40
• Uconnect® 130 WITH SiriusXM pg. 40
• Uconnect® 430/430N pg. 45
• Uconnect® 730N pg. 54
• How do I set the clock on my radio?
• Uconnect® 130 pg. 38
• Uconnect® 130 WITH SiriusXM pg. 38
• Uconnect® 430/430N pg. 41
• Uconnect® 730N pg. 50
• How do I use the Navigation feature?
• Uconnect® 430/430N pg. 47
• Uconnect® 730N pg. 57
• How do I pair my cell phone via Bluetooth® with the Uconnect® Hands-Free Voice Activation System? pg. 66
• How do I use my USB port to listen to audio through my touch-screen radio? pg. 71
• What does the ECO message mean on the EVIC display? pg. 73
• How do I configure my Universal Garage Door Opener (HomeLink®)? pg. 75
FREQUENTLY ASKED QUESTIONS
134
Page 138 of 148
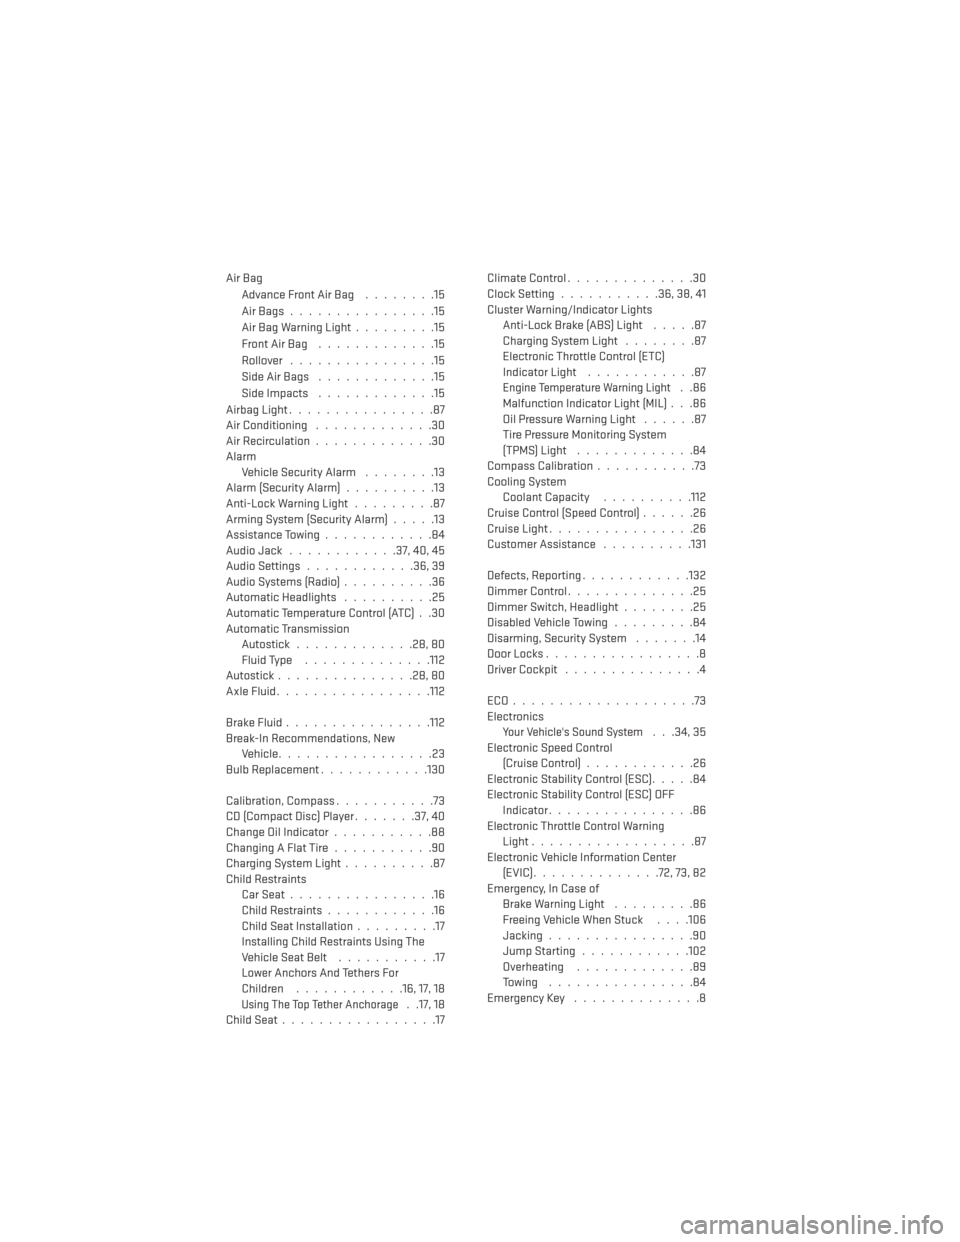
Air BagAdvanceFrontAirBag ........15
AirBags................15
Air Bag Warning Light .........15
FrontAirBag .............15
Rollover ................15
SideAirBags .............15
Side Impacts .............15
Airbag Light ................87
Air Conditioning .............30
Air Recirculation .............30
Alarm Vehicle Security Alarm ........13
Alarm (Security Alarm) ..........13
Anti-Lock Warning Light .........87
Arming System (Security Alarm) .....13
Assistance Towing ............84
Audio Jack ............37,40,45
Audio Settings ............36,39
Audio Systems (Radio) ..........36
Automatic Headlights ..........25
Automatic Temperature Control (ATC) . .30
Automatic Transmission Autostick .............28,80
Fluid Type ..............112
Autostick ...............28,80
AxleFluid................ .112
BrakeFluid............... .112
Break-In Recommendations, New Vehicle .................23
Bulb Replacement ............130
Calibration, Compass ...........73
CD (Compact Disc) Player .......37,40
Change Oil Indicator ...........88
ChangingAFlatTire...........90
Charging System Light ..........87
Child Restraints CarSeat................16
Child Restraints ............16
Child Seat Installation .........17
Installing Child Restraints Using The
Vehicle Seat Belt ...........17
Lower Anchors And Tethers For
Children ............16,17,18
Using The Top Tether Anchorage. .17, 18
ChildSeat.................17 ClimateControl..............30
Clock Setting
...........36,38,41
Cluster Warning/Indicator Lights Anti-Lock Brake (ABS) Light .....87
Charging System Light ........87
Electronic Throttle Control (ETC)
Indicator Light ............87
Engine Temperature Warning Light..86
Malfunction Indicator Light (MIL) . . .86
Oil Pressure Warning Light ......87
Tire Pressure Monitoring System
(TPMS)Light .............84
Compass Calibration ...........73
Cooling System Coolant Capacity ..........112
Cruise Control (Speed Control) ......26
Cruise Light ................26
Customer Assistance ..........131
Defects, Reporting ............132
Dimmer Control ..............25
Dimmer Switch, Headlight ........25
Disabled Vehicle Towing .........84
Disarming, Security System .......14
DoorLocks.................8
DriverCockpit ...............4
ECO....................73
Electronics
Your Vehicle's Sound System. . .34, 35
Electronic Speed Control (Cruise Control) ............26
Electronic Stability Control (ESC) .....84
Electronic Stability Control (ESC) OFF Indicator ................86
Electronic Throttle Control Warning Light ..................87
Electronic Vehicle Information Center (EVIC)..............72,73,82
Emergency, In Case of Brake Warning Light .........86
Freeing Vehicle When Stuck . . . .106
Jacking ................90
JumpStarting............102
Overheating .............89
Towing ................84
Emergency Key ..............8
INDEX
136